この記事は Retty Advent Calendar 22日目です。
昨日は、@akiさんのAWS Cognitoを実践で使うときのハマりどころでした。
こんにちは、エンジニアのkawamuraです。
今年も盛り上がりを見せた、React.jsとFirebaseの流行りの波に乗り、簡単なChatアプリを作ってみました。
データベースからホスティングまで全て無料で利用できるFirebaseはとても便利ですね!
作ったアプリはこちらです。
Firebaseの準備
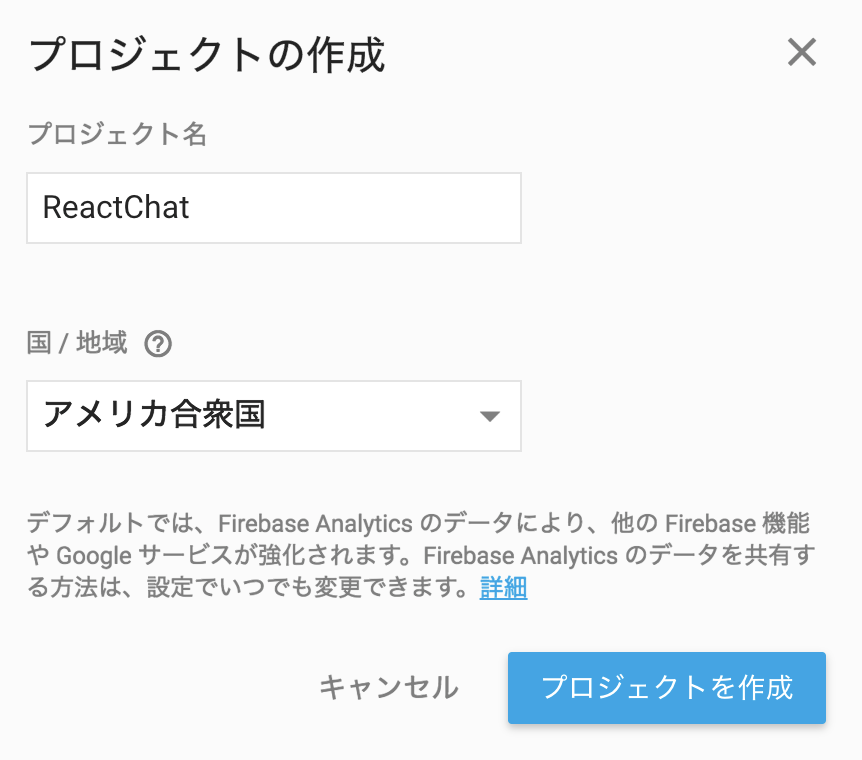
https://console.firebase.google.com/ にアクセスし自身のGoogle accountでログインし、「新規プロジェクト」を作成します。

Reactプロジェクトの準備
一から環境構築するのが大変なので、create-react-appを利用します。
導入方法
Node.js version 4以上があれば、以下のコマンドで導入ができます。
npm install -g create-react-app
プロジェクトの作成をします。
create-react-app react-chat
react-chatディレクトリが作成され、必要なファイルとパッケージが全てインストールされます。
サーバーの開始
サーバー開始用のscriptも用意されてるので、とても簡単です。
npm start
localhost:3000にアクセスすれば、デフォルトのアプリが表示されます。
Firebase Realtime Databaseとの紐付け
まず、firebaseパッケージをインストールします。
npm install firebase --save
firebase/config.jsを作成し、Firebaseの接続情報を記載します。
Firebase consoleから「Overview」 → 「ウェブアプリにFirebaseを追加」から取得できます。
export const firebaseConfig = {
  apiKey: "****************",
  authDomain: "****************",
  databaseURL: "****************",
  storageBucket: "****************",
  messagingSenderId: "****************"
};
firebase/index.jsではデータベース参照用のインスタンスの作成を行います。
このファイルをimportすれば、どこのファイルからでもデータベースのアクセスを可能にします。
import firebase from 'firebase';
import { firebaseConfig } from './firebase/config.js';

export const firebaseApp = firebase.initializeApp(firebaseConfig);
export const firebaseDb = firebaseApp.database();
Firebaseとの紐付けは以上です!簡単ですね!
Componentの作成
今回のチャットアプリでは二つのComponentを作成します。
- メッセージ表示用のComponent

export default class Message extends React.Component {
  render() {
    return (
      <div className="Message">
        <img className=""src={this.props.message.profile_image} />
        <div className="">
          <p className="">@{this.props.message.user_name}</p>
          <p className="">{this.props.message.text}</p>
        </div>
      </div>
    );
  }
}
- メッセージ入力用のComponent

import React from "react";

export default class ChatBox extends React.Component {
  render() {
    return (
      <div className="ChatBox">
        <div className="">
          <input name='user_name' onChange={this.props.onTextChange} className=""  placeholder="名前" />
          <input name='profile_image' onChange={this.props.onTextChange} className="" placeholder="プロフィール画像URL" />
        </div>

        <textarea name='text' className="" onChange={this.props.onTextChange} />
        <button className="" onClick={this.props.onButtonClick}>送信</button>
      </div>
    );
  }
}
これらは表示用のComponent(Presentational Component)なので、onClickやonChangeなどのイベント処理はpropsとして受けとり、Containerで実装します。
Containerの作成
Containerはデフォルトで用意されているApp.jsを利用します。
まず、簡単な骨組を作り、stateの初期化をする。
stateで以下の状態を監視する。
- text → 入力された、メッセージのテキスト
- user_name → 入力された、ユーザー名
- profile_image → 入力された、プロフィール画像のURL
- messages → 保存されている、すべてのメッセージ
import React, { Component } from 'react';
import './App.css';
import { firebaseDb } from './firebase.js'
import Message from './components/message.js'
import ChatBox from './components/chatBox.js'

const messagesRef = firebaseDb.ref('messages')

class App extends Component {
  constructor(props) {
    super(props);
    this.onTextChange = this.onTextChange.bind(this)
    this.onButtonClick = this.onButtonClick.bind(this)
    this.state = {
      text : "",
      user_name: "",
      profile_image: "",
      messages : []
    }
  }

  render() {
    return (
      <div className="App">
        <div className="App-header">
          <h2>Chat</h2>
        </div>
        <div className="MessageList">
          {this.state.messages.map((m, i) => {
            return <Message key={i} message={m} />
          })}
        </div>
        <ChatBox onTextChange={this.onTextChange} onButtonClick={this.onButtonClick} />
      </div>
    );
  }
}

export default App;
次に、文字が入力されているたびstateの更新を行うためのイベント処理の実装します。
ChatBoxのonTextChangeにpropsとして受け渡してます。
これでユーザー名、メッセージのテキスト、画像URLが変更されるたびにstateが更新されます。
//...
  onTextChange(e) {
    if(e.target.name == 'user_name') {
      this.setState({
        "user_name": e.target.value,
      });
    } else if (e.target.name == 'profile_image') {
      this.setState({
        "profile_image": e.target.value,
      });
    } else if (e.target.name == 'text') {
      this.setState({
        "text": e.target.value,
      });
    }
  }
//..
次に、送信ボタン押下時のイベント処理の実装します。
firebaseのpushメソッドを利用しmessages内にに追加します。
pushメソッドは新しい要素を追加するたびに一意のIDを生成します。これによって生成されるIDはタイムスタンプに基づいているため、リストのアイテムは自動的に時系列に並び替えられます。
これも同様に、ChatBoxのonButtonClickにpropsとして受け渡してます。
//...
  onButtonClick() {
    // 簡単なバリデーション
    if(this.state.user_name == "") {
      alert('user_name empty')
      return
    } else if(this.state.text == "") {
      alert('text empty')
      return
    }
    messagesRef.push({
      "user_name" : this.state.user_name,
      "profile_image" : this.state.profile_image,
      "text" : this.state.text,
    })
  }

//..
最後に、データベースの変更をキャッチするリスナーの実装です。
データベースのmessages内に新たな子が追加されるたびにstateのmessagesも更新され、Viewも更新される仕組みなってます。
//..
  componentWillMount() {
    messagesRef.on('child_added', (snapshot) => {
      const m = snapshot.val()
      let msgs = this.state.messages

      msgs.push({
        'text' : m.text,
        'user_name' : m.user_name,
        'profile_image' : m.profile_image,
      })

      this.setState({
        messages : msgs
      });
    })
  }
//..
デプロイ
デプロイ用のコマンドラインツールをインストールし、初期設定とログインをします。
$ npm install -g firebase-tools
$ firebase init
$ firebase login
firebaseのデプロイ先はデフォルトがpublicなので、以下のようにfirebase.jsonを変更します。
{
  "database": {
    "rules": "database.rules.json"
  },
  "hosting": {
    "public": "build"
  }
}
また、databaseのアクセスルールも変更します。
{
  "rules": {
    ".read": "true",
    ".write": "true"
  }
}
buildをし、firebaseにdeployします。
$ npm run build
$ firebase deploy
最後に
Firebaseがここまでサービスを無料で提供しているのはとても素晴らしいことだと思います。
簡単なウェブアプリをサクッとつくってみてはいかがでしょうか。