http://revel.github.io/tutorial/index.html
前回、GolangのWebFramework、Revelの概要を理解したので、今度はチュートリアルに挑戦していきます。なお環境はcloud9です。プロジェクトタイプ:カスタムでGoが使えますが、始めからあるdemo-projectでも問題ありません。
Introduction
Getting Startedを通してとてもシンプルなRevelについて学びましょう。
・Getting started:Revelの入手と起動
・Creating a new Revel app:スケルトンプロジェクトの作成
・The request flow:別手法でのリクエストハンドリング
・Implementing the Hello World app:Hallo World アプリケーションの作成
Getting started
Install Go
Revelを使用するにはGoのインストールが必要です。
今回はCloud9を使用するので割愛します。
Set up your GOPATH
インストールでGOPATHを設定しなかった場合、作成が必要です。GOPATHはコードのトップディレクトリになります。なおCloud9ではデフォルトが'~/workspace'になっています。
1.ディレクトリを作成します。
~/workspace (master) $ mkdir gocode
2.GOPATHを設定します。
export GOPATH=~/workspace/gocode
3.設定を保存します。
echo export GOPATH=$GOPATH >> ~/.bashrc
Install git and hg
ライブラリを入手する'go get'を利用するにはGitとMercurialが必要です。Cloud9には既に入っているため割愛します。
Get the Revel framework
Revelを入手するには以下のコマンドを実行します。
go get github.com/revel/revel
このコマンドは$GOPATH/src/github.com/revel/revel/にリポジトリをコピーし、さらにその依存関係を解決します。なお成功した場合、コマンドライン上には何も出力されません。
Get and Build the Revel command line tool
Revelアプリケーションをビルド・実行するにはコマンドラインツールが必要です。以下のコマンドで入手します。こちらも同様にコマンドライン上には何も出力されません。
go get github.com/revel/cmd/revel
$GOPATH/binにrevelコマンドがインストールされましたのでパスを通します。
~/workspace/gocode (master) $ export PATH="$PATH:$GOPATH/bin"
~/workspace/gocode (master) $ revel
~
~ revel! http://revel.github.io
~
usage: revel command [arguments]

The commands are:

    new         create a skeleton Revel application
    run         run a Revel application
    build       build a Revel application (e.g. for deployment)
    package     package a Revel application (e.g. for deployment)
    clean       clean a Revel application's temp files
    test        run all tests from the command-line

Use "revel help [command]" for more information.
~/workspace/gocode (master) $
Creating a new Revel application
http://revel.github.io/tutorial/createapp.html
revelコマンドrevel new myappを実行しアプリケーションを作成します。
~/workspace/gocode (master) $ revel new myapp
~
~ revel! http://revel.github.io
~
Your application is ready:
   /home/ubuntu/workspace/gocode/src/myapp

You can run it with:
   revel run myapp
~/workspace/gocode (master) $
Cloud9の場合、アドレスとポートを変更する必要があります。
# The IP address on which to listen.
http.addr = 0.0.0.0

# The port on which to listen.
http.port = 8080
revel run myappで作成したアプリケーションを起動します。
~/workspace/gocode (master) $ revel run myapp
~
~ revel! http://revel.github.io
~
INFO  2015/04/23 01:23:12 revel.go:329: Loaded module static
INFO  2015/04/23 01:23:12 revel.go:329: Loaded module testrunner
INFO  2015/04/23 01:23:12 revel.go:206: Initialized Revel v0.12.0 (2015-03-25) for >= go1.3
INFO  2015/04/23 01:23:12 run.go:57: Running myapp (myapp) in dev mode
INFO  2015/04/23 01:23:12 harness.go:165: Listening on 0.0.0.0:8080
ブラウザでアクセスします。

できましたね。
The Request Flow
http://revel.github.io/tutorial/requestflow.html
この項ではRevelがどのようにリクエストを扱いウェルカムページを表示したかを見ていきます。
Routes
まず最初にconf/routesをチェックします。
GET / App.Index
これはルートパスにアクセスがあった場合、AppコントローラのIndexメソッドを実行することを意味しています。
Actions
ではAppコントローラを見てみましょう。
package controllers

import "github.com/revel/revel"

type App struct {
	*revel.Controller
}

func (c App) Index() revel.Result {
	return c.Render()
}
全てのコントローラは*revel.Controllerを組み込んだstructです。revel.Resultを返すエクスポートされたメソッドはアクションとして使用されます。エクスポートかどうかはメソッド名の頭が大文字かどうかで判定されます。
Revelコントローラは一般的なResultを返すための多くのメソッドを提供しています。この例ではテンプレートを使用した200 OKなResultを返します。なお次項で説明しますがc.Render()は対応するテンプレートを自動的に見つけ出します。
Templates
テンプレートはapp/viewsの中にあります。上記の例のようにテンプレートが明示されていない場合、app/views/<contorller>/<action>.htmlが対象となります。この場合だとapp/views/App/Index.htmlです。
{{set . "title" "Home"}}
{{template "header.html" .}}

<header class="hero-unit" style="background-color:#A9F16C">
  <div class="container">
    <div class="row">
      <div class="hero-text">
        <h1>It works!</h1>
        <p></p>
      </div>
    </div>
  </div>
</header>

<div class="container">
  <div class="row">
    <div class="span6">
      {{template "flash.html" .}}
    </div>
  </div>
</div>

{{template "footer.html" .}}
GoテンプレートとRevelは有用なヘルパを用意しています。setやtemplateなどがそうです。
Hot-reload
Revelはファイルの変更を監視し再コンパイルしてくれます。確認するためにIt workds!をHello Revelに変えて保存してみましょう。ブラウザを更新すると次のようになるはずです。

Revelは次のファイルを監視してます。
- app/以下のgoファイル
- app/views/以下のテンプレート
- conf/routes
ここでコンパイルエラー時の画面表示を確認してみましょう。app.go の c.Render() を c.Renderx()にして、画面を更新してみましょう。

このようにわかりやすいメッセージが表示されます。
では次にコントローラからテンプレートに値を渡してみましょう。
func (c App) Index() revel.Result {
  greeting := "Aloha World"
  return c.Render(greeting)
}
テンプレートでその値を使います。
<h1>{{.greeting}}</h1>
画面を更新して確認します。

できましたね。
The 'Hello World' app
http://revel.github.io/tutorial/firstapp.html
ではハローワールドアプリケーションの作成に移りましょう。
flashテンプレートより下に次のフォームを追加します。
<form action="/App/Hello" method="GET">
    <input type="text" name="myName" /><br/>
    <input type="submit" value="Say hello!" />
</form>

サブミットしてみましょう。エラーになります。
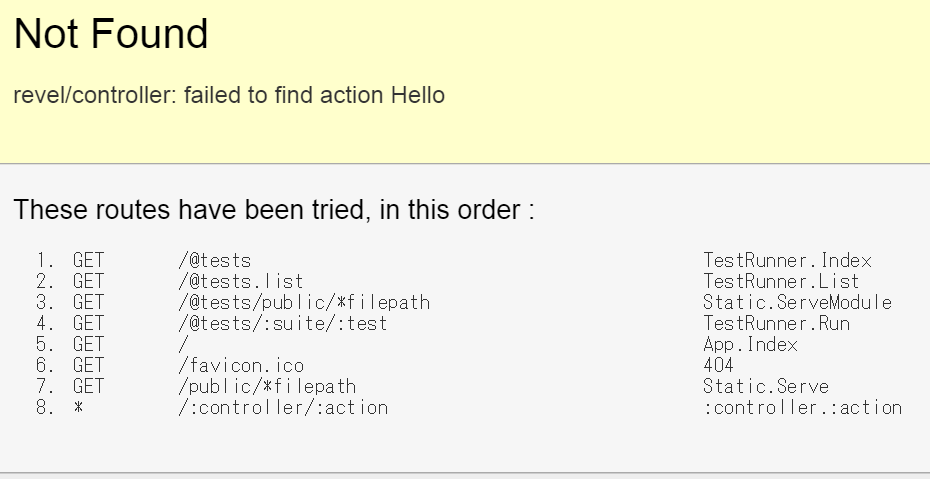
ではアクションとビューを用意しましょう。
func (c App) Hello(myName string) revel.Result {
    return c.Render(myName)
}
{{set . "title" "Home"}}
{{template "header.html" .}}

<h1>Hello {{.myName}}</h1>
<a href="/">Back to form</a>

{{template "footer.html" .}}
ではもう一度サブミットしてみましょう。入力欄にはRevelと入れています。

本文では全く触れてませんが、フォーム送信データとアクションの引数でmyNameがバインディングされています。
ではちょっとしたバリデーションを追加してみましょう。myNameは必須で3文字以上という制限をかけます。
func (c App) Hello(myName string) revel.Result {
    c.Validation.Required(myName).Message("Your name is required!")
    c.Validation.MinSize(myName, 3).Message("Your name is not long enough!")

    if c.Validation.HasErrors() {
        c.Validation.Keep()
        c.FlashParams()
        return c.Redirect(App.Index)
    }

    return c.Render(myName)
}
これらのバリデーションエラーはflashテンプレートで表示されます。
現状ですと不正な値を入力した場合、フォームがクリアされていると思います。場合にもよりますが残しておいたほうがいいケースも多々あるでしょう。そのためには次にようにします。
<form action="/App/Hello" method="GET">
    {{with $field := field "myName" .}}
        <input type="text" name="{{$field.Name}}" value="{{$field.Flash}}"/><br/>
    {{end}}
    <input type="submit" value="Say hello!" />
</form>
これで誤ったデータを修正可能になりました。

以上でチュートリアルは終わりとなります。
お疲れ様でした。