はじめに
apollo-iosはApolloClientのios版です。
基本的にこの通りにやればいけますが、いくつかハマりどころがあったので、そこを補助しつつ説明して同じような人の助けになれればと思います。
https://www.apollographql.com/docs/ios/installation.html
この記事を読むとできること
- apollo-iosを開発しているiosアプリに導入できる
- apollo-iosの簡単な使い方が理解できる
環境
Xcode Version 10.1 (10B61)
Apollo (0.9.4)
Installing the Apollo framework
これはただただインストールするだけですね。
自分はCocoaPods
pod "Apollo"
pod install
でOK
Adding a code generation build step
ここが少しややこしいです。
build時にscriptを走らせて、自動的にapolloのクライアントコードを生成します。
手順としては
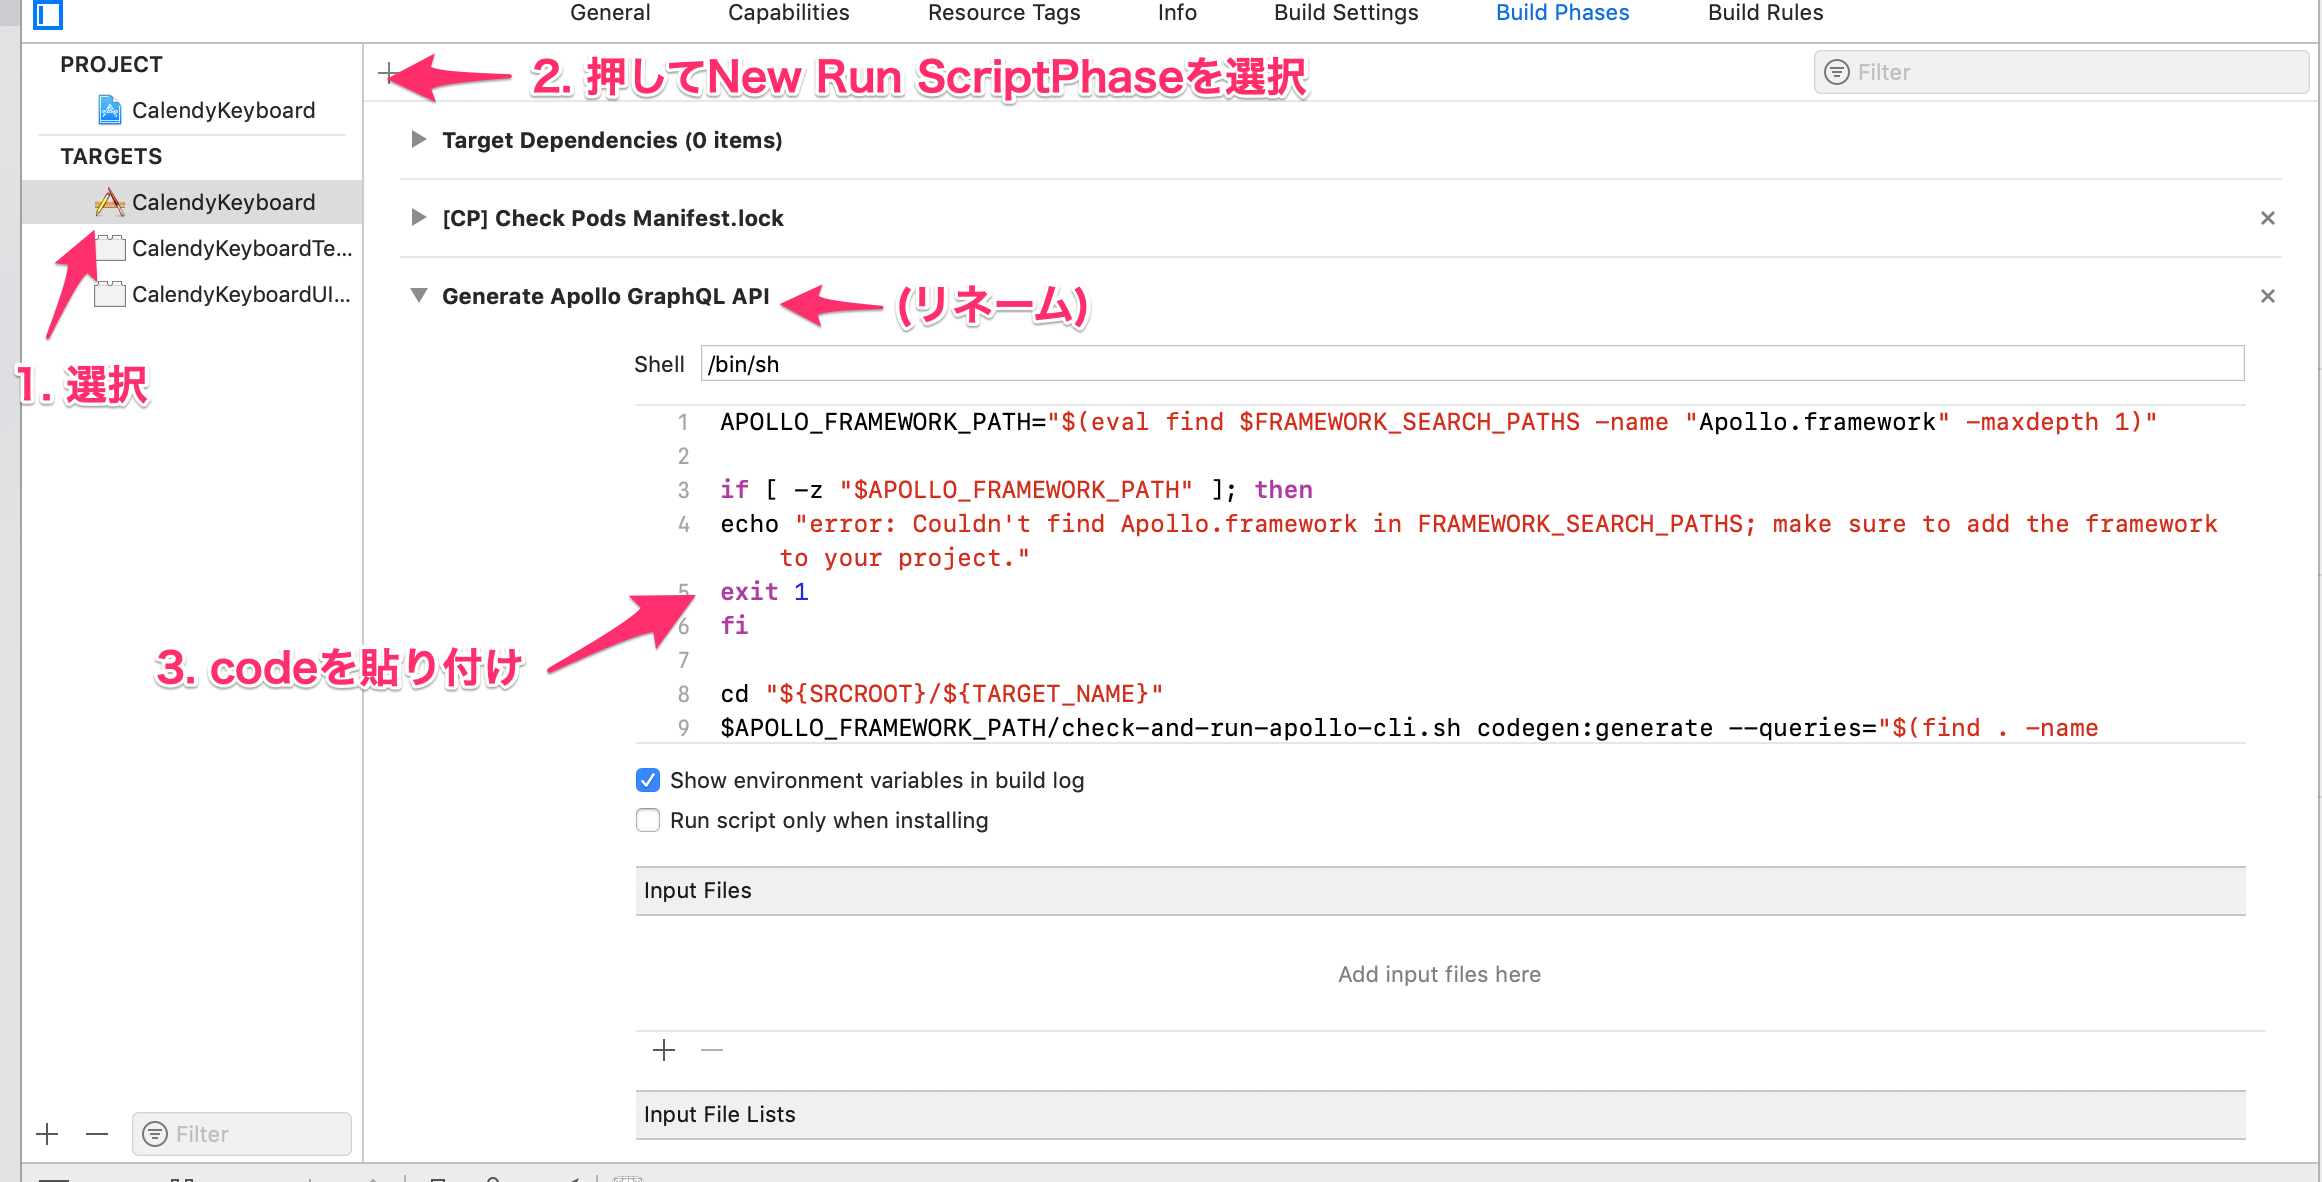
- Targets, BuildPhaseを選択
- +を押してNew Run ScriptPhaseを選択
- Script名をGenerate Apollo GraphQL APIに変更
- 以下のコードを貼り付け(CocoaPodsの場合)
APOLLO_FRAMEWORK_PATH="$(eval find $FRAMEWORK_SEARCH_PATHS -name "Apollo.framework" -maxdepth 1)"

if [ -z "$APOLLO_FRAMEWORK_PATH" ]; then
  echo "error: Couldn't find Apollo.framework in FRAMEWORK_SEARCH_PATHS; make sure to add the framework to your project."
  exit 1
fi

cd "${SRCROOT}/${TARGET_NAME}"
$APOLLO_FRAMEWORK_PATH/check-and-run-apollo-cli.sh codegen:generate --queries="$(find . -name '*.graphql')" --schema=schema.json API.swift
- そしてよく読まないと気づかないんですが
“Generate Apollo GraphQL API” and drag it just above “Compile Sources”.
と書いてあるのでCompile Sourcesの上に作成した「Generate Apollo GraphQL API」を配置します。

これでビルド時にこのスクリプトがはしり.graphqlファイルを探して自動で必要な.swiftファイルを作成してくれるようになります。
Adding a schema file to your target directory
続いてschema.jsonを用意します。
apollo cliが使える環境であればこちらの方法でやるのが良さそうです。
自分の場合はgraphql-rubyを使っているので
https://github.com/rmosolgo/graphql-ruby/pull/1354/files#diff-ee904bfc600cba8c1b186cda3fe7fd11
schema.jsonを作るワンライナーを作ってrails consoleで実行します。
File.open("schema.json", "w") do |f| f.write(ApoleSchema.execute(GraphQL::Introspection::INTROSPECTION_QUERY).to_json) end
Build your target
作成したschema.jsonをターゲットディレクトリに配置して、この時点で一度buildします。
API.swiftというファイルが作成されているはずです。
(この時点では.graphqlファイルが無いのでからの状態でOKです)
→ 何かdummyの.graphqlファイルを作って追加しておく必要があります。
query GetUser {
    user {
        id,
        email
    }
}
NOTE: If you don't have pre-existing .graphql files in your file tree, create a very simple query and add it to a .graphql file in your file tree so that when you run the code generation build step, it actually finds something. If you don't, you'll get the error No operations or fragments found to generate code for.
このときも少しハマりポイントがあって、生成されたファイルはxcode上では表示されません。
terminalなどで確認すれば生成されていることがわかります。
Adding the generated API file to your target
Finderなどで生成されたAPI.swiftを選択してターゲットに追加します。
(オプション) Installing the Xcode add-ons to get syntax highlighting
これをやっておくと.graphqlファイルにシンタックスハイライトがつけられます。
オプションなのとそのまま実行するだけなので説明は割愛します。
Create .graphql files with your queries or mutations
準備ができたので簡単な.graphqlファイルを作成します。(お使いのschemaに合わせて変更してください)
query GetUser {
    user {
        id,
        email
    }
}
ビルドすると自動的にAPI.swiftにコードが生成されます!
public final class GetUserQuery: GraphQLQuery {
  public let operationDefinition =
    "query GetUser {\n  user {\n    __typename\n    id\n    email\n  }\n}"

  public init() {
  }

 ...
Creating a client
では先ほど作ったGetUserQueryを使ってみます。
まずAppDelegate.swiftにApolloClientを作成します。
let apollo = ApolloClient(url: URL(string: "http://localhost:8080/graphql")!)
@UIApplicationMain
class AppDelegate: UIResponder, UIApplicationDelegate {
...
(こうすることでGlobalVariableになるから簡単にできるよとかいてあるがグローバル変数こんな簡単に使っていいのやや疑問...)
The easiest way to do this is to define a global variable in AppDelegate.swift:
Fetching queries
これでクライアントが使えるようになったので、先ほど作ったクエリを実行してみます。
apollo.fetch(query: GetUserQuery())  { (result) in
            switch result {
            case .success(let graphQLResult):
                print("Success! Result: \(graphQLResult)")

            case .failure(let error):
                print("error!: \(error)")
            }
        }
コンソールにemailが出力されればOKです!
Have a nice Hack ![]()