複数プロジェクトとサイドカーの自動起動をを試す
前回は環境構築を行いました、今回は何かサンプルになるようなプロジェクトを作り、Daprのサイドカー起動などの環境整備を行っていきます。
前回の記事は以下からどうぞ
プロジェクトを作る
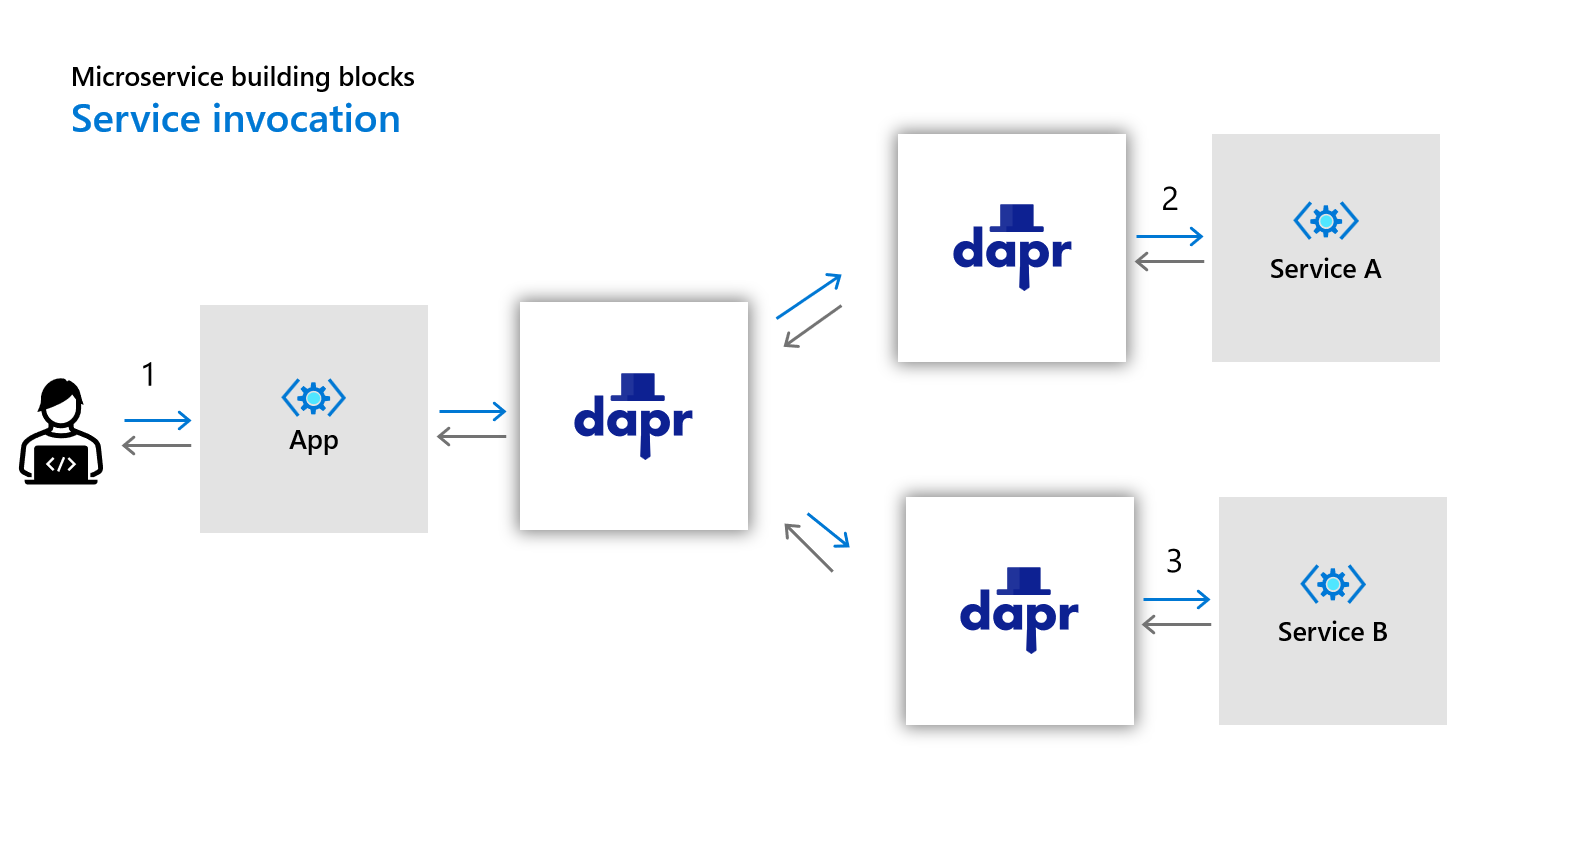
今回は、以下のように フロントREST APIを担当する Appのプロジェクト から バックエンドREST APIであるService A と同じく バックエンドREST APIであるService Bを呼び出し、その結果をマージして返却するような仕組みを考えてみましょう。
ここで、Daprの機能の一つである Service Invocation(サービス起動) を使います。
早速プロジェクトを準備しましょう。
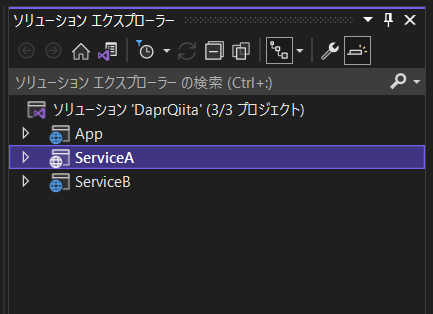
作るプロジェクトは、以下の3つのプロジェクトでASP .NET Core Web API(.NET 6)です。そして、これらの3つのプロジェクトのサイドカーとしてそれぞれのDaprも起動させます。
- App (ASP.NET Core WebAPI)
- ServiceA (ASP.NET Core WebAPI)
- ServiceB (ASP.NET Core WebAPI)
プロジェクトとソリューションの作成
Visual Studio 2022などから作っても良いですが、今回はWindows,Mac,Linuxなど問わずに作れるように、CLIから作成しました。
それぞれのOSのターミナルで空のフォルダを作ってください。そこで、以下を実行すると、3つのプロジェクトと1つのソリューションができると思います。
dotnet new webapi -o ServiceA
dotnet new webapi -o ServiceB
dotnet new webapi -o App
dotnet new sln
dotnet sln add ServiceA ServiceB App
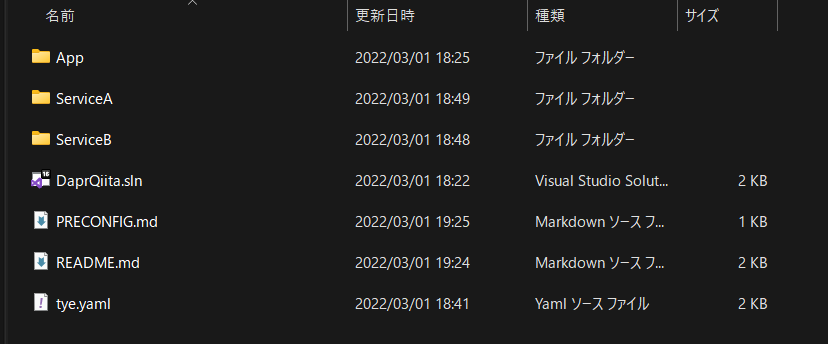
プロジェクトとソリューションの確認
Windowsのエクスプローラーであれば、こんな感じになります。
Visual Studio 2022 でソリューションを開けば、こんな感じになります。
tyeの設定
前回の記事でも触れたとおり、各マイクロサービスの依存関係を把握しながらプロジェクトごとに起動して、ローカルに再現するなんてのは案外大変で面倒です。加えて、Daprの場合はサイドカーの起動も考慮しないといけなくなります。では、シェルスクリプトを書きましょう・・・デバッグ用にK8S作りましょう。
サボります。ローカルでデバッグをする為に、前もってシェルスクリプト書いてとか考えたくないです。とっても面倒なのでできればやりたくないので、そこでtyeを使います。
tye.yamlを作成
以下のようなtye.yamlをプロジェクトルートに作成します。tye initでサンプルのyamlも生成してくれます。
このyamlでは、プロジェクトを3つ登録しました。コンポーネントは、今回はまだ使わないので、 #components-path: "./components/" でコメントアウトしています。
# tye application configuration file
# read all about it at https://github.com/dotnet/tye
#
# when you've given us a try, we'd love to know what you think:
#    https://aka.ms/AA7q20u
#
name: dapr
extensions:
- name: dapr

  # log-level configures the log level of the dapr sidecar
  log-level: debug

  # config allows you to pass additional configuration into the dapr sidecar
  # config will be interpreted as a named k8s resource when deployed, and will be interpreted as
  # a file on disk when running locally at `./components/myconfig.yaml`
  #
  # config: myconfig

  # components-path configures the components path of the dapr sidecar
  #components-path: "./components/"

  # If not using the default Dapr placement service or otherwise using a placement service on a nonstandard port,
  # you can configure the Dapr sidecar to use an explicit port.
  # placement-port: 6050
services:
- name: service-a
  project: ServiceA/ServiceA.csproj
- name: service-b
  project: ServiceB/ServiceB.csproj
- name: app
  project: App/App.csproj

# This may conflict with the redis instance that dapr manages.
#
# Doing a `docker ps` can show if its already running. If that's the case
# then comment out out when running locally.
# - name: redis
#   image: redis
#   bindings:
#   - port: 6379
各マイクロサービスとDaprサイドカーの起動
サービス間連携以前に各プロジェクトをtyeで起動してみます。プロジェクトのtye.yamlがあるルートフォルダに移動して、tye run を実行してください。
いかがでしょうか?各プロセスに自動的にポートが割り当てられ、Daprもサイドカーとして起動しているのがわかります。
$ tye run
Loading Application Details...
Launching Tye Host...

[20:37:02 INF] Executing application from C:\Users\user\DaprQiita\tye.yaml
[20:37:02 INF] Dashboard running on http://127.0.0.1:8000
[20:37:02 INF] Build Watcher: Watching for builds...
[20:37:02 INF] Building projects
[20:37:04 INF] Application dapr started successfully with Pid: 22460
[20:37:04 INF] Launching service service-b_572bed1d-6: C:\Users\user\DaprQiita\ServiceB\bin\Debug\net6.0\ServiceB.exe
[20:37:04 INF] Launching service service-b-dapr_1c945e4a-7: C:/dapr/dapr.exe run --app-id service-b --dapr-grpc-port 56373 --dapr-http-port 56374 --metrics-port 56375 --app-port 56366 --log-level debug
[20:37:04 INF] Launching service app-dapr_d9123681-6: C:/dapr/dapr.exe run --app-id app --dapr-grpc-port 56376 --dapr-http-port 56377 --metrics-port 56378 --app-port 56368 --log-level debug
[20:37:04 INF] Launching service service-a-dapr_0b9ef9b6-9: C:/dapr/dapr.exe run --app-id service-a --dapr-grpc-port 56370 --dapr-http-port 56371 --metrics-port 56372 --app-port 56364 --log-level debug
[20:37:04 INF] Launching service app_46e483bf-f: C:\Users\user\DaprQiita\App\bin\Debug\net6.0\App.exe
[20:37:04 INF] Launching service service-a_b76326cf-c: C:\Users\user\DaprQiita\ServiceA\bin\Debug\net6.0\ServiceA.exe
[20:37:04 INF] service-b_572bed1d-6 running on process id 30256 bound to http://localhost:56366, https://localhost:56367
[20:37:04 INF] service-b-dapr_1c945e4a-7 running on process id 32488 bound to https://localhost:56373, http://localhost:56374, http://localhost:56375
[20:37:04 INF] app-dapr_d9123681-6 running on process id 8164 bound to https://localhost:56376, http://localhost:56377, http://localhost:56378
[20:37:04 INF] service-a-dapr_0b9ef9b6-9 running on process id 33220 bound to https://localhost:56370, http://localhost:56371, http://localhost:56372
[20:37:04 INF] Replica service-b-dapr_1c945e4a-7 is moving to a ready state
[20:37:04 INF] Replica app-dapr_d9123681-6 is moving to a ready state
[20:37:04 INF] Replica service-a-dapr_0b9ef9b6-9 is moving to a ready state
[20:37:04 INF] Replica service-b_572bed1d-6 is moving to a ready state
[20:37:04 INF] app_46e483bf-f running on process id 2044 bound to http://localhost:56368, https://localhost:56369
[20:37:04 INF] Replica app_46e483bf-f is moving to a ready state
[20:37:04 INF] service-a_b76326cf-c running on process id 2252 bound to http://localhost:56364, https://localhost:56365
[20:37:04 INF] Replica service-a_b76326cf-c is moving to a ready state
[20:37:04 INF] Selected process 2044.
[20:37:04 INF] Selected process 2252.
[20:37:04 INF] Selected process 30256.
[20:37:04 INF] Listening for event pipe events for app_46e483bf-f on process id 2044
[20:37:04 INF] Listening for event pipe events for service-a_b76326cf-c on process id 2252
[20:37:04 INF] Listening for event pipe events for service-b_572bed1d-6 on process id 30256
[20:37:09 INF] Failed to collect diagnostics for app-dapr_d9123681-6 after 00:00:05.
[20:37:09 INF] Failed to collect diagnostics for service-a-dapr_0b9ef9b6-9 after 00:00:05.
[20:37:09 INF] Failed to collect diagnostics for service-b-dapr_1c945e4a-7 after 00:00:05.
tyeダッシュボードを起動する
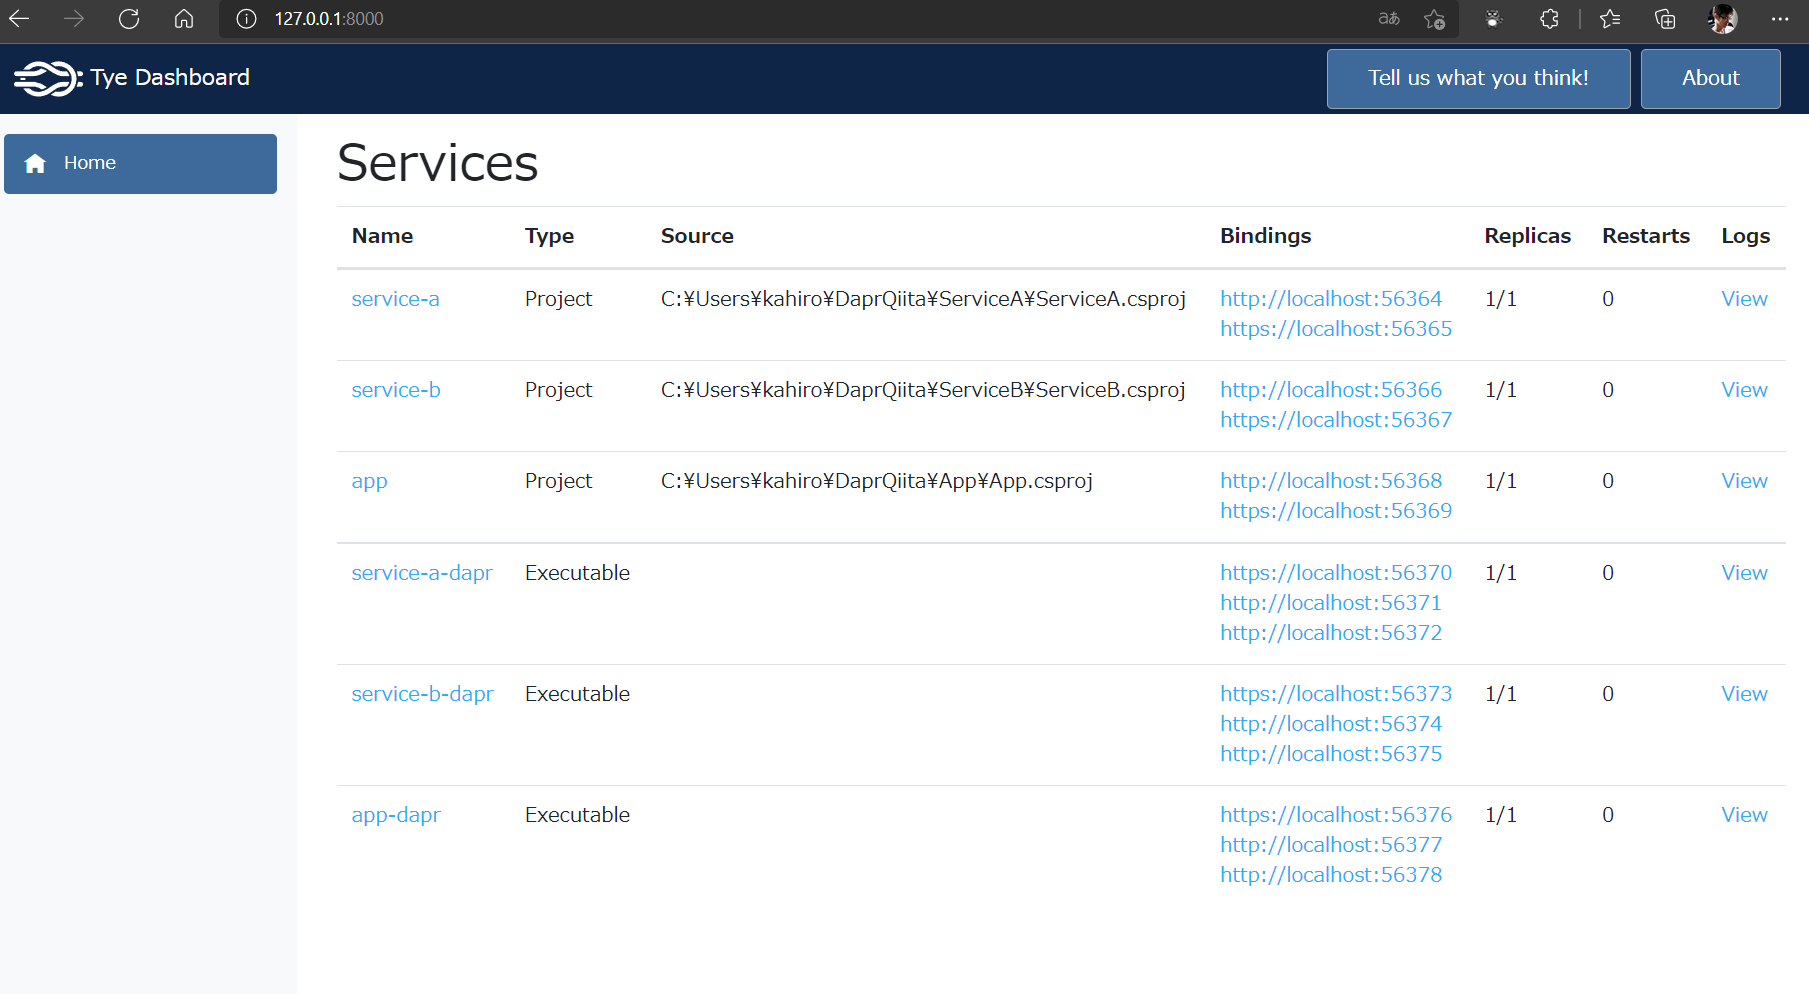
さて、tyeでは都度ポートが割り当てられます。そこで、何か便利に確認できるものがあるとうれしいですよね。そこで、tyeではダッシュボード機能を持っています。tye runの起動が終わったら、 http://127.0.0.1:8000 でダッシュボードを起動してみましょう。
各プロジェクトとDaprがサイドカーが起動している事がわかると思います。
このように、各サービスのエンドポイント、レプリカ数、再起動回数、そして一番右には各サービス個別のLogsもあります。
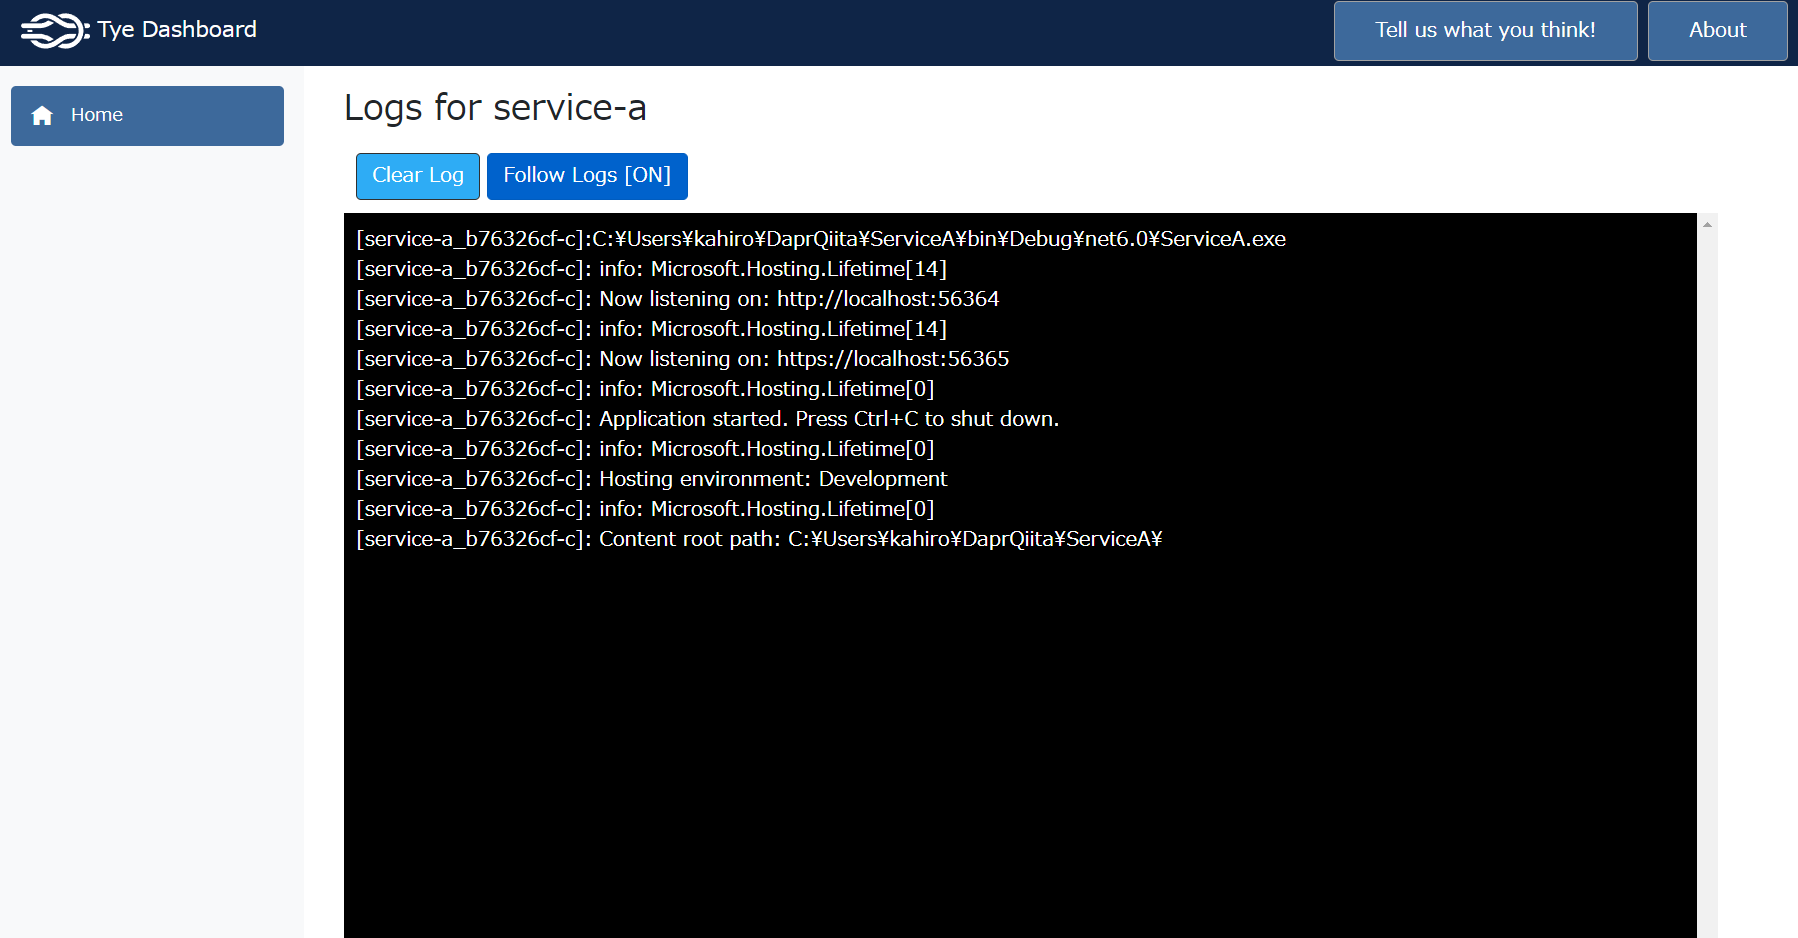
次に、ログをみてみましょう。
Logsからは、以下のように各サービス名個別にログを見る事ができます。
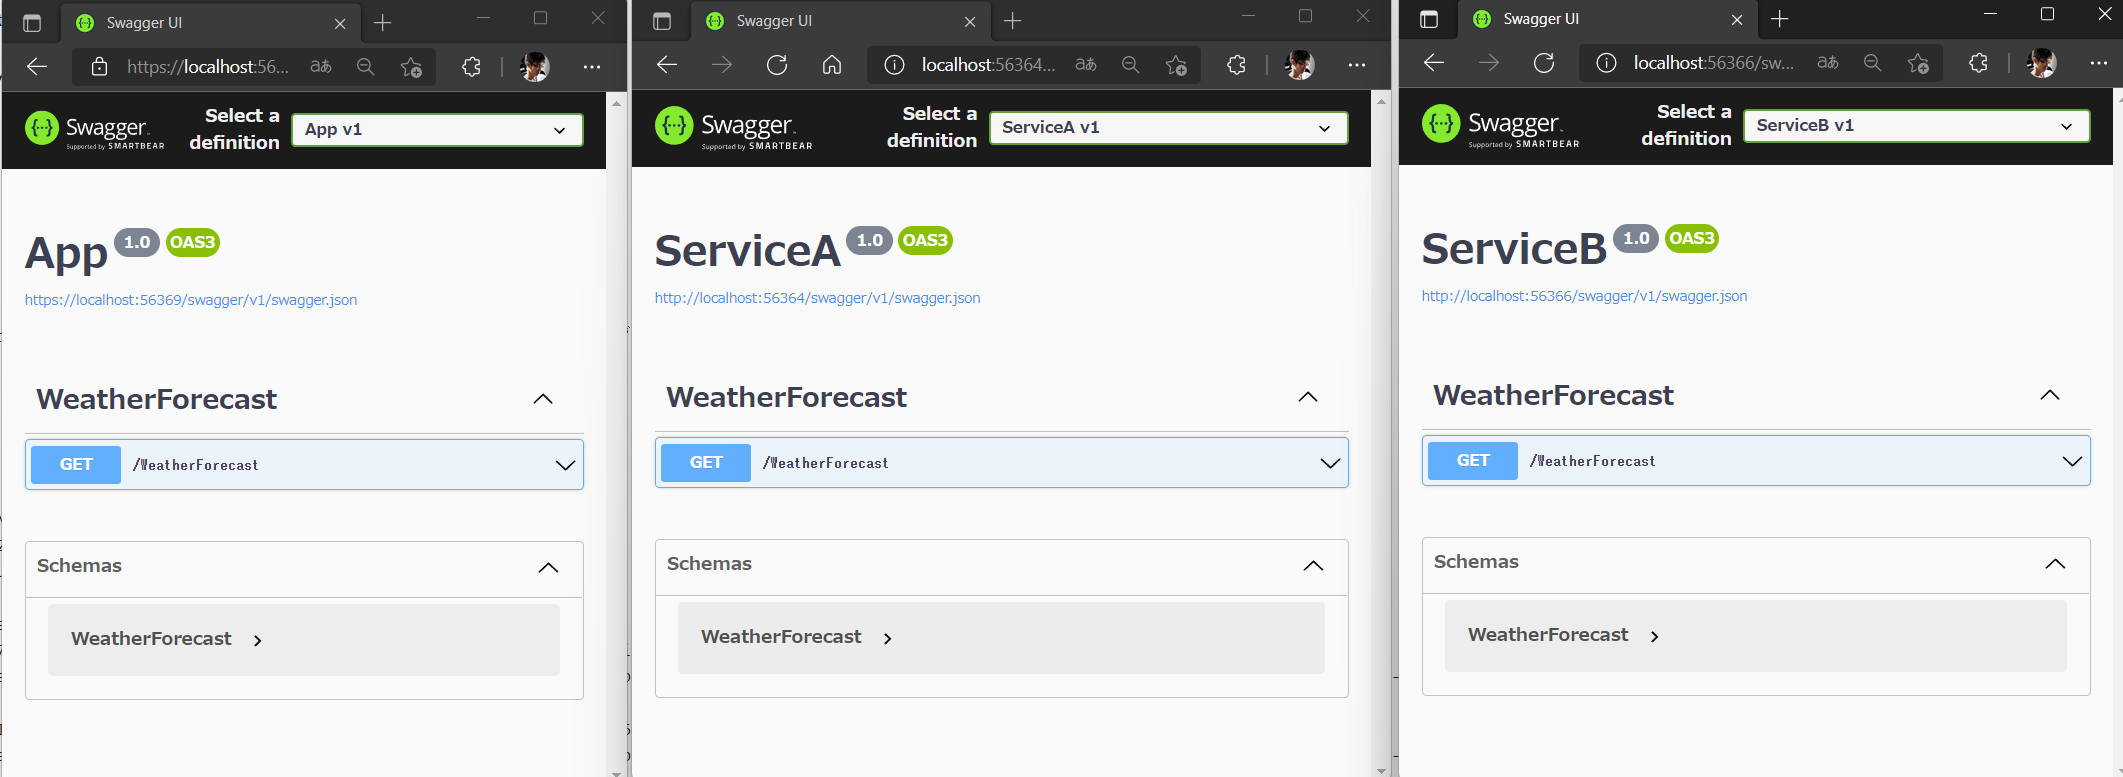
次に先ほどの一覧のページから各エンドポイントをクリックしてみてください。デフォルトで導入されているSwaggerを表示してみます。Swagger及びOpen APIが初見という方は、REST APIを使った今後の開発でとても大きな影響が出てきます。先に進む前に、Swaggerについて必ず調べてください。
今回は http://localhost:56354/swagger という感じでブラウザから参照してみます。
以下のように、3つのWeb APIプロジェクトそれぞれのSwagger UIが確認できます。見た目が全く同じで紛らわしいですが。左から App / Service A / Service B のSwagger UIページです。
