0. はじめに
大阪のLaravel初学者サウナーこと、kazumakishimoto(@kazuma_dev)です!
CloudFormationで環境構築→EC2 / RDS作成方法です(DBはMySQL)。
0-1. 前回記事
- 【AWS】LaravelアプリをEC2デプロイ【まとめ編】
0-2. 全体の流れ
1.CloudFormation
2.yum
3.nginx
4.PHP
5.Composer
6.Node.js
7.Git
8.php-fpm,nginx設定
9.RDS
10.MySQL
11..env
12.migration
13.permission
補足
Reference
次回記事
0-3. 本記事の対象者
- EC2上でLaravel + MySQLを動かしてみたい人
- ついでにnginxに少し触れてみたい人
0-4. 事前準備
- AWSアカウント作成済み
- リージョンはアジアパシフィック(東京)ap-northeast-1
-
grflやhogeはサンプル名なので適宜変更して下さい
0-5. 要件
- CloudFormationで環境構築
- DBはMySQL(RDS)
-
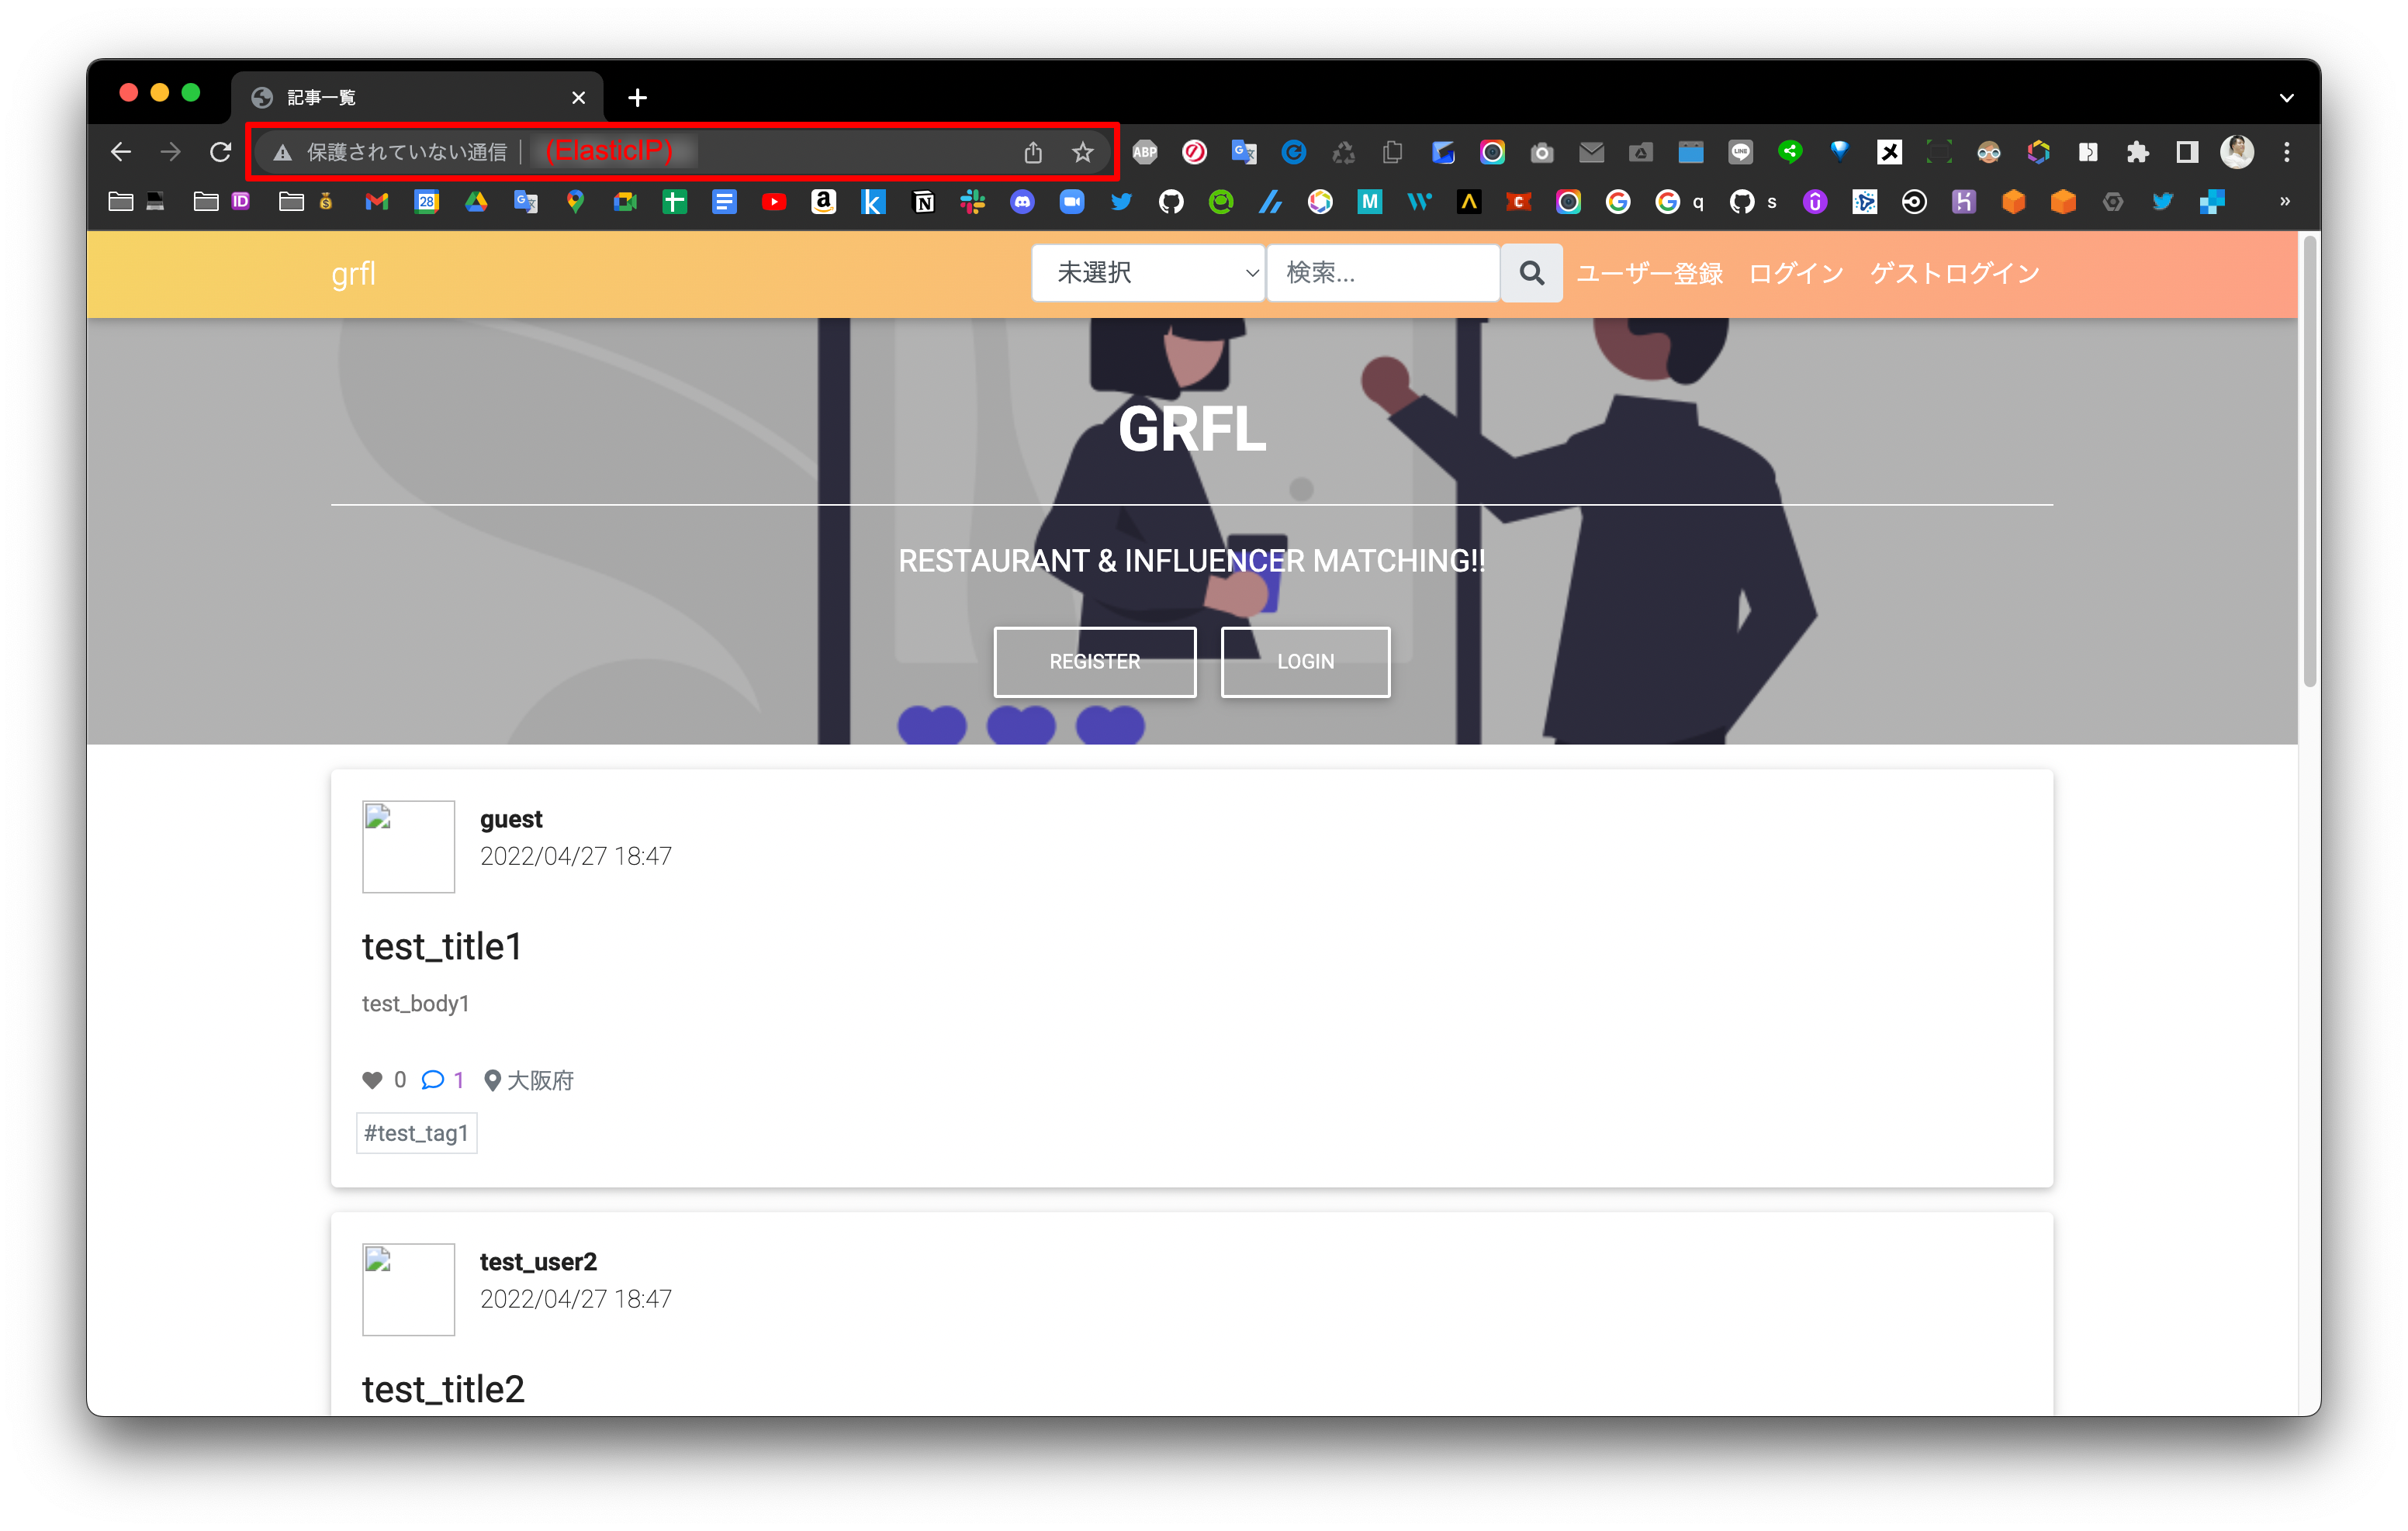
http://xx.xxx.xxx.xxx/の表示(EC2のEIP)
0-6. 本番環境
| ツール | バージョン |
|---|---|
| OS | Amazon Linux 2 |
| nginx | 1.12 |
| PHP | 7.4.28 |
| Laravel | 6.20.44 |
| MySQL | 5.7.37 |
| Composer | 1.10.26 |
| Node.js | 13.14.0 |
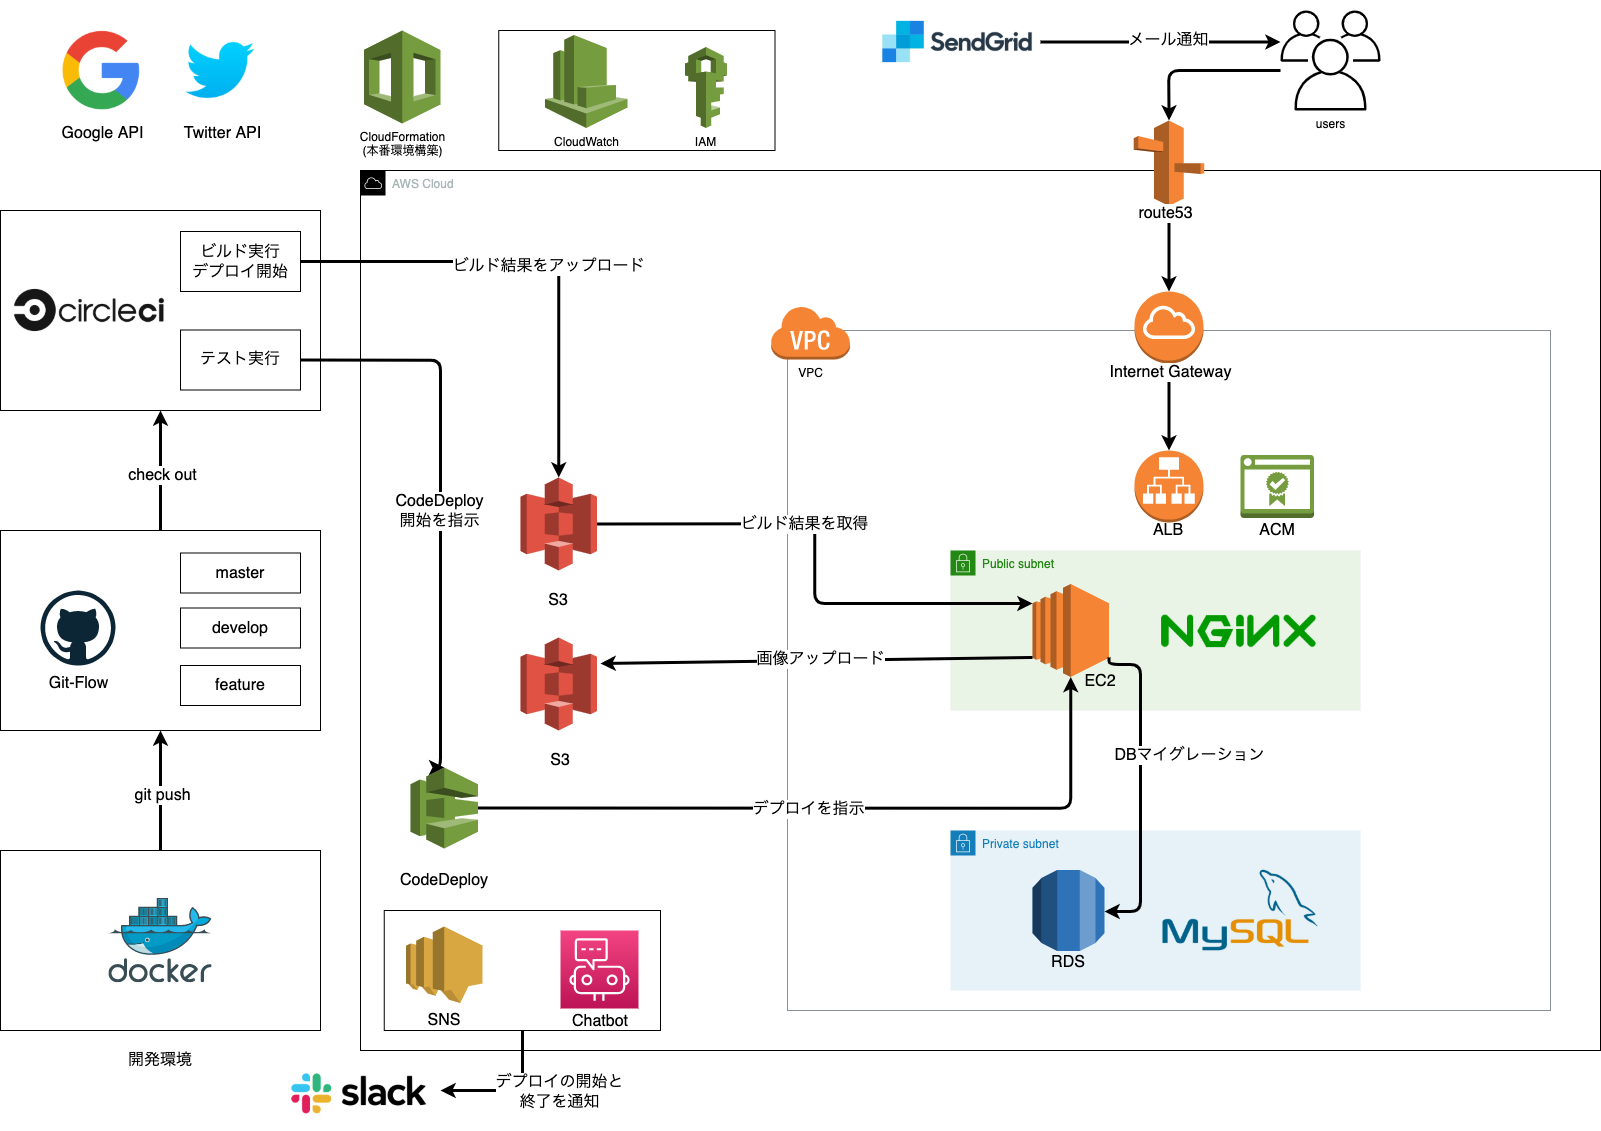
0-7. AWS構成図
1. CloudFormation
1-1. リソース一覧
- 下記をCloudFormationにて作成。
- VPC
- サブネット(パブリック / プライベート)
- DBサブネットグループ
- ルートテーブル
- インターネットゲートウェイ
- セキュリティグループ(パブリックサーバー用 / プライベートサーバー用)
- ElasticIP
- EC2(パプリックIPアドレスありで、ElasticIPをアタッチする)
1-2. ec2.yml
ec2.yml
AWSTemplateFormatVersion: 2010-09-09

Parameters:
  VpcCidrBlock:
    Type: String
    Default: 172.18.0.0/16
  PublicSubnet01CidrBlock:
    Type: String
    Default: 172.18.3.0/24
  PublicSubnet02CidrBlock:
    Type: String
    Default: 172.18.4.0/24
  PrivateSubnet01CidrBlock:
    Type: String
    Default: 172.18.6.0/24
  PrivateSubnet02CidrBlock:
    Type: String
    Default: 172.18.7.0/24
  Ec2ImageId:
#    Type: AWS::SSM::Parameter::Value<String>
#    Default: /aws/service/ami-amazon-linux-latest/amzn2-ami-hvm-x86_64-gp2
    Type: String
    Default: ami-0f310fced6141e627
  Ec2InstanceType:
    Type: String
    Default: t2.micro
  Ec2KeyName:
    Type: String
    Default: grfl

Resources:
  VPC:
    Type: AWS::EC2::VPC
    Properties:
      CidrBlock: !Ref VpcCidrBlock
      Tags:
        -
          Key: Name
          Value: !Ref AWS::StackName
  PublicSubnet01:
    Type: AWS::EC2::Subnet
    Properties:
      CidrBlock: !Ref PublicSubnet01CidrBlock
      MapPublicIpOnLaunch: true
      VpcId: !Ref VPC
      AvailabilityZone: ap-northeast-1a
      Tags:
        - Key: Name
          Value: !Sub ${AWS::StackName}-public-subnet-01
  PublicSubnet01:
    Type: AWS::EC2::Subnet
    Properties:
      CidrBlock: !Ref PublicSubnet02CidrBlock
      MapPublicIpOnLaunch: true
      VpcId: !Ref VPC
      AvailabilityZone: ap-northeast-1c
      Tags:
        - Key: Name
          Value: !Sub ${AWS::StackName}-public-subnet-02
  PrivateSubnet02:
    Type: AWS::EC2::Subnet
    Properties:
      CidrBlock: !Ref PrivateSubnet01CidrBlock
      MapPublicIpOnLaunch: false
      VpcId: !Ref VPC
      AvailabilityZone: ap-northeast-1a
      Tags:
        - Key: Name
          Value: !Sub ${AWS::StackName}-private-subnet-01
  PrivateSubnet02:
    Type: AWS::EC2::Subnet
    Properties:
      CidrBlock: !Ref PrivateSubnet02CidrBlock
      MapPublicIpOnLaunch: false
      VpcId: !Ref VPC
      AvailabilityZone: ap-northeast-1c
      Tags:
        - Key: Name
          Value: !Sub ${AWS::StackName}-private-subnet-02
  DBSubnetGroup:
    Type: AWS::RDS::DBSubnetGroup
    Properties:
      DBSubnetGroupDescription: !Ref AWS::StackName
      DBSubnetGroupName: !Ref AWS::StackName
      SubnetIds:
        - !Ref PrivateSubnet01
        - !Ref PrivateSubnet02
  InternetGateway:
    Type: AWS::EC2::InternetGateway
    Properties:
      Tags:
        - Key: Name
          Value: !Ref AWS::StackName
  AttachInternetGateway:
    Type: AWS::EC2::VPCGatewayAttachment
    Properties:
      InternetGatewayId : !Ref InternetGateway
      VpcId: !Ref VPC
  RouteTableForPublicSubnet:
    Type: AWS::EC2::RouteTable
    Properties:
      VpcId: !Ref VPC
      Tags:
        - Key: Name
          Value: !Sub ${AWS::StackName}-rt-for-public-subnet
  RouteForPublicSubnet:
    Type: AWS::EC2::Route
    Properties:
      RouteTableId: !Ref RouteTableForPublicSubnet
      DestinationCidrBlock: 0.0.0.0/0
      GatewayId: !Ref InternetGateway
  AssocciateRouteTableForPublicSubnet:
    Type: AWS::EC2::SubnetRouteTableAssociation
    Properties:
      RouteTableId: !Ref RouteTableForPublicSubnet
      SubnetId: !Ref PublicSubnet
  SecurityGroupForPublicServer:
    Type: AWS::EC2::SecurityGroup
    Properties:
      GroupName: !Sub ${AWS::StackName}-sg-for-public-server
      GroupDescription: !Sub ${AWS::StackName}-sg-for-public-server
      VpcId: !Ref VPC
      SecurityGroupIngress:
        - IpProtocol: tcp
          FromPort: 22
          ToPort: 22
          CidrIp: 0.0.0.0/0
        - IpProtocol: tcp
          FromPort: 80
          ToPort: 80
          CidrIp: 0.0.0.0/0
        - IpProtocol: tcp
          FromPort: 443
          ToPort: 443
          CidrIp: 0.0.0.0/0
      Tags:
        - Key: Name
          Value: !Sub ${AWS::StackName}-sg-for-public-server
  PublicServer:
    Type: AWS::EC2::Instance
    Properties:
      ImageId: !Ref Ec2ImageId
      InstanceType: !Ref Ec2InstanceType
      KeyName: !Ref Ec2KeyName
      #      SubnetId: !Ref PublicSubnet
      #      SecurityGroupIds:
      #        - !Ref SecurityGroupForPublicServer
      NetworkInterfaces:
        - SubnetId: !Ref PublicSubnet # Network interfaces and an instance-level subnet ID may not be specified on the same request
          GroupSet:
            - !Ref SecurityGroupForPublicServer # Network interfaces and an instance-level security groups may not be specified on the same request
          AssociatePublicIpAddress: true
          DeviceIndex : 0 # Property DeviceIndex cannot be empty.
      Tags:
        - Key: Name
          Value: !Sub ${AWS::StackName}-ec2
  ElasticIpForPublicServer:
    Type: AWS::EC2::EIP
    Properties:
      InstanceId: !Ref PublicServer
  SecurityGroupForPrivateServer:
    Type: AWS::EC2::SecurityGroup
    Properties:
      GroupName: !Sub ${AWS::StackName}-sg-for-private-server
      GroupDescription: !Sub ${AWS::StackName}-sg-for-private-server
      VpcId: !Ref VPC
      SecurityGroupIngress:
        - IpProtocol: tcp
          FromPort: 22
          ToPort: 22
          SourceSecurityGroupId: !Ref SecurityGroupForPublicServer
        - IpProtocol: tcp
          FromPort: 3306
          ToPort: 3306
          SourceSecurityGroupId: !Ref SecurityGroupForPublicServer
      Tags:
        - Key: Name
          Value: !Sub ${AWS::StackName}-sg-for-private-server
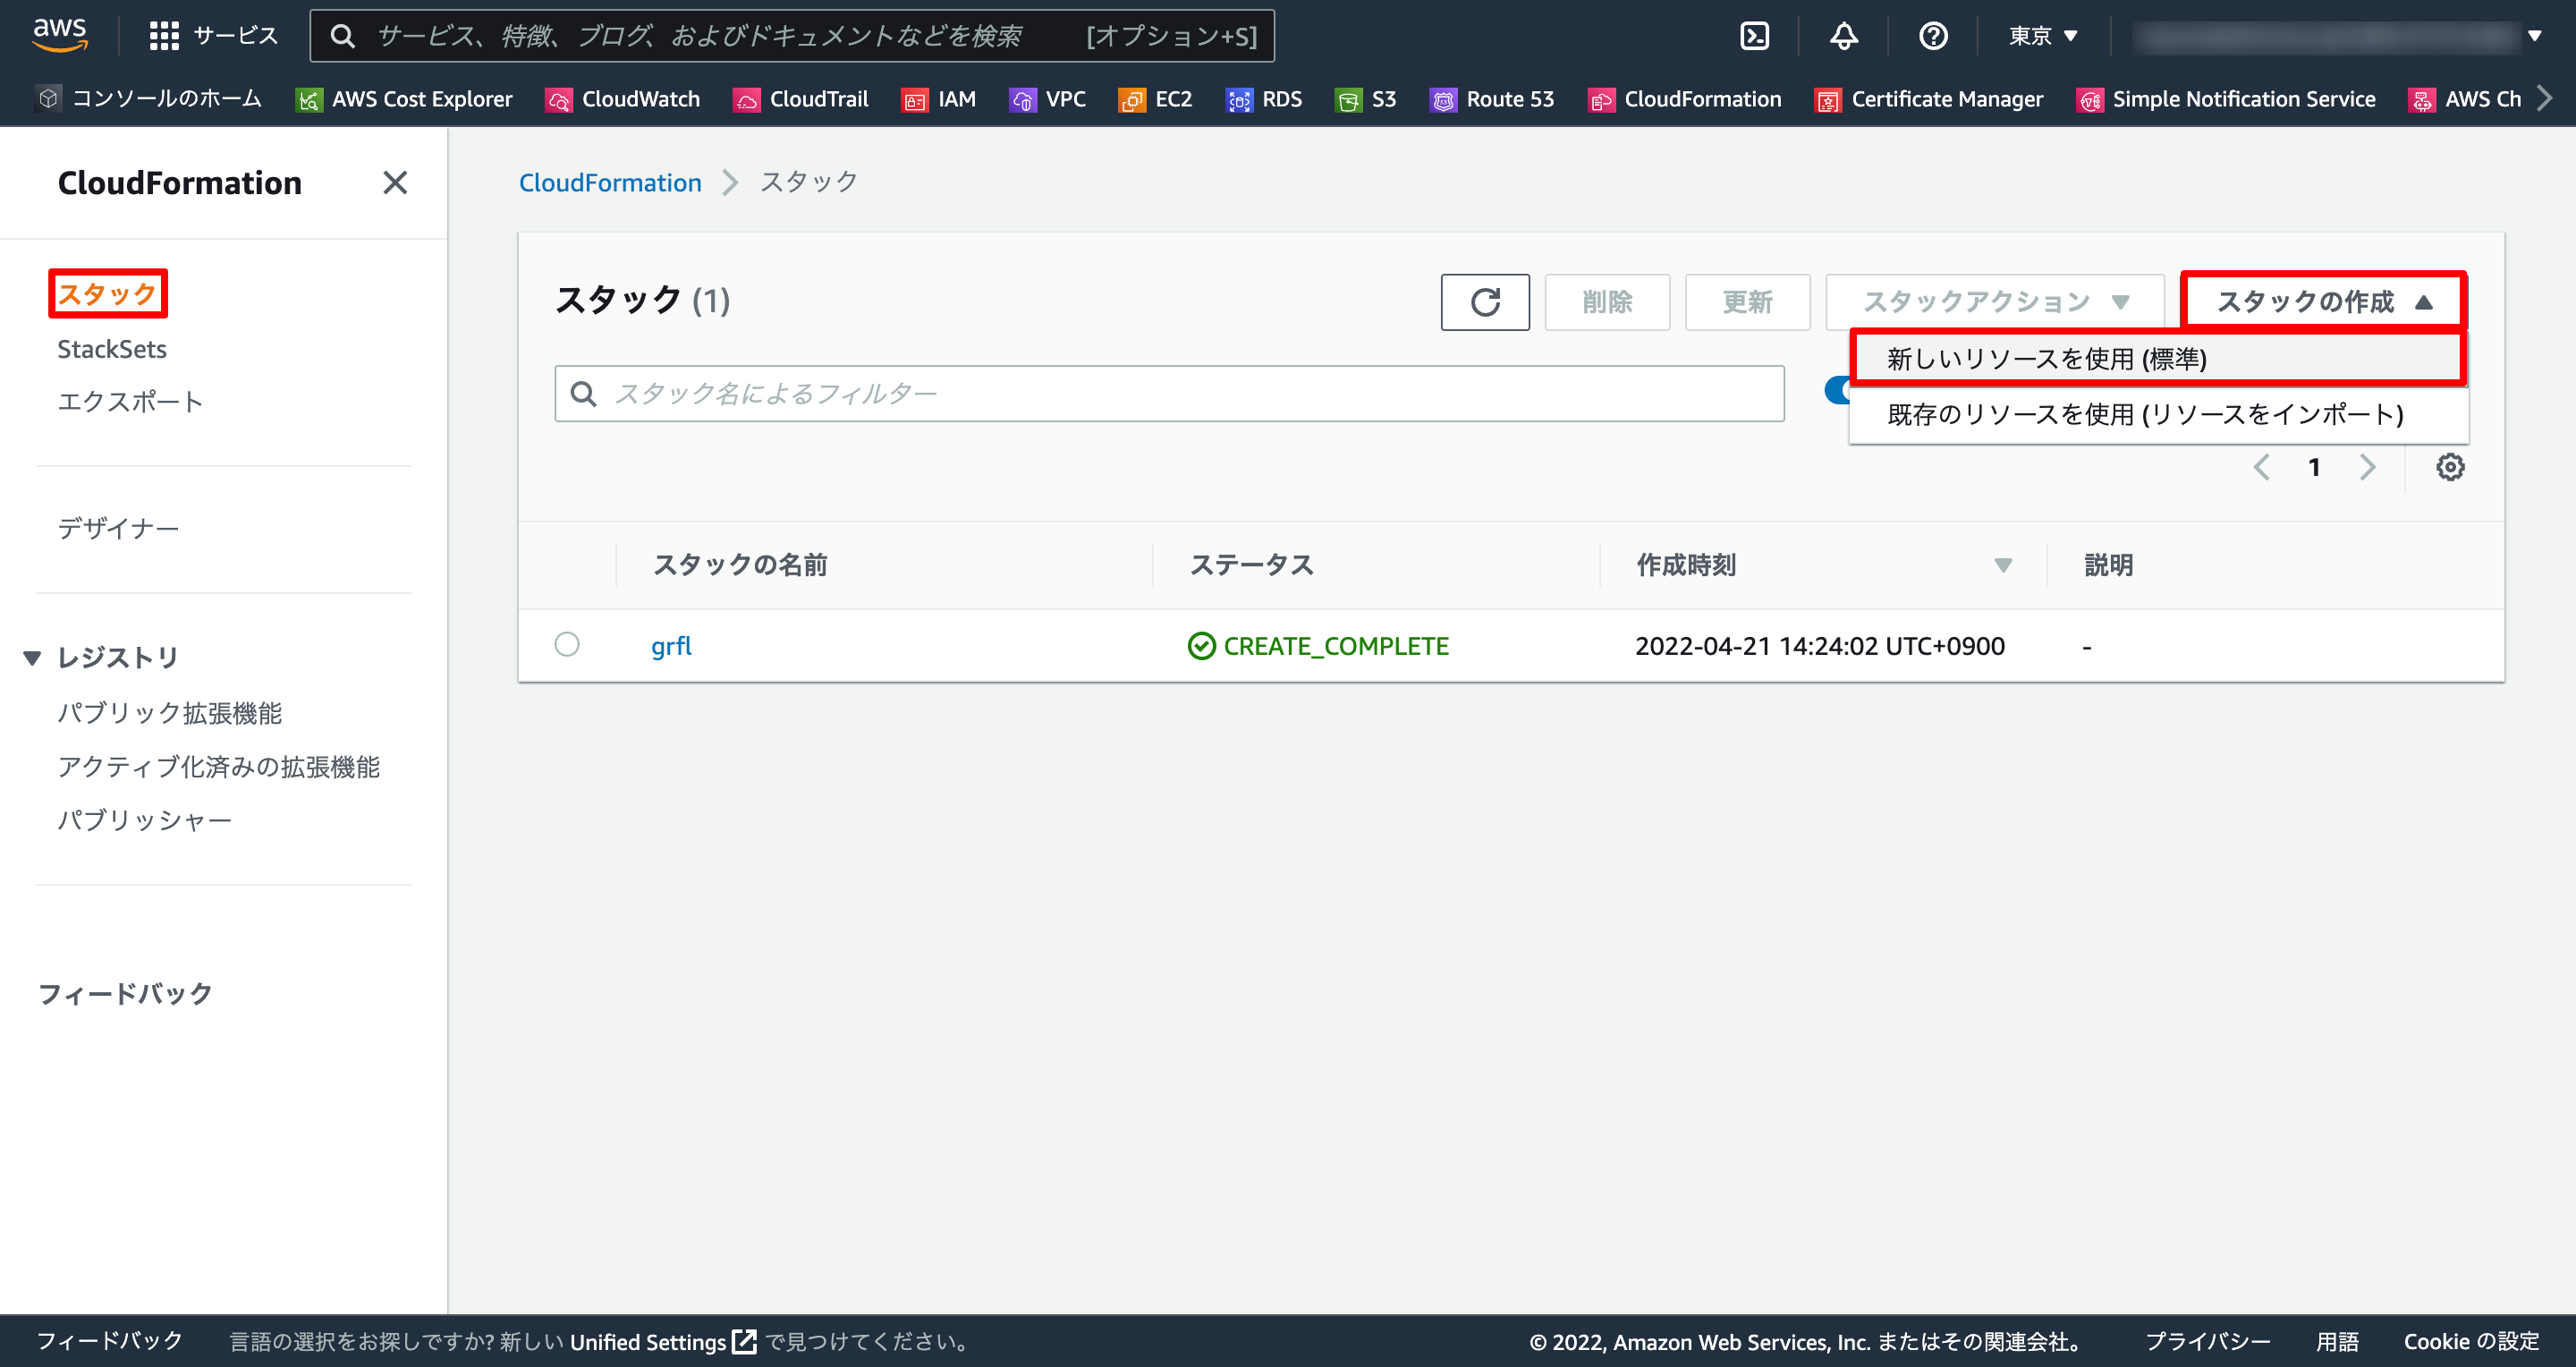
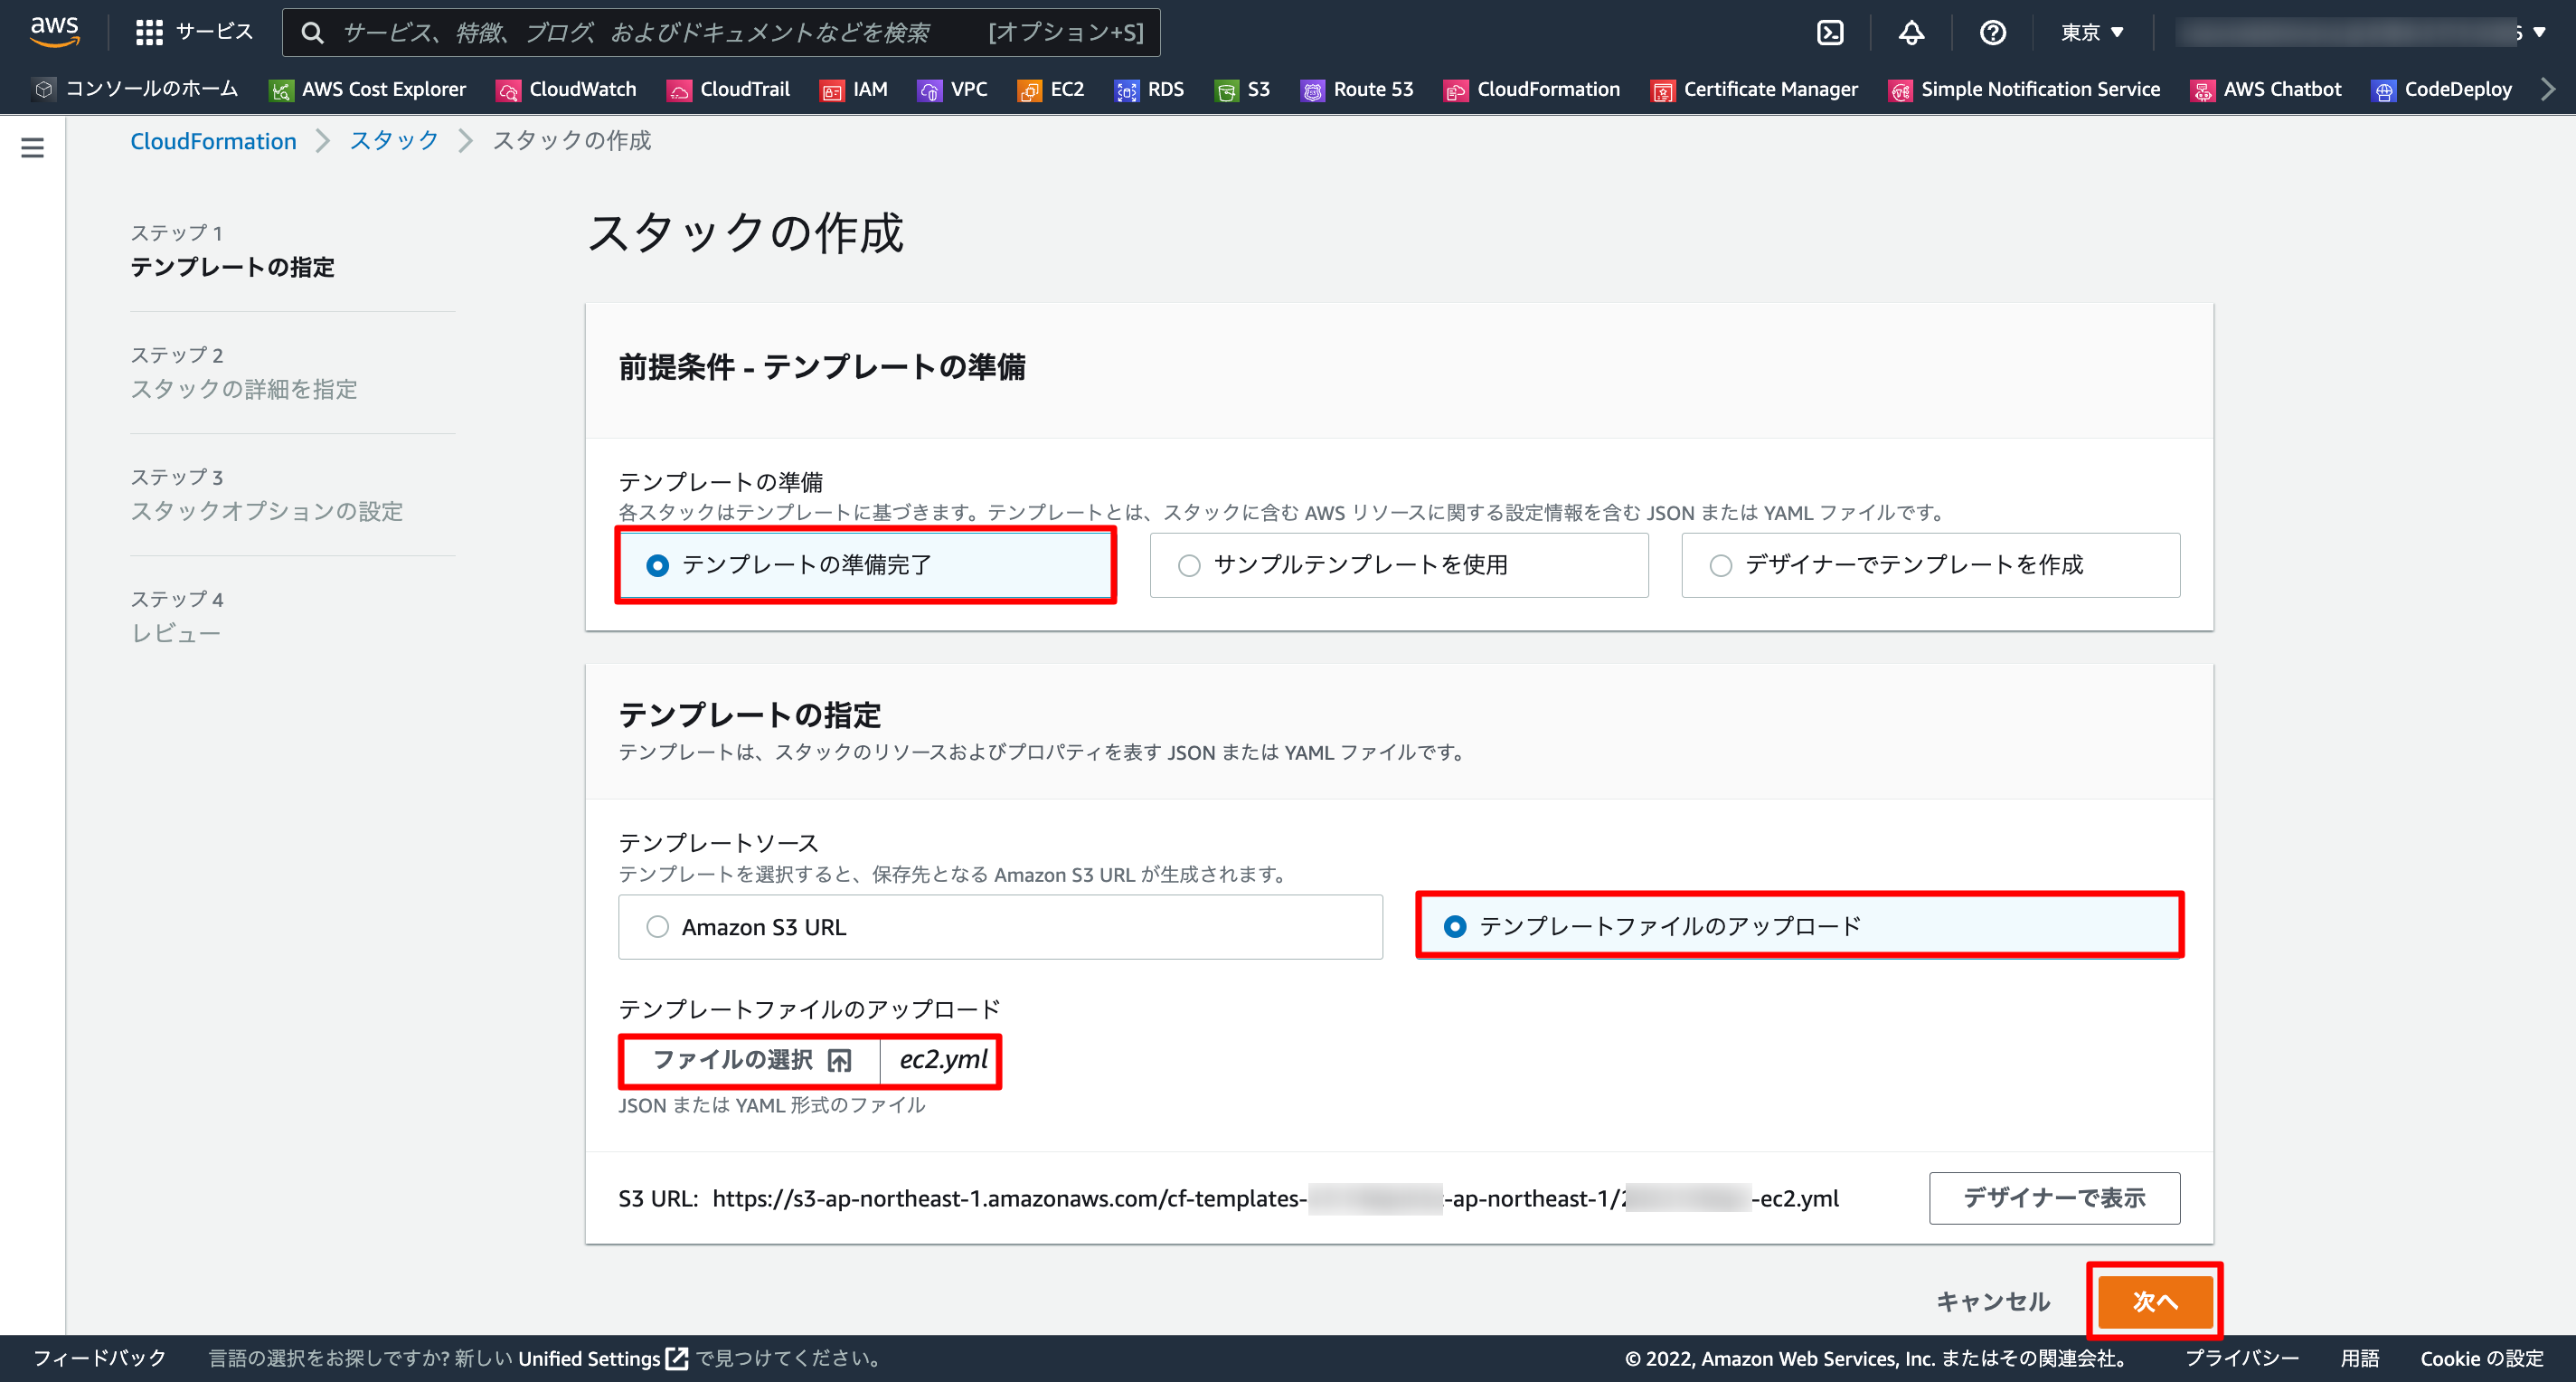
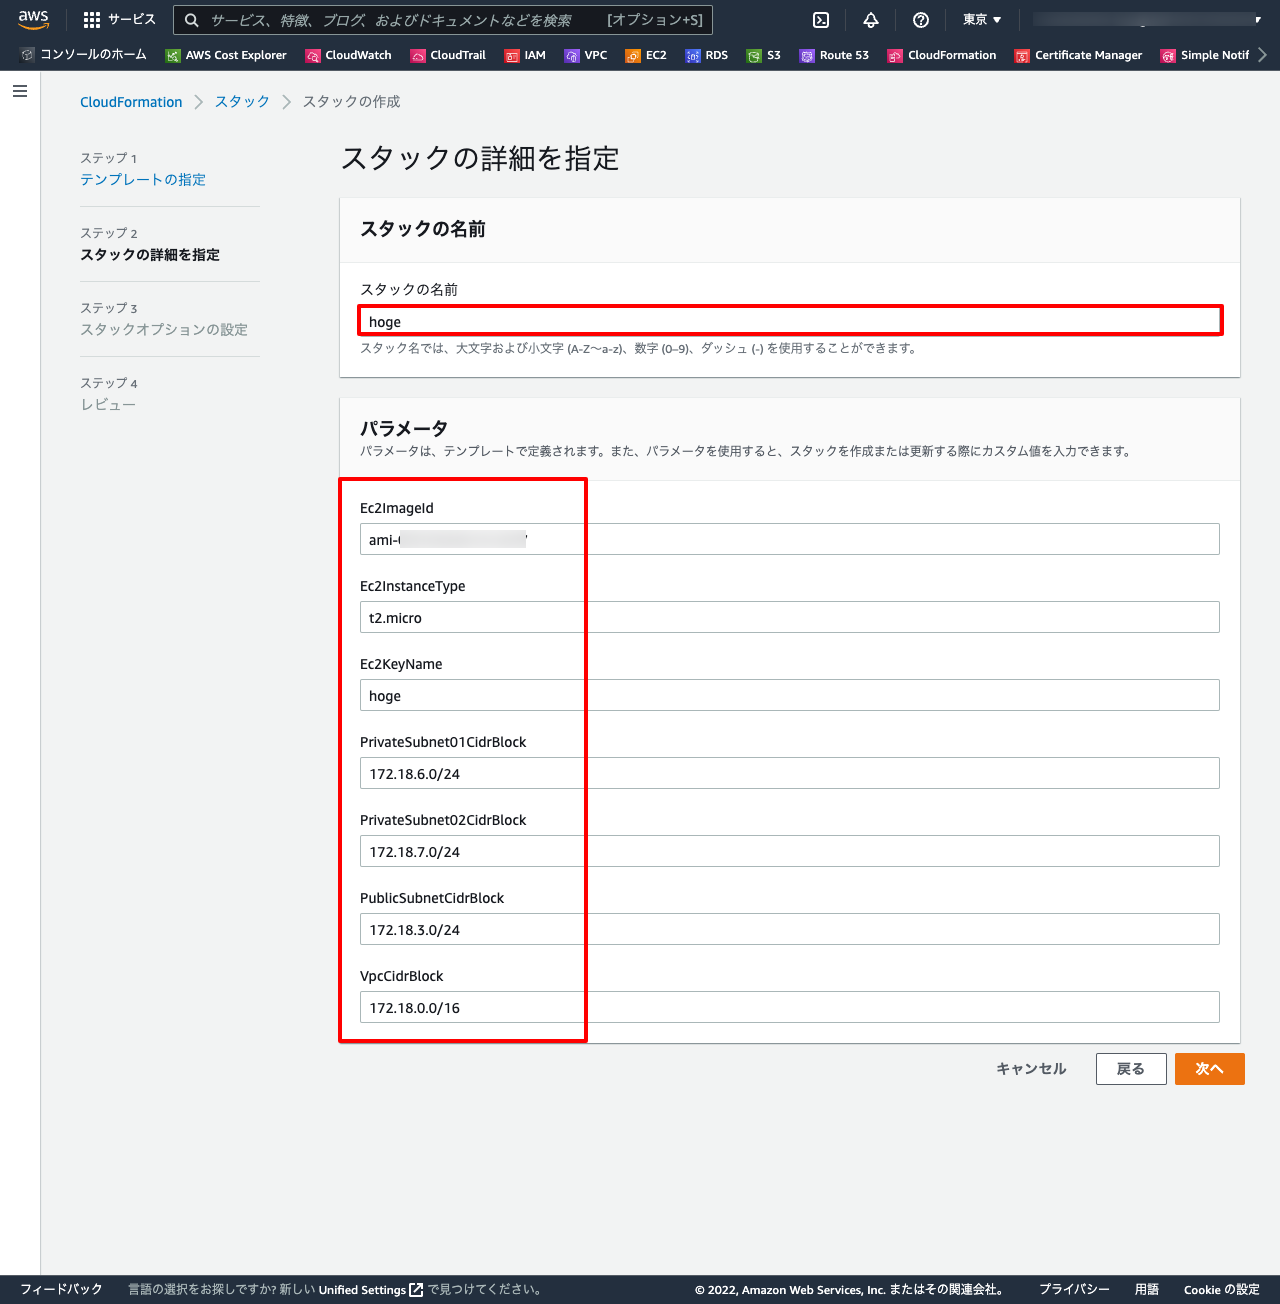
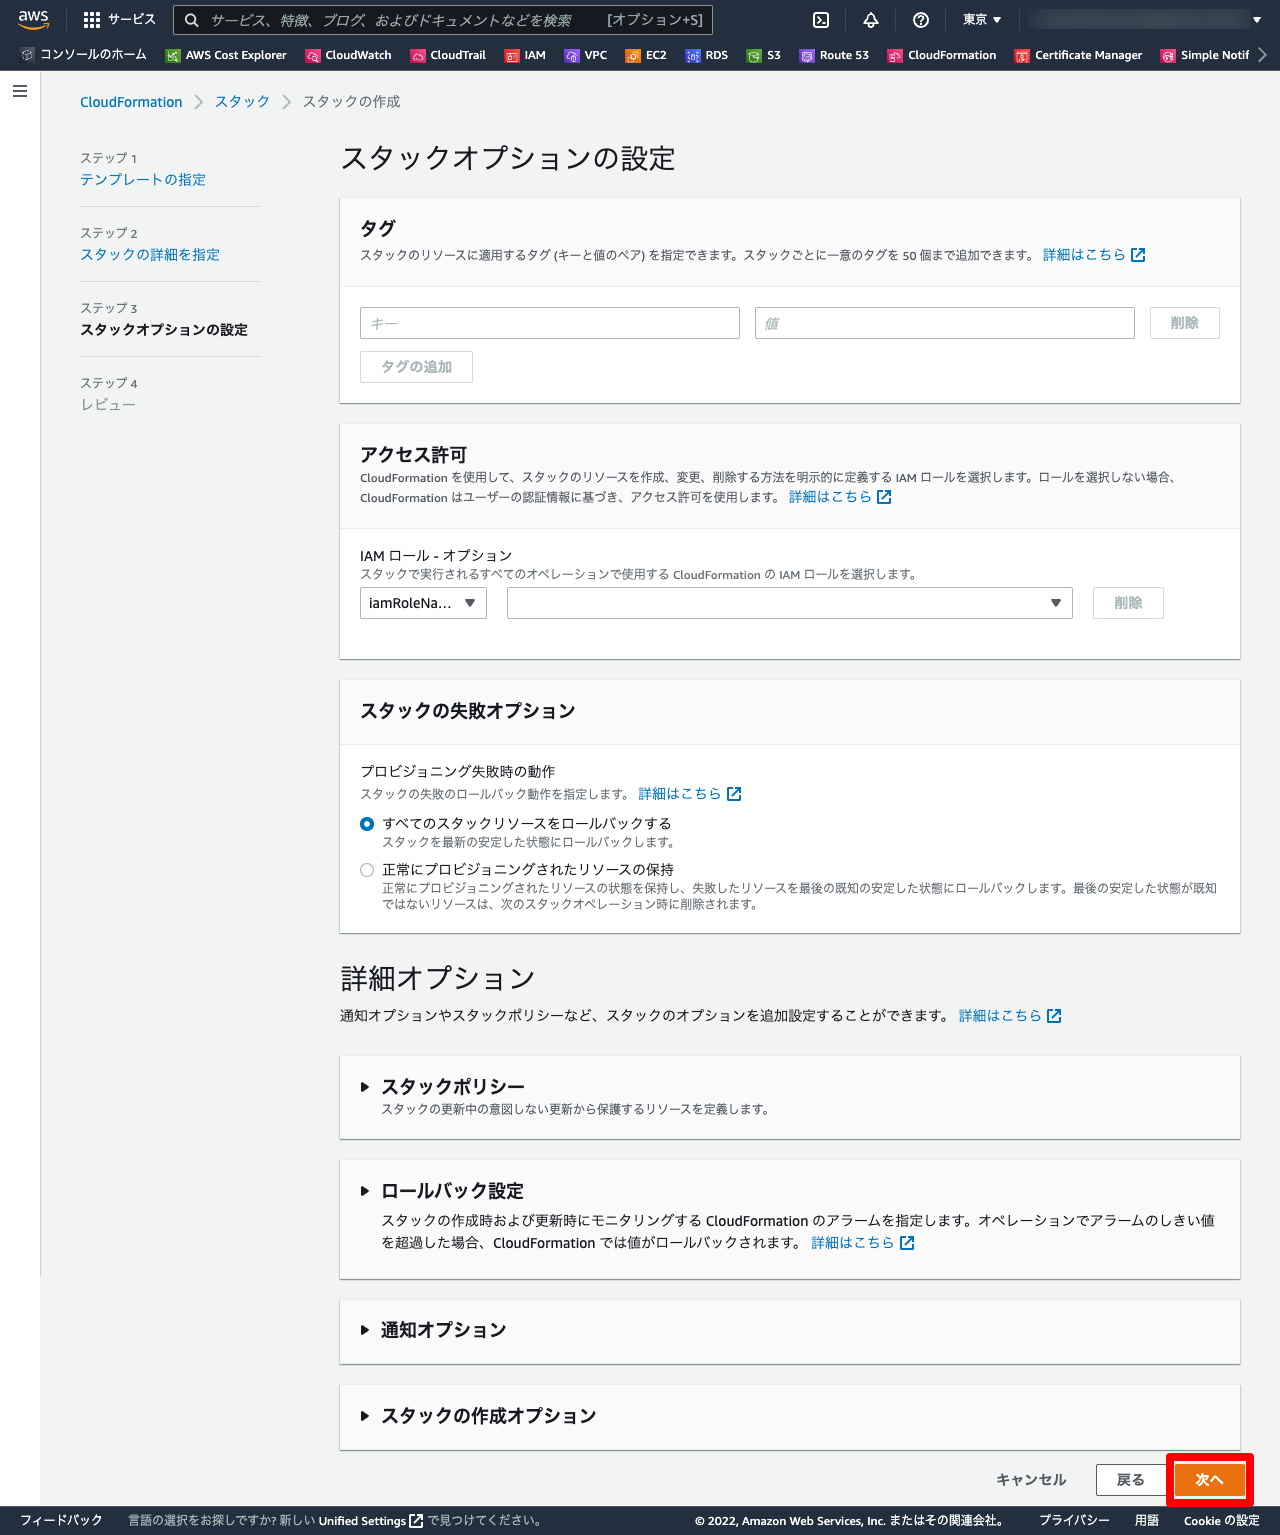
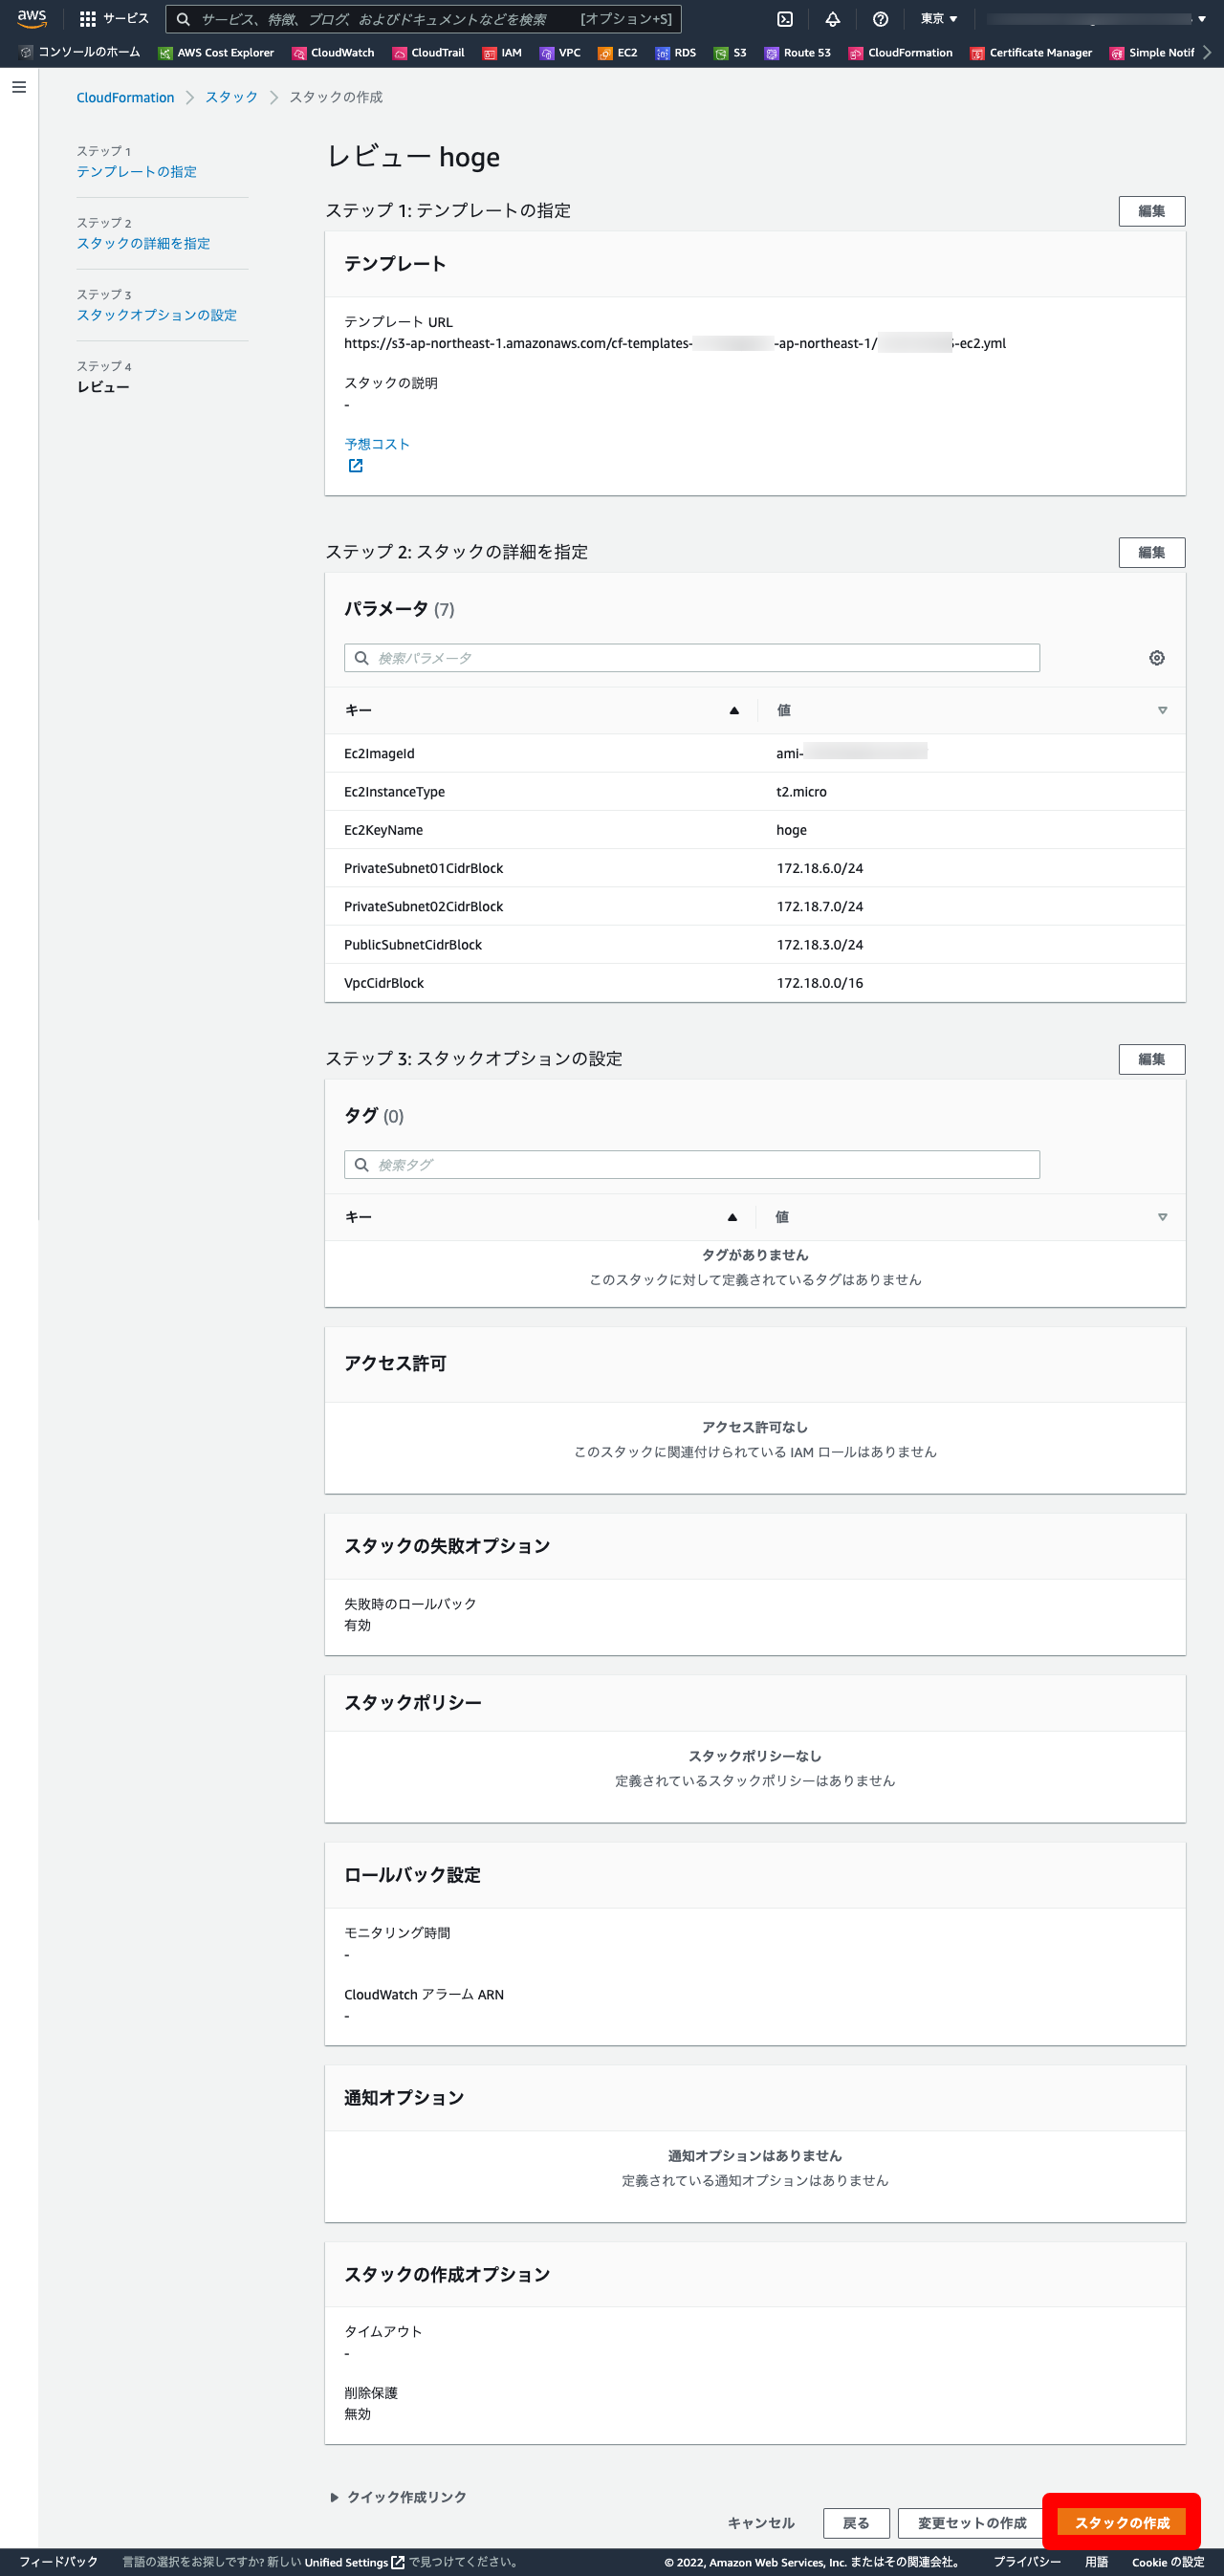
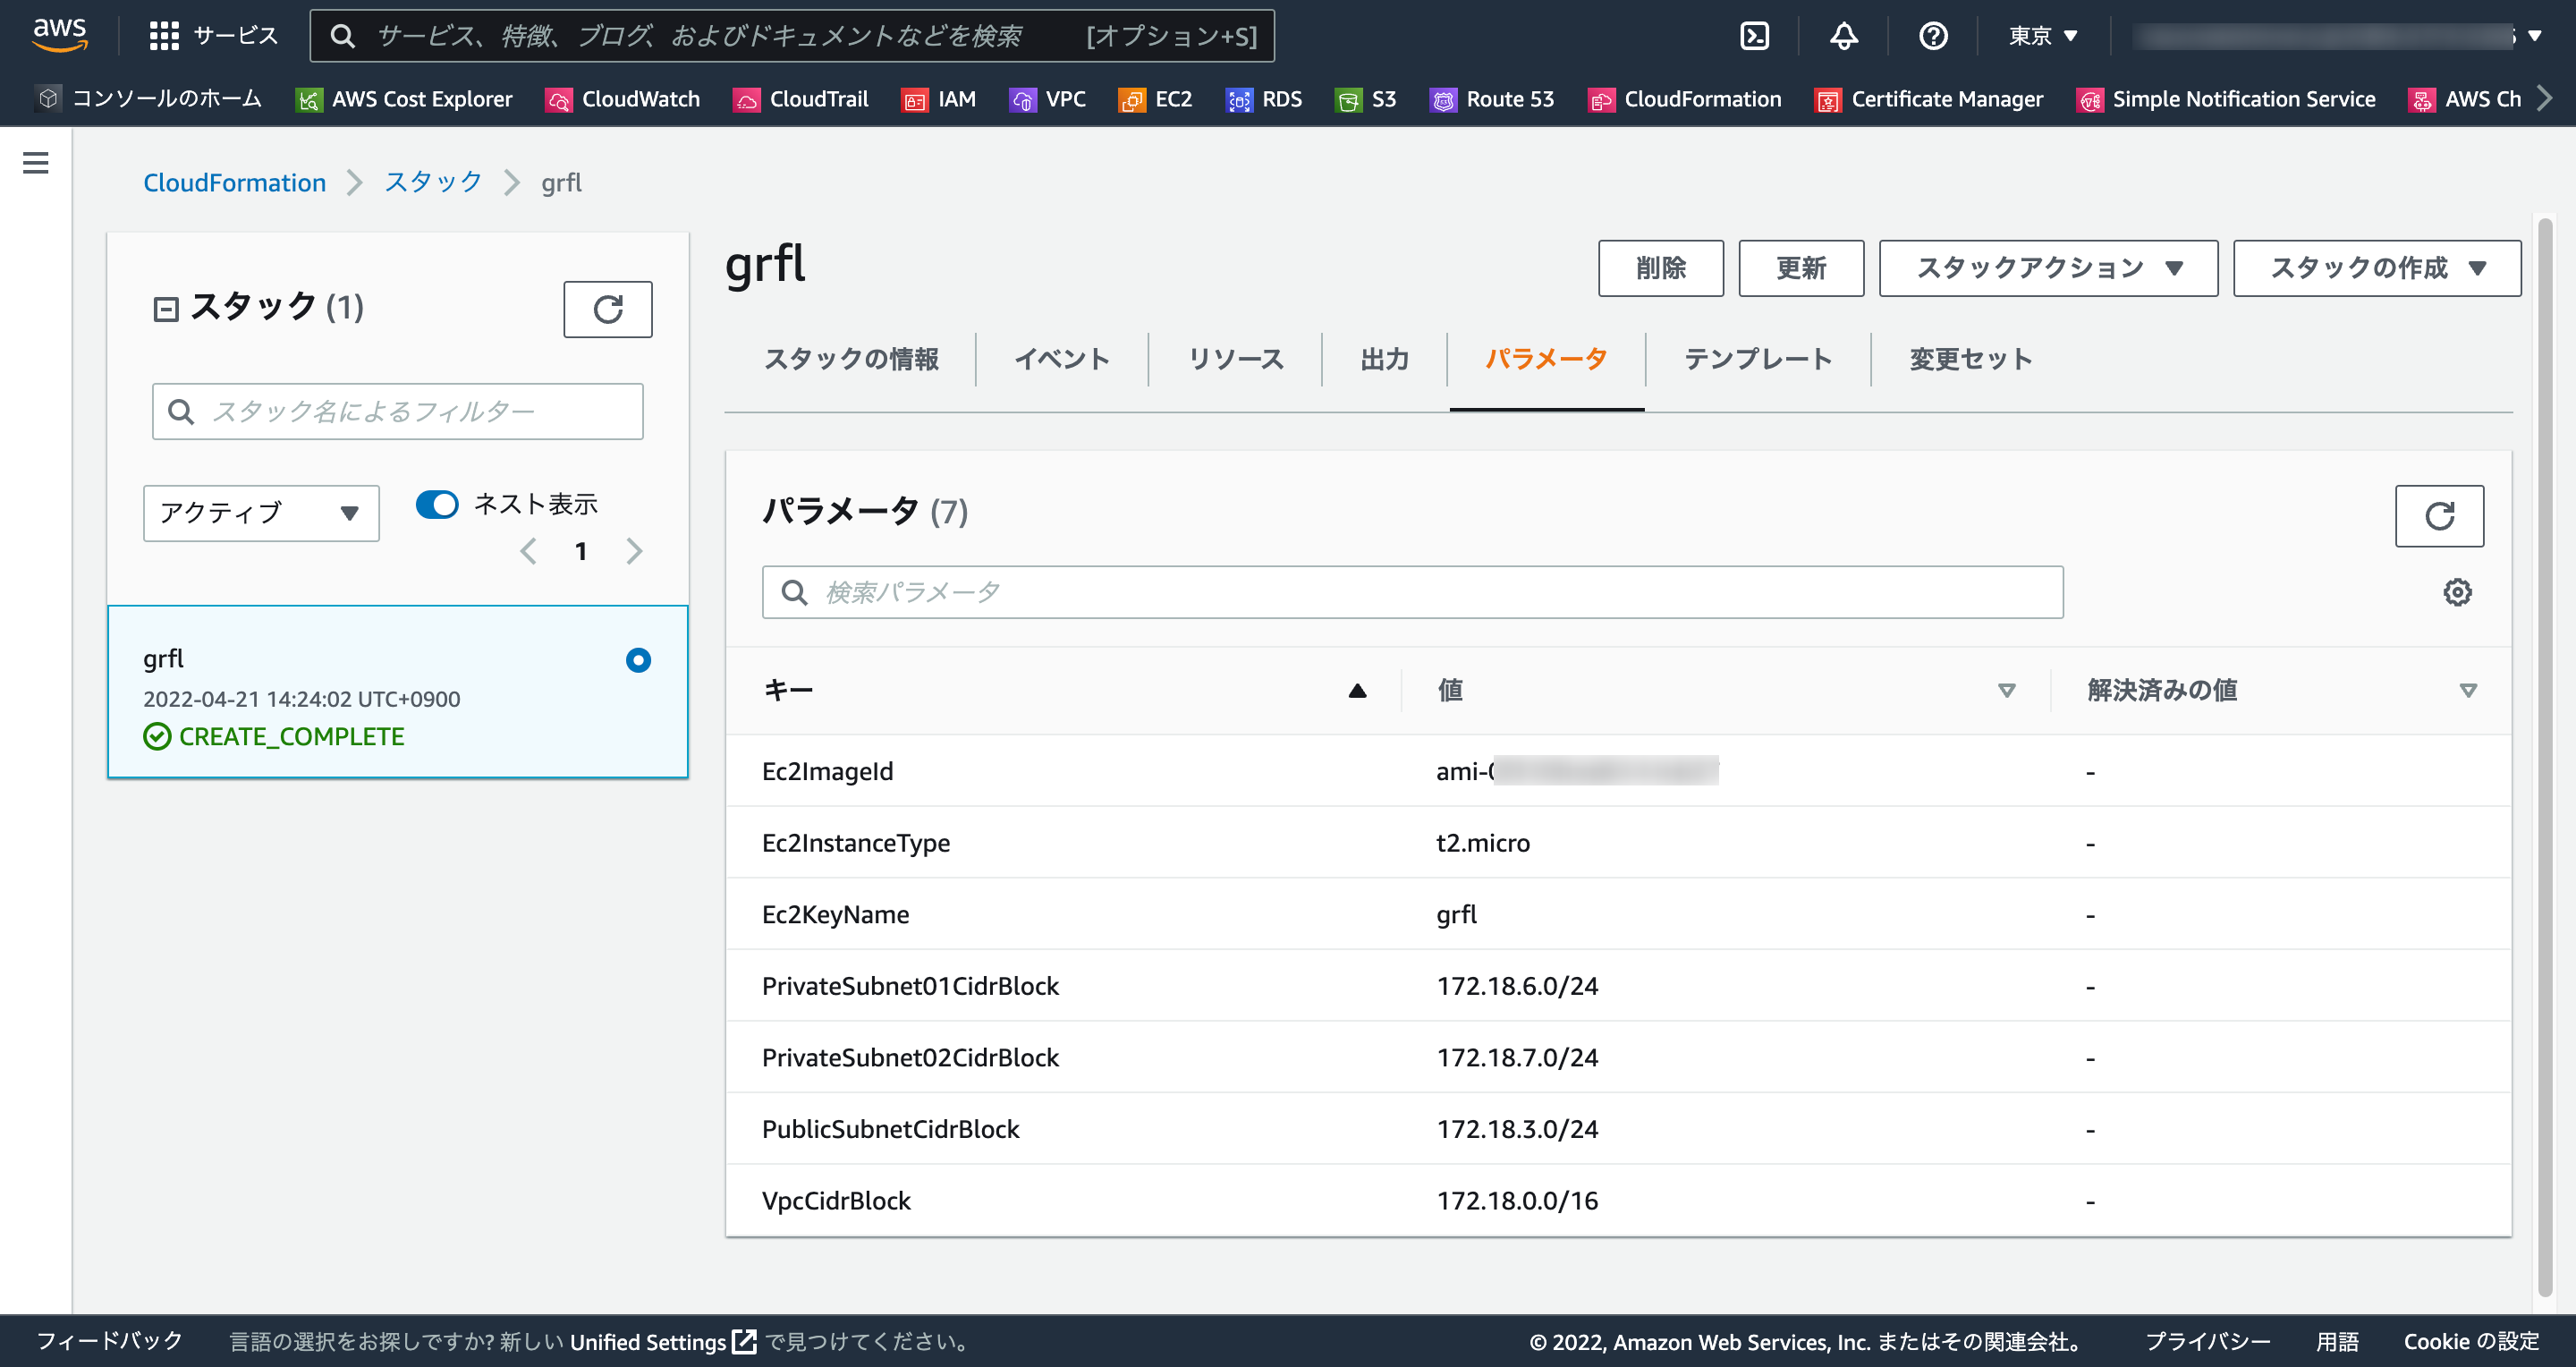
1-3. スタック作成
2. yum
local
$ ssh ec2-user@(ElasticIP) -i ~/.ssh/(キーペア名.pem)
ec2-user
$ sudo yum update -y
3. nginx
ec2-user
$ sudo amazon-linux-extras install nginx1.12 -y
$ nginx -v
$ sudo systemctl start nginx
4. PHP
4-1. PHPインストール
ec2-user
$ sudo amazon-linux-extras install php7.4 -y
$ php -v
4-2. パッケージインストール
ec2-user
$ sudo yum install php-cli php-pdo php-fpm php-json php-mysqlnd -y
$ sudo yum install php-bcmath php-mbstring php-xml -y
$ sudo yum install php-opcache
4-3. php-fpm起動
ec2-user
$ sudo systemctl start php-fpm
5. Composer
5-1. Composerインストール
ec2-user
$ sudo curl -sS https://getcomposer.org/installer | php
$ sudo chown root:root composer.phar
$ sudo mv composer.phar /usr/bin/composer
$ composer -V
$ sudo composer self-update --1
$ composer -V
5-2. php-mbstring,php-xmlインストール
ec2-user
$ sudo yum install php-mbstring php-xml -y
5-3. パッケージインストール
ec2-user
$ cd /var/html/grfl/src
$ composer install --no-dev --prefer-dist
$ cd
6. Node.js
ec2-user
$ curl -sL https://rpm.nodesource.com/setup_13.x | sudo bash -
$ sudo yum install -y nodejs
$ node -v
6-2. gcc-c++
ec2-user
$ sudo yum -y install gcc-c++
6-3. JavaScriptパッケージインストール
ec2-user
$ cd /var/www/grfl/src
$ npm ci
6-3. JavaScriptトランスパイル
ec2-user
$ npm run prod
7. Git
7-1. Gitインストール
ec2-user
$ sudo yum install git -y
$ git --version
7-2. git clone
ec2-user
$ cd /var/www
$ sudo chmod 777 /var/www
$ git clone (リモートリポジトリURL)
$ ls -l
$ cd
8. php-fpm,nginx設定
8-1. php-fpm
ec2-user
$ sudo vi /etc/php-fpm.d/www.conf
www.conf
; RPM: apache user chosen to provide access to the same directories as httpd
user = nginx
; RPM: Keep a group allowed to write in log dir.
group = nginx

// 略

listen.owner = nginx
listen.group = nginx
listen.mode = 0660
ec2-user
$ sudo systemctl restart php-fpm
8-2. nginx
ec2-user
$ sudo vi /etc/nginx/nginx.conf
nginx.conf
# For more information on configuration, see:
#   * Official English Documentation: http://nginx.org/en/docs/
#   * Official Russian Documentation: http://nginx.org/ru/docs/

user nginx;
worker_processes auto;
error_log /var/log/nginx/error.log;
pid /run/nginx.pid;

# Load dynamic modules. See /usr/share/nginx/README.dynamic.
include /usr/share/nginx/modules/*.conf;

events {
    worker_connections 1024;
}

http {
    log_format  main  '$remote_addr - $remote_user [$time_local] "$request" '
                      '$status $body_bytes_sent "$http_referer" '
                      '"$http_user_agent" "$http_x_forwarded_for"';

    access_log  /var/log/nginx/access.log  main;

    sendfile            on;
    tcp_nopush          on;
    tcp_nodelay         on;
    keepalive_timeout   65;
    types_hash_max_size 2048;

    include             /etc/nginx/mime.types;
    default_type        application/octet-stream;

    # Load modular configuration files from the /etc/nginx/conf.d directory.
    # See http://nginx.org/en/docs/ngx_core_module.html#include
    # for more information.
    include /etc/nginx/conf.d/*.conf;

    server {
        listen 80 default_server;
        listen [::]:80 default_server;
        server_name  _;
        root /var/www/grfl/src/public;
        index index.php;

        # Load configuration files for the default server block.
        include /etc/nginx/default.d/*.conf;

        location / {
            try_files $uri $uri/ /index.php?$query_string;
        }

        location ~ \.php$ {
            fastcgi_pass unix:/run/php-fpm/www.sock;
            fastcgi_param SCRIPT_FILENAME $realpath_root$fastcgi_script_name;
            include fastcgi_params;
        }

        error_page 404 /404.html;
            location = /40x.html {
        }

        error_page 500 502 503 504 /50x.html;
            location = /50x.html {
        }
    }
}
ec2-user
$ sudo systemctl restart nginx
9. RDS
10. MySQL
10.1 MariaDBのパッケージ削除
ec2-user
$ sudo yum remove mariadb-*
10-2. MySQLのリポジトリをyumに追加
ec2-user
$ sudo yum install https://dev.mysql.com/get/mysql80-community-release-el7-5.noarch.rpm -y
$ sudo yum-config-manager –enable mysql80-community
10-3. MySQLインストール
ec2-user
$ sudo yum install --enablerepo=mysql80-community mysql-community-server
$ sudo yum install --enablerepo=mysql80-community mysql-community-devel

$ mysqld --version
$ sudo yum install https://dev.mysql.com/get/mysql80-community-release-el7-5.noarch.rpm -y
$ sudo yum-config-manager –enable mysql80-community
$ sudo systemctl start mysqld.service
$ sudo systemctl status mysqld.service
$ sudo systemctl enable mysqld.service
10-4. ログファイル作成
ec2-user
$ sudo touch /var/log/mysqld.log
10-5. mysqld自動起動
ec2-user
$ sudo systemctl start mysqld.service
$ sudo systemctl status mysqld.service
$ sudo systemctl enable mysqld.service
10-6. PHP-FPM再起動
ec2-user
$ sudo systemctl restart php-fpm
10-7. MySQL接続確認
ec2-user
$ mysql -h (エンドポイント) -u (マスターユーザー名) -p
Enter password:(パスワード)
11. .env
11-1. .env作成
ec2-user
$ cd /var/www/grfl/src
$ cp .env.example .env
$ vi .env
11-2. .env設定
.env
+ APP_NAME=アプリ名
+ APP_ENV=production
APP_KEY=
+ APP_DEBUG=false
+ APP_URL=https://(EC2のパブリックIPアドレス)

LOG_CHANNEL=stack

DB_CONNECTION=mysql
+ DB_HOST=エンドポイント
DB_PORT=3306
+ DB_DATABASE=DB名
+ DB_USERNAME=マスターユーザー名
+ DB_PASSWORD=マスターパスワード
11-3. APP_KEY,permission
ec2-user
$ cd /var/www/grfl/src
$ php artisan key:generate
$ chmod 755 .env
12. migration
ec2-user
$ php artisan migrate:refresh --seed
13. permission
ec2-user
$ cd /var/www/grfl/src
$ chmod -R 777 storage
$ chmod -R 777 bootstrap/cache
補足
トラブルシューティング
エラーログ
/var/log/nginx/error.log;
production.ERROR: No application encryption key has been specified. {"exception":"[object] (RuntimeException(code: 0): No application encryption key has been specified. at /var/www/grfl/src/vendor/laravel/framework/src/Illuminate/Encryption/EncryptionServiceProvider.php:80)
[stacktrace]
解決方法
-
.envのpermissionwp600→755に変更
ec2-user
$ vi /etc/php-fpm.d/www.conf
user=nginx
$ ls -al
-rw-rw----  1 ec2-user ec2-user 1916  5月 10 12:43 .env
$ chmod 755 .env
-rwxr-xr-x  1 ec2-user ec2-user 1916  5月 10 12:48 .env
動作確認
開発環境(FW/ツールのバージョンなど)
| ツール | バージョン |
|---|---|
| Vue.js | 2.6.14 |
| jQuery | 3.4.1 |
| PHP | 7.4.1 |
| Laravel | 6.20.43 |
| MySQL | 5.7.36 |
| Nginx | 1.18.0 |
| Composer | 2.0.14 |
| npm | 6.14.6 |
| Git | 2.33.1 |
| Docker | 20.10.11 |
| docker-compose | v2.2.1 |
| PHPUnit | 8.0 |
| CircleCI | 2.1 |
| heroku | 7.59.4 |
| MacBook Air | M1,2020 |
| macOS | Monterey 12.3 |
| Homebrew | 3.3.8 |
ディレクトリ構造
【ルートディレクトリ】
├─ .circleci
│   └─ config.yml
├─ aws / CloudFormation
│   └─ ec2.yml
├─ docker
│   └─ mysql
│   └─ nginx
│   └─ php
│   └─ phpmyadmin
├─ src
│   └─ 【Laravelのパッケージ】
└─ docker-compose.yml
Reference
次回記事
- 【AWS】LaravelアプリをEC2デプロイ②【Route53編】
- 【AWS】LaravelアプリをEC2デプロイ③【ACM / ELB編】
- 【AWS】LaravelアプリをEC2デプロイ④【CircleCI / CodeDeploy編】
- 【AWS】LaravelアプリをEC2デプロイ⑤【SNS / Chatbot編】
- 【AWS】LaravelアプリをEC2デプロイ⑥【S3編】
- 【AWS】LaravelアプリをEC2デプロイ⑦【API編】
- 【AWS】お役立ちリンク集【随時更新】
