0
0

Delete article

Deleted articles cannot be recovered.

Draft of this article would be also deleted.

Are you sure you want to delete this article?

More than 3 years have passed since last update.

[Flutter]画像を表示する

Last updated at Posted at 2021-09-11

概要

画像を表示する時、画像ファイルを扱うための準備が少し手間なので、手順をまとめました。

画像ファイルを準備する

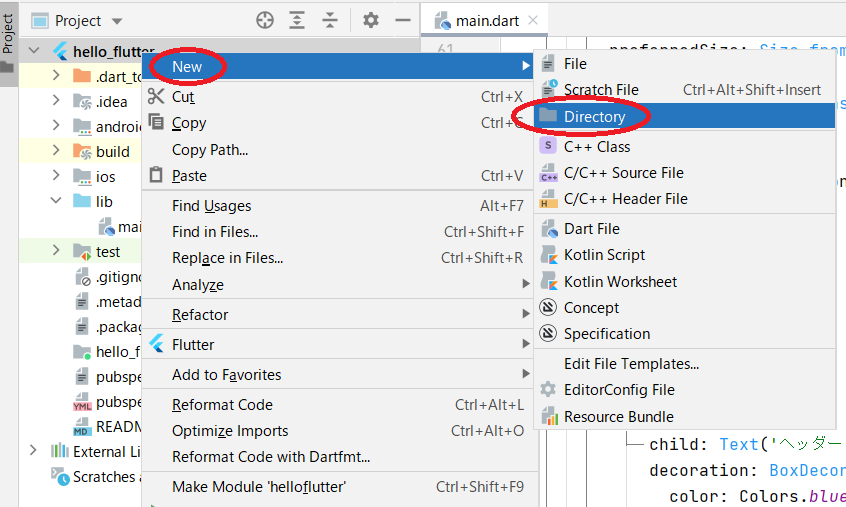
最初に画像を入れるフォルダを用意します。
Projectの一番上の項目で右クリックしてNew > Directory
スクリーンショット (718).png
今回はこの様なフォルダ構成にしました。
スクリーンショット (719).png
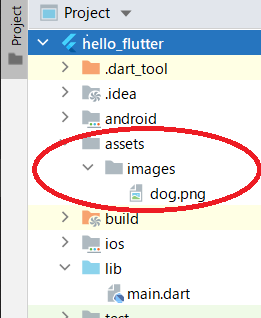
画像は「ドラッグ&ドロップ」もしくは「コピー&ペースト」で登録してください。

pubspec.yamlファイルを編集する

pubspec.yamlファイルに「画像が保存されているディレクトリ」を指定します。
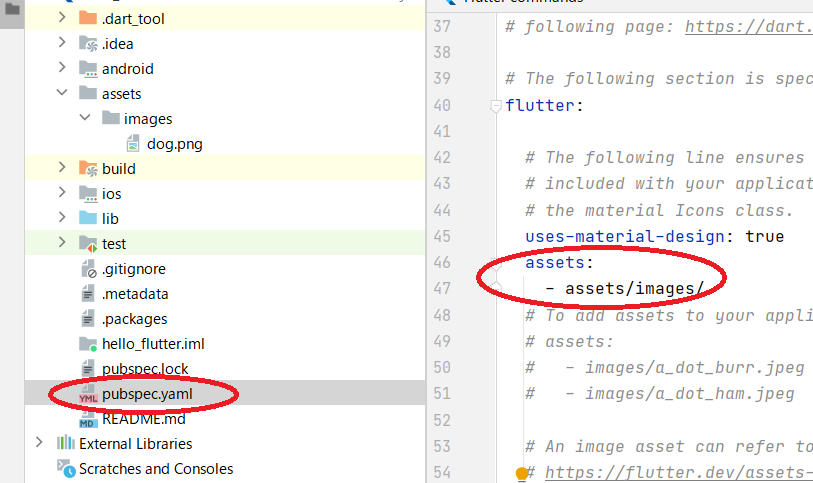
スクリーンショット (720).png

flutter:

  uses-material-design: true
  assets:
    - assets/images/

※ インデントによっては正常に動かないかもしれません。コピペした事でうまく動作しなかった時は直接入力してみてください
※ assets/images/の頭にある『-』を書き忘れるとエラーになりますので注意してください

画像を表示するコードを追加する

画像を表示したい位置にコードを追加します。

Image.asset('assets/images/dog.png'),

スクリーンショット (721).png

Screenshot2.png

補足1

ネットワーク上に用意された画像を表示したい場合は、以下のコードを記述するだけで出来ます。

Image.network('https://picture/test.png');

補足2

スクリーンショット (722) - コピー.png

画面の上側にこういうのが表示されるかもしれません。pubspec.yamlファイルを編集した事で「パッケージ情報などに変更が必要かもしれませんが更新しますか?」というお知らせですが、今回の場合は無視しても大丈夫です。

0
0
0

Register as a new user and use Qiita more conveniently

  1. You get articles that match your needs
  2. You can efficiently read back useful information
  3. You can use dark theme
What you can do with signing up
0
0

Delete article

Deleted articles cannot be recovered.

Draft of this article would be also deleted.

Are you sure you want to delete this article?