LoginSignup
5
0

More than 1 year has passed since last update.

[Blender]1つのオブジェクトに複数のアニメーションを登録する手順

Last updated at Posted at 2023-01-17

概要

Blenderで作ったオブジェクトに複数のアニメーションを登録する手順です。
Unityへのエクスポートまでやっていきます。

本文

前準備

画面上部のタブで「Animation」を選択
スクリーンショット 2023-01-17 9.07.26.png
画面下側のスクショ部分が「DopeSheet」になっていることを確認してください。
スクリーンショット 2023-01-17 8.49.57.png
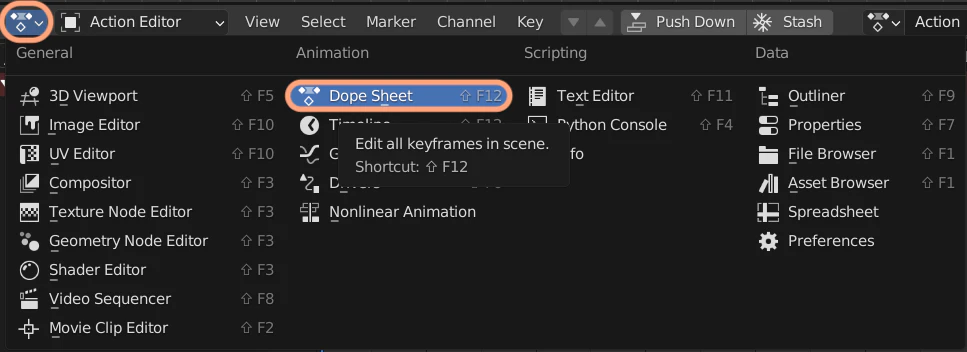
その右隣を「Dope Sheet」から「Action Editor」に切り替えます。
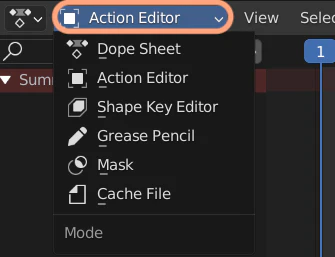
スクリーンショット 2023-01-17 8.50.03.png

Animationを作成

「+ New」を押すとAnimationを用意できます。一つ目のAnimationを作成します。
スクリーンショット 2023-01-17 9.13.42.png

Animationの追加

Animationを追加するときは「New Action」を押します。
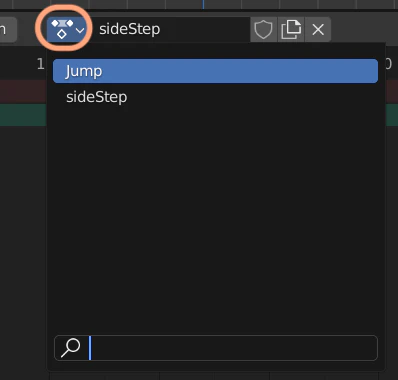
スクリーンショット 2023-01-17 8.52.14.png

Animationの切り替え

スクショのボタンを押すことでアニメーションを切り替えられます。また、その右隣の文字入力欄を変更することでアニメーションの名前を変更することもできます。
スクリーンショット 2023-01-17 8.54.26.png

Unityへのエクスポート

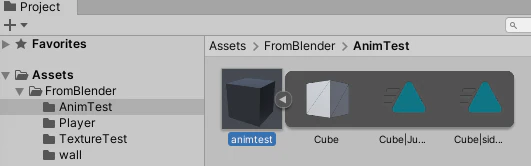
以上のように作成してエクスポートすると、Unityへ導入した時オブジェクトに複数のアニメーションが登録されている事を確認できます。
スクリーンショット 2023-01-17 9.00.16.png

補足

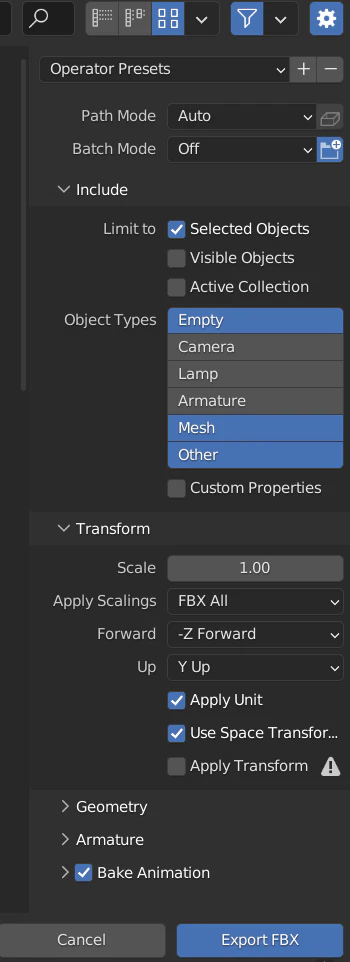
エクスポートの一例も載せておきます。それぞれの目的に合わせて調整してください。
(File > Export > FBX)
スクリーンショット 2023-01-17 21.19.10.png

5
0
0

Register as a new user and use Qiita more conveniently

  1. You get articles that match your needs
  2. You can efficiently read back useful information
  3. You can use dark theme
What you can do with signing up
5
0