Nuxt3の本リリース(予定)が6月に迫っている!ということで、RC版を試しながらアコーディオンを作ってみました。
具体的には、下記の流れでNuxt3でアコーディオンを作成した際に学んだこと・詰まったことについて記述しています。
- Nuxt3(RC版)導入
- page作成(index.vue)
- sass導入
- component作成(accordion.vue)
- その他、nuxt3を触って気になったこと
さっそくNuxt3をはじめてみる
2022projects % npx nuxi init nuxt3-accordion

2022projects % cd nuxt3-accordion
nuxt3-accordion % ls
README.md	app.vue		nuxt.config.ts	package.json	tsconfig.json
nuxt3−demo % npm install
(yarn install)

nuxt3-accordion % npm run dev -- -o
(yarn dev -o)
※ -o: 立ち上げたローカルに飛べる
導入周りで感じたことまとめ
- vue cliや従来のNuxt導入時に面倒だった、導入パッケージの質問がなくなってサクッとプロジェクトを作成できる(ほんの数秒)
- ビルドツール: vite, サーバーエンジン: Nitro。
サーバー起動、HMR(ホットリロード)がサクサク。画面描画のパフォーマンスも改善 - デフォルトでtypescrpt導入済み
- 内蔵されているvueバージョンは3.2.33(2022年5月時点)
■ 参考記事
Nuxt3 Quick Start
ディレクトリ作成
初期状態だととてもシンプルなので、どのようにvueファイルを管理していこうか迷いましたが、公式がディレクトリ構成をまとめてくれています。(とても見やすい)
公式のディレクトリ構造を参考に、アコーディオン(部品)を格納するcomponentsディレクトリと、アコーディオンを表示するためのpagesディレクトリを作成します。
nuxt3-accordion % mkdir {./components,./pages}
nuxt3-accordion % touch {pages/index.vue,components/Accordion.vue}
app.vueを編集
pagesディレクトリ以下のコンポーネントをルーティングとして表示するため、app.vueを下記のように編集
<template>
  <div>
    <!-- 変更前: <NuxtWelcome /> -->
    <NuxtPage />
  </div>
</template>
上記の編集によって、pagesディレクトリ以下のコンポーネントがルーティングとして表示されるようになります。
例えば、index.vueの場合だと"localhost:3000/"に対応して描画されます。
<template>
  <h2>アコーディオンを表示</h2>
</template>
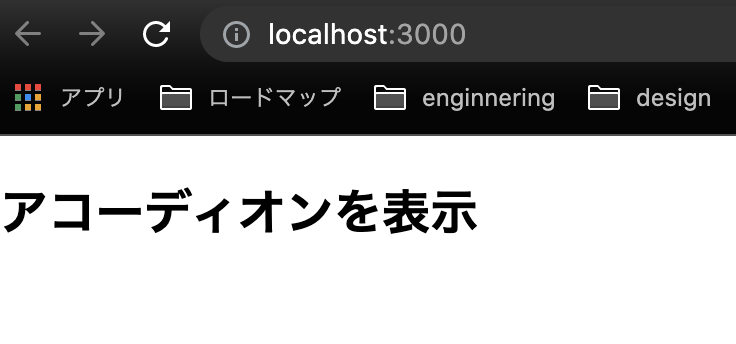
※ このとき、pagesディレクトリのファイル名は小文字スタートにしなければ、うまくルーティングとして認識されないことに注意です。(ハマりました..)
index.vueの編集
次は、composition API、lang="ts"でindex.vueを書いていきます。
<template>
  <div class="content-wrap">
    <h1>アコーディオンを表示</h1>
    <p>
      {{ `姓名: ${user.firstName} ${user.lastName}`}}
    </p>
    <p>
      Counter:{{ count }}
    </p>
    <button
      @click="count++"
    >
      Count Up
    </button>
    <Accordion />
  </div>
</template>

<script setup lang="ts">
import { ref, reactive } from 'vue'
// interface オブジェクトの型を指定
interface User {
  firstName: string;
  lastName: string;
  age: number;
}

const count = ref<number>(0);
const user: User = reactive({
  firstName: 'Hallo',
  lastName: 'World',
  age: 23
});
</script>

<style scoped>
.content-wrap {
  margin: 0 auto;
  width: 400px;
}
</style>
シンプルに姓名の表示し、ボタンのカウント機能を作ってみました。
script setup構文
nuxt3では、内部でvue3.2系が使用されているためsetupの糖衣構文が使えるようになっています。具体的には、下記のようなメリットがありました。
- export defaultで囲む必要がなくなった
- データや関数をreturnで返す必要がなくなった
個人的には、スッキリ書けるようになっており気に入っております。
sassをインストール
デフォルトのNuxt3で、styleをscss形式で書いていこうとするとエラーがでました。

githubのissueにも解決策がのっていたのですが、シンプルにsassパッケージをインストールすれば解決します。
npm i -D sass
Accordion.vueの編集
次に、アコーディオンを表示するためのコンポーネントを作っていきます。
<template>
  <div class="accordion-wrap">
    <div class="accordion-menu" @click="open()">
      <div class="title">カテゴリー</div>
      <transition name="rotate" mode="out-in">
      </transition>
    </div>
    <transition name="accordion">
      <div v-if="isOpen" class="text-wrap">
        <div>選択中のカテゴリー: {{ checkedCategories }}</div>
        <div
          class="accordion-textarea"
          v-for="user in userProfiles"
          :key="user.id"
        >
          <label for="jack">{{ user.name }}</label>
          <input type="checkbox" :id="user.sin" :value="user.name" v-model="checkedCategories">
        </div>
      </div>
    </transition>
  </div>
</template>

<script setup lang="ts">
  import { ref, reactive } from 'vue';
  // data
  const isOpen = ref(false);
  const checkedCategories = ref([])
  const userProfiles = reactive([
    { id: 1, name: "Beelzebub", sin: "glutonny" },
    { id: 2, name: "Asmodeus", sin: "lust" },
    { id: 3, name: "Mammon", sin: "greed" },
    { id: 4, name: "Satan", sin: "wrath" },
    { id: 5, name: "Astaroth", sin: "sloth" },
    { id: 6, name: "Lucifer", sin: "pride" },
    { id: 7, name: "Leviathan", sin: "envy" },
  ])

  const open = () => {
    isOpen.value = !isOpen.value
  };
</script>

<style lang="scss" scoped>
.accordion-wrap {
  width: 280px;
  height: 70px;
  margin: 16px 0px;
  .accordion-menu {
    width: 100%;
    height: 28px;
    background-color: lightblue;
    &:hover {
      opacity: 0.7;
      cursor: pointer;
    }
    .title {
      padding: 4px 0 4px 8px;
      font-size: 16px;
    }
  }
  .text-wrap {
    padding-top: 16px;
    .accordion-textarea {
      padding-left: 8px;
      padding-top: 8px;
    }
  }
}
// アニメーション開始から終了するまでどのようなアニメーションをするのか指定
@keyframes accordion {
  0% {
    opacity: 0;
    transform: translateY(-10px);
  }
  100% {
    opacity: 1;
    transform: translateY(0px);
  }
}
.accordion-enter-active {
  animation: accordion .5s;
}
.accordion-leave-active {
  animation: accordion .5s reverse;
}
</style>
- open関数を用意して、アコーディオンの切り替えをtrue/falseで管理
- アコーディオン内のマルチチェックボックスは、チェックしたデータの値をv-modelでバインディング
型推論
先ほどのindex.vueの例では、
const count = ref<number>(0);といったように、number型を明示しましたが、今回のref(false);のような形でも、値に応じて型を推論してくれます。
ブラウザで見てみると、こんな感じになります。

レイアウトとか動きとかツッコミどころ満載ですが、とりあえず一旦完成とします。
その他、Nuxt3触ってて気になったことメモ
tsconfig.json
// Typescriptをjsにコンパイルする際の設定を記述
{
  // https://v3.nuxtjs.org/concepts/typescript
  "extends": "./.nuxt/tsconfig.json"
}
nuxt3では、初期プロジェクト作成時に作られる.nuxt/tsconfig.jsonファイル内に、デフォルトで基本的なtypescirptの設定が記述されているため、特に意識しなくてもvueファイル内に無理なくtypescriptを書いていくことが可能。(めっちゃ便利!)
公式のtypescriptガイドを見ていると、カスタマイズも可能なようです。
■ 参考記事
typescript 構成ファイル
tsconfig.jsonの全オプションを理解する
nuxt3 typescript公式ガイド
Composables directoryについて
Nuxt3では、Composablesディレクトリが用意されており、このディレクトリ内でグローバルstateを管理することができます。(つまり、Vuexを個別に入れる必要がない!?)
■ 参考記事
Nuxt3 composables directory
nuxt.config.ts
nuxtの設定周りのファイル。nuxt3からts拡張子に変わった。
nuxt3では、デフォルトでtypescriptが厳格モードになっておらず、エラーの検出を見逃すケースがあるよう。
下記のように、nuxt.config.tsを編集することで修正できるようです。(この辺ちゃんと理解できていないなぁ..)
import { defineNuxtConfig } from 'nuxt'

// https://v3.nuxtjs.org/api/configuration/nuxt.config
export default defineNuxtConfig({
  typescript: {
    strict: true
  }
})
参考:
Nuxt3の新しい機能