背景
自社の企業サイトをできるだけ楽に構築するためにNotionをCMSとして活用したく、WEB公開のための手段を検討した。
要件は以下の通り。
- 独自ドメインが付与できること
- 企業サイトなので当然
- 作り込みが不要なこと
- Notionで作った見た目をそのまま公開できることが望ましい
- ファビコンやヘッダ部分にあるNotionロゴなどを消せること
- とはいえ、できるだけNotion感を隠したい
いくつか選択肢を探すなかで、Fruitionが要件にマッチしており、実際簡単にサイト構築することができた。
本稿では、Fruitionを使ったサイト構築方法と、簡単なカスタマイズ方法を記載する。
他の選択肢
NotionをWEB公開する手順としていくつか候補があったが、以下の理由により利用を見送った。
-
Super
- NotionをWEB化する有料サービス。多機能/安定していそうで、日本語での紹介記事も多く見かける。
- Pros
- 独自ドメイン,作り込み不要,ロゴ消せる(CSSカスタマイズできる)
- Cons
- 有料(月$12 2021/5現在)
- => とりあえず無料でできるものを使いたかったので見送り
- 有料(月$12 2021/5現在)
-
notion-blog
- VercelでWEB公開することを前提にしたOSSのツール。Next.js+Vercelで見た目を作り、NotionをHeadlessCMSとして使う
- Pros
- 無料(Verselの無料プランで公開可能)
- Cons
- だいぶ作り込みが必要。Cloneしたそのままだと、オリジナルのブログの見た目そのままなので、ほぼNext.jsで見た目を1から作っていく必要あり
- => Next.jsでブログ作る気がなかったので見送り
- だいぶ作り込みが必要。Cloneしたそのままだと、オリジナルのブログの見た目そのままなので、ほぼNext.jsで見た目を1から作っていく必要あり
- Notionデフォルト機能でサイト公開 + DNSサービスで独自ドメイン付与
- Pros
- シンプル。Route53とかを使えば簡単にできそう
- Cons
- Notionのページがそのまま表示される(ファビコンやヘッダのアイコンなど)
- => Notion丸出しは避けたかったので見送り
- Notionのページがそのまま表示される(ファビコンやヘッダのアイコンなど)
- Pros
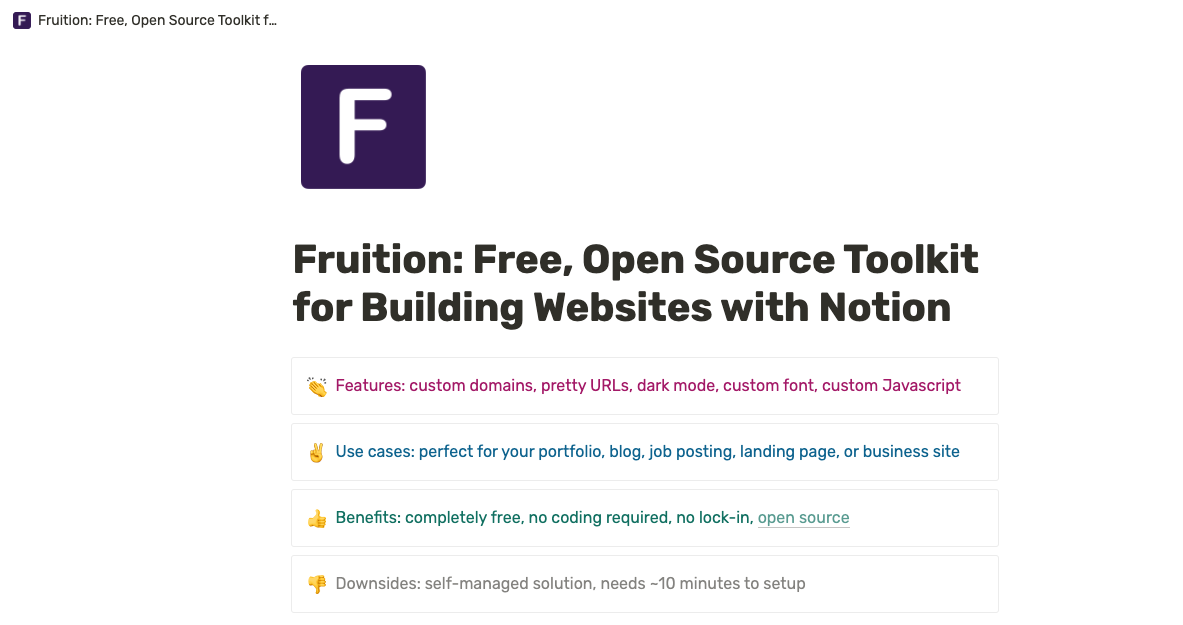
Fruitionについて
WEB公開しているNotionページを、Cloudflare Workersを使ってProxyさせることで、
- サイトの独自ドメイン化
- カスタムスクリプト(JS/CSS/HTML)の注入
を実現するToolkit。
Toolkitと謳うだけあって、上記実現のための手順及び、Cloudflare Workersで動かすJavaScript(300行程度のシンプルなスクリプト)を、サイト上で無料公開しているのみ。
トラフィック量次第では有料になるが、小規模な企業サイト程度のアクセスであれば、Cloudflareも無料枠で問題ない。
なお,
Downsides: self-managed solution
とあるが、やっていることは極めてシンプルなので、多少なりともHTML/CSS/JSの知識があれば、運用・カスタマイズも難しくない(と思われる)
手順
手順はFruitionのサイトに詳しく記載があるため、
あくまで、上記サイトの補足として記載する。
Step 0: Prerequisite
Notionでページをつくり、WEBでshareする。ここは割愛。
Step 1: Set up your Cloudflare account (5 mins)
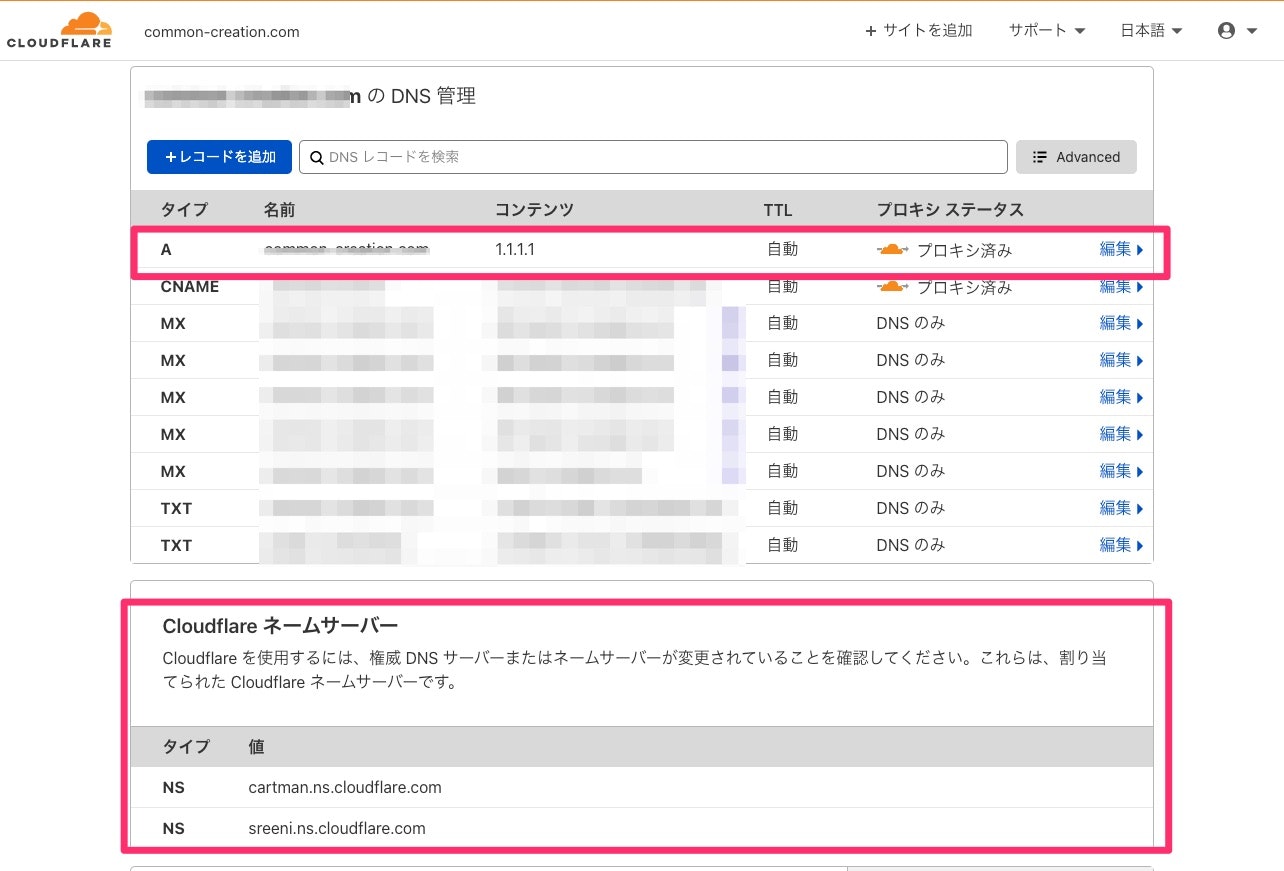
Cloudflareでアカウントを作り、DNSレコードを設定する。
4. If you don't have any A records imported, add one with your root domain as the Name and 1.1.1.1 as the Content. Otherwise, click Continue on the DNS Record page.
CloudflareのDNSレコード設定画面で、Aレコードを追加する。
ここでは以下のように設定するといい
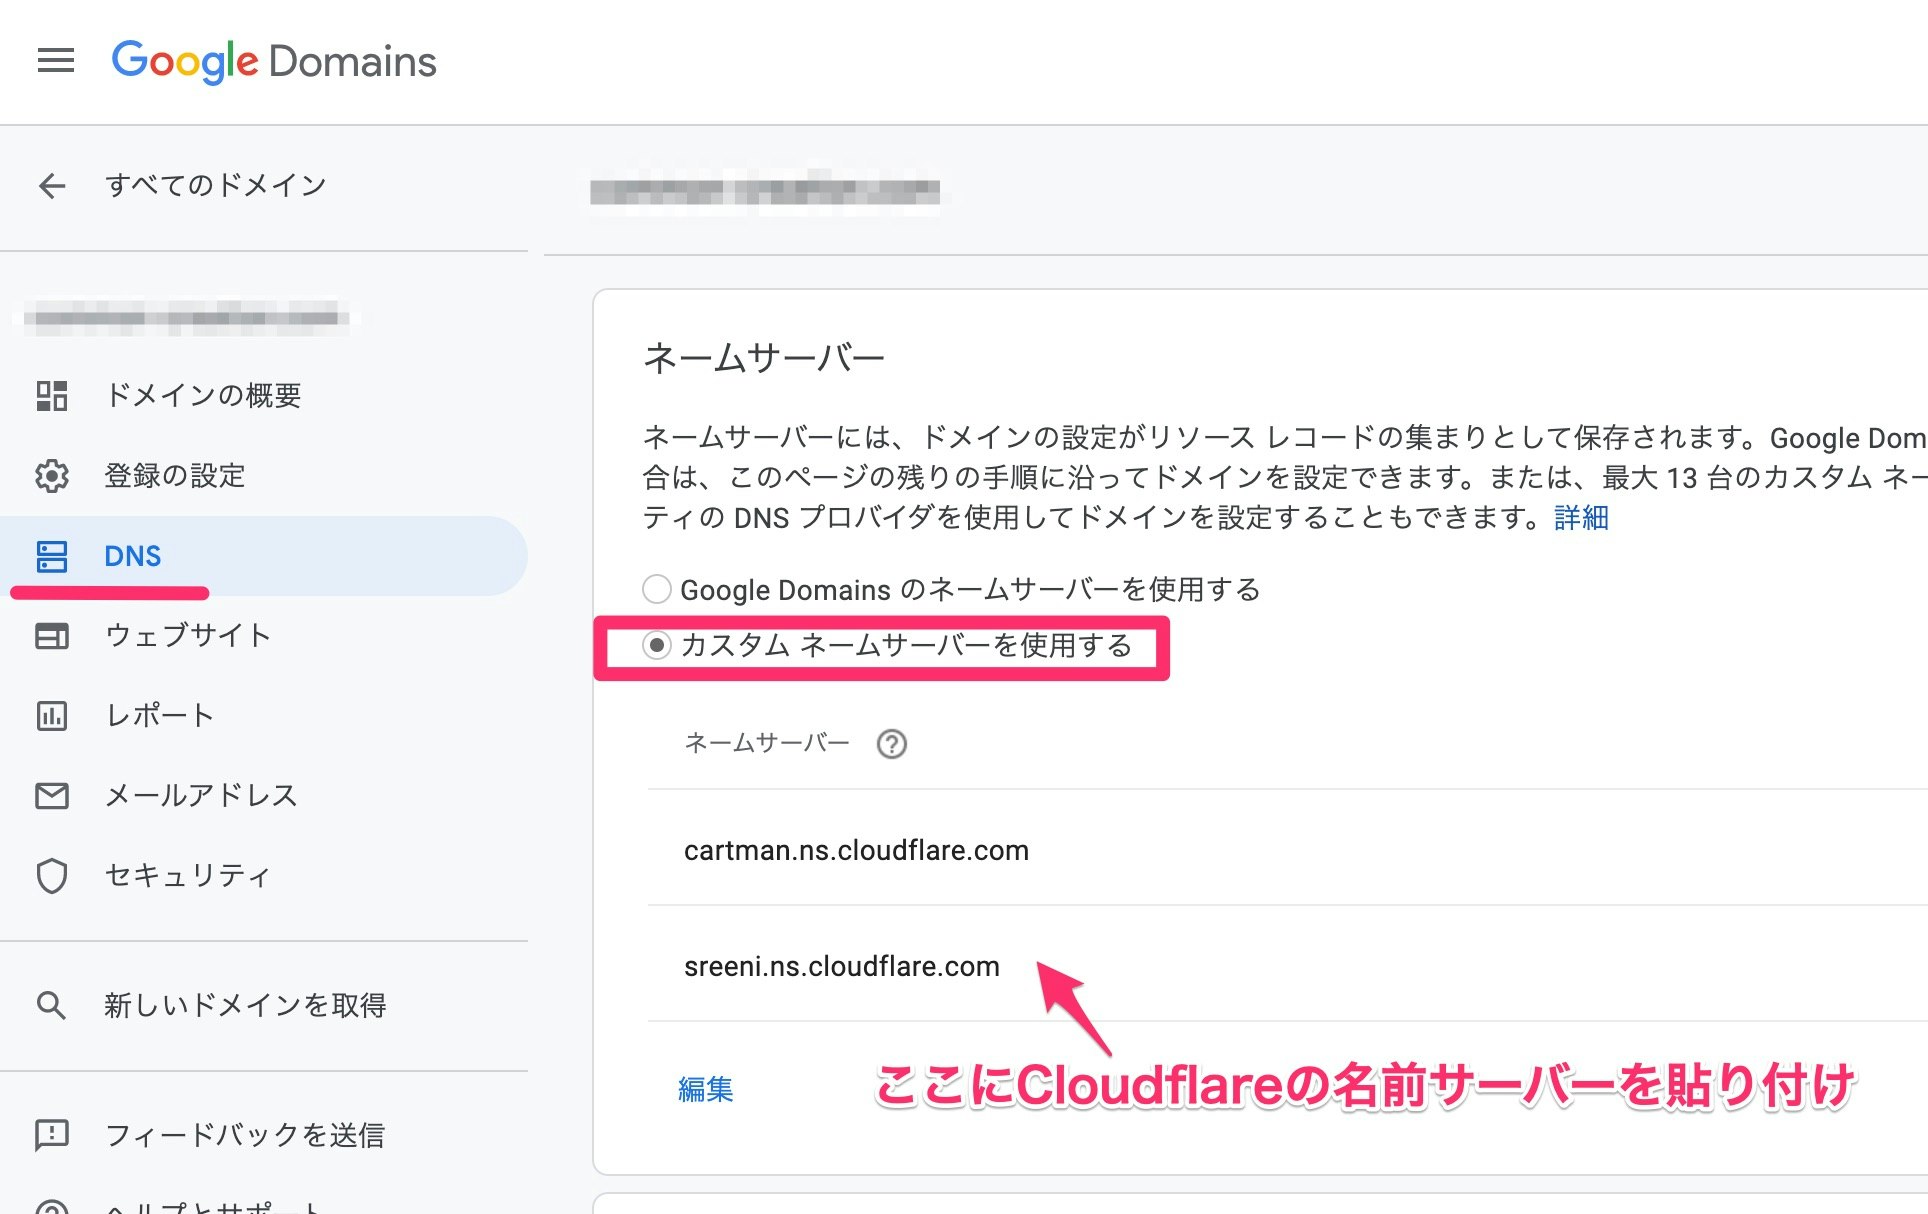
6. Paste the nameservers in the domain setting page at your registrar (Namecheap in my case). Make sure you save the setting.
ドメイン取得したサイト(お名前comとか)の管理画面にいき、ネームサーバーをCloudflareのそれに変更する。
今回はGoogleドメインで名前取得したので、以下のように設定した。
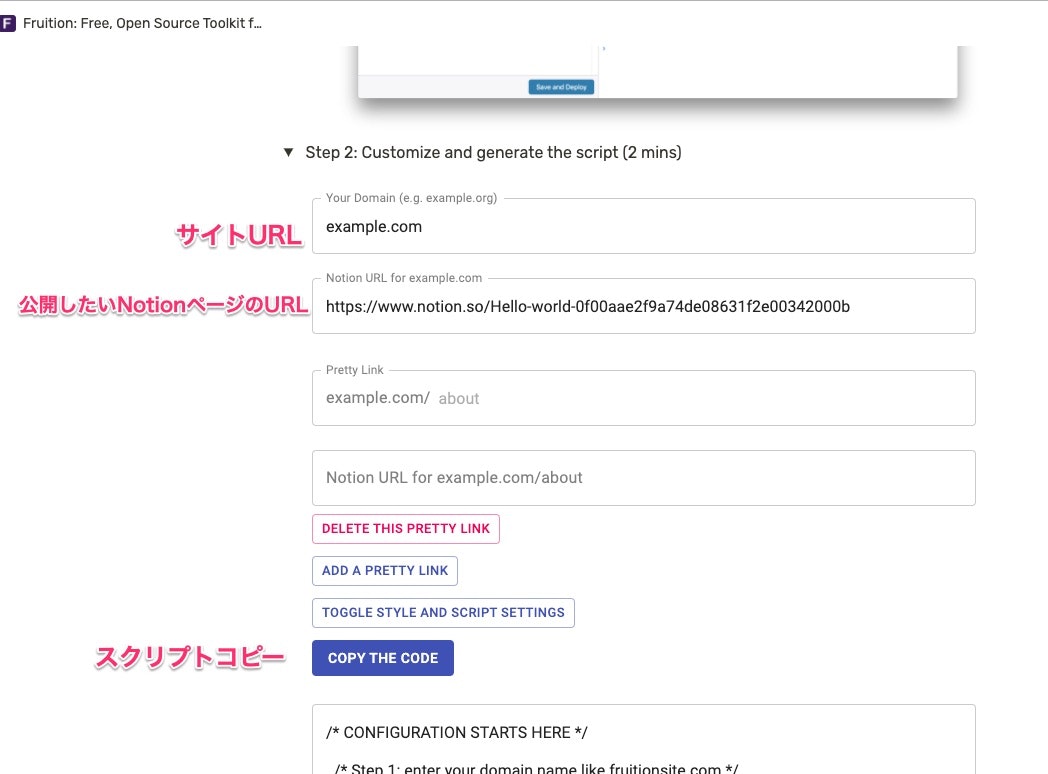
Step 2: Customize and generate the script (2 mins)
ここでCloudflare Workerで動かすスクリプトを取得する。画面に従って操作するといい。
なお、スクリプトには一部カスタマイズを加えた。具体的なカスタマイズ箇所は後述。
300行程度のシンプルなJavaScriptなので、プラスアルファのカスタマイズも簡単に行える。
Step 3: Paste the script in Cloudflare (1 min)
Step2で取得したスクリプトをCloudflareにセットする。ここは手順どおりなので、割愛。
スクリプトのカスタマイズ
上述のStep 2: Customize and generate the script (2 mins)で取得したスクリプトに対して以下の修正を加えた。
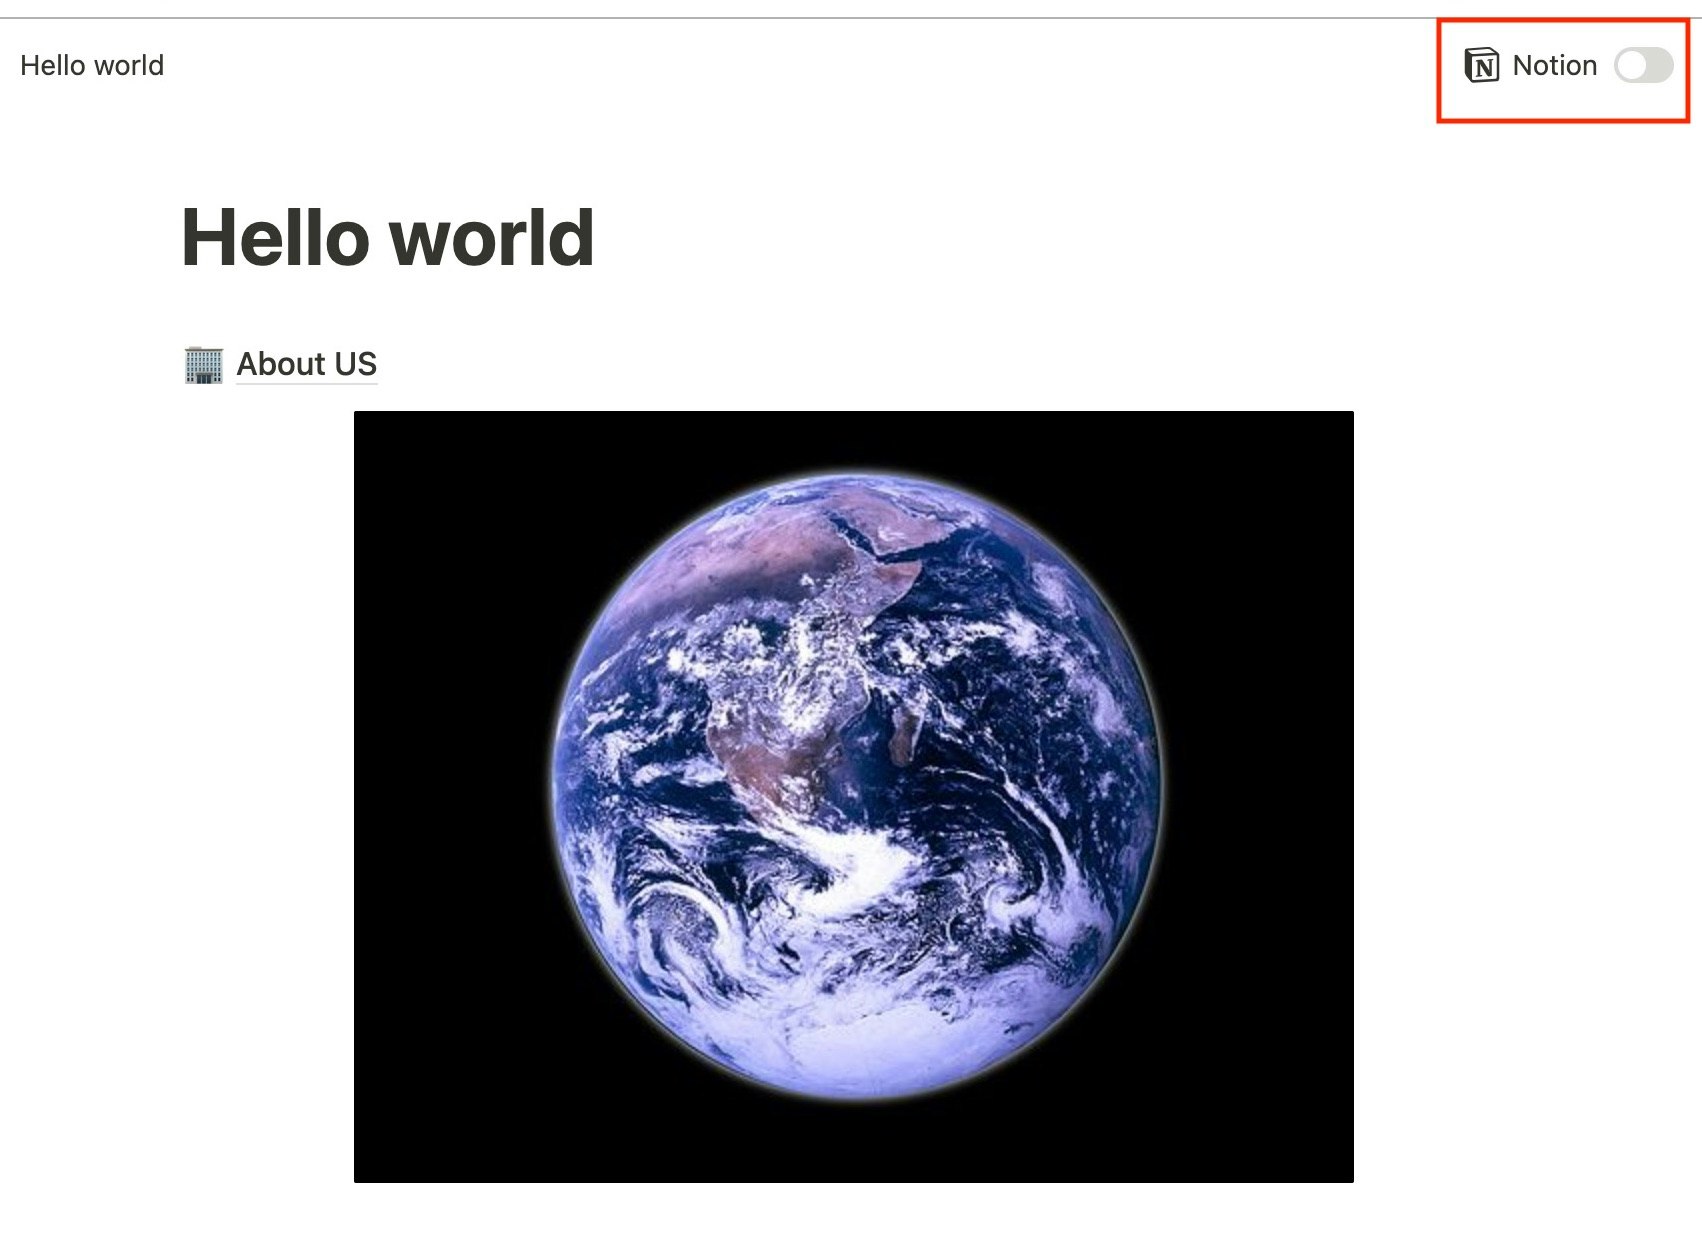
画面上部のNotionアイコンと、Darkモードのトグルを隠す
⇓の部分を隠す
※ もとのスクリプトでも隠そうとしている気配はあるので、もしかするとNotionの実装が変わり、Fruitionが追従できていないのかもしれない。。
# 180行目あたり
       div.notion-topbar > div > div:nth-child(6) { display: none !important; }
       div.notion-topbar-mobile > div:nth-child(3) { display: none !important; }
       div.notion-topbar-mobile > div:nth-child(4) { display: none !important; }
-      div.notion-topbar > div > div:nth-child(1n).toggle-mode { display: block !important; }
-      div.notion-topbar-mobile > div:nth-child(1n).toggle-mode { display: block !important; }
+      div.notion-topbar > div > div:nth-child(1n).toggle-mode { display: none !important; }
+      div.notion-topbar-mobile > div:nth-child(1n).toggle-mode { display: none !important; }
+      div.notion-topbar > div > div[role="button"] { display: none !important; }
+      div.notion-topbar-mobile > div > div[role="button"] { display: none !important; }
       </style>`, {
         html: true
       })
GA(GTM)タグを入れる
ここはFruitionの画面上 TOGGLES STYLE AND SCRIPT SETTINGS -> Paste Your Custom Scriptで設定してもよい。
直接スクリプト書き換える場合は、以下のように実施。
GTMタグ設置の例だが、ここにScriptタグやCSSタグなどを書きこめばよい。
# 23行目あたり
   /* Step 5: enter any custom scripts you'd like */
-  const CUSTOM_SCRIPT = ``;
+  const CUSTOM_SCRIPT = `
+<!-- Google Tag Manager -->
+<script>(function(w,d,s,l,i){w[l]=w[l]||[];w[l].push({'gtm.start':
+new Date().getTime(),event:'gtm.js'});var f=d.getElementsByTagName(s)[0],
+j=d.createElement(s),dl=l!='dataLayer'?'&l='+l:'';j.async=true;j.src=
+'https://www.googletagmanager.com/gtm.js?id='+i+dl;f.parentNode.insertBefore(j,f);
+})(window,document,'script','dataLayer','GTM-XXXXXXXX');</script>
+<!-- End Google Tag Manager -->
+`;
完成物
以下のように、Notionのページが、一部のヘッダなど除き、見た目そのままにWEB公開される。
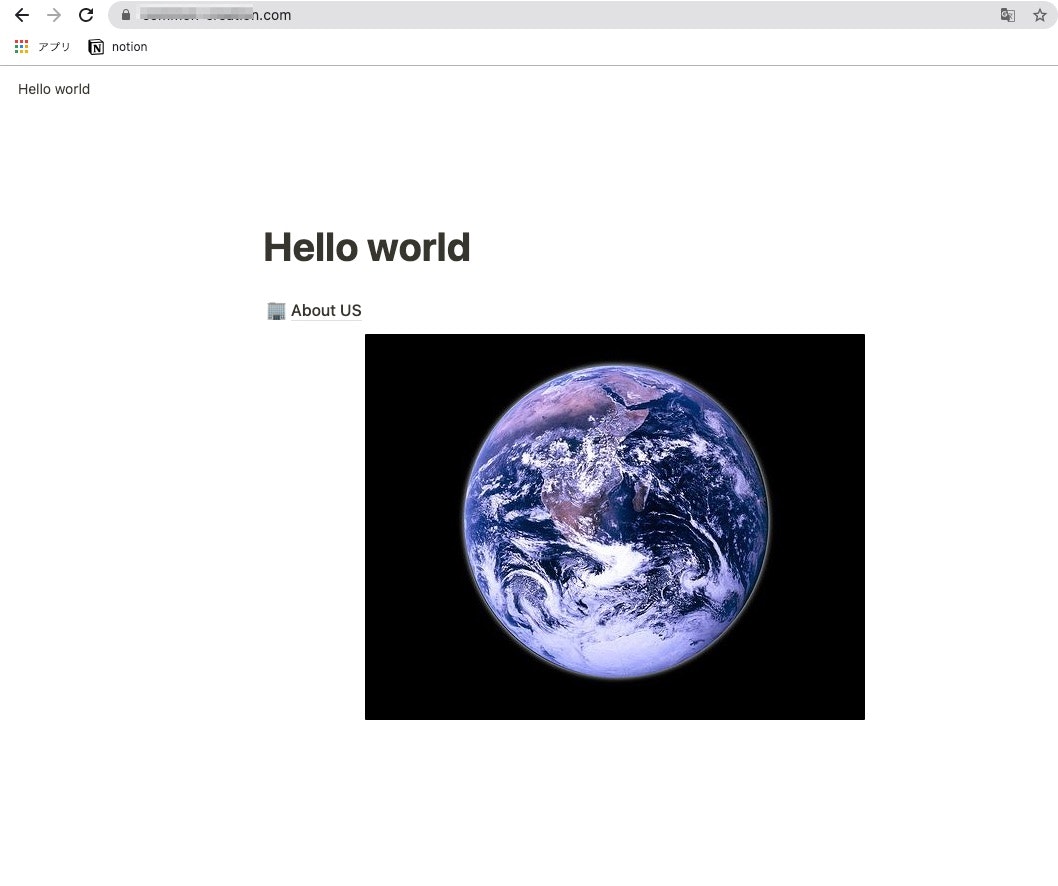
当然ながら、この状態でNotionでページを加筆修正すると、WEBサイトも追従して更新される。
あとはNotionでページを作り込めば、立派な(!?)WEBサイトのできあがり。
以上、手順を記載すると書きつつ、大半がFruitionのサイトを見よ。となってしまいました。。
それだけサイト上に細かく手順書かれているという意味だったりします。
めちゃくちゃ有用なツールだと思うのですが、日本語の記事がほとんど見当たらなかったので、誰かの参考になれば幸いです。
