DIについて。
「依存性の注入」と言われるもの。
依存とは
他のクラスを利用することを指す。
インターフェースにより、依存度合いを下げることができる(疎結合になる)。
//Badな例
//CarクラスとEngineAクラスが蜜結合

import java.util.*;

class EngineA{
    public void boot(){
        System.out.println("EngineA boot");
    }
    public void stop(){
        System.out.println("EngineA stop");
    }
}

class EngineB{
    public void boot(){
        System.out.println("EngineB boot");
    }
    public void stop(){
        System.out.println("EngineB stop");
    }
}

class Car{
    private EngineA engineA;
    public Car(EngineA engineA){
        this.engineA = engineA;
    }
    public void engineStart(){
        this.engineA.boot();
    }
    public void engineStop(){
        this.engineA.stop();
    }
}

class Main {
    public static void main(String[] args) throws Exception {

        EngineA engineA = new EngineA();
        Car car = new Car(engineA);//EngineBインスタンスを入れたい時は、Carクラス&利用クラス両方の修正が必要になる。
        car.engineStart();
        car.engineStop();
    }
}
//Goodな例
//CarクラスとEngineAクラスが疎結合
//インターフェースにより結合度を下げる。

import java.util.*;

interface Engine{
    public void boot();
    public void stop();
}

class EngineA implements Engine{
    public void boot(){
        System.out.println("EngineA boot");
    }
    public void stop(){
        System.out.println("EngineA stop");
    }
}

class EngineB implements Engine{
    public void boot(){
        System.out.println("EngineB boot");
    }
    public void stop(){
        System.out.println("EngineB stop");
    }
}

class Car{
    private Engine engine;
    public Car(Engine engine){
        this.engine = engine;
    }
    public void engineStart(){
        this.engine.boot();
    }
    public void engineStop(){
        this.engine.stop();
    }
}

class Main {
    public static void main(String[] args) throws Exception {

        Engine engine = new EngineA();
        Car car = new Car(engine);//EngineBインスタンスに変える場合は、利用クラスも修正だけで済む。
        car.engineStart();
        car.engineStop();
    }
}
注入とは
インターフェースの型にインスタンスを入れることを指す。
class Main {
    public static void main(String[] args) throws Exception {

        Engine engineA = new EngineA();
        Car car = new Car(engineA);

        Engine engineB = new EngineB();
        Car car = new Car(engineB);

    }
}
ただし以下のようにEngineAをEngineA_Ver2に変えたい時は
利用クラスの実装も変えないといけなくなる。
インスタンス生成してる箇所が100箇所とかあると修正が大変になる。
class EngineA_ver2 implements Engine{
    public void boot(){
        System.out.println("EngineA_ver2 boot");
    }
    public void stop(){
        System.out.println("EngineA_ver2 stop");
    }
}

class Main {
    public static void main(String[] args) throws Exception {

        //Engine engineA = new EngineA();
        Engine engineA = new EngineA_ver2();
        Car car = new Car(engineA);

    }
}
ではどうするか。
Factoryを使う。
そうすることでインスタンスを入れ変えたい時は
Factoryを変えてあげるだけになる。
class EngineFactory{

    public static Engine CreateEngineA(){
        //return new EngineA();
        new EngineA_ver2();
    }

    public static Engine CreateEngineB(){
        return new EngineB();
    }
}

class Main {
    public static void main(String[] args) throws Exception {

        Engine engineA = EngineFactory.CreateEngineA();
        Car car = new Car(engineA);
        car.engineStop();
    }
}
シングルトンにするなら以下のように実装する。
※他にも実装方法があるかもしれないがここでは触れない。
final class EngineFactory{

    private static final Engine engineA = new EngineA();
    private static final Engine engineB = new EngineB();

    public static Engine CreateEngineA(){
        return engineA;
    }

    public static Engine CreateEngineB(){
        return engineB;
    }
}
SpringのDIについて。
Springにはこの依存性注入(DI)の機能が備わっている。
「DIコンテナ」というものがその役割を担っている。
DIコンテナでDIされるクラスのインスタンス(Beanって言ったりするらしい)を管理しており、
これを必要に応じて注入してくれる。
<DIコンテナ>
---------------------
|                    |
|   <Bean1>          |
|  -----            |
|   |   |            |
|   -----            |
|                    |
|   <Bean2>         |
|  -----            |
|   |   |            |
|   -----            |
|                    |
---------------------
よくある使い方
Springで用意されてるアノテーション(@Controller、@RestController、@Service、@Repository などなど。)があるので、基本的にはそれを各クラスの用途(※)によって、付けることでBean対象とすることができ、使いたいときに@Autowiredを付けると注入してくれる。※例えばトランザクション処理を扱うクラスなら@Repositoryを付けるなど
package com.example.demo.web.controller;

import org.springframework.beans.factory.annotation.Autowired;
import org.springframework.web.bind.annotation.GetMapping;
import org.springframework.web.bind.annotation.PathVariable;
import org.springframework.web.bind.annotation.RestController;

import com.example.demo.service.impl.HelloService;

@RestController
public class HelloController {

	@Autowired
	private HelloService helloService;

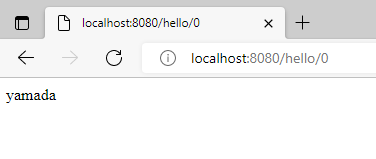
	@GetMapping("/hello/{id:.+}")
	public String hello(@PathVariable("id") int userId) {
		return helloService.findOne(userId);
	}
}
package com.example.demo.service.impl;

public interface HelloService {

	public String findOne(int userId);
}
package com.example.demo.service;

import org.springframework.beans.factory.annotation.Autowired;
import org.springframework.stereotype.Service;

import com.example.demo.persistence.repository.HelloRepository;
import com.example.demo.service.impl.HelloService;

@Service
public class HelloServiceImpl implements HelloService {
	@Autowired
	private HelloRepository helloRepository;
	public String findOne( int id) {

		// 1 件 検索 実行
		String str = helloRepository.findOne(id);

		return str;
	}
}
package com.example.demo.persistence.repository;

import org.springframework.stereotype.Repository;

@Repository
public class HelloRepository {

	public String findOne( int id) {

		//本当はここでDBから値取ってきたりする

		String[] tbl = {"yamada","yoshida"};

		String str = tbl[id];

		return str;
	}
}
独自で(?)Bean定義したいとき
2つやり方がある。
・コンポーネントスキャン
・メソッドによるBean定義
コンポーネントスキャン
①Bean化したい範囲を決める。(ここではdemo配下を指定)
package com.example.demo.config;

import org.springframework.context.annotation.ComponentScan;
import org.springframework.context.annotation.Configuration;

@Configuration
@ComponentScan(basePackages = {"demo"})
public class AppConfig {

}
package com.example.demo.service;

public interface FooService{
	String method();
}
②Bean化したいクラスに「@Componet」を付ける
package com.example.demo.service.impl;

import org.springframework.stereotype.Component;

import com.example.demo.service.FooService;

@Component
public class FooServiceImpl implements FooService {

	 public String method() {
		return "hello FooServiceImpl";
	}
}
③Beanをセットしたい@Autowiredを付ける
package com.example.demo.web.controller;

import org.springframework.beans.factory.annotation.Autowired;
import org.springframework.web.bind.annotation.GetMapping;
import org.springframework.web.bind.annotation.RestController;

import com.example.demo.service.FooService;

@RestController
public class FooController {

	@Autowired
	private FooService fs;

	@GetMapping("/foodi")
	public String fooDi() {
		return fs.method();
	}

}
メソッドによるBean定義
ConfigクラスでBeanにしたいクラスのインスタンスを生成するメソッドを定義して、@Beanを付ける。
これがそのままBeanになる。メソッドの名前はなんでもいい。
package com.example.demo.config;

import org.springframework.context.annotation.Bean;
import org.springframework.context.annotation.Configuration;

import com.example.demo.service.HogeService;
import com.example.demo.service.impl.HogeServiceImpl;

@Configuration
public class AppConfig2 {

	@Bean
	public HogeService getHogeService() {
		return new HogeServiceImpl();
	}

}
package com.example.demo.service;

public interface HogeService{
	public String method();
}
package com.example.demo.service.impl;

import com.example.demo.service.HogeService;

public class HogeServiceImpl implements HogeService {

	public HogeServiceImpl() {
	}

	 public String method() {
		return "hello HogeServiceImpl";
	}
}
package com.example.demo.web.controller;

import org.springframework.beans.factory.annotation.Autowired;
import org.springframework.web.bind.annotation.GetMapping;
import org.springframework.web.bind.annotation.RestController;

import com.example.demo.service.HogeService;

@RestController
public class HogeController {

	private HogeService hs;

	@Autowired //アノテーションはコンストラクタが単一なら省略可能
	public HogeController(HogeService hs) {
		this.hs = hs;
	}

	@GetMapping("/hogedi")
	public String hogeDi() {
		return hs.method();
	}
}
参考文献
https://www.amazon.co.jp/後悔しないためのSpring-Boot-入門書:Spring-解体新書(第2版)-Spring解体新書-ebook/dp/B08XPBPH9C
”4章 DI(依存性の注入)とは”
https://www.slideshare.net/masatoshitada7/spring-boot-jjug
”②Springのコア「DI」「コンテナ」「Bean」”


