はじめに
こんにちは!
アプリ作成にボタンってほぼ必ずと言っていいほど使用しますよね?
そしてボタンを切り替えることをするかもしれないです。
例えば、ある処理を実行した後にボタンのグレーアウトを解除するとか、
ある処理の時はこのボタンを表示して別の処理の時はこのボタンを表示させるとかですね。
もちろんこれはボタンだけではなくテキストとかでも色々言えることだと思います。
この時まだ表示・非表示ならsetVisibility、文字列切り替えならsetTextとか使っていませんか?
もちろん場合によっては使用することもあるかもしれないですが、もし知らないのであればこれから書いていくObservableで切り替える方法を知っておくと便利かもしれないです。
Observableとは
ここではObservableはざっくりにしておきましょう。
話は戻りますがObservableとは値が変更された時に値が変更されたことを通知できるものになります。
これはString型やBoolean型に限らず例えば "Hello" → "would" に変わった時 true → false に変わった時など、その値が変わった時通知してくれるものというものになります。
これを使って、レイアウトが変わるように今回は実装しました。
せっかくなのでsetVisibility、setTextで変更するコードも紹介します。
今回のサンプルアプリ
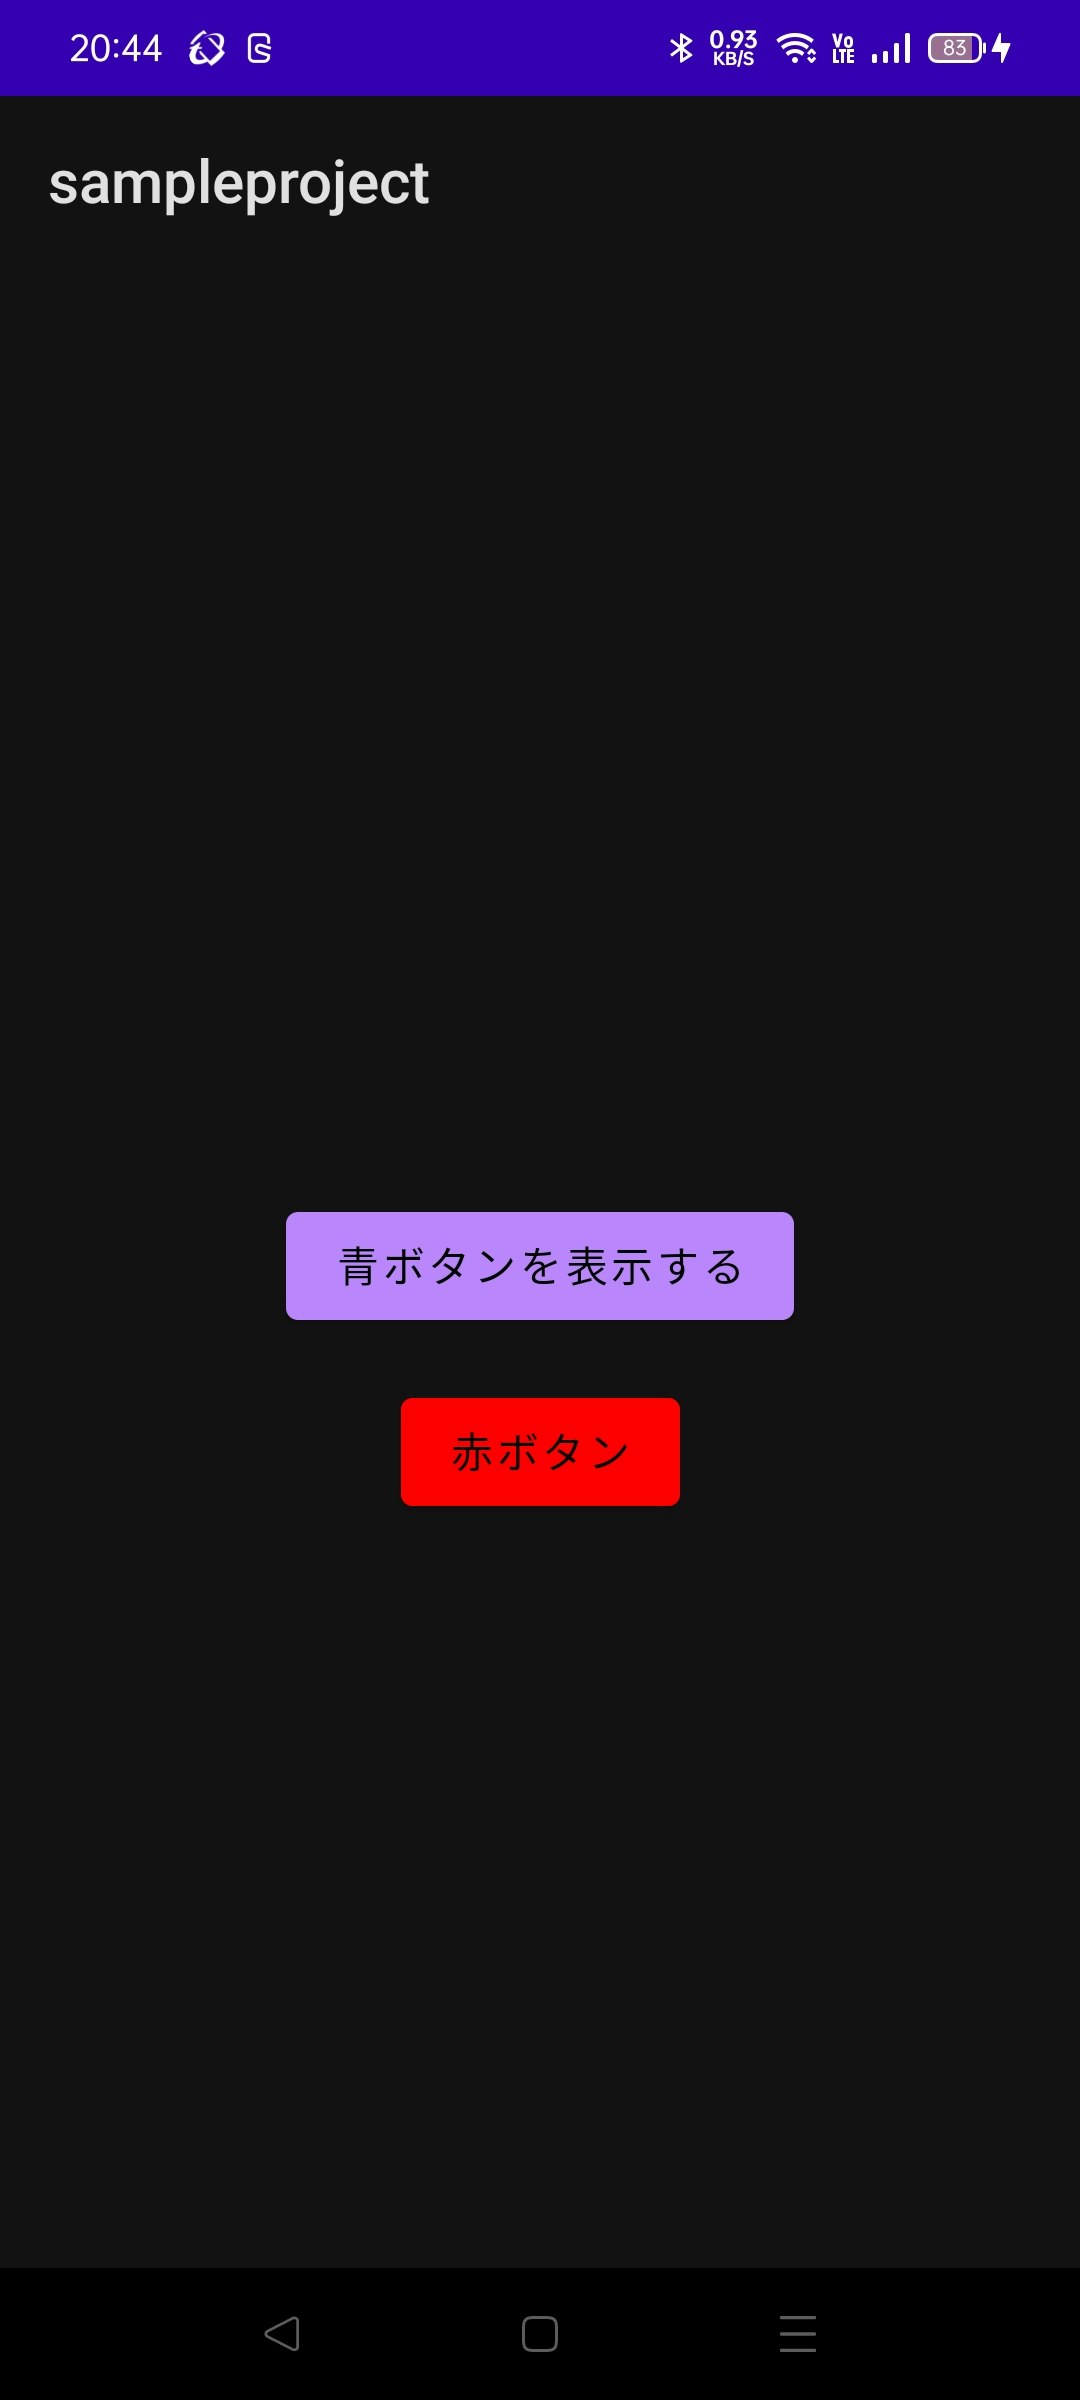
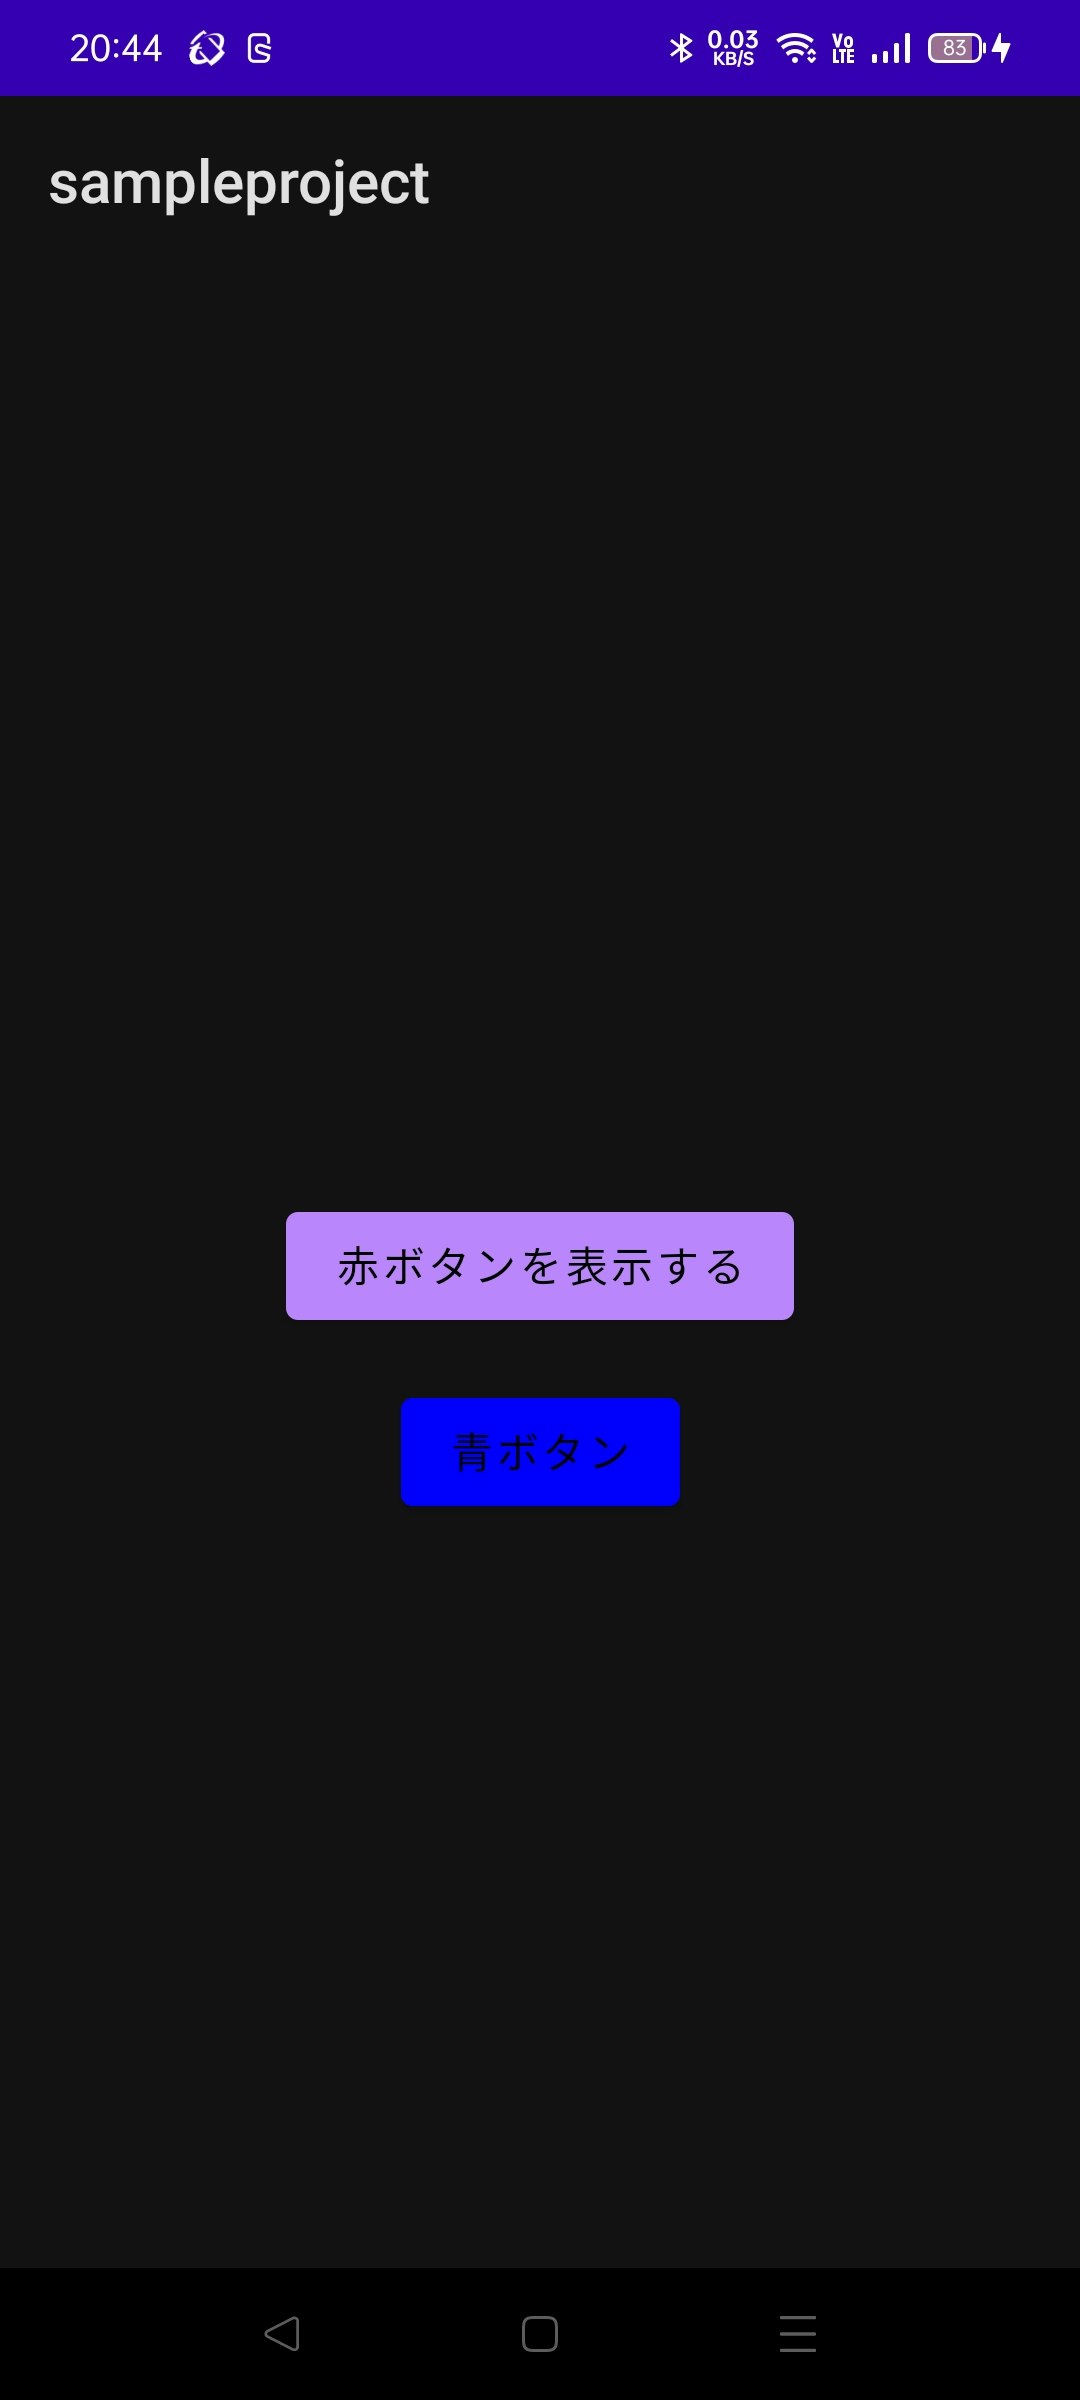
今回のアプリはボタンをタップしたら下にある色付きボタンを切り替えて切り替えボタンのテキストを変えるアプリです。


これから紹介する下記コードは動きは全く同じです。
setxxxで変更したときのコード
以下がコードになります。
コメントはコード内に記載します。
<androidx.constraintlayout.widget.ConstraintLayout
        xmlns:android="http://schemas.android.com/apk/res/android"
        xmlns:app="http://schemas.android.com/apk/res-auto"
        xmlns:tools="http://schemas.android.com/tools"
        android:layout_width="match_parent"
        android:layout_height="match_parent"
        tools:context=".MainActivity">

        <Button
            android:id="@+id/parent_button"
            android:layout_width="wrap_content"
            android:layout_height="wrap_content"
            android:text="青ボタンを表示する"  ← 初期値のテキストを表示させる
            app:layout_constraintBottom_toBottomOf="parent"
            app:layout_constraintLeft_toLeftOf="parent"
            app:layout_constraintRight_toRightOf="parent"
            app:layout_constraintTop_toTopOf="parent" />

        <Button
            android:id="@+id/child_button_1"
            android:layout_width="wrap_content"
            android:layout_height="wrap_content"
            android:text="赤ボタン"
            android:backgroundTint="#ff0000"
            android:visibility="visible"   ← visibleを指定する
            app:layout_constraintBottom_toBottomOf="parent"
            app:layout_constraintLeft_toLeftOf="parent"
            app:layout_constraintRight_toRightOf="parent"
            app:layout_constraintTop_toTopOf="@+id/parent_button"
            app:layout_constraintVertical_bias="0.2" />

        <Button
            android:id="@+id/child_button_2"
            android:layout_width="wrap_content"
            android:layout_height="wrap_content"
            android:text="青ボタン"
            android:backgroundTint="#0000ff"
            android:visibility="gone"      ← goneを指定する
            app:layout_constraintBottom_toBottomOf="parent"
            app:layout_constraintLeft_toLeftOf="parent"
            app:layout_constraintRight_toRightOf="parent"
            app:layout_constraintTop_toTopOf="@+id/parent_button"
            app:layout_constraintVertical_bias="0.2"/>

    </androidx.constraintlayout.widget.ConstraintLayout>
MainActivity.java

public class MainActivity extends AppCompatActivity {
    private ActivityMainBinding binding;
    // 初期値 ここのフラグはObservableBooleanじゃなくても良い
    public final ObservableBoolean isRedButtonVisibility = new ObservableBoolean(true);

    @Override
    protected void onCreate(Bundle savedInstanceState) {
        super.onCreate(savedInstanceState);
        // Binding処理
        binding = ActivityMainBinding.inflate(getLayoutInflater());
        View view = binding.getRoot();
        setContentView(view);
        binding.setActivity(this);

        // ボタンのクリックイベントを設定
        binding.parentButton.setOnClickListener(v -> {
            changeLayout();
        });

    }

    private void changeLayout() {
        if (isRedButtonVisibility.get()) {
            // フラグを変更する
            isRedButtonVisibility.set(false);
            // ボタンのテキストを変更する
            binding.parentButton.setText("赤ボタンを表示する");
            // 赤色ボタンを非表示にする
            binding.childButton1.setVisibility(View.GONE);
            // 青色ボタンを表示する
            binding.childButton2.setVisibility(View.VISIBLE);
        } else {
            // フラグを変更する
            isRedButtonVisibility.set(true);
            // ボタンのテキストを変更する
            binding.parentButton.setText("青ボタンを表示する");
            // 赤色ボタンを表示にする
            binding.childButton1.setVisibility(View.VISIBLE);
            // 青色ボタンを非表示する
            binding.childButton2.setVisibility(View.GONE);
        }

    }
}
Observableを実装
次はObservableのサンプル実装です
<androidx.constraintlayout.widget.ConstraintLayout
        xmlns:android="http://schemas.android.com/apk/res/android"
        xmlns:app="http://schemas.android.com/apk/res-auto"
        xmlns:tools="http://schemas.android.com/tools"
        android:layout_width="match_parent"
        android:layout_height="match_parent"
        tools:context=".MainActivity">

        <!-- Observableで変更したときのコード -->
        <Button
            android:id="@+id/parent_button"
            android:layout_width="wrap_content"
            android:layout_height="wrap_content"
            android:text="@{activity.changeText}"       ←MainActivity changeTextを設定
            app:layout_constraintBottom_toBottomOf="parent"
            app:layout_constraintLeft_toLeftOf="parent"
            app:layout_constraintRight_toRightOf="parent"
            app:layout_constraintTop_toTopOf="parent" />

       <Button
            android:id="@+id/child_button_1"
            android:layout_width="wrap_content"
            android:layout_height="wrap_content"
            android:text="赤ボタン"
            android:backgroundTint="#ff0000"
            android:visibility="@{activity.isRedButtonVisibility?View.VISIBLE:View.GONE}"  ←三項演算子で切り替える
            app:layout_constraintBottom_toBottomOf="parent"
            app:layout_constraintLeft_toLeftOf="parent"
            app:layout_constraintRight_toRightOf="parent"
            app:layout_constraintTop_toTopOf="@+id/parent_button"
            app:layout_constraintVertical_bias="0.2" />

        <Button
            android:id="@+id/child_button_2"
            android:layout_width="wrap_content"
            android:layout_height="wrap_content"
            android:text="青ボタン"
            android:backgroundTint="#0000ff"
            android:visibility="@{activity.isRedButtonVisibility?View.GONE:View.VISIBLE}"   ←三項演算子で切り替える
            app:layout_constraintBottom_toBottomOf="parent"
            app:layout_constraintLeft_toLeftOf="parent"
            app:layout_constraintRight_toRightOf="parent"
            app:layout_constraintTop_toTopOf="@+id/parent_button"
            app:layout_constraintVertical_bias="0.2"/>
    </androidx.constraintlayout.widget.ConstraintLayout>
public class MainActivity extends AppCompatActivity {
    private ActivityMainBinding binding;
    // 初期値 booleanを入れている
    public final ObservableBoolean isRedButtonVisibility = new ObservableBoolean(true);
    // 初期値 テキストを入れる
    public final ObservableField<String> changeText = new ObservableField<>("青ボタンを表示する");

    @Override
    protected void onCreate(Bundle savedInstanceState) {
        super.onCreate(savedInstanceState);
        // Binding処理
        binding = ActivityMainBinding.inflate(getLayoutInflater());
        View view = binding.getRoot();
        setContentView(view);
        // ↓これを忘れると更新されなくなります
        binding.setActivity(this);

        // 戻るボタンのクリックイベントを設定
        binding.parentButton.setOnClickListener(v -> {
            if (isRedButtonVisibility.get()) {
                // 青ボタンの時の文字列を設定する
                this.changeText.set("赤ボタンを表示する");
                // 赤ボタンを表示するフラグを設定する
                this.isRedButtonVisibility.set(false);
            } else {
                // 赤ボタンの時の文字列を設定する
                this.changeText.set("青ボタンを表示する");
                // 青ボタンを表示するフラグを設定する
                this.isRedButtonVisibility.set(true);
            }
        });

    }
}
補足です。
xmlはObservableのレイアウトですが切り替える時は"@{ variablename.Observableの変数 }"で記載します。
Activityの今回でいう実装のこれ binding.setActivity(this);setActivityのActivityはxmlのvariableタグのnameのactivityをMainActivityに設定しています。
まとめ
setxxxでレイアウトを修正するとコード量がちょっと増えてしまいますね。
ちなみにset系の処理を使うなと言っていませんのでそれは注意を。
ただ実装に合わせたコードを書けるようになるといいですね。
参考になればと思います!