背景
開発プロジェクトのソースコードをGitHubで管理しており、リリースのたびに前回リリース時から作成されたプルリクエスト一覧をリリースノートに書くルールにしていたのですが、これが地味に手間だったので改善したいと考えました。
gren-release-notesパッケージのインストール
gren-release-notesは、前回タグ付けしたコミットからの差分を基にリリースノートを作成してくれるツールです。以下の手順でインストールと設定をします。
-
npm install github-release-notes -gを実行します。Linuxなどの環境で権限が足りない場合は、先頭にsudoを足してください。 -
個人アクセストークンを使用するを参考に、
repoスコープを指定した個人アクセストークンを作成し、環境変数GREN_GITHUB_TOKENに設定します。Linux環境だとexport GREN_GITHUB_TOKEN={個人アクセストークンの文字列}のように設定します。~/.bashrcなど、起動シェルに設定しておくと便利です。

3. GitHubで管理しているgradleプロジェクトへ移動し、gren initを実行して設定ファイルを作成します。2つ目の質問だけPull Requestsを指定し、あとは必要に応じて変更します。
$ gren init
I can't get your repo labels, make sure you are online to use the complete initialisation

🤖 : Hello, I'm going to ask a couple of questions, to set gren up!

? What type of APIs do you need? Normal
? Where shall I get the informations from? Pull Requests
? Do you want to add a prefix to release titles? e.g. v
? Do you want to only include issues/prs that belong to a milestone? No
? Do you want to ignore tags containing certain words? No
? Do you want to group your notes? No
? What file name do you want for your changelog? CHANGELOG.md
? Which extension would you like for your file? .grenrc.yml
.grenrc.ymlという設定ファイルが作成されたら準備完了です。
リリース手順
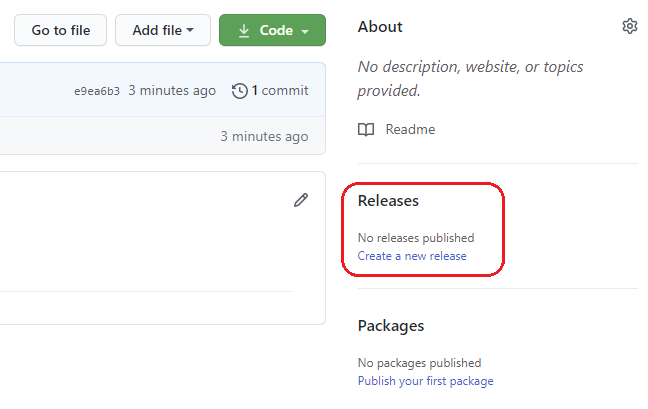
それでは早速試してみましょう。まず、GitHubのリポジトリに移動し、右側のペインから新しいリリースを作成します。

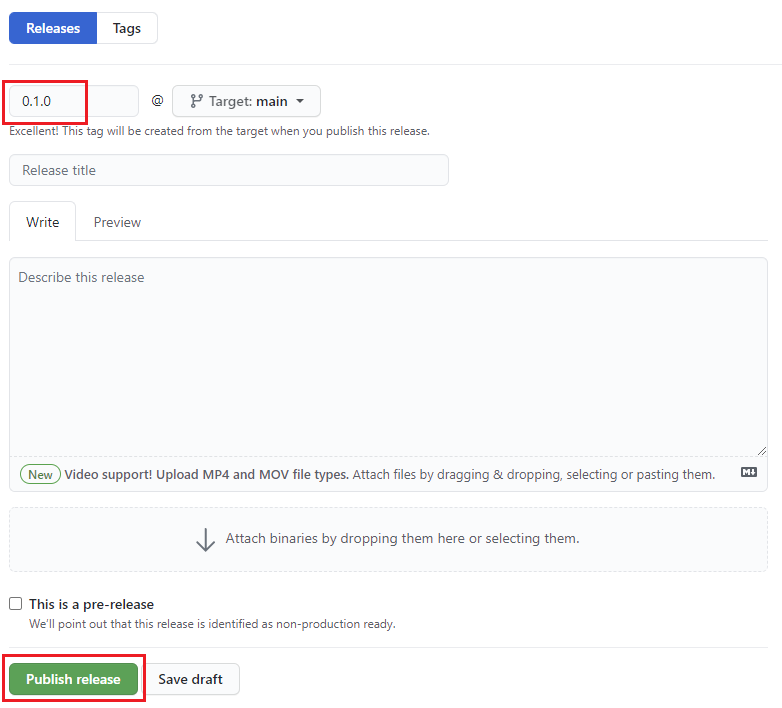
リリースのドラフト作成画面では、バージョンだけを指定してPublish releaseボタンをクリックします。タイトルや本文は、後ほどgrenコマンドで上書きするので入力不要です。

GitHub上でリリースしたら、次にgrenコマンドを実行します。gren release --overrideを実行して以下のような結果になったら成功です。
$ gren release --override
Getting gren config from local file /home/ec2-user/github/gren-test/.grenrc.yml

🤖  - Generate release notes:
===================================
✔ Releases found: 1
✔ Tags found: 0.1.0
✔ Pull Requests found: 1
✔ 0.1.0 has been successfully updated!
See the results here: https://github.com/kazntree/gren-test/releases/tag/0.1.0
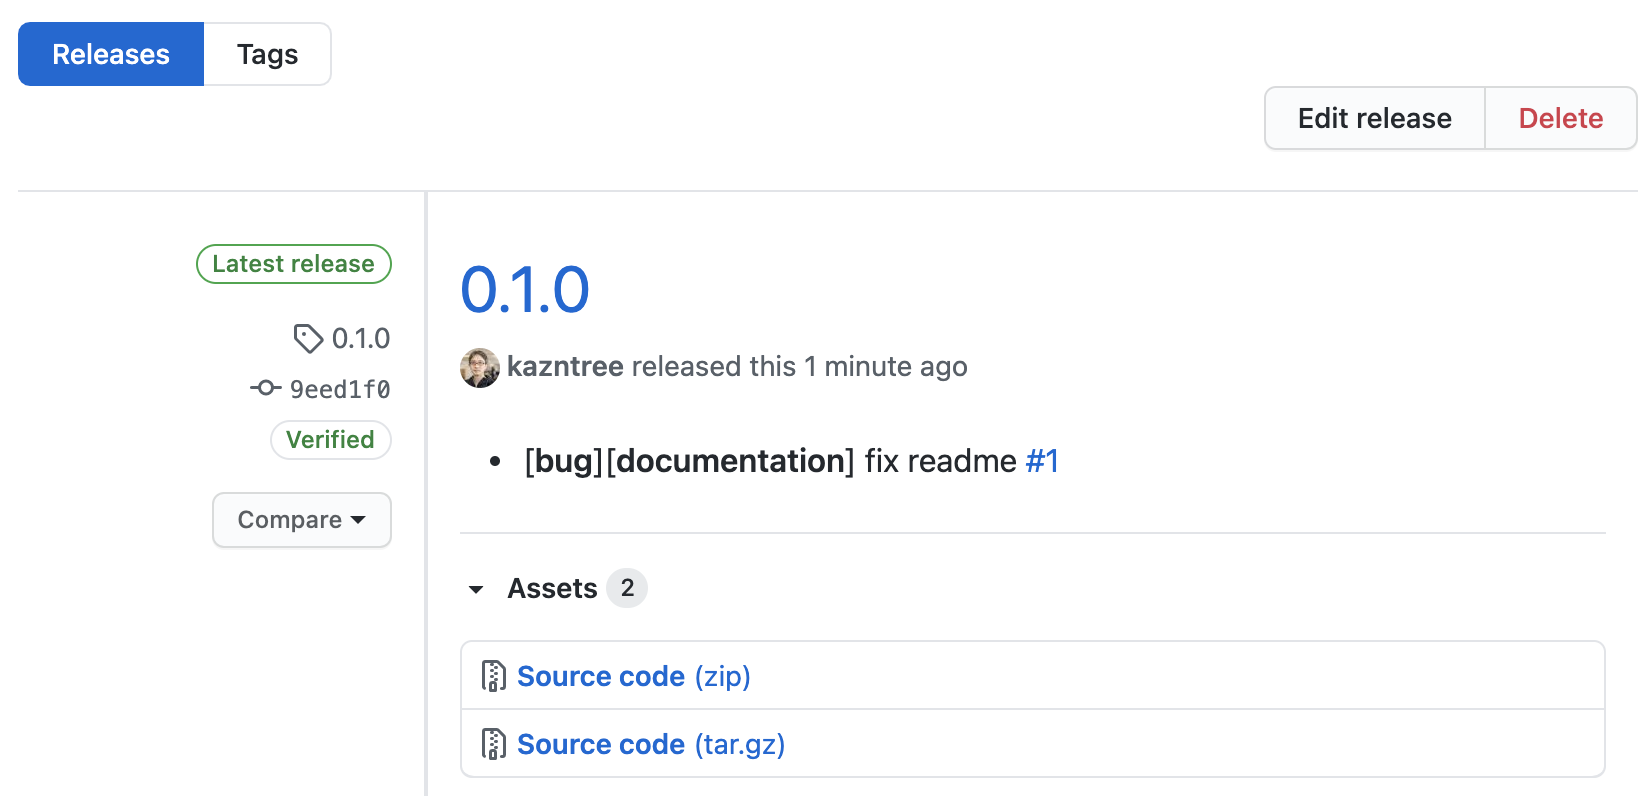
GitHubのリリースノートを確認すると、grenによってタイトルと本文が更新されています。前のバージョンからのプルリクエスト一覧が表示され、プルリクエストにラベルが付けられていた場合はそれも表示されます(以下の場合だとbugとdocumentation)。
