Node.jsを利用して書いた自作のコマンドラインツールをnpm installして使えるようにしたくて、npmパッケージを作ってGitHub Packagesに登録することにしました。が、ドキュメント読んでもやり方が飲み込めず、試行錯誤。なんとか実現できたので、ここに手順のメモを残します。
npmパッケージを作るためのソースとして、"hello world"を出力するだけの小さなJavaScriptプログラムを使います。本記事で作成したリポジトリはこちら:
https://github.com/kazhashimoto/hello
実行環境
1. GitHubにリポジトリを作成する
Create a new repository画面で、Initialize this repository withの
- Add a README file
- Choose a license
にチェックを入れてリポジトリを作成します。3
リポジトリ作成時にREADME.mdやLICENSEファイルを一緒に作っておくと、リポジトリのdefault branchの名前が"main"に設定されます。
記事中のコードや出力例などに現れるパス名やユーザー名などは筆者の環境のものです。具体的には以下の文字列です。
| 項目 | 値 |
|---|---|
| リポジトリ名 | hello |
| リポジトリの所有者 | @kazhashimoto |
| リポジトリのURL | https://github.com/kazhashimoto/hello.git |
| ローカルのホームディレクトリ | /Users/me/ |
| ローカルのclone先のディレクトリ | /Users/me/github/ |
npmのglobal prefix$ npm prefix -g
|
/Users/me/.nodebrew/node/v16.4.0 |
2. 最初のnpmパッケージを作る
ローカルにclone先のディレクトリを作り、リモートのリポジトリのURLを指定してcloneを作成します。cloneしたディレクトリでnpm initを実行します。
$ cd /Users/me/github
$ git clone https://github.com/kazhashimoto/hello.git
$ cd hello
$ npm init -y
package.jsonのbinのパス名を修正します。
"bin": {
  "hello": "bin/hello.js"
},
.gitignoreファイルを作り、node_modules/を追加して保存します。
$ touch .gitignore
node_modules/
hello.jsがrequireしているパッケージをローカルにinstallします。
$ npm install commander debug
その結果、プロジェクトのディレクトリにnode_modulesが作られ、
$ ls
LICENSE			bin			package-lock.json
README.md		node_modules		package.json
$
$ npm ls
hello@1.0.0 /Users/me/github/hello
├── commander@8.0.0
└── debug@4.3.2
package.jsonとpackage-lock.binに"dependencies"が追加されているのがわかります。
"dependencies": {
  "commander": "^8.0.0",
  "debug": "^4.3.2"
}
ここまでの状態でファイルをリモートに一旦pushします。
3. パッケージのinstallテスト
npmを使ってローカルの環境にインストールできるか確認します。まず、テスト用のディレクトリを作り、そこにリモートからhelloのファイル一式をcloneします。
$ mkdir test-package
$ cd test-package/
$ git clone https://github.com/kazhashimoto/hello.git .
このままではhello.jsがrequireしているパッケージがまだローカルにインストールされていないので、npm installを実行して、package.jsonの"dependencies"にリストしたパッケージすべてを./node_modulesにダウンロードさせます。
$ npm install
"dependencies"のパッケージもここにインストールされました。
$ ls
LICENSE			bin			package-lock.json
README.md		node_modules		package.json
$ npm ls
hello@1.0.0 /Users/me/github/test-package
├── commander@8.0.0
└── debug@4.3.2
手元のtest-packageディレクトリにあるhelloのリソースをglobalにインストールした状態にするため、npm linkを実行して、globalフォルダからtest-packageへのシンボリックリンクを作成します。
$ npm link
added 1 package, and audited 3 packages in 864ms
globalフォルダの下にあるbin/helloからtest-packageへのシンボリックリンクが作られました。
$ cd $(npm prefix -g)
$ pwd
/Users/me/.nodebrew/node/v16.4.0
$ ls -l bin/ lib/node_modules/ | grep hello
lrwxr-xr-x  1 me  staff   38  7 25 09:31 hello -> ../lib/node_modules/hello/bin/hello.js
lrwxr-xr-x  1 me  staff   34  7 25 09:31 hello -> ../../../../../github/test-package
globalにインストールされているのもわかります。
$ npm ls -g
/Users/me/.nodebrew/node/v16.4.0/lib
├── hello@1.0.0 -> ./../../../../github/test-package
└── npm@7.18.1
別のディレクトリに移ってhelloを実行してみます。
$ pwd
/Users/me
$ hello
/Users/me/.nodebrew/current/bin/hello: line 1: syntax error near unexpected token `('
/Users/me/.nodebrew/current/bin/hello: line 1: `const { program } = require("commander");'
このエラーは実行時のインタプリタが指定されていないためです。hello.jsの1行目に以下を追加します。
# !/usr/bin/env node
実行できました。
$ hello
hello, world!
ここまでの修正をリモートにpushしておきます。
npm linkで作成したシンボリックリンクを削除するには、通常のパッケージ削除と同じく
npm uninstall -gを実行します。
$ npm uninstall -g hello
removed 1 package, and audited 1 package in 229ms
"npm unlink"ではシンボリックリンクは削除されません。"unlink"は"uninstall"のエイリアスにすぎないので、-gオプションが必要です。
globalから削除され、シンボリックリンクも消えているのがわかります。
$ npm ls -g
/Users/me/.nodebrew/node/v16.4.0/lib
└── npm@7.18.1
$ cd $(npm prefix -g)
$ ls -l bin/ lib/node_modules/ | grep hello
$
4. eslintをworkflowに組み込む
次に、リモートにpushした際にGitHub側でeslintが自動的に実行されるように設定してみます。
まず、ローカルのディレクトリでeslintが実行できるようにpackageを構成します。
4.1 eslintをpackageに追加する
ローカルに作ったパッケージのディレクトリを一旦削除し、リモートから再度cloneした後、helloが依存するパッケージもそこにインストールします。
$ cd /Users/kaz_hashimoto/github
$ git clone https://github.com/kazhashimoto/hello.git
$ cd hello
$ npm install
cloneしたディレクトリの下で、eslintパッケージをローカルにインストールします。
npm installは--save-devオプションを付けてを実行します。
$ npm install eslint --save-dev
--initオプションを付けてeslintを実行し、いくつかの質問に答えていくと最後に.eslintrc.jsファイルが現在のディレクトリに生成されます。
$ ./node_modules/.bin/eslint --init
✔ How would you like to use ESLint? · problems
✔ What type of modules does your project use? · commonjs
✔ Which framework does your project use? · none
✔ Does your project use TypeScript? · No / Yes
✔ Where does your code run? · node
✔ What format do you want your config file to be in? · JavaScript
Successfully created .eslintrc.js file in /Users/me/github/hello
$
$ npm ls
hello@1.0.0 /Users/me/github/hello
├── commander@8.0.0
├── debug@4.3.2
└── eslint@7.31.0
--save-devを付けてinstallしたので、package.jsonに"devDependencieses"が追加され、.eslintのエントリが作られました。
"devDependencies": {
  "eslint": "^7.31.0"
}
実行できるか確認します。
$ ./node_modules/.bin/eslint bin/hello.js
package.jsonの"scripts"項目に"lint"のエントリを追記します。直前の行に「,」を付け足すのを忘れずに。
"scripts": {
  "test": "echo \"Error: no test specified\" && exit 1",
  "lint": "eslint bin/*.js"
},
npm runでeslintが実行できることを確認します。
$ npm run lint
> hello@1.0.0 lint
> eslint bin/*.js
$
ここまで行った修正を一旦リモートにpushします。
4.2 GitHubのworkflowにActionを追加する
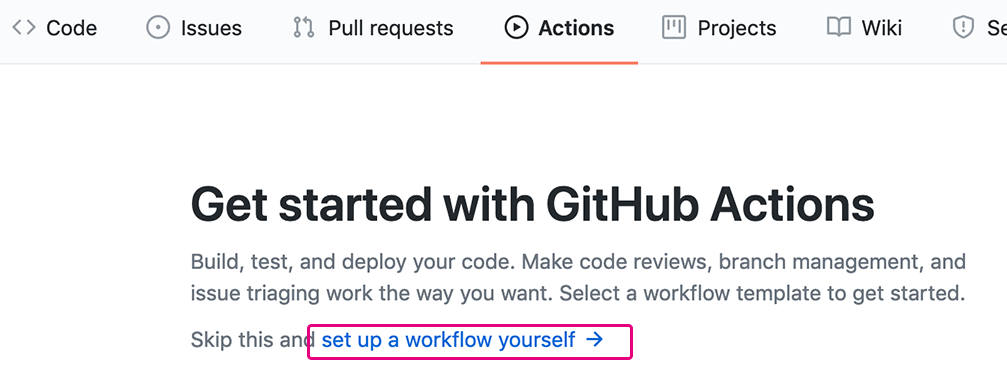
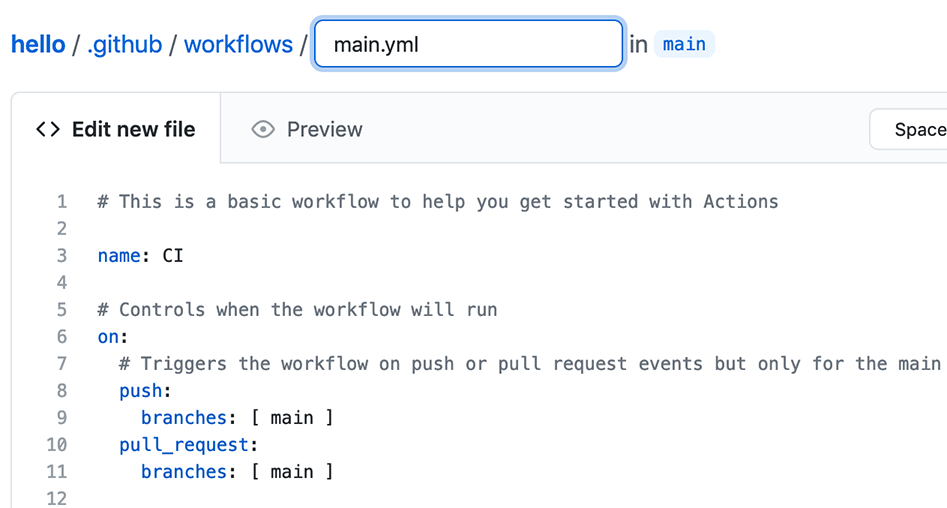
GitHubのリポジトリ画面のActionsタブを開き、"set up a workflow yourself"をクリックして新しいworkflowのテンプレートを開きます。
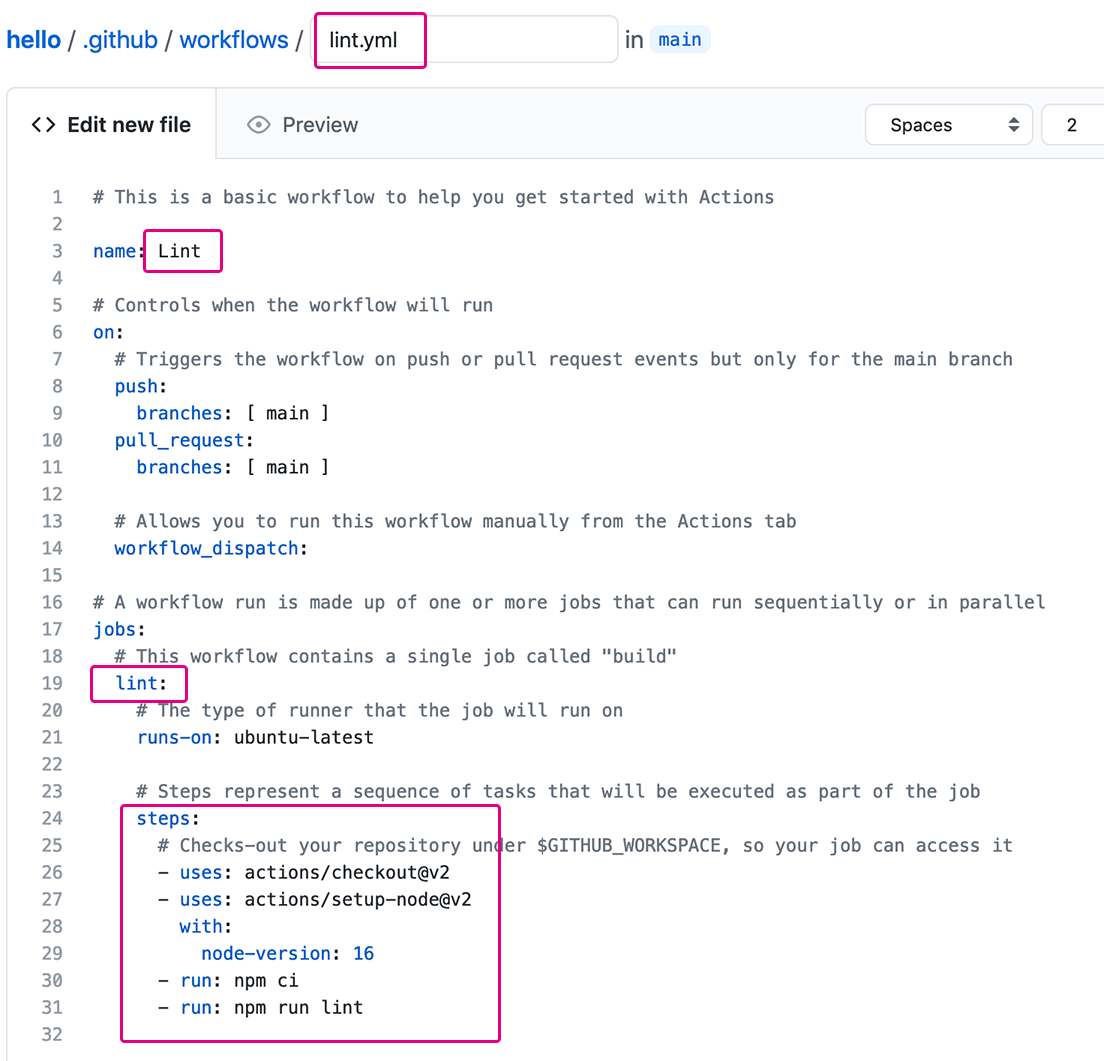
Actionのテンプレートを元にlint.ymlという名前でActionのファイルを作成します。編集した箇所は下図の赤枠で囲った部分です。最後に画面右側にある"Start commit"ボタンをクリックして編集内容をcommitします。
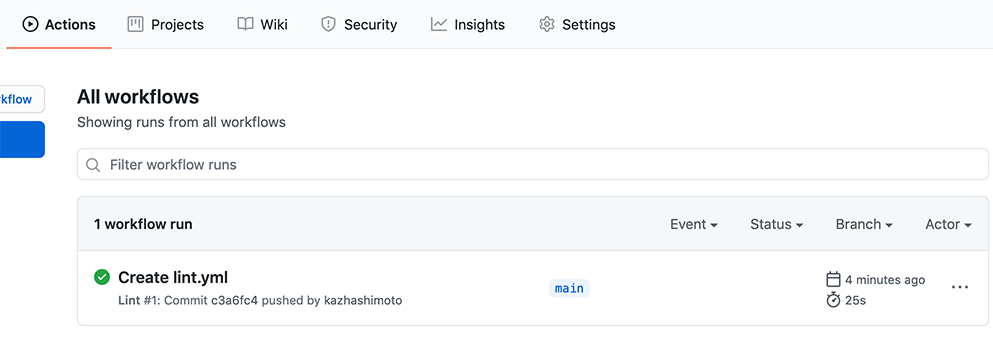
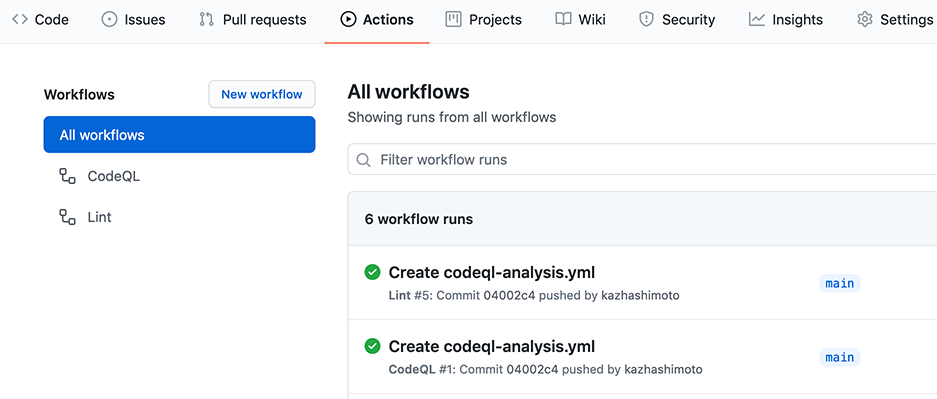
ActionsタブのAll workflowsの一覧にlint.ymlが処理状況が表示されます。
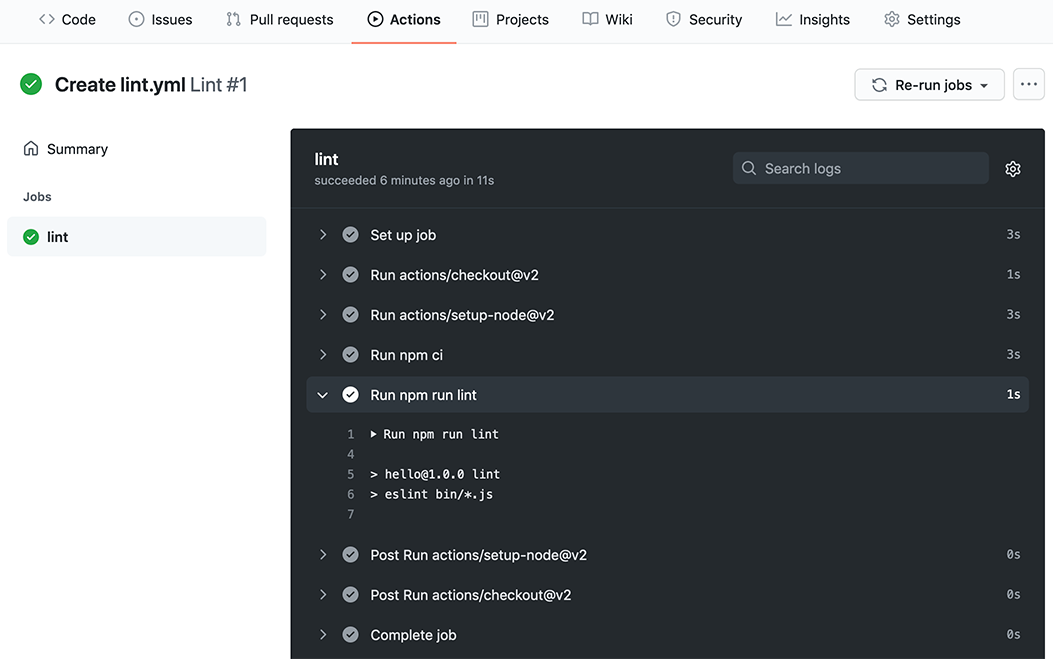
lintの出力を確認するには、workflow名をクリックします。
5. Code scanningをworkflowに追加する
JavaScriptプログラムのcodingエラーや脆弱性を検出するためのActionもworkflowに追加しましょう。
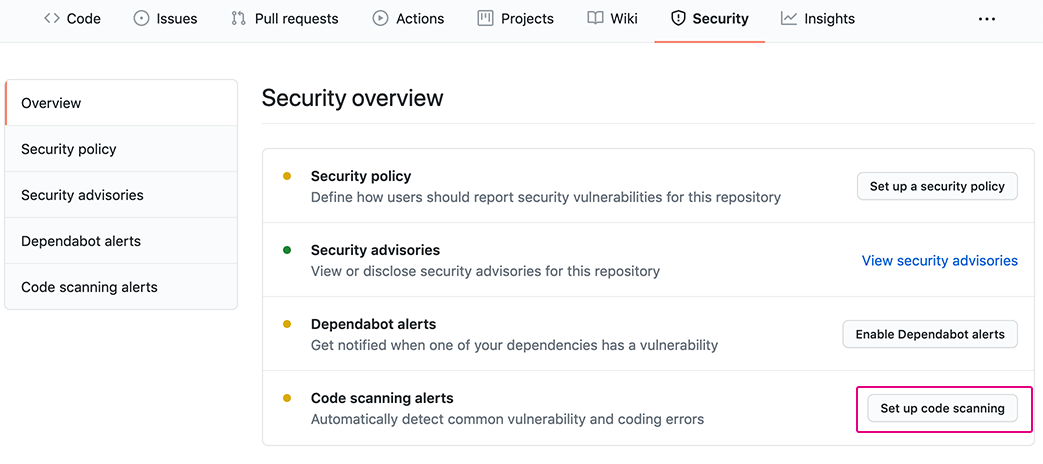
リポジトリのSecurityタブを開き、"Code scanning alerts"の右側"Set up code scannning"ボタンをクリックします。
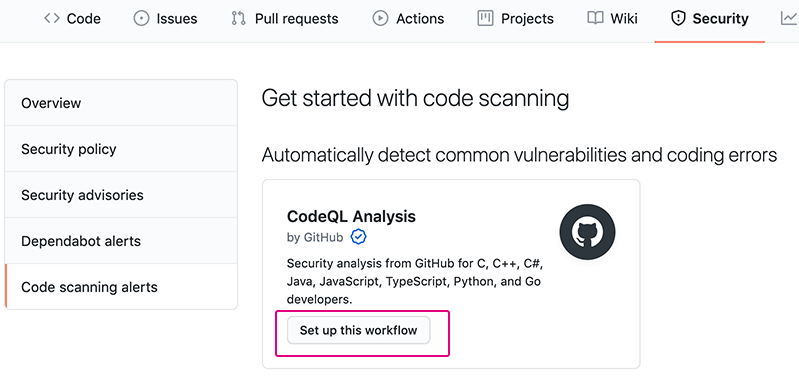
"CodeQL Analysis"の"Set up this workflow"ボタンをクリックします。
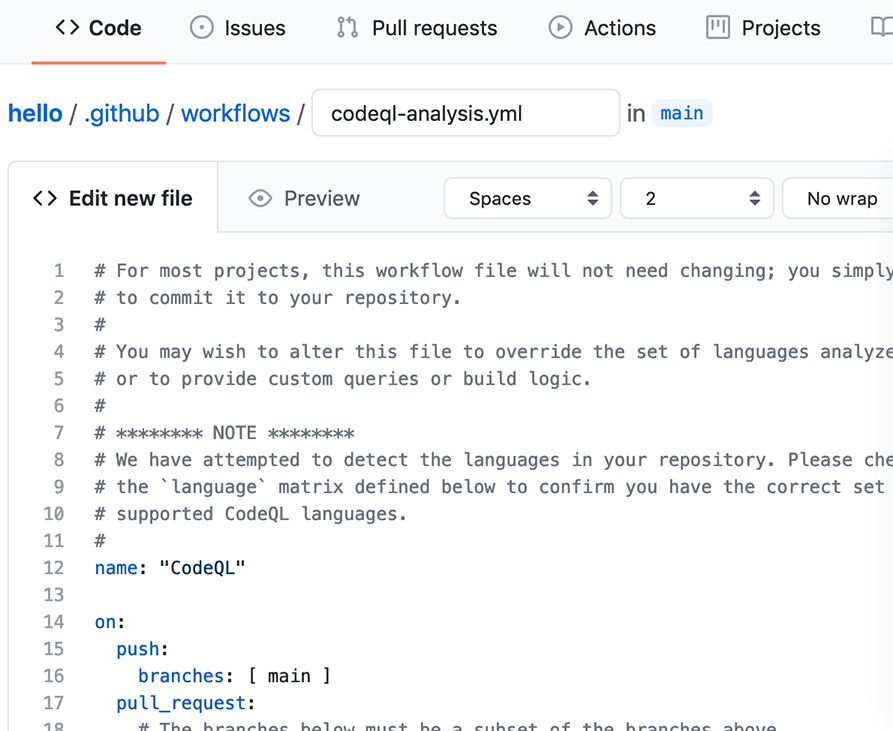
codeql-analysis.ymlというテンプレートが開きます。内容はそのまま編集せずにcommitします。
Actionsタブを開くと、codeql-analysis.ymlのcommitによって2つのworkflow "CodeQL"と"Lint"が wor実行されたのを確認できます。
ステップ4と5で作成した.github/workflows/lint.ymlおよびcodeql-analysis.ymlはまだリモートリポジトリのみにあるため、pullしてローカルリポジトリにも反映させておきましょう。
6. GitHub Packagesにnpmパッケージとして登録する
6.1 ローカルのディレクトリから登録
GitHub Packagesにアクセスする際の認証に必要となるpersonal access token (PAT)を入手します。
GitHubアカウントのプルダウンメニューから"Settings" > "Developer settings" > Personal access tokensをクリックします。"Generate new token"ボタンをクリックしてトークンの編集画面を開きます。scopeのwrite:packagesにチェックを入れて画面下の"Generate token"ボタンをクリックします。

"Personal access tokens"画面に表示された"ghp_"で始まるtokenの文字列をコピーしておきます。
ローカルのパッケージのディレクトリでnpm loginを実行します。下記出力例で、Usernameは自分のGItHubユーザー名、Passwordに対するTOKENは上記で取得したPATの文字列に置き換えて入力します。
$ cd hello
$ npm login --scope=@kazhashimoto --registry=https://npm.pkg.github.com

> Username: kazhashimoto
> Password: TOKEN
> Email: (email address)
npm loginを実行すると~/.npmrcファイルが作られて、次の行が書き込まれます。
//npm.pkg.github.com/:_authToken=TOKEN
package.jsonに"publishConfig"項目を追加し、"registry"のURLを指定します。
"publishConfig": {
  "registry": "https://npm.pkg.github.com"
}
"name"項目はscopeを指定した形式に書き換えます。
"name": "@kazhashimoto/hello",
npm publishでパッケージをレジストリに公開する際、node_modules/や.github/ディレクトリの中身は不要なので、これらを除外するように.npmignoreファイルに書いておきます。
$ touch .npmignore
node_modules/
.github/
ステップ6.1で更新したファイルを一旦リモートにpushします。
npm publishを実行してGitHub Packagesのレジストリにパッケージを登録します。
$ npm publish
しばらくすると、Repositoryページ右側のPackages欄に、登録したパッケージが表示されます。
6.2 GitHub Packagesからのインストール
GitHub Packagesのレジストリからパッケージをインストールしてみましょう。ローカルにディレクトリを作って、npm initを実行します。レジストリのURLを指定するため、同じディレクトリに.npmrcファイルをエディタで作成します。
$ mkdir test-package
$ cd test-package/
$ npm init -y
$ touch .npmrc
.npmrcには以下の行を記述します。
@kazhashimoto:registry=https://npm.pkg.github.com
scopeを指定して、パッケージをglobalにインストールします。
$ npm install -g @kazhashimoto/hello@1.0.0
$ npm ls -g
/Users/me/.nodebrew/node/v16.4.0/lib
├── @kazhashimoto/hello@1.0.0
└── npm@7.18.1
インストールできました。
パッケージをアンインストールします。
$ npm uninstall -g @kazhashimoto/hello
7. GitHub Packagesへの登録をworkflowに組み込む
7.1 publish.ymlの作成
ステップ6では手作業でパッケージをpublishしました。最後に、GitHubのリポジトリ上で新しいリリースを作成した時に、その時点でのパッケージも生成してGitHub Packagesのリポジトリに登録する処理をworkflowに組み込みます。
Repository画面のActionsタブ > "New workflow" > "set up a workflow yourself"でエディタを開き、
Publishing packages to GitHub Packages
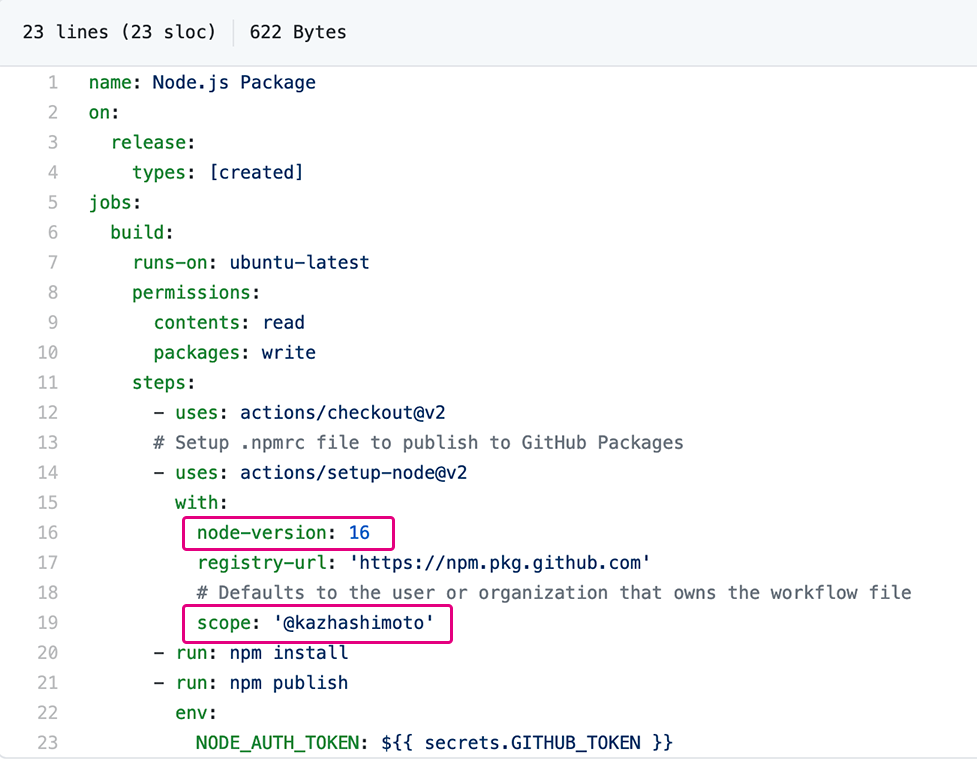
のExample workflowセクションに記載されているYAMLのソースコードをエディタにコピー&ペーストします。node-versionの値を対象バージョンに書き換え、scopeの値を自分のGitHubアカウント名に書き換えます。
ファイル名をpublish.ymlとしてcommitします。
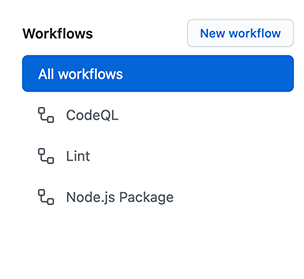
3個目のworkflow "Node.js Package"が追加されました。
7.2 publishの実行
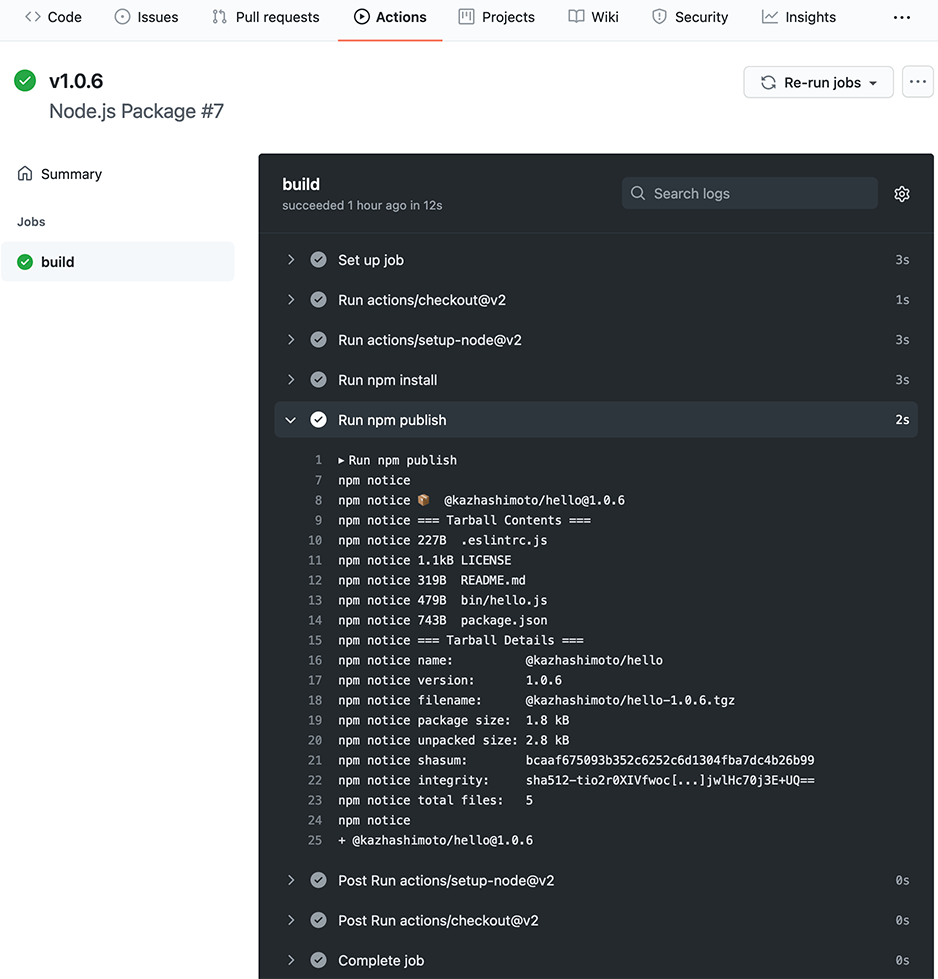
GitHubリポジトリのReleases画面で"Draft a new release"ボタンをクリックします。tagなどを入力し、"Publish release"ボタンをクリックします。新しいリリースが作成されると共に、workflow画面で"Node.js Package"が実行されるのを確認できます。
パッケージが登録されました。
パッケージのバージョンを更新するには、ローカルでpackage.jsonのversionの値を更新してからリモートにpushし、新しいリリースを作成します。
8. GitHub Packagesからのインストール
登録したhelloパッケージをnpmを使ってインストールしてみましょう。
$ mkdir test-package
$ cd test-package
$ npm init -y
作業ディレクトリに.npmrcファイルを作成し、scope @kazhashimotoに対するレジストリのURLを書いて保存します。
$ touch .npmrc
@kazhashimoto:registry=https://npm.pkg.github.com
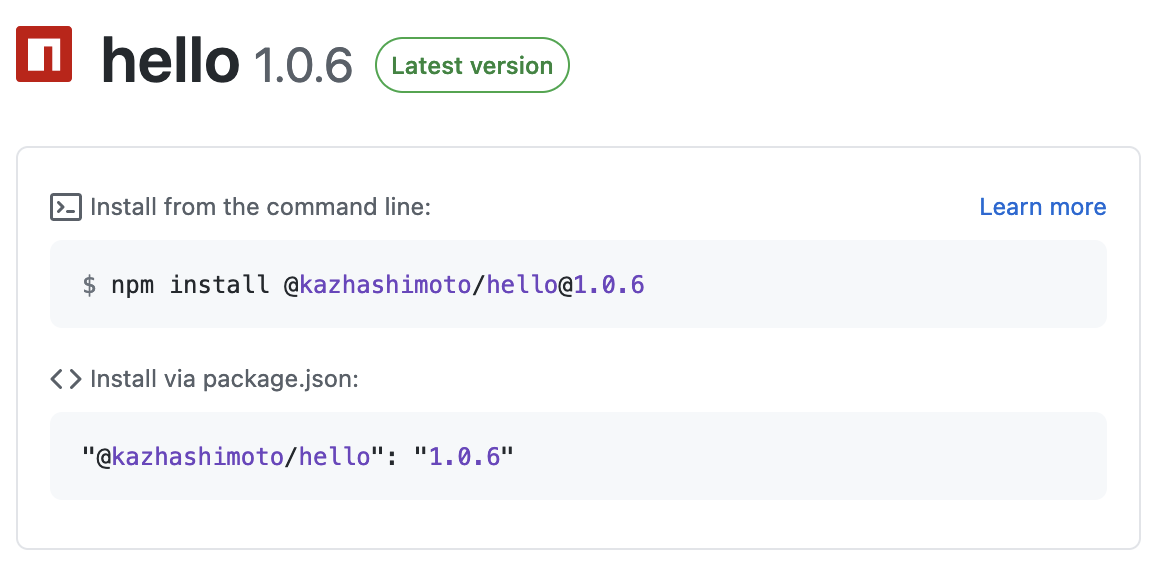
パッケージの画面(上記7.2)に表示された"Install from the command line"に表示された行をコピーします。グローバルにインストールしたいので、コマンドラインには-gオプションを追加してインストールします。
$ npm install @kazhashimoto/hello@1.0.6 -g
インストールされました。
$ npm ls -g
/Users/me/.nodebrew/node/v16.4.0/lib
├── @kazhashimoto/hello@1.0.6
└── npm@7.18.1
$ hello
hello, world!
アンインストールします。
$ npm uninstall @kazhashimoto/hello -g
手順終わり。
-
macOSプリインストール版のgitです。Atom内蔵のgitは別に存在します。 ↩
-
v1.58.0現在、Atom内蔵のgitはv2.26.2です。 ↩
-
ローカルリポジトリのdefault branch名を"master"ではなく"main"にするには、
git config --global init.defaultBranch mainで設定できますが、gitがinit.defaultBranchを追加したのはv2.28、一方Atom 1.58.0内蔵のgitはこれより低いv2.26.2を使っているため、Atomは.gitconfigのこの設定を無視してしまいます。Atomエディタを使用する自分としては、GitHubに合わせてdefault branchを"main"にしたい場合、GitHubのリポジトリ作成時に"main"にしといた方が後々楽だと思いました。 ↩
