最近Angularを触り始めて、AzureAD認証を使いたかったので色々調べてみました。
悪戦苦闘しながら動くところまではたどり着きましたが、後で忘れそうなのでメモです。
とりあえず動くようにはなりましたが、おそらく最適な方法ではありません。
ご注意ください。
※Visual Studioを使って開発しているので、多少イレギュラーな方法かもしれません。
前提
- Visual Studio Community 2019 (Version16.4.4)
- .NET Core (ASP.NET Core 3.1)
- ASP.NET Core Webアプリケーション(Angular)
- Angular 8.2.12
- adal-angular8
手順
Step 0. 事前準備
0-1. ASP.NET Core Webアプリケーション(Angular)を作成
「新しいプロジェクトの作成」からポチポチ進んでいくとできます。
備考
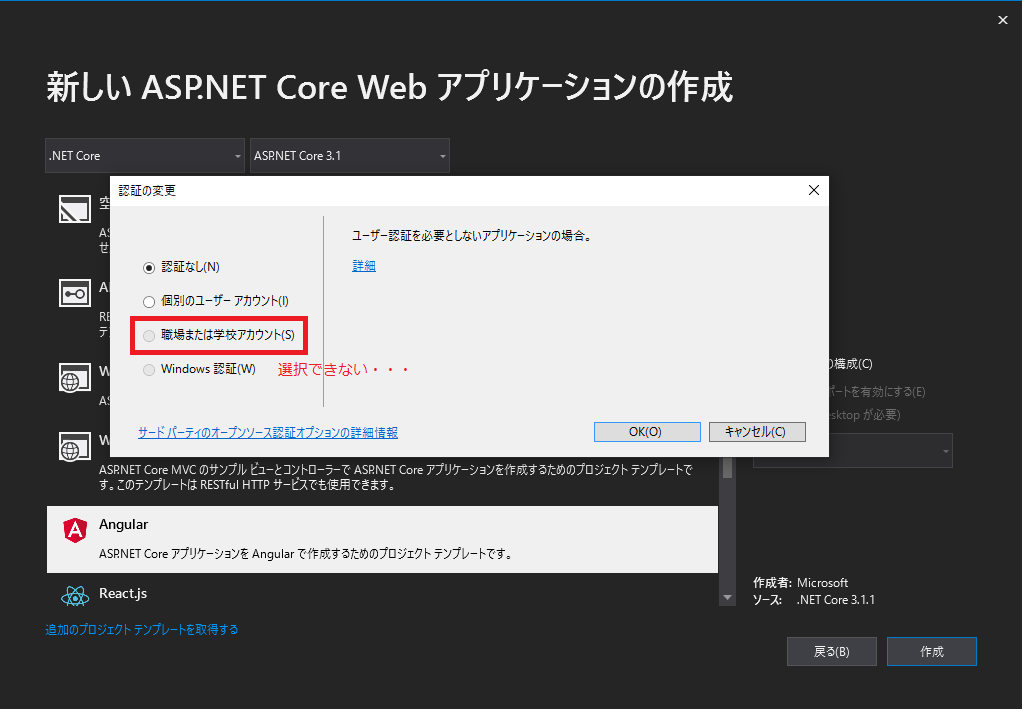
ここで「認証の変更」から「職場または学校アカウント(S)」が選択可能だと楽なのですが、残念ながら選べません。
0-2. プロジェクトをビルド
一度プロジェクトをビルドしないと、ClientAppフォルダの下にnode_modulesができないので注意。
node_modulesフォルダがないと、Step 1.で困ります。
Step 1. adal-angular8をインストール
下記の記事でも書いていますが、クライアント側のライブラリ(L)...を追加だとうまくいかなかったので、コマンドプロンプトからインストールします。
Visual Studio 2019 で Ant Design of Angular を使う
1-1. 開発者コマンドプロンプトを起動する
ツール(T) > コマンドライン(L) > 開発者用コマンドプロンプト(C)
1-2. コマンドプロンプトで下記のコマンドを実行
cd <プロジェクト名>\ClientAppnpm i adal-angular8
1-3. Visual Studioを再起動
コマンドプロンプトからパッケージをインストールすると、Visual Studioがうまく認識してくれないことがあるので一度再起動します。
Step 2. Azure Active Directoryの設定
2-1. Azure Active Directoryを作成する
画面に沿ってポチポチ進めば登録できます。
2-2. アプリの登録
AzureAD認証を使うには、アプリケーションの登録が必要になります。
新規登録をすると、こんな画面が表示されるはずです。
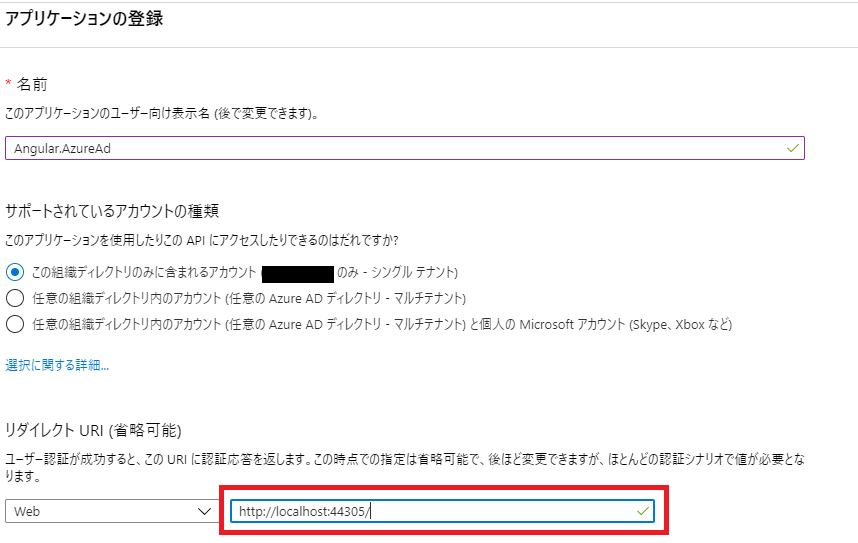
赤枠部分は開発時のURLを入力するとデバッグが楽です。
本番環境にデプロイするときは、別途URLを追加してあげる必要があります。
開発時のURLはhttps://localhost:<sslPort>になっているはずです。
sslPortの値については、lounchSettings.jsonで確認可能です。
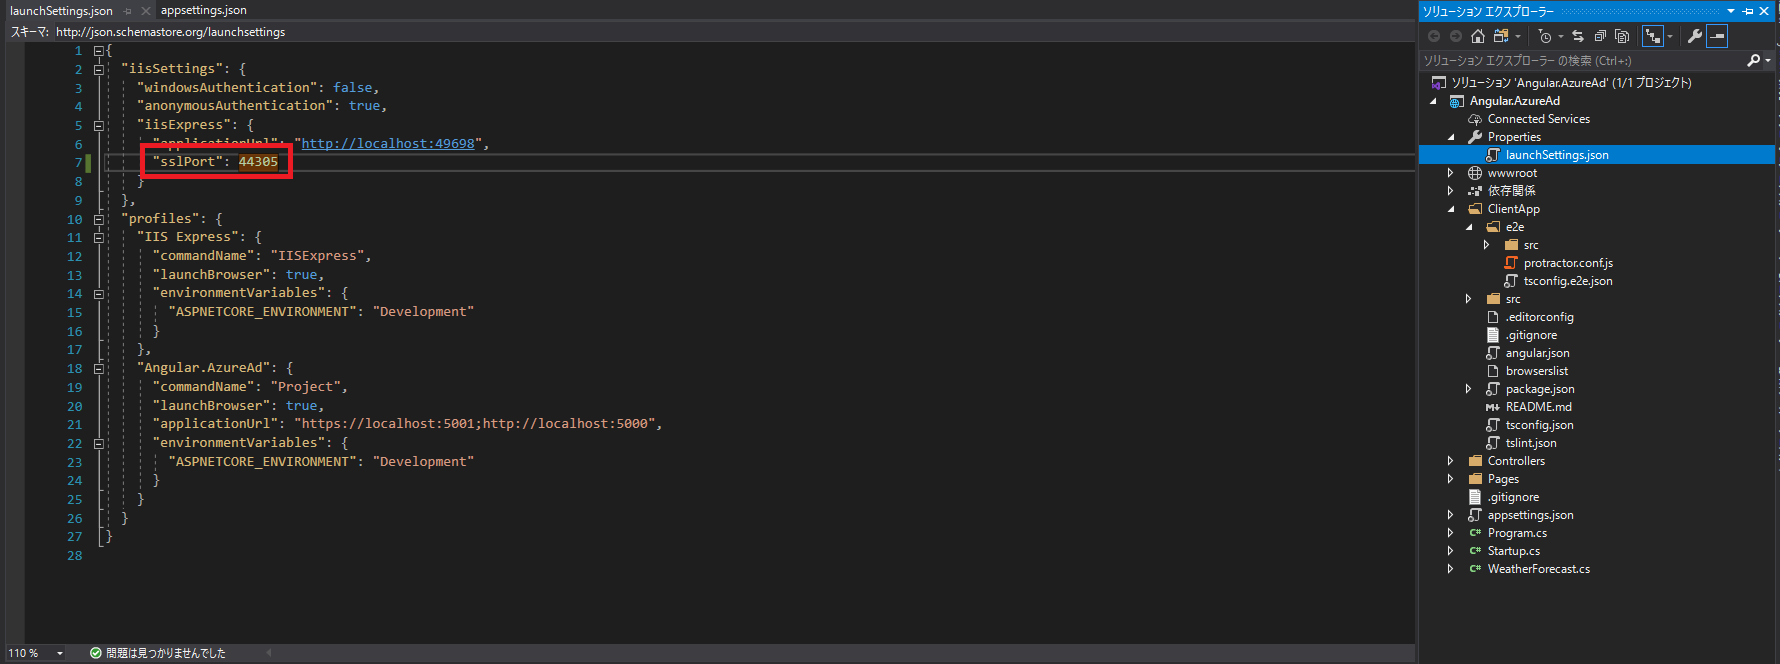
2-3. 認証の変更
下記の手順で認証についての設定を変更する必要があります。
- 「2-2. アプリの登録」で登録したアプリケーションを選択して管理画面に移動
- 暗黙の付与の下にある「IDトークン」にチェックを入れる
Visual StudioのテンプレートからAngularのプロジェクトを作成する場合、デフォルトでバックエンドコンポーネントがあります。
暗黙の付与で「IDトークン」にチェックを入れるのは非推奨な気もしますが、今回は都合上チェックします。
Step 3. ソースコードの変更
下記のサイトを参考に、ソースコードを変更しました。
Angular と Azure Active Directory の利用
3-1. app.module.tsの変更
テンプレートから変更した箇所のみ抜粋
import { HttpClient, HttpClientModule, HTTP_INTERCEPTORS } from '@angular/common/http';
import { Adal8Service, Adal8HTTPService } from "adal-angular8";

@NgModule({
  ...
    providers: [
      Adal8Service,
      {
        provide: Adal8HTTPService,
        useFactory: Adal8HTTPService.factory,
        deps: [HttpClient, Adal8Service]
      }
    ],
  ...
})
3-2. app.component.tsを変更
import { Component, OnInit } from '@angular/core';

import { Adal8Service } from "adal-angular8";
import { adal } from "adal-angular";

const config: adal.Config = {
  tenant: '<登録したテナントID>',
  clientId: '<登録したアプリケーションID>'
}

@Component({
  selector: 'app-root',
  templateUrl: './app.component.html'
})

export class AppComponent implements OnInit {
  username: string;

  constructor(private service: Adal8Service) {
    this.service.init(config);
  }

  ngOnInit() {
    this.service.handleWindowCallback();

    if (!this.service.userInfo.authenticated) {
      this.service.login();
    }

    this.username = this.service.userInfo.username;
    console.log('profile', this.service.userInfo.profile);
  }

  public logout() {
    this.service.logOut();
  }
}
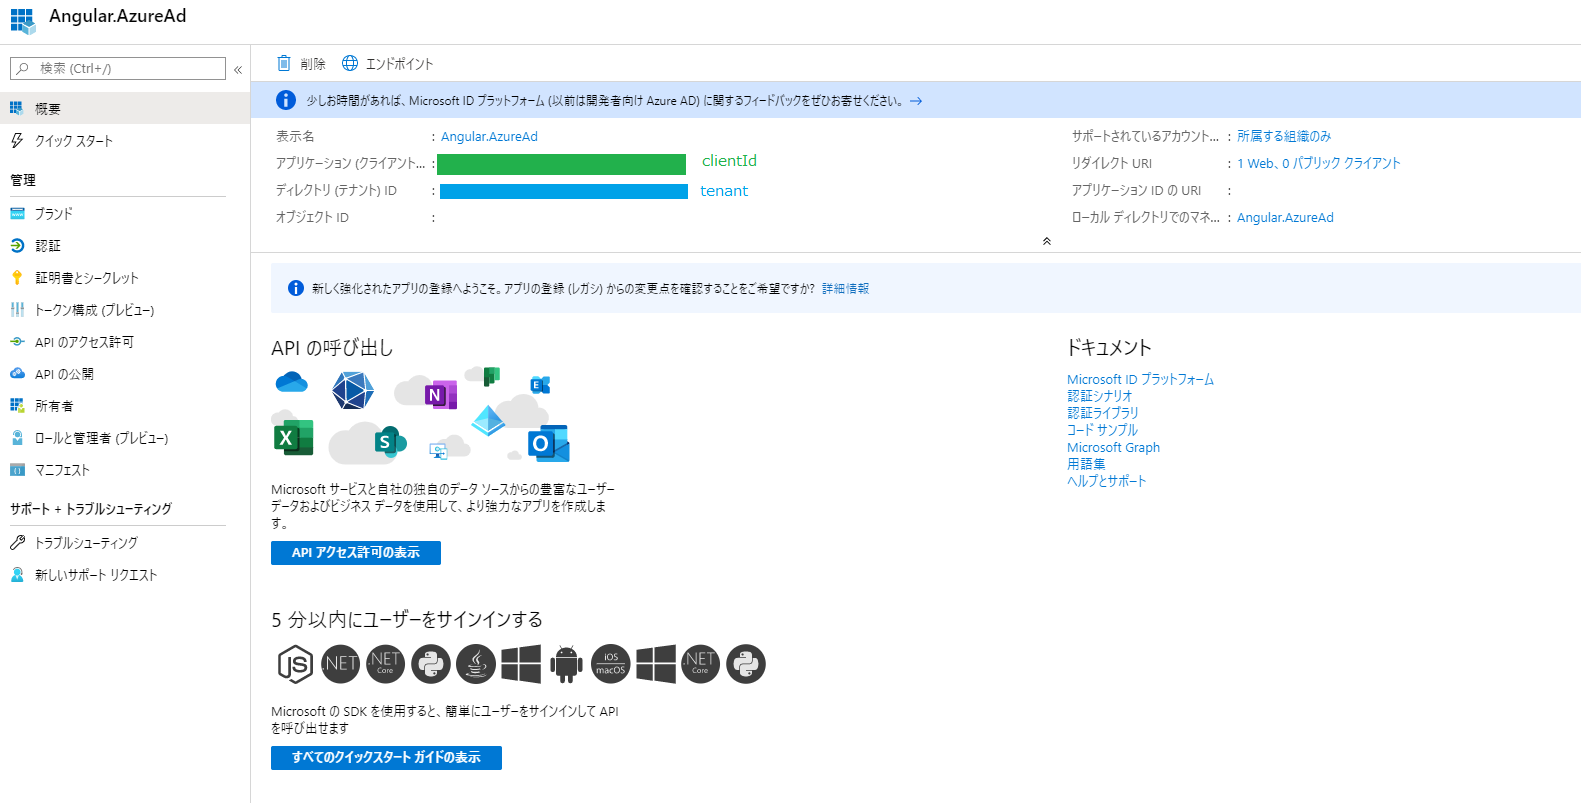
<>内の値は、下記の画像を参考にしてください。
