やったこと
Go言語で特定の地域の天気と気温をツイートするアプリを作り、Raspberry Pi 4上からcronで自動実行させるようにしました。
OpenWeatherMapとTwitterAPIを利用しています。
環境
・macOS Catalina 10.15.7(開発と動作確認時)
・Raspbian 10.6(Raspberry Pi 4B)
・go 1.15.2
流れ
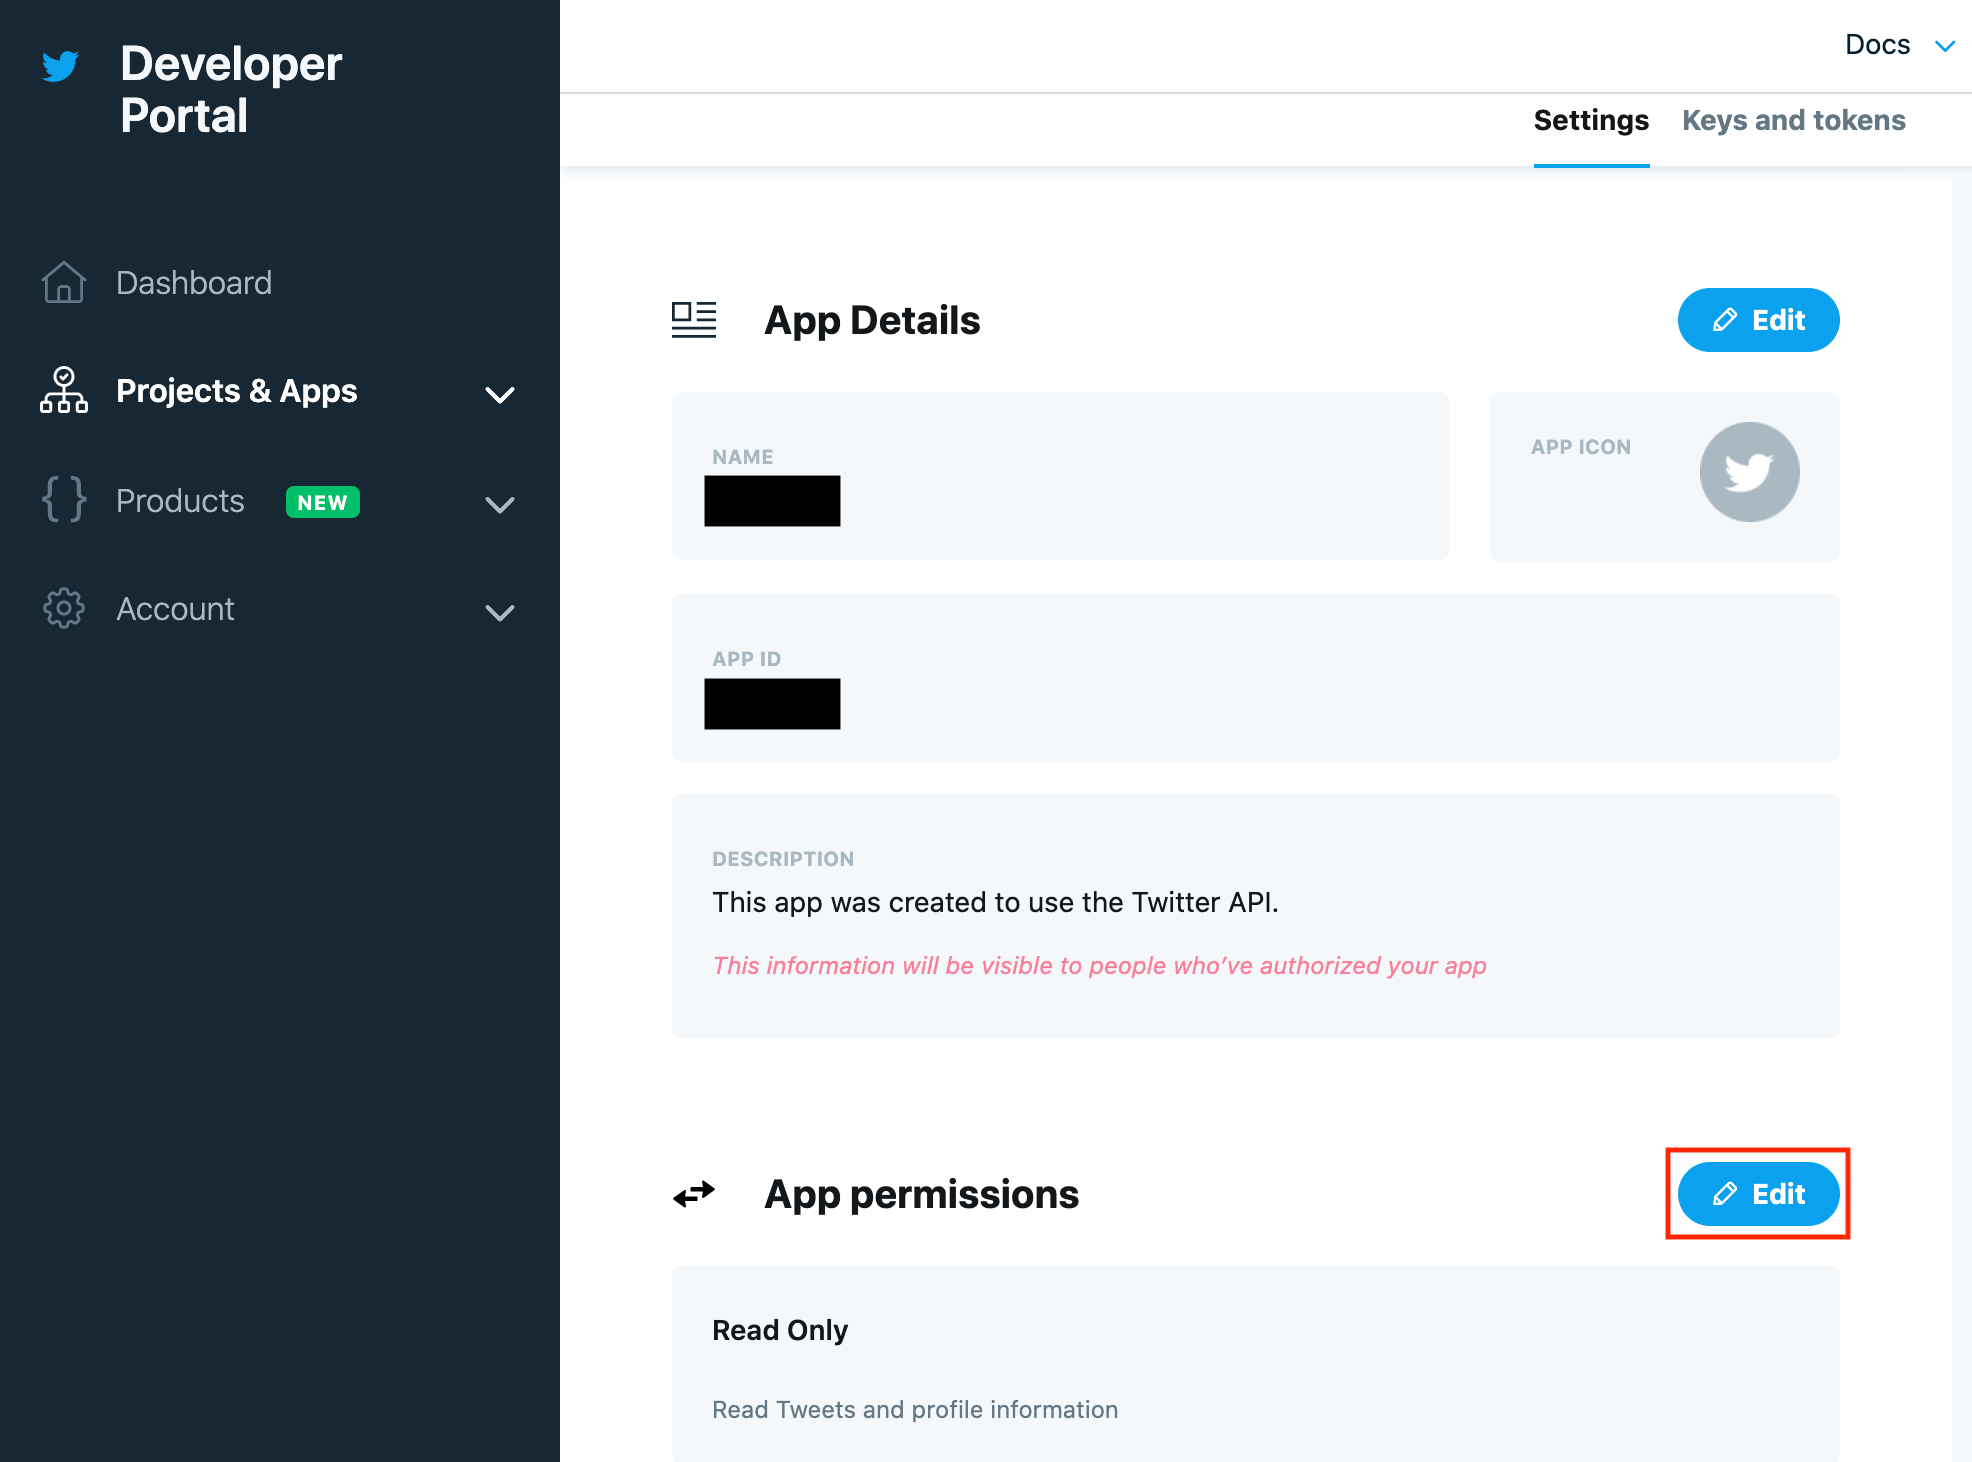
1.TwitterのAPIアカウント申請 & App作成
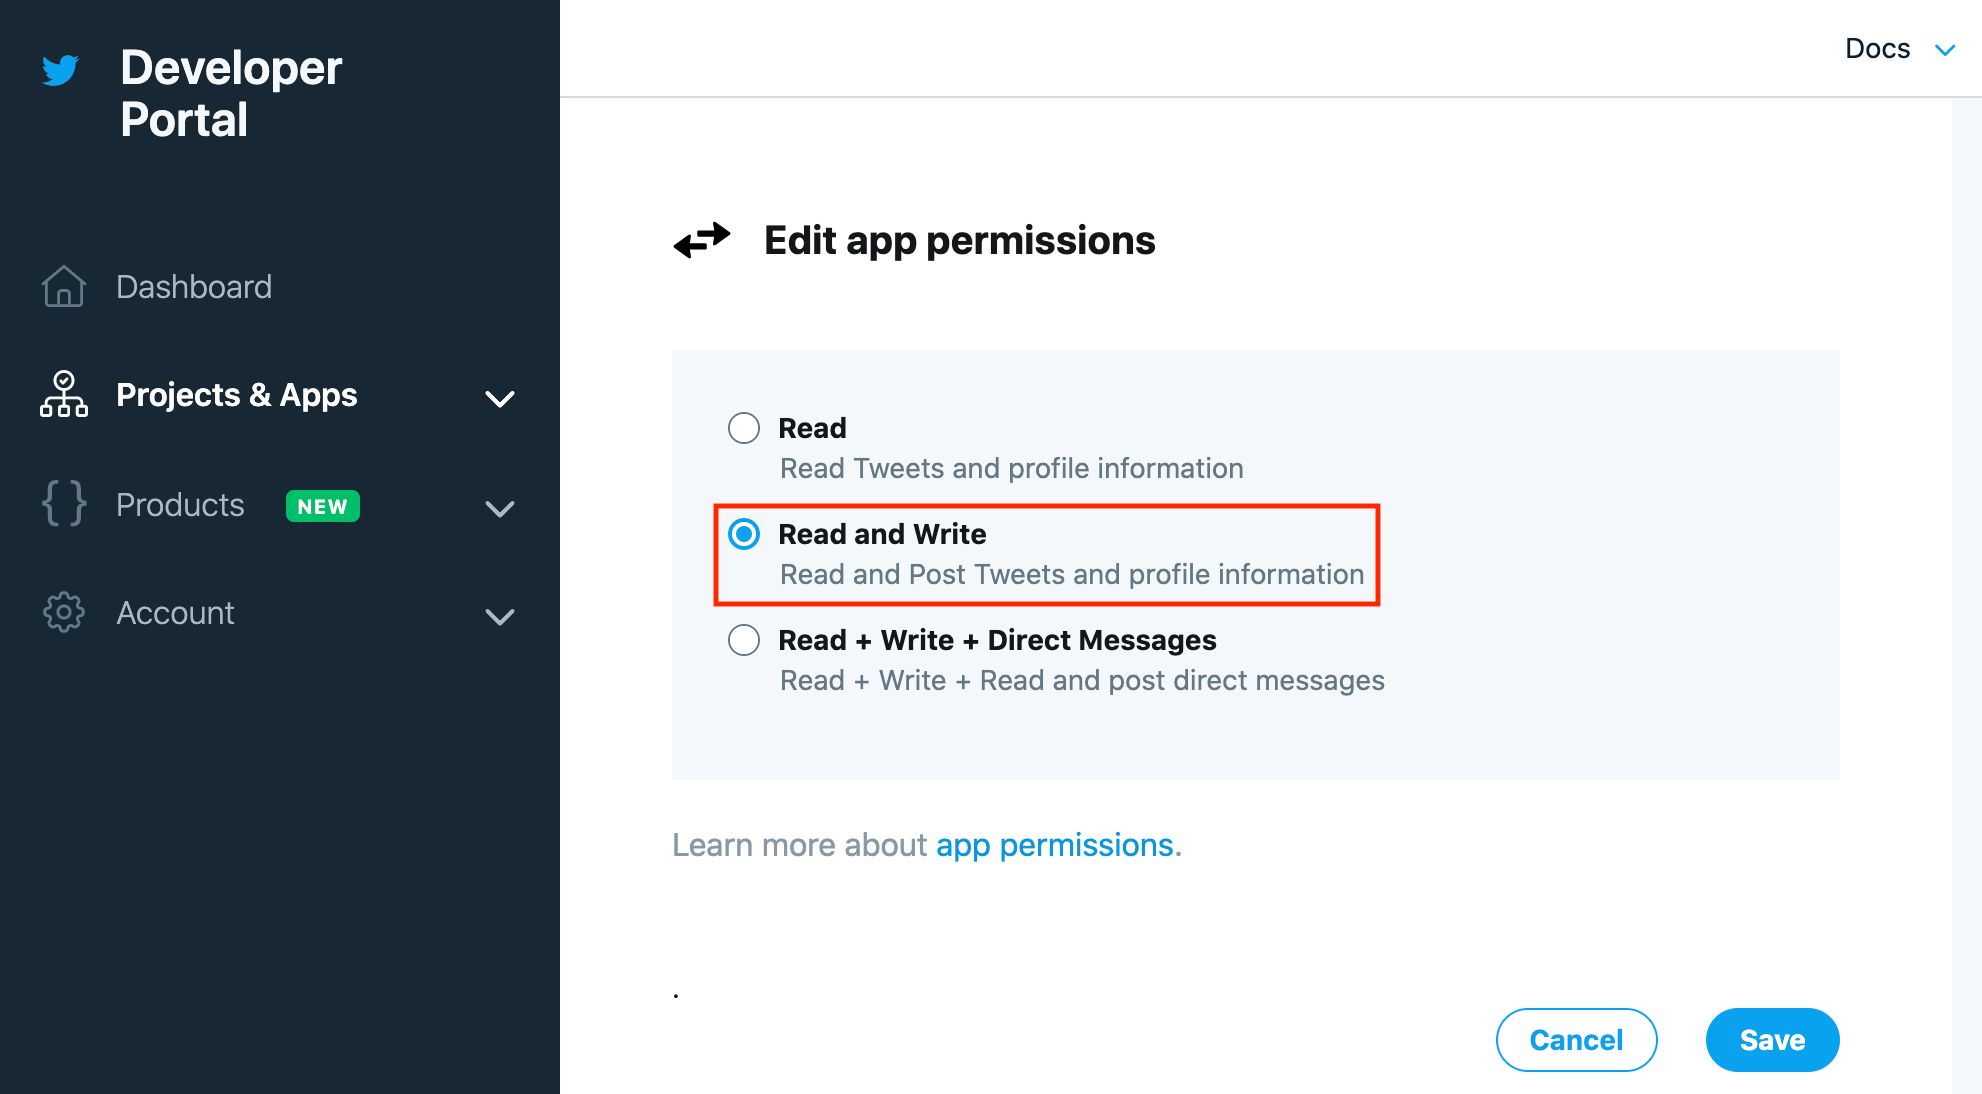
2.TwitterアプリのApp Permissons設定をReadからRead & Writeに変更
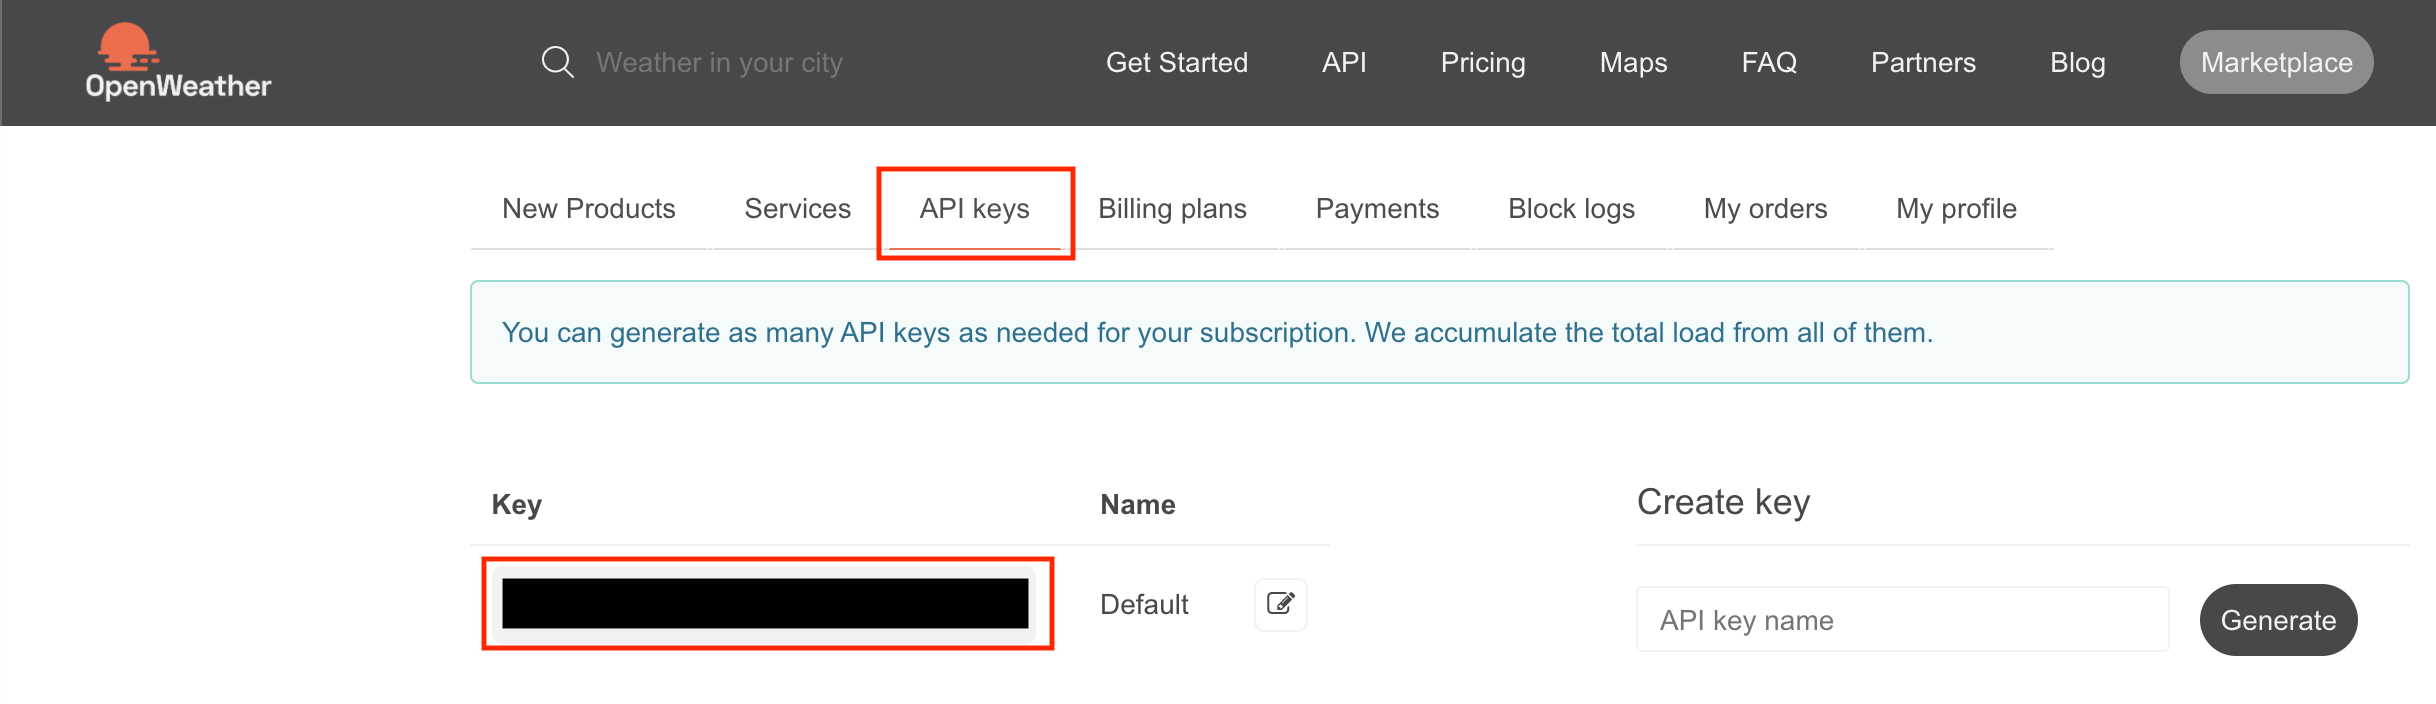
3.OpenWeatherMapのアカウント作成 & APIキーの取得
4.Go言語でツイートアプリ作成
5.作ったアプリをラズパイ向けにビルド & 配置
6.cronを使ってラズパイから自動実行させる
1.TwitterのAPIアカウント申請 & App作成
Developerページから開発者申請とTwitterアプリケーション作成を行い、API key & secretとAccess token & secretを取得します。
以下の記事を参考にさせていただきました。
2020年度版 Twitter API利用申請の例文からAPIキーの取得まで詳しく解説
Twitter Developerの開発者申請(例文あり)とAPIキー取得方法まとめ【2019年版】
2.TwitterアプリのApp Permissons設定をReadからRead & Writeに変更
作成したTwitterアプリのApp permissionsの設定が「Read Only」になっていると、ツイートしようとした時に権限エラーになってしまうので、「Read and Write」に変更します。
3.OpenWeatherMapのアカウント作成 & APIキーの取得
まず、以下のページからアカウントを作成します。
http://home.openweathermap.org/users/sign_up
サインイン後、API keysのタブを選択するとAPI keyが表示されます。
4.Go言語でツイートアプリ作成
OpenWeatherMapから天気情報を取得して、TwitterAPIでツイートするアプリを作ります。
以下の記事を参考にさせていただきました。
Go言語のTwitter APIで定期的にツイートする
【Go】OpenWeatherMap APIを使用して現在の天気情報を取得する
フォルダ構成は以下です。
tenkiapp
├── keys
│   └── keys.go
├── getweather
│   └── getweather.go
├── text
│   └── text.go
└── main.go
まずTwitter認証用のコードを書きます。
「1.TwitterのAPIアカウント申請 & App作成」で取得したAPI key & secretとAccess token & secretをそれぞれ下記のコードの該当箇所にあてはめます。
package keys

import (
	"github.com/ChimeraCoder/anaconda"
)

func GetTwitterApi() *anaconda.TwitterApi {
	anaconda.SetConsumerKey("API_KEY")
	anaconda.SetConsumerSecret("API_KEY_SECRET")
	api := anaconda.NewTwitterApi("ACCESS_TOKEN", "ACCESS_TOKEN_SECRET")
	return api
}
次にOpenWeatherMapから天気を取得するコードを書きます。
APIリクエストパラメータのappidには、「3.OpenWeatherMapのアカウント作成 & APIキーの取得」で取得したAPIキーを指定します。
package getweather

import (
	"encoding/json"
	"io/ioutil"
	"net/http"
	"net/url"
)

type OpenWeatherMapAPIResponse struct {
	Main    Main      `json:"main"`
	Weather []Weather `json:"weather"`
	Coord   Coord     `json:"coord"`
	Wind    Wind      `json:"wind"`
	Dt      int64     `json:"dt"`
}

type Main struct {
	Temp     float64 `json:"temp"`
	TempMin  float64 `json:"temp_min"`
	TempMax  float64 `json:"temp_max"`
	Pressuer int     `json:"pressure"`
	Humidity int     `json:"humidity"`
}

type Coord struct {
	Lon float64 `json:"lon"`
	Lat float64 `json:"lat"`
}

type Weather struct {
	Main        string `json:"main"`
	Description string `json:"description"`
	Icon        string `json:"icon"`
}

type Wind struct {
	Speed float64 `json:"speed"`
	Deg   int     `json:"deg"`
}

func GetWeather() OpenWeatherMapAPIResponse {

	endPoint := "https://api.openweathermap.org/data/2.5/weather" // APIのエンドポイント

	// パラメータを設定
	values := url.Values{}
	values.Set("q", "Tokyo,jp")                             // 地域を指定(ここでは東京)
	values.Set("units", "metric")                           // 気温の単位を摂氏で取得
	values.Set("lang", "ja")                                // Descriptionを日本語で取得
	values.Set("appid", "xxxxxxxxxxxxxxxxxxxxxxxxxxxxxxxx") // APIキー

	// リクエストを投げる
	res, err := http.Get(endPoint + "?" + values.Encode())
	if err != nil {
		panic(err)
	}
	defer res.Body.Close()

	// レスポンスを読み取り
	bytes, err := ioutil.ReadAll(res.Body)
	if err != nil {
		panic(err)
	}

	// JSONパース
	var apiRes OpenWeatherMapAPIResponse
	if err := json.Unmarshal(bytes, &apiRes); err != nil {
		panic(err)
	}

	return apiRes
}
ツイートする文章を作成するコードを書きます。
package text

import (
	. "tenkiapp/getweather"
	"fmt"
	"time"
)

func GetTweetText() string {
	weather := GetWeather()
	tweetText := fmt.Sprintf("%s\n", time.Unix(weather.Dt, 0).Format("2006/01/02 15:04"))
	tweetText += fmt.Sprintf("%s\n", weather.Weather[0].Main)
	tweetText += fmt.Sprintf("%s\n", weather.Weather[0].Description)
	tweetText += fmt.Sprintf("%.1f%s\n", weather.Main.Temp, "℃")
	return tweetText
}
最後にmain.goを作ります。
package main

import (
	. "tenkiapp/keys"
	. "tenkiapp/text"
)

func main() {
	api := GetTwitterApi()
	_, err := api.PostTweet(GetTweetText(), nil)
	if err != nil {
		panic(err)
	}
}
試しに一度実行してみます。
$ go run main.go
作成したTwitterアカウントで以下のようなツイートができていればOKです。
2021/01/01 12:00
Clouds
曇りがち
6.8℃
5.作ったアプリをラズパイ向けにビルド & 配置
以下の記事を参考にさせていただきました。
go buildとクロスコンパイル
ラズパイ4上でgo envを実行してみたところ、GOARCHとGOOSは下記の通りでした。
(ラズパイ上でgoのバイナリを動かすだけなら、ラズパイ上にgoをインストールする必要はありませんが、確認のために実施)
GOARCH="arm"
GOOS="linux"
アプリのディレクトリに移動して、下記のコマンドを実行します。
$ env GOOS=linux GOARCH=arm go build main.go
できたバイナリファイルをラズパイ上に転送します。
$ scp [アプリのディレクトリ]/main pi@xxx.xxx.xxx.xxx:/home/pi/tenkiapp/
6.cronを使ってラズパイから自動実行させる
以下の記事を参考にさせていただきました。
ラズベリーパイ4でcronを動かす
ラズパイにssh接続します。
$ ssh pi@xxx.xxx.xxx.xxx
ここからはラズパイ上での作業です。
まずはcronのログを有効化します。
# 以下のコメントアウトを外す
cron.*                          /var/log/cron.log
// 変更を反映
$ sudo /etc/init.d/rsyslog restart

// cronのステータス確認 active (running)になっていればOK
$ sudo /etc/init.d/cron status

// cronの再起動(必要に応じて)
$ sudo /etc/init.d/cron restart
次にcronの設定を行います。
$ crontab -e

// 毎日6時、12時、18時にツイートさせる
0 6 * * * /home/pi/tenkiapp/main
0 12 * * * /home/pi/tenkiapp/main
0 18 * * * /home/pi/tenkiapp/main
設定した時間にツイートできていればOKです。
参考
参考にさせていただいた記事の作成者様、ありがとうございました。
2020年度版 Twitter API利用申請の例文からAPIキーの取得まで詳しく解説
Twitter Developerの開発者申請(例文あり)とAPIキー取得方法まとめ【2019年版】
Go言語のTwitter APIで定期的にツイートする
【Go】OpenWeatherMap APIを使用して現在の天気情報を取得する
go buildとクロスコンパイル
ラズベリーパイ4でcronを動かす