はじめに
リンクラフト株式会社でモバイルアプリエンジニアとして働いているカワチです。リンクラフトアドベントカレンダーの11日目を担当します。
直近でFlutterの案件に参画しているので関連した記事を書いてみました。
TextButtonとは
FluttetにはデフォルトでTextButton、OutlinedButton、ElevatedButtonの三つのButtonWidgetがあります。
今回はこの3種類の内の一つ「TextButton」についていじってみようと思いまして備忘録的に記事を書きました。
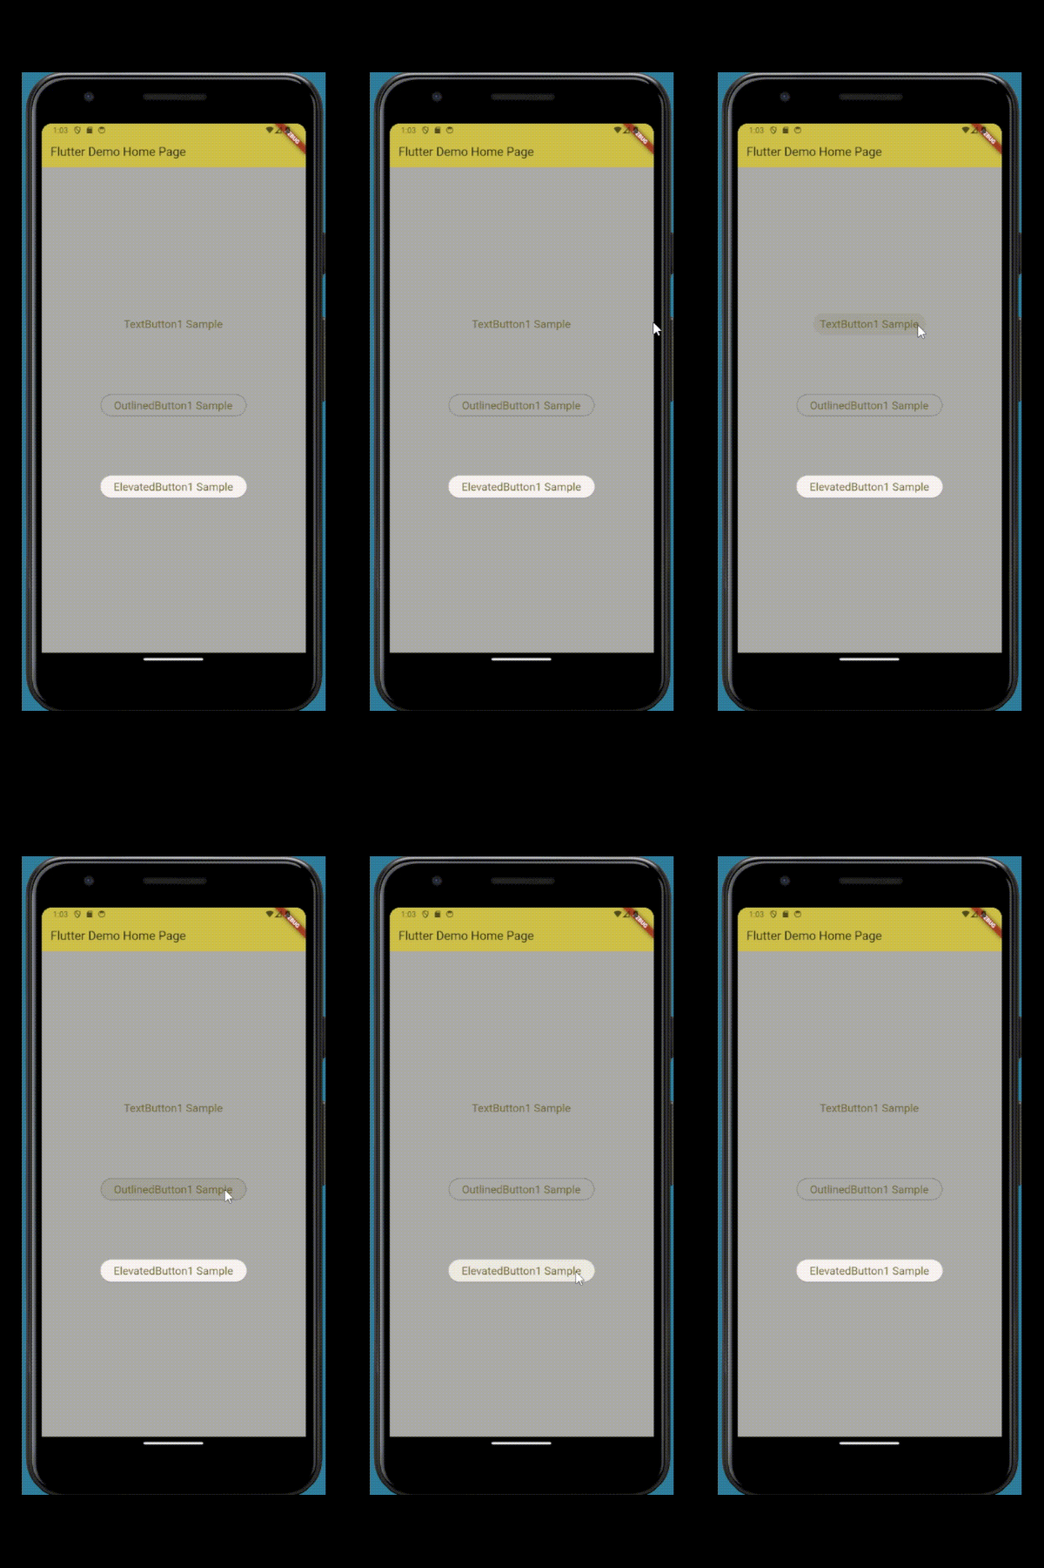
参考までにデフォルトの使用感を以下GIFで載せています。
// 見やすくするため、背景色とボタンの文字色を変更しています

TextButton(
    onPressed: () {},
    child: const Text('TextButton1 Sample'),
),

OutlinedButton(
    onPressed: () {},
    child: const Text('OutlinedButton1 Sample'),
),

ElevatedButton(
    onPressed: () {},
    child: const Text('ElevatedButton1 Sample'),
),
デフォルトの見た目だけみるとTextButtonは
- アウトラインがない
- 背景に色が設定されない
- 微妙にテキストに対しての余白が少ない
- 押下した時は波紋の様なアニメーション
がTextButtonの特徴です。他の二つよりもシンプルに構成されている気がします。
見た目を変更してみる
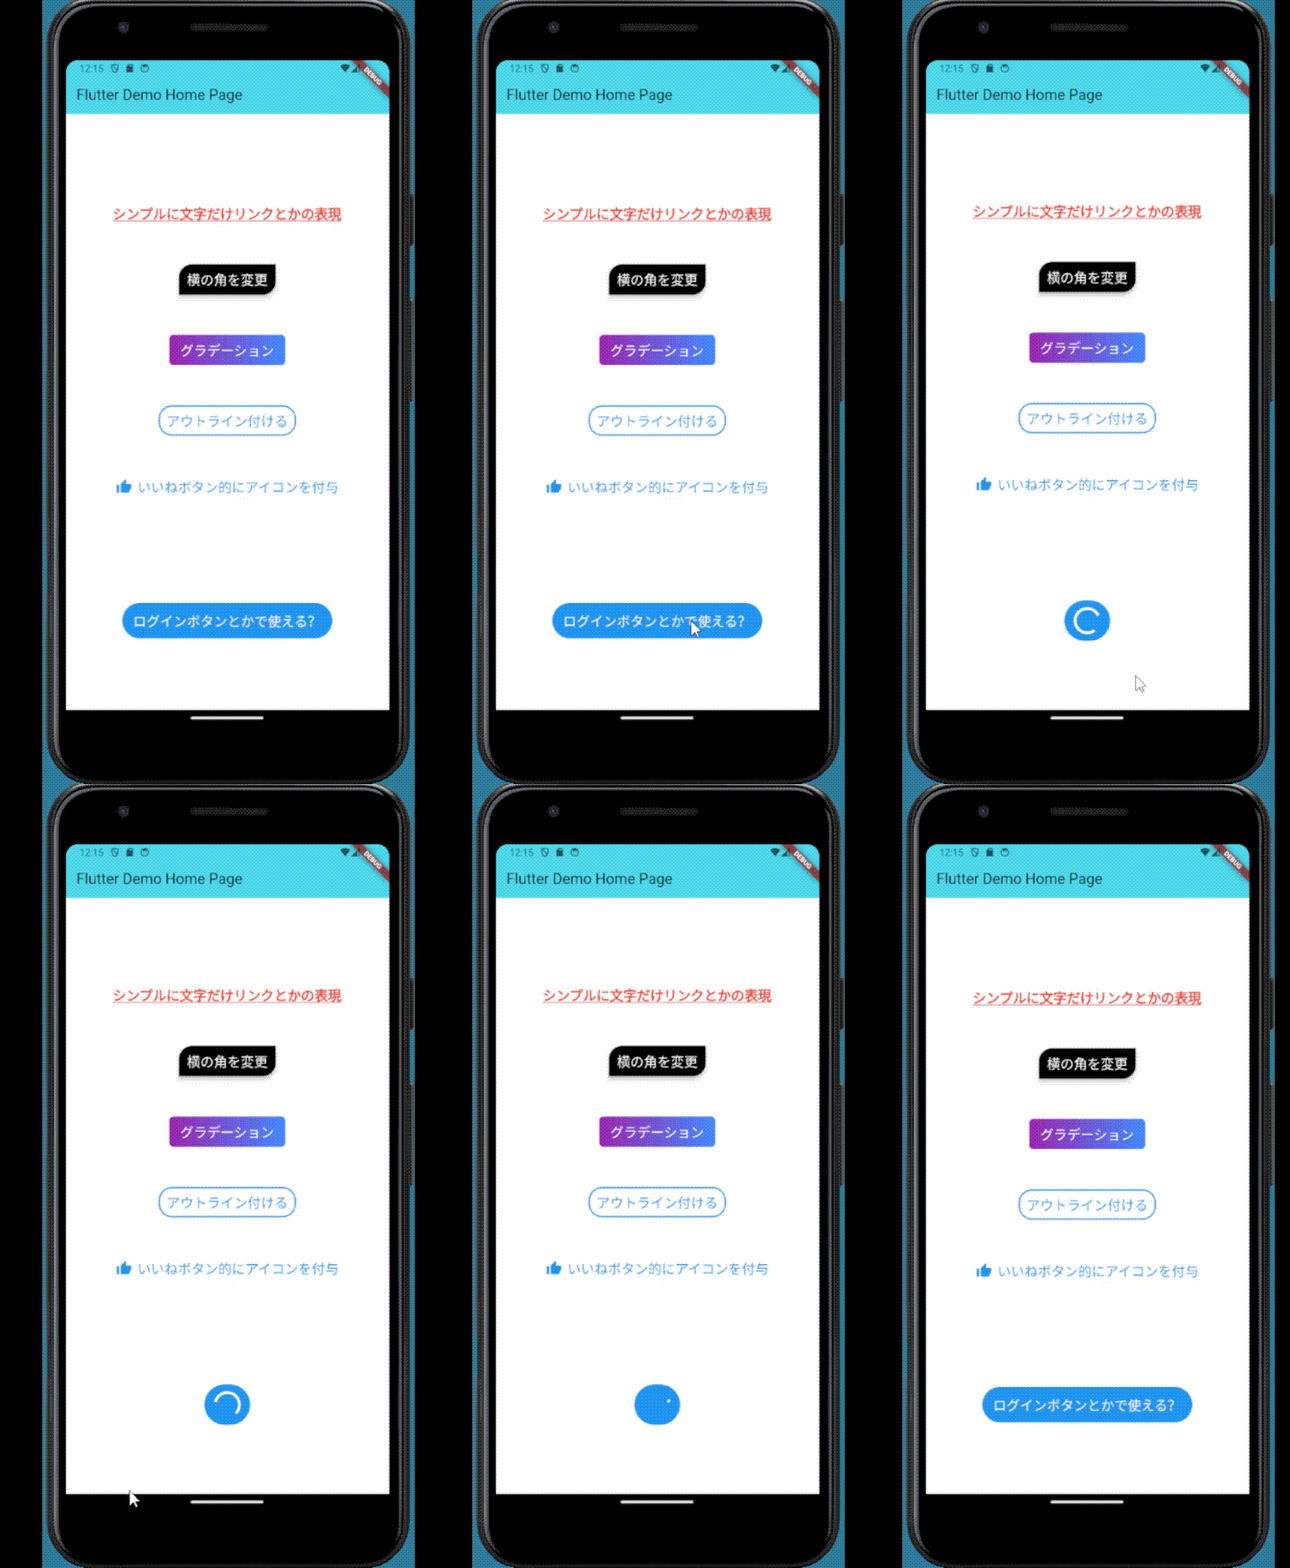
文字に下線を引いてリンクの様な表現
よく使われてそうなイメージです。
TextButton(
  onPressed: () {},
  style: TextButton.styleFrom(
    shape: const RoundedRectangleBorder(
      borderRadius: BorderRadius.only(
        topLeft: Radius.circular(20),
        bottomRight: Radius.circular(20),
      ),
    ),
  ),
  child: const Text(
    'シンプルに文字だけリンクとかの表現',
    style: TextStyle(
      color: Colors.red,
      fontWeight: FontWeight.bold,
      decoration: TextDecoration.underline,
    ),
  ),
),
角を丸める
borderRadiusで指定できます。
TextButton(
  onPressed: () {},
  style: TextButton.styleFrom(
    backgroundColor: Colors.black,
    shape: const RoundedRectangleBorder(
      borderRadius: BorderRadius.only(
        topLeft: Radius.circular(20),
        bottomRight: Radius.circular(20),
      ),
    ),
    shadowColor: Colors.black,
    elevation: 5,
  ),
  child: const Text('横の角を変更'),
),
グラデーションかけてみる
TextButton(
  onPressed: () {},
  style: TextButton.styleFrom(
    backgroundColor: Colors.transparent,
  ),
  child: Ink(
    decoration: BoxDecoration(
      gradient: const LinearGradient(
          colors: [Colors.purple, Colors.blueAccent]),
      borderRadius: BorderRadius.circular(6),
    ),
    child: Container(
      padding: const EdgeInsets.symmetric(
          horizontal: 16, vertical: 8),
      child: const Text(
        'グラデーション',
      ),
    ),
  ),
),
アウトラインを付けてみる
TextButtonでもOutLineを付けるときはshapeで指定するだけで大丈夫です。
TextButton(
  onPressed: () {},
  style: TextButton.styleFrom(
    foregroundColor: Colors.blue, // 文字色
    backgroundColor: Colors.white, // 背景色
    shape: RoundedRectangleBorder(
      side: const BorderSide(
          color: Colors.blue, width: 2), // アウトライン
      borderRadius: BorderRadius.circular(20), // 角を丸く
    ),
  ),
  child: const Text('アウトライン付ける'),
),
アイコンを付けてみる
TextButton.iconがなんとなく柔軟性なさそうだったのでrowで実装する様にしています。
TextButton(
  onPressed: () {},
  style: TextButton.styleFrom(
    foregroundColor: Colors.blue, // 文字色
  ),
  child: const Row(
    mainAxisSize: MainAxisSize.min,
    children: [
      Icon(Icons.thumb_up, color: Colors.blue), // アイコン
      SizedBox(width: 8), // アイコンとテキストの間のスペース
      Text('いいねボタン的にアイコンを付与'),
    ],
  ),
),
アニメーションするボタン
ログインボタンとかで使える様にインジケーター表示。
class AnimatedTextButton extends StatefulWidget {
  const AnimatedTextButton({super.key});

  @override
  State<AnimatedTextButton> createState() => _AnimatedTextButtonState();
}

class _AnimatedTextButtonState extends State<AnimatedTextButton> {
  bool _isLoading = false;
  void _handlePress() async {
    setState(() {
      _isLoading = true;
    });
    await Future.delayed(Duration(seconds: 3));
    setState(() {
      _isLoading = false;
    });
  }

  @override
  Widget build(BuildContext context) {
    return TextButton(
      onPressed: _isLoading ? null : _handlePress,
      style: TextButton.styleFrom(
        foregroundColor: Colors.white,
        backgroundColor: Colors.blue,
        padding: const EdgeInsets.symmetric(horizontal: 16, vertical: 12),
      ),
      child: _isLoading
          ? const CircularProgressIndicator(color: Colors.white)
          : const Text('ログインボタンとかで使える?'),
    );
  }
}
onLongPress
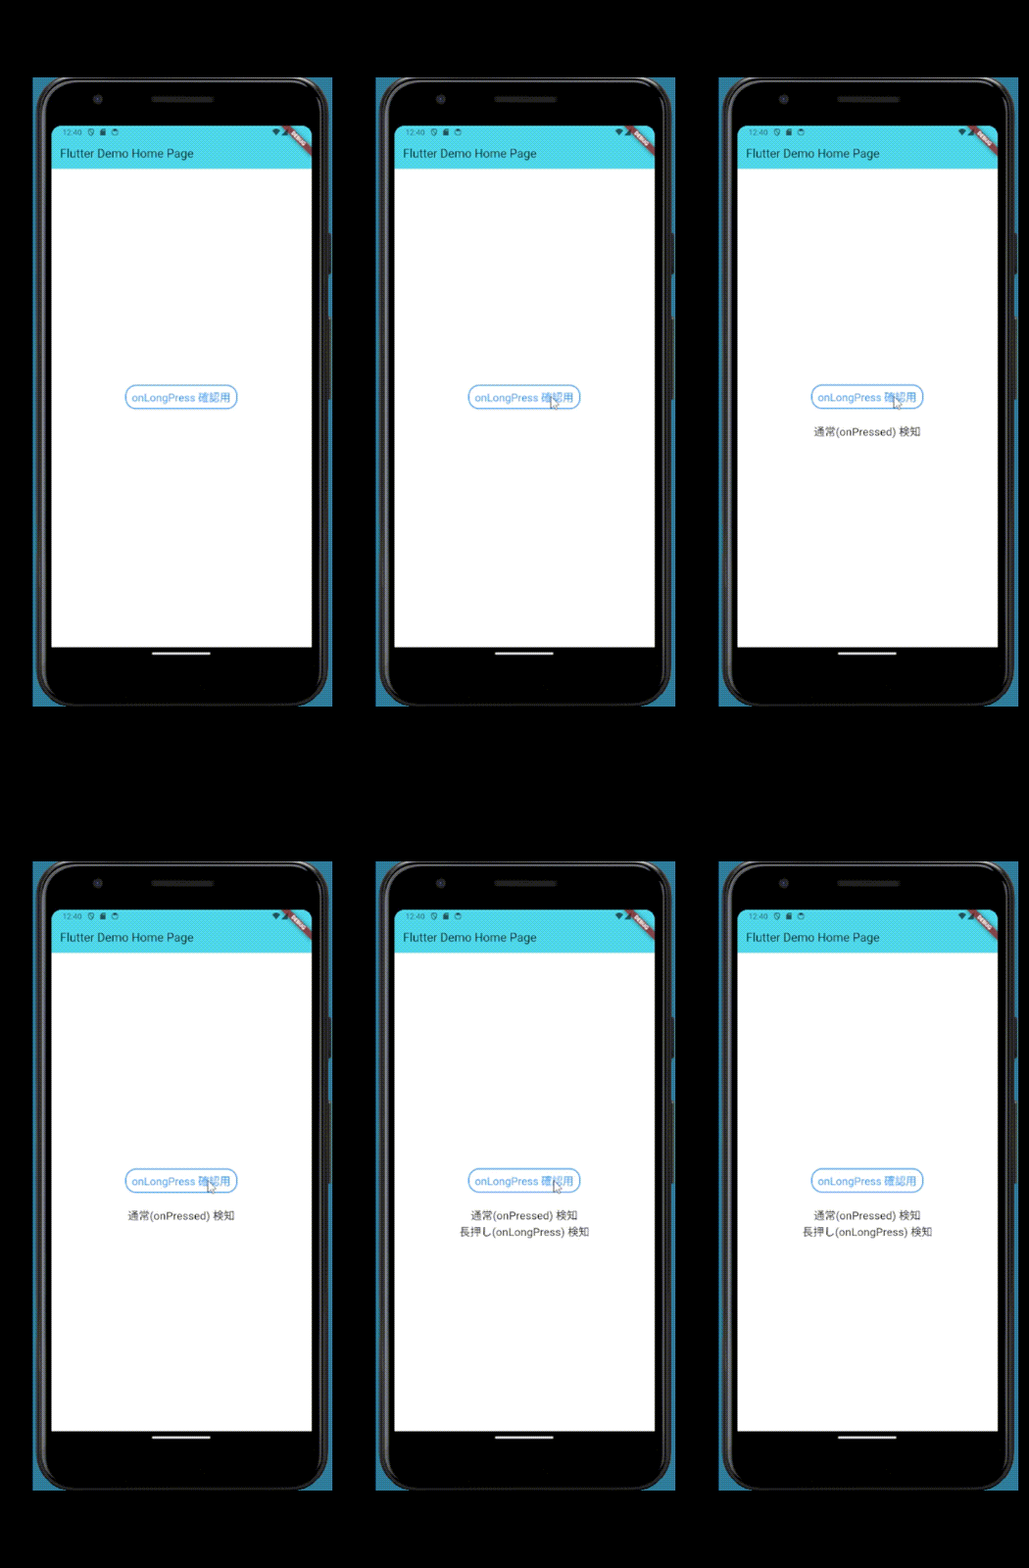
あまり使ったことがなかったonLongPressというメソッドを検証してみました。
思ってたより時間が短かったので時間が調整できたらいいなと思ったのですが、TextButtonのonLongPressの時間は調整できないのでGestureDetectorなどで作る必要がありそうです。
さいごに
普段はElevatedButtonばかり使っていたのですが、TextButtonでもスタンダードに使う事は問題ないなと思いました。
公式的には用途によってちゃんと使い分けてねといってるみたいなので今回の様にアウトラインつけたりなどはOutlinedButtonを使ったりした方がいいみたいです。
一緒に働く仲間を募集中です!
リンクラフト株式会社では、組織拡大に伴い積極的な採用活動を行っています。
少しでも興味がある方はぜひご連絡ください。
▽会社ホームページ
https://lincraft.co.jp/
▽Instagram
https://www.instagram.com/lincraft.inc/
▽ご応募はこちらより
https://lincraft.co.jp/recruit
※カジュアル面談も受付中です。ご希望の方はHPのお問い合わせフォームよりご連絡ください。


