はじめに
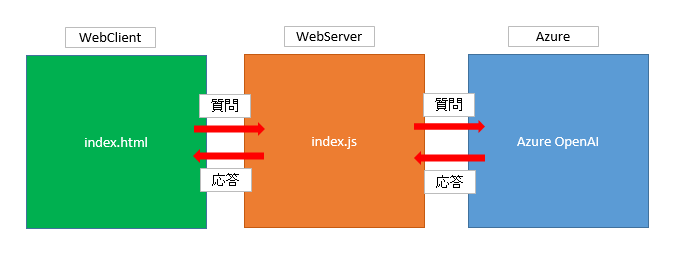
Azure OpenAIにWeb ClientからWeb Serverを介してリクエストを行い、
応答をWebクライアントに表示する方法をサンプルコードで紹介します。
※node.js、socket.io、Azure OpenAIについての学習を行う過程で作成したもののため
回りくどいやり方をしている部分があります。ご了承ください。
作るもの
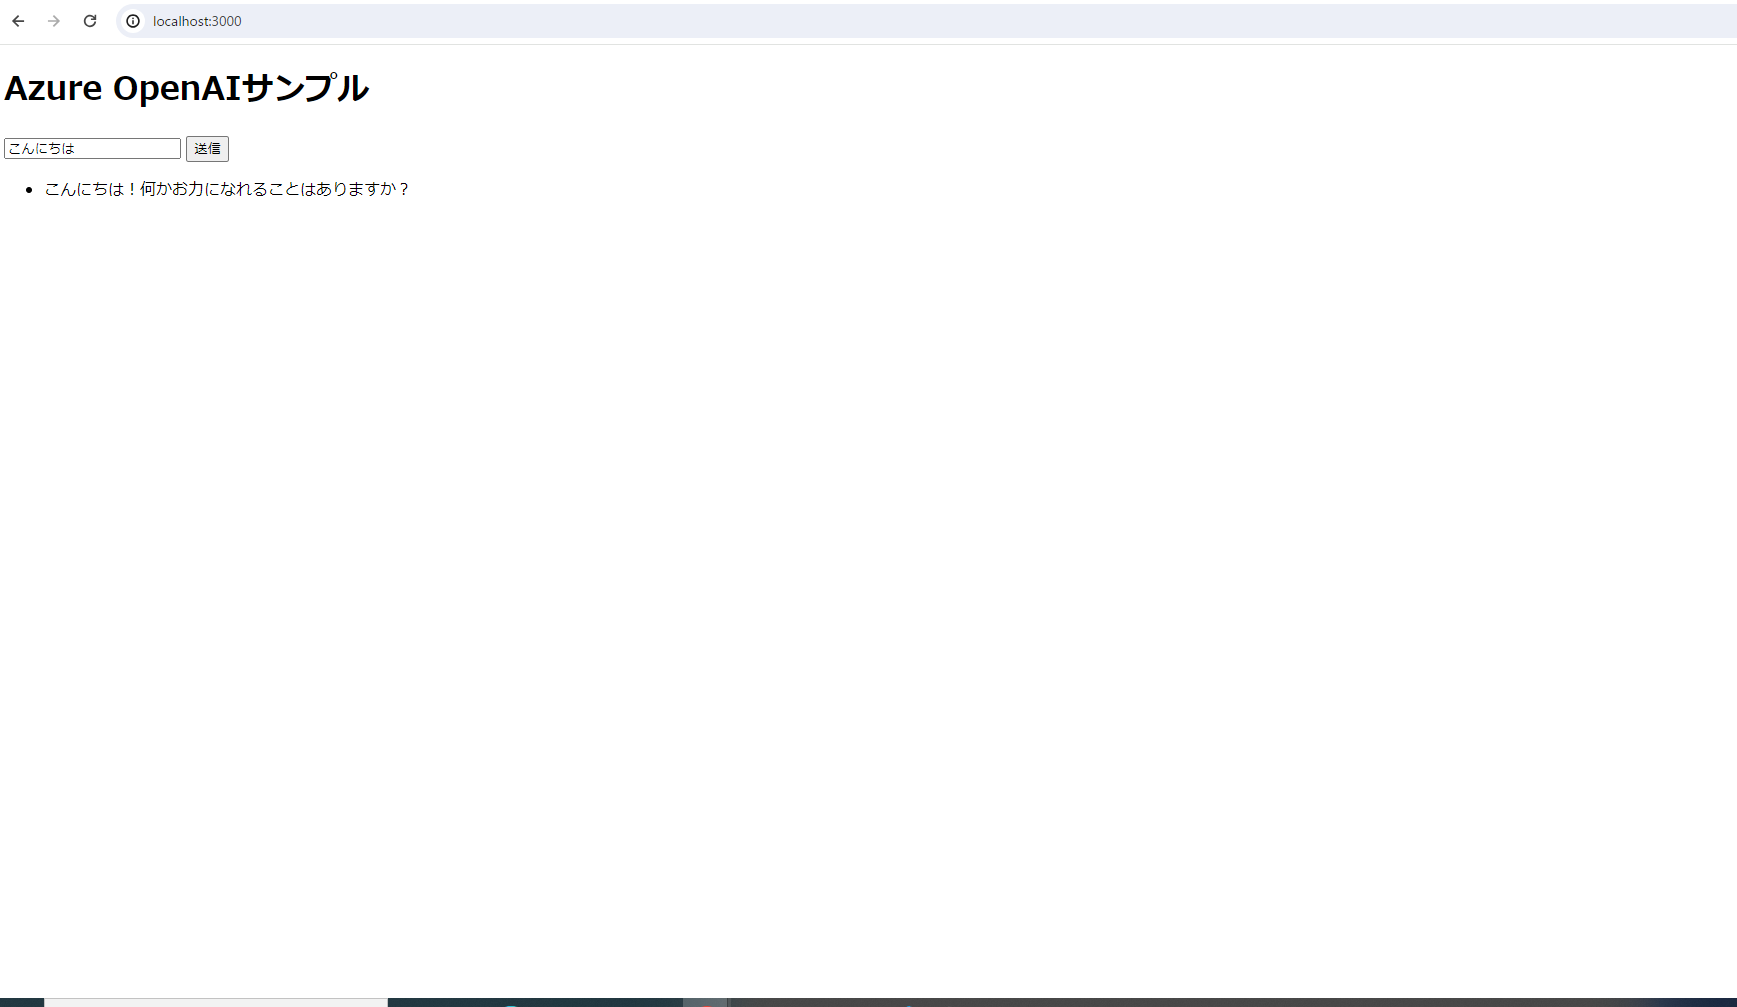
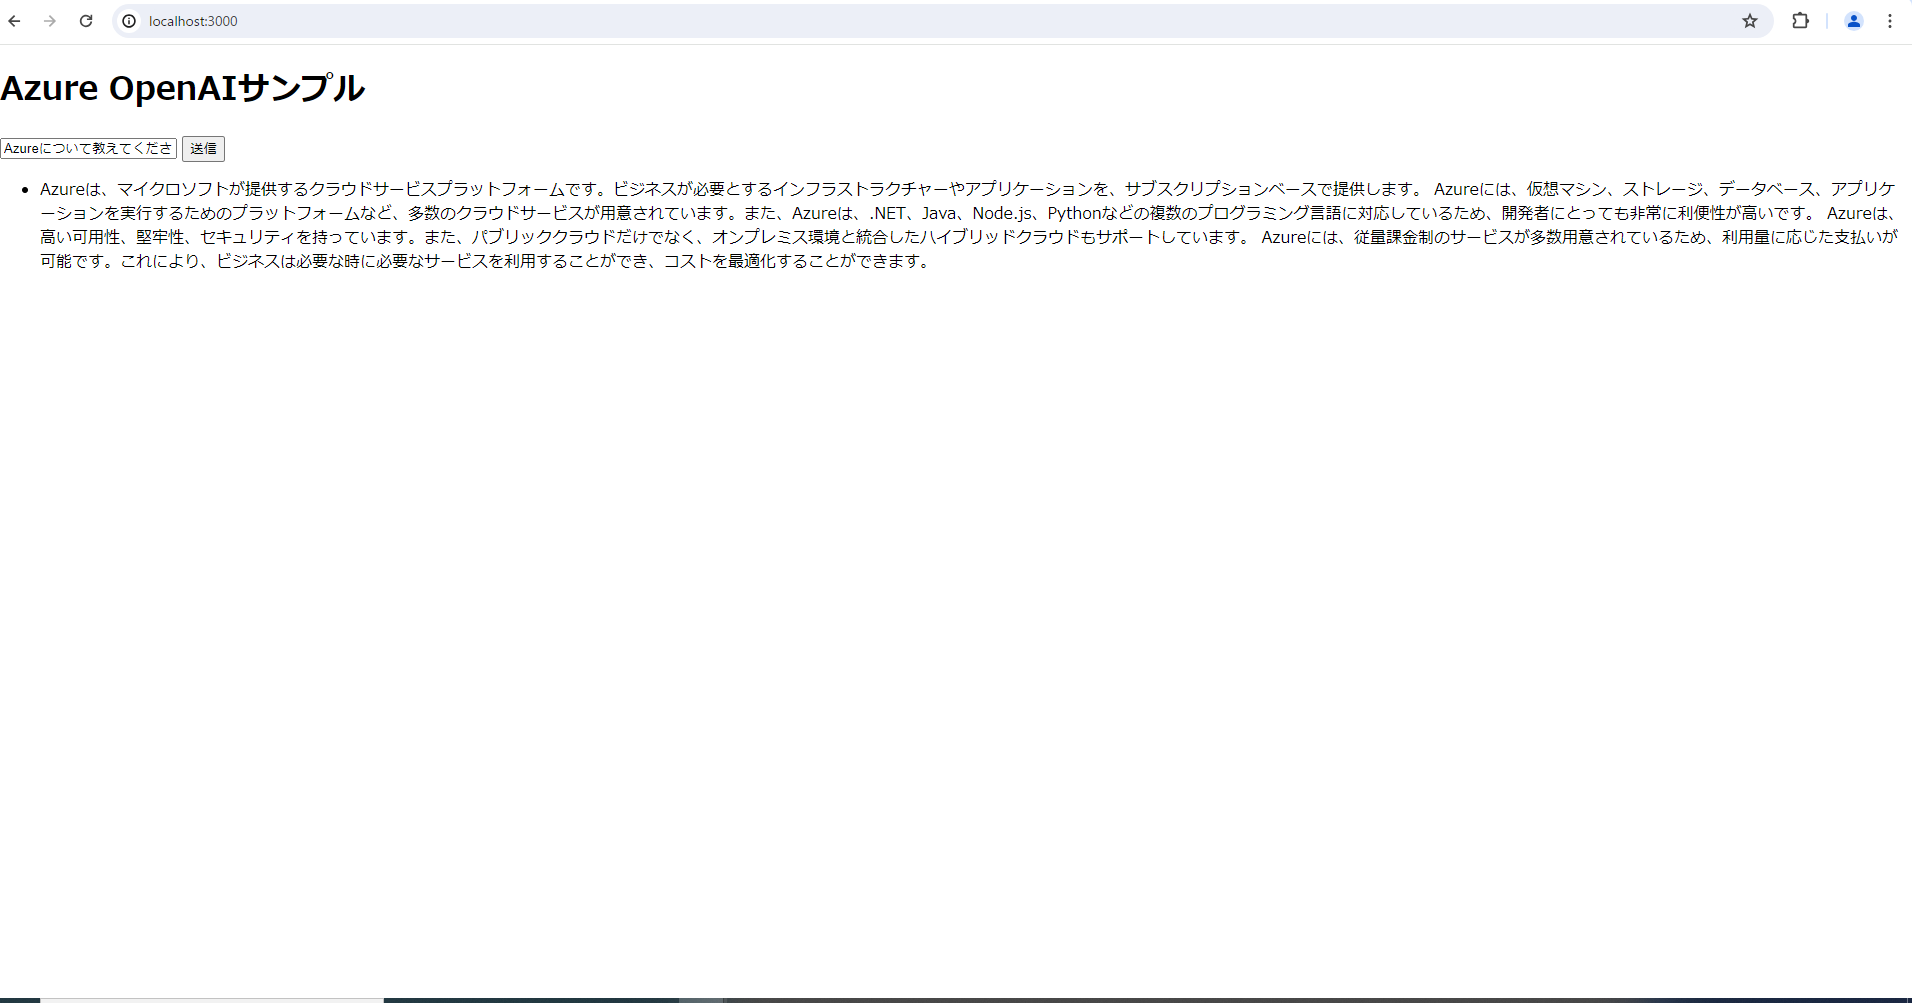
テキストボックスに質問を入力して送信するとAzure OpenAIからの応答が表示される
プログラムを作成します。
Azure OpenAIについて
Azure OpenAI Serviceとは
ChatGPTを含む、複数のAIモデルを利用することができるMicrosoftの提供するサービスのことです。
プラットフォームはAzureでAzureのリソースと組み合わせて利用することができます。
参考: Azure OpenAI Serviceとは? ChatGPTとの違いや特長について解説
環境
Node.js v18.17.0
express v4.19.2
socket.io v4.7.5
@azure/openai v1.0.0-beta.12
※Node.jsやその他ライブラリのインストール方法は割愛しています。
構成
main
   ├─ index.html
   └─ index.js
表示画面&Web Serverの作成
今回はexpressを利用してサーバーの作成を行います。
const express = require('express');
const http = require('http');

const app = express();

const server = http.Server(app); //socket.ioを利用するため

const port = 3000;

server.listen(port, () => {
  console.log('Server listening on port ${port}');
});
サーバーの起動ができたら表示させたい画面へのルーティングを行います。
const express = require('express');
const http = require('http');

const app = express();

const server = http.Server(app); //socket.ioを利用するため

const port = 3000;

//ここにルーティング設定を追加
app.get('/',(req,res) => {
    res.sendFile(__dirname + '/index.html');
});
//

server.listen(port, () => {
  console.log(`Server listening on port ${port}`);
});
表示させる画面はこちら。
<!DOCTYPE html>
<html lang="ja">
<head>
    <meta charset="utf-8">
    <title>Azure OpenAIサンプル</title>
</head>
<body>
    <h1>Azure OpenAIサンプル</h1>
    <input id="inputText" type="text">
    <input id="sendButton" type="submit">
    <ul id="messageList"></ul>
</body>
</html>
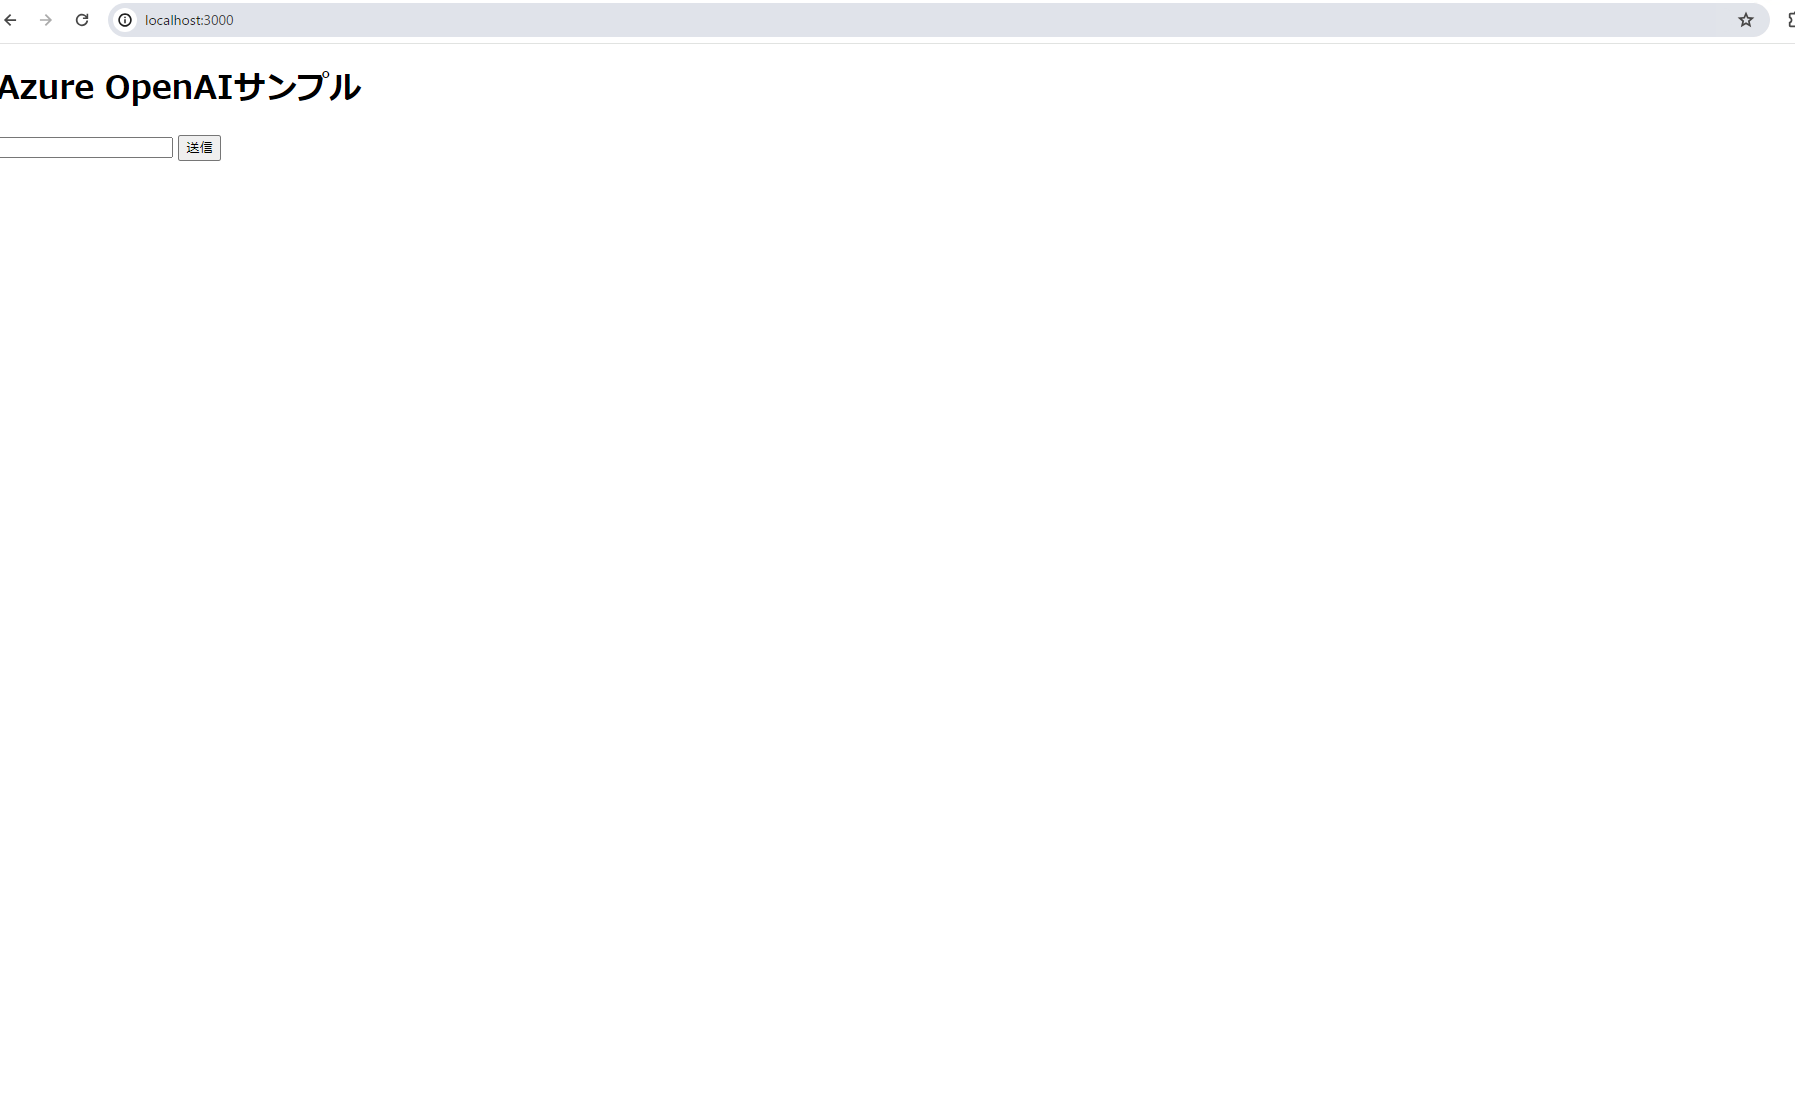
サーバーを起動した状態でhttp://localhost:3000 にアクセスするとindex.htmlが表示されます。
フロントエンドからバックエンドへのデータの受け渡し
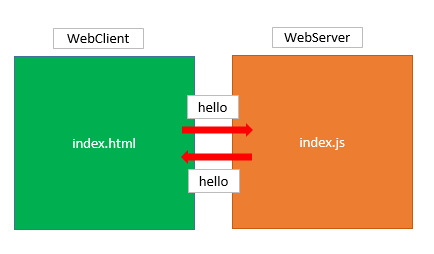
次にWeb Clientサイドのindex.htmlからWeb Serverサイドのindex.jsに質問内容の受け渡しを行うため、Node.jsのライブラリsocket.ioを利用します。
index.htmlとindex.jsに以下のコードを追加します。
    <script src="/socket.io/socket.io.js"></script>
    <script>

    const socket = io();

    //送信ボタンがクリックされた際の処理
    document.getElementById('sendButton').addEventListener('click', () => {

        const message = document.getElementById('inputText').value;

        socket.emit('sendMessage',message);//トリガー名'sendMessage'と送信内容をサーバー側に渡す
    });

    //サーバー側から応答を受け取る際の処理
    socket.on('receiveMessage', (message) => {

        const ul = document.getElementById('messageList'); //メッセージを表示する予定のul要素を取得
        const li = document.createElement('li');

        li.innerHTML = message;

        ul.appendChild(li); //ul要素に子要素としてli要素を追加
    });

    </script>
const socketIo = require('socket.io');

const io = socketIo(server);

//Websocket接続が確立すると発生
io.on('connection', (socket) => {
//Webクライアントからトリガー名'sendMessage'が送られてくると発生
socket.on('sendMessage', (ms) => {
    io.emit('receiveMessage',ms);//トリガー名'receiveMessage'と受信内容をそのままクライアントに返す
    });
});
追加し終わったコードがこちらです。
<!DOCTYPE html>
<html lang="ja">
<head>
    <meta charset="utf-8">
    <title>Azure OpenAIサンプル</title>
</head>
<body>
    <h1>Azure OpenAIサンプル</h1>
    <input id="inputText" type="text">
    <input id="sendButton" type="submit">
    <ul id="messageList"></ul>

    <script src="/socket.io/socket.io.js"></script>
    <script>

        const socket = io();
        //送信ボタンを押した際の処理
        document.getElementById('sendButton').addEventListener('click', () => {
            const message = document.getElementById('inputText').value;
            socket.emit('sendMessage',message);
        });

        //サーバー側から応答を受け取る際の処理
        socket.on('receiveMessage', (message) => {
            const ul = document.getElementById('messageList');
            const li = document.createElement('li');
            li.innerHTML = message;
            ul.appendChild(li);
        });

    </script>
</body>
</html>
const express = require('express');
const socketIo = require('socket.io');
const http = require('http');
const app = express();
const server = http.Server(app);
const io = socketIo(server);
const port = 3000;

app.get('/',(req,res) => {
    res.sendFile(__dirname + '/index.html');
});

server.listen(port, () => {
  console.log(`Server listening on port ${port}`);
});

io.on('connection', (socket) => {
    socket.on('sendMessage', (ms) => {
       io.emit('receiveMessage',ms);
    });
});
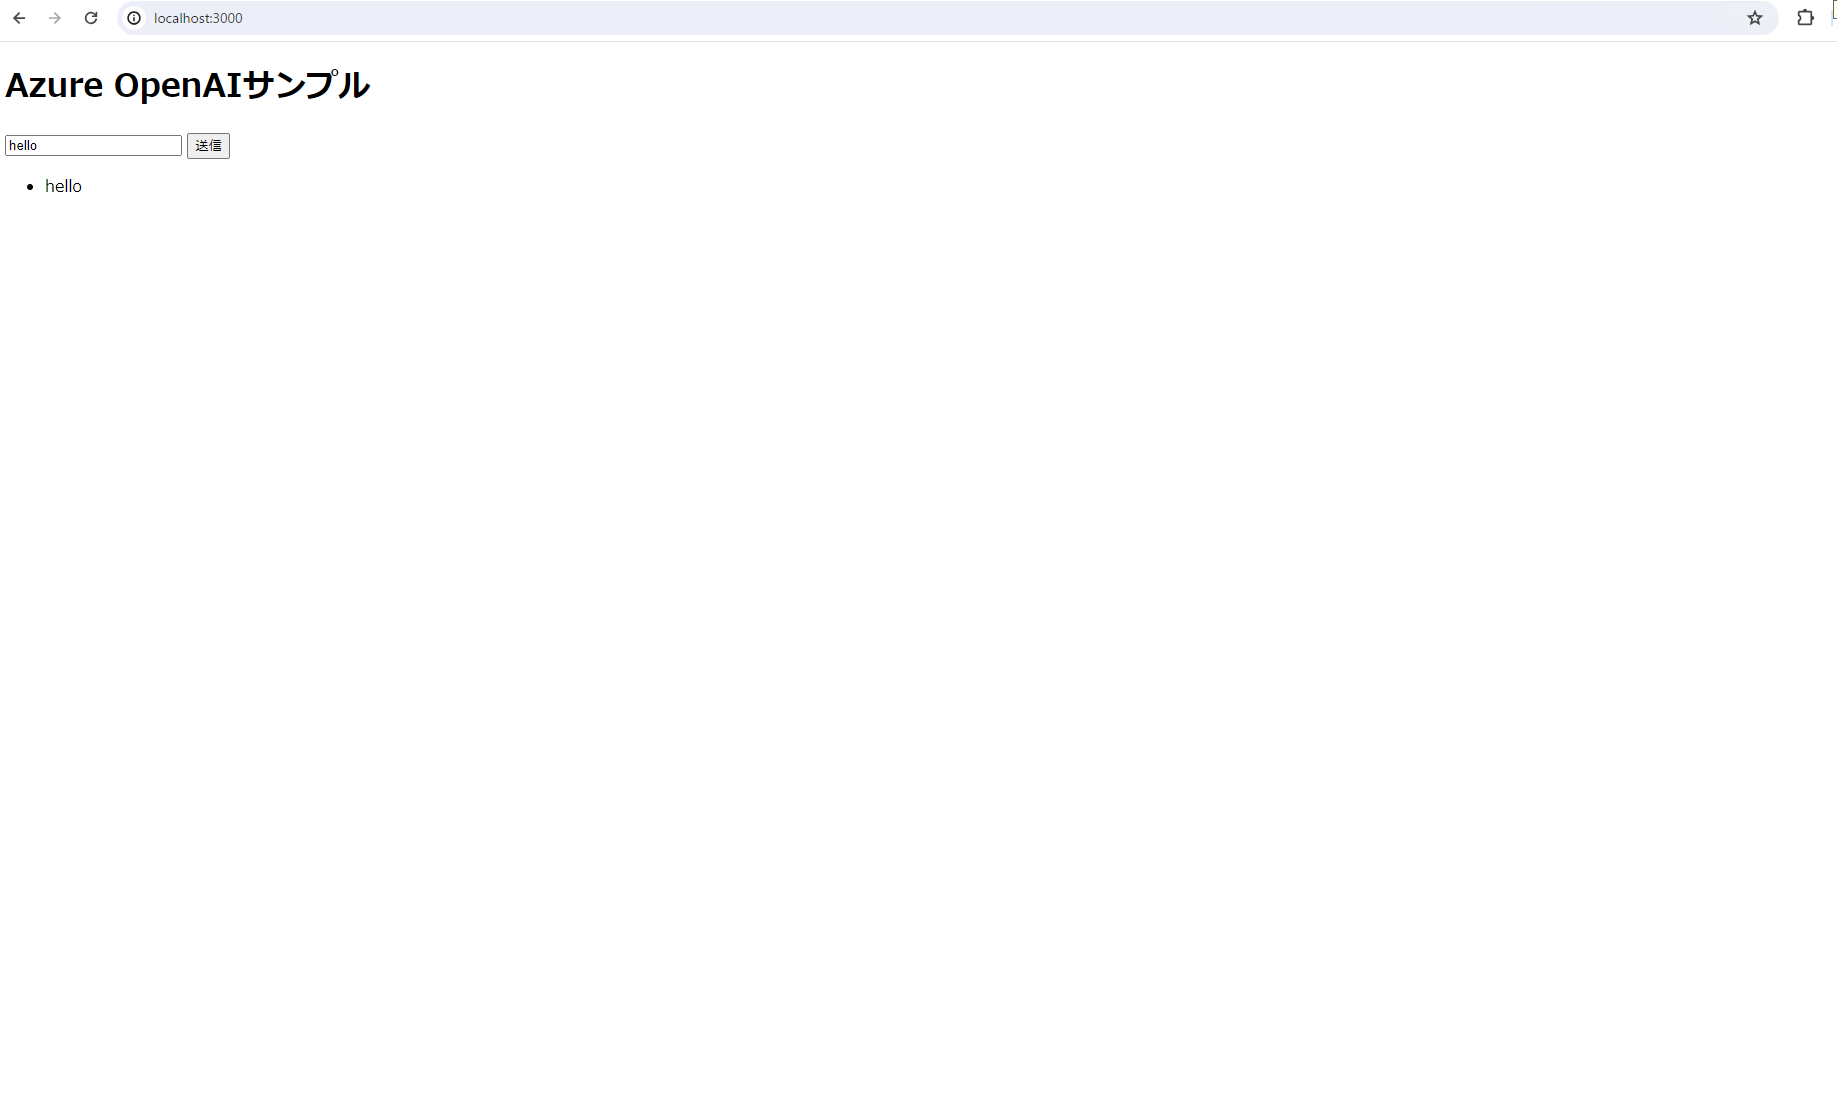
テキストボックスに入力して送信すると入力したテキストがli要素になって画面に追加されました。
以下の図の矢印部分にてsocket.ioがデータを相互にやり取りしています。
Azure OpenAIから回答を受け取る。
いよいよAzure OpenAIに質問を送信して回答を受け取る処理を記述していきます。
Azure OpenAIライブラリの利用
Azure OpenAIの作成からAPI Keyの発行まで
Azure OpenAI作成方法については以下のリンクを参考にしてください。
参考: Azure OpenAIでモデルを作成・デプロイからAPIキー発行する方法までを解説
ライブラリのインストール
今回Azure OpenAIを実装するにあたりNode.js向けのAzure OpenAIライブラリを使用しています。
インストールをするためには以下のコマンドを実行します。
npm install @azure/openai
ライブラリを利用するために用意するもの
- APIキー
- デプロイ名
- エンドポイントURL
実装
index.jsに以下のコードを追加します。
const { OpenAIClient,AzureKeyCredential } = require("@azure/openai");
const endpoint = 'YOUR ENDPOINT'; //エンドポイント
const azureApiKey = 'YOUR API KEY'; //APIキー
const deploymentId = 'YOUR DEPLOYMENT ID'; //デプロイ名

async function getAzureOpenAI(message) {
    const client = new OpenAIClient(endpoint, new AzureKeyCredential(azureApiKey));
    const messages = [
        { role: "system", content: "あなたは優秀なアシスタントで幅広い分野について回答することができます。" },
        { role: "user", content: message }
    ];

    const result = await client.getChatCompletions(deploymentId, messages);

    const [choice] = result.choices;

    return choice.message.content;
};
YOUR ○○○○の部分にはご自身Azure OpenAIの情報が入ります。
※実際に運用する場合は環境変数等を利用してソースコードに直書きしないようにしましょう。
messagesについて
Azure OpenAIに与えるmessages(Array型)にはロールを指定することができます。
| パラメータ | タイプ | 説明 |
|---|---|---|
messages |
array型 | このチャット完了要求に関連付けられている一連のメッセージ。 会話には以前のメッセージを含める必要があります。 各メッセージには role と content があります。 |
role |
string型 | 現在のメッセージを提供しているユーザーを示します。 system、user、assistant、tool、または function にできます。 |
参考: Azure OpenAI Service の REST API リファレンス
応答について
getChatCompletions();にデプロイ名とプロンプトを与えることで応答を受け取ることができます。
resultにはオブジェクト型が代入されます。
Async/awaitを利用することでオブジェクト型にすべての値が格納されるのを待ちます。
const result = await client.getChatCompletions(deploymentId, messages);
result中身は以下の通りになります。
{
  id: '',
  model: '',
  object: '',
  systemFingerprint: null,
  created: 1970-01-20T20:07:10.961Z,
  promptFilterResults: [ { promptIndex: 0, contentFilterResults: [Object] } ],
  usage: { completionTokens: 77, promptTokens: 53, totalTokens: 130 },
  choices: [
    {
      index: 0,
      logprobs: null,
      message: [Object],
      finishReason: '',
      contentFilterResults: [Object]
    }
  ]
}
このままではAIからの回答が入っているmessage.contentが参照できません。
choicesに対して展開代入を行います。
const [choice] = result.choices;
展開代入をしたことによりcontentが参照できるようになりました。
{
  index: 0,
  logprobs: null,
  message: { content: '申し訳ありません、何か質問がありますか?', role: 'assistant' },
  finishReason: 'stop',
  contentFilterResults: {
    hate: { filtered: false, severity: 'safe' },
    sexual: { filtered: false, severity: 'safe' },
    violence: { filtered: false, severity: 'safe' },
    selfHarm: { filtered: false, severity: 'safe' }
  }
}
応答を受け取ることができたので最後にWeb Clientに応答を送る処理を記述します。
    socket.on('sendMessage', async(ms) => {
        const resp = await getAzureOpenAI(ms);
        io.emit('receiveMessage',resp);
    });
最後にトリガー名:'sendMessage'を受け取った際の処理を上記のように書き換えてください。
先ほど記述したAzure OpenAIから応答を受け取る関数にWeb Clientで入力した値を渡し、
respに格納された応答をトリガー名:'receiveMessage'にて WebClientに送信します。
以上となります。
サーバーが起動した状態でメッセージを送信すると回答がHTML上に表示されるようになりましたね。
完成形のソースコードはこちらです。
<!DOCTYPE html>
<html lang="ja">

<head>
    <meta charset="utf-8">
    <title>Azure OpenAIサンプル</title>
</head>

<body>
    <h1>Azure OpenAIサンプル</h1>
    <input id="inputText" type="text">
    <input id="sendButton" type="submit">
    <ul id="messageList"></ul>

    <script src="/socket.io/socket.io.js"></script>
    <script>

        const socket = io();

        //送信ボタンが押された際の処理
        document.getElementById('sendButton').addEventListener('click', () => {

            const message = document.getElementById('inputText').value;

            socket.emit('sendMessage', message);

        });

        //サーバー側から応答を受け取る際の処理
        socket.on('receiveMessage', (message) => {

            const ul = document.getElementById('messageList');
            const li = document.createElement('li');

            li.innerHTML = message;

            ul.appendChild(li);

        });

    </script>
</body>

</html>
const express = require('express');
const socketIo = require('socket.io');
const http = require('http');
const { OpenAIClient, AzureKeyCredential } = require('@azure/openai');
const endpoint = 'YOUR ENDPOINT'; //エンドポイント
const azureApiKey = 'YOUR API KEY'; //APIキー
const deploymentId = 'YOUR DEPLOYMENT ID'; //デプロイ名
const app = express();
const server = http.Server(app);
const io = socketIo(server);
const port = 3000;

app.get('/', (req, res) => {
    res.sendFile(__dirname + '/index.html');
});

server.listen(port, () => {
    console.log(`Server listening on port ${port}`);
});

io.on('connection', (socket) => {
    socket.on('sendMessage', async (ms) => {
        const resp = await getAzureOpenAI(ms);
        io.emit('receiveMessage', resp);
    });
});

async function getAzureOpenAI(ms) {
    const client = new OpenAIClient(endpoint, new AzureKeyCredential(azureApiKey));
    const messages = [
        { role: "system", content: "あなたは優秀なアシスタントで幅広い分野について回答することができます。" },
        { role: "user", content: ms }
    ];

    const result = await client.getChatCompletions(deploymentId, messages);

    const [choice] = result.choices;

    return choice.message.content;
};
注意点
emit('イベント名', {データ})の形でデータを送信すると、コネクションしているすべてのユーザーにデータが送信されてしまいます。
Roomを作成することで特定のユーザにのみ送信することが可能になります。
参考: socket.io 1.x でプライベートチャット作成
最後に
Azure OpenAIとsocket.ioを同時に学ぶ良い機会になりました。
今後より理解を深めて実用的な形に仕上げていければよいなと感じています。
Azure OpenAIについては調査を進めている段階なので、何か良い情報があれば
発信していきたいと思います。
