こんにちは。エキサイトでAndroid開発に携わっている伊藤(克)です。
こちらは XTechグループ 2 Advent Calendar 2020 の14日目の記事です。
はじめに
ただ単にAndroidで通知を表示したいだけであれば単純ですが、場合によっては考慮しなければならないことがいくつかあります。
今回は通話着信時の通知を仮定して、順に進めていこうと思います。
通知に関する詳細な情報については公式のドキュメントも参照ください。
着信通知の表示
着信時の通知表示について以下で実装していきます。
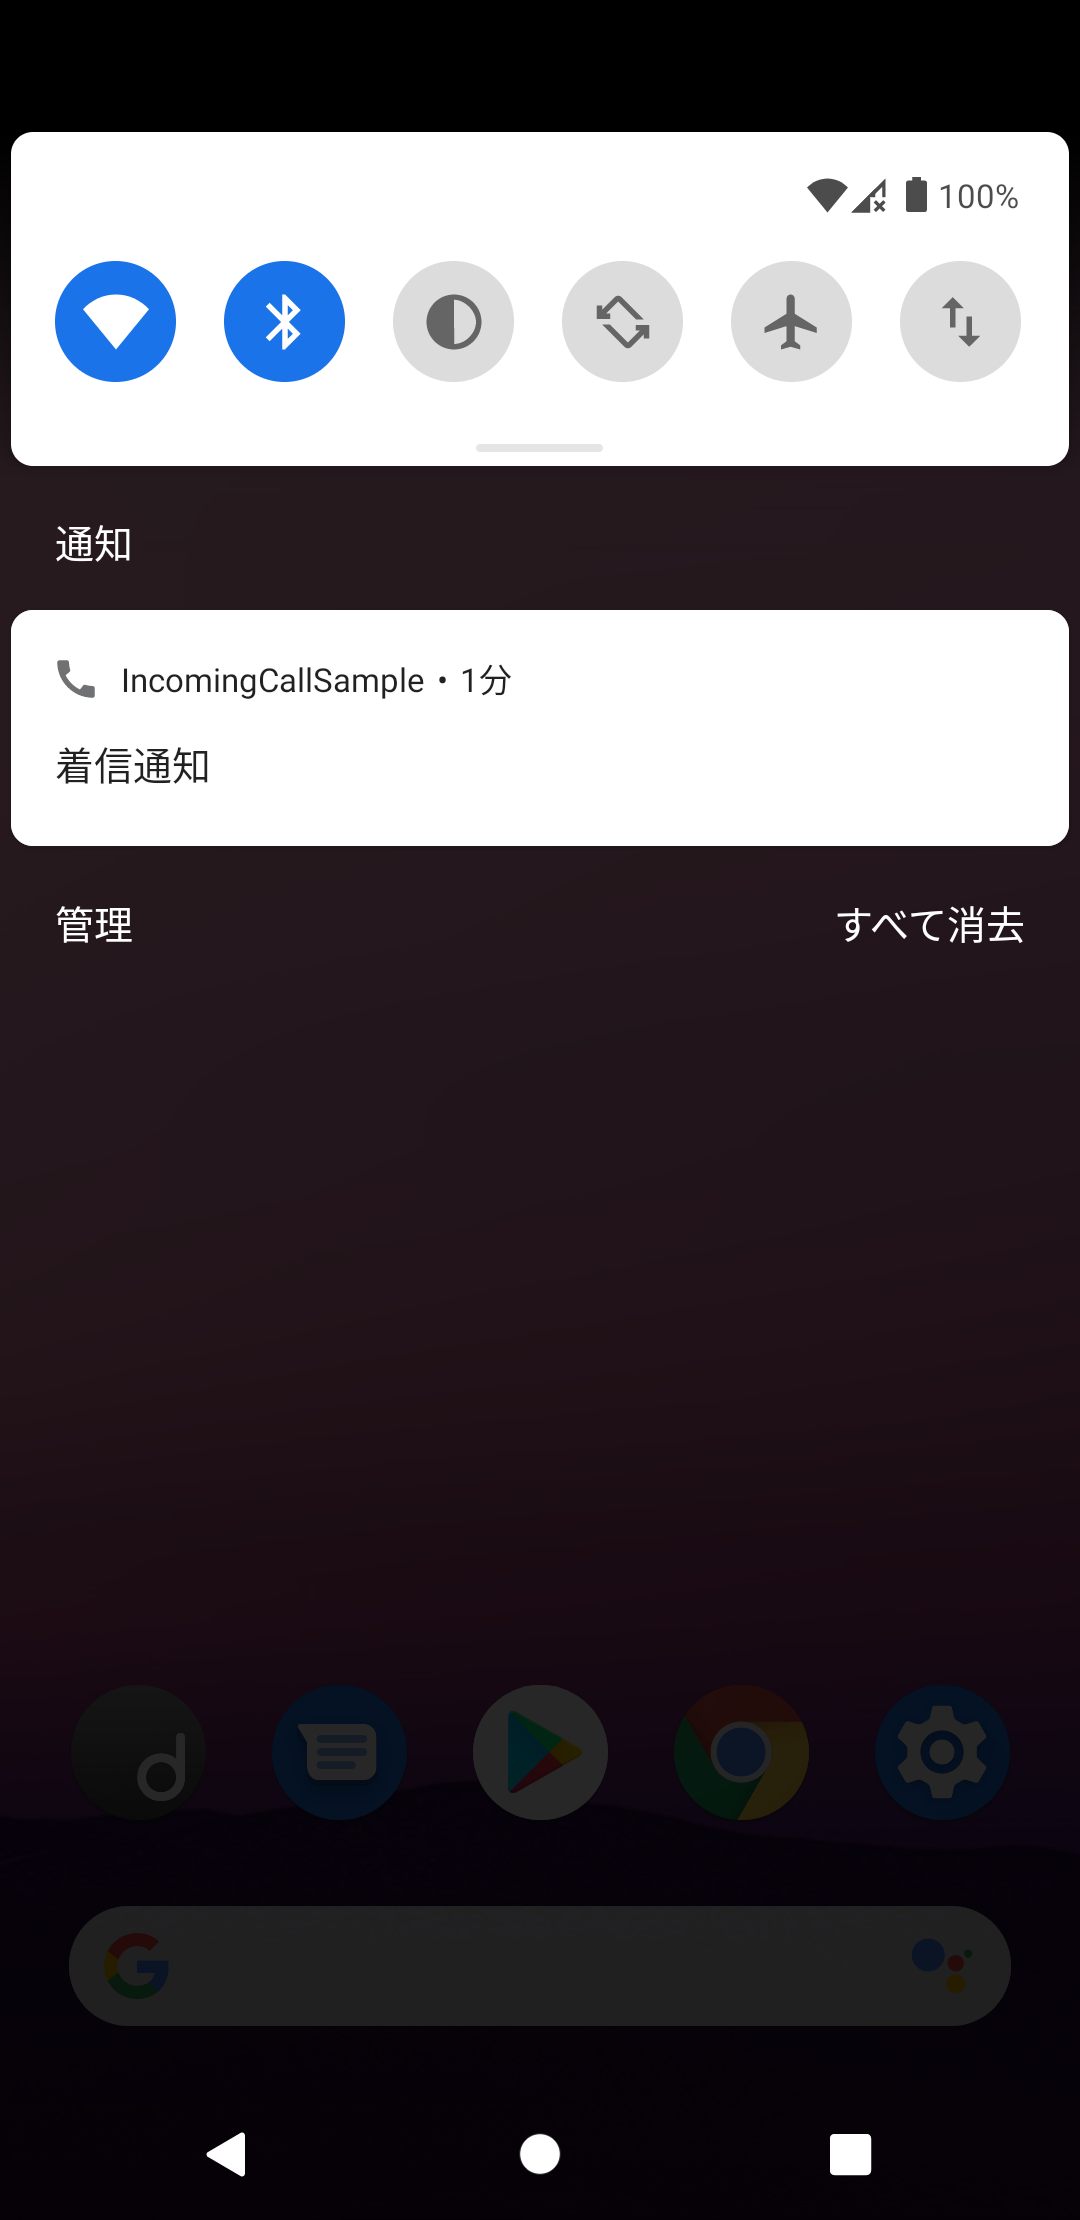
1. 通知の表示
まずはただ単純に通知を表示してみます。
Android 8からは通知チャンネルの対応が必須なため、こちらも合わせて設定します。
class MainActivity : AppCompatActivity() {

    override fun onCreate(savedInstanceState: Bundle?) {
        super.onCreate(savedInstanceState)
        setContentView(R.layout.activity_main)

        val notifications = getSystemService(Service.NOTIFICATION_SERVICE) as NotificationManager

        // Android 8以降の場合は通知チャンネルを作成
        if (Build.VERSION.SDK_INT >= Build.VERSION_CODES.O) {
            val channel = NotificationChannel(
                    "incoming_call", // チャンネルのID
                    "通話着信の通知", // チャンネルの表示名
                    NotificationManager.IMPORTANCE_DEFAULT // チャンネルの重要度
            )
            notifications.createNotificationChannel(channel)
        }

        // 通知を表示
        val notification = NotificationCompat.Builder(this, "incoming_call")
                .setSmallIcon(R.drawable.ic_call)
                .setContentText("着信通知")
                .build()
        notifications.notify(1, notification)
    }
}
2. 通知のライフサイクル
着信通知の場合、通知には着信開始(着信した)から着信終了(着信に応答したなど)までのライフサイクルが存在します。
前項ではActivityで通知を表示しましたが、着信に画面(Activity)はなくても問題ないはずです。
Androidにはバックグラウンドで処理を実行し、その状態をユーザに表示するためのForegroundServiceというものが存在します。
着信中に通知を表示するように変更してみましょう。
class IncomingCallService : Service() {

    override fun onBind(intent: Intent?): IBinder? {
        return null
    }

    override fun onCreate() {
        super.onCreate()

        /* 通知チャンネルを作成 */

        startForeground(1, /* Notification */) // ① ServiceをForegroundServiceで実行する
    }
}
<!-- Android 9からはForegroundServiceの使用に宣言が必要 -->
<uses-permission android:name="android.permission.FOREGROUND_SERVICE" />
① ServiceをForegroundServiceで実行する
Serviceを起動した後、startForegroundメソッドを実行することでServiceはForegroundServiceとして扱われるようになります。
引数に渡した通知がForegroundServiceの実行中に表示されます。
これにより、着信時にServiceを起動し不要になったらServiceを破棄することで、ライフサイクルに合わせて通知が管理されるようになりました。
3. 通知のアクション
通知は表示できましたが、通知から直接に応答や拒否などの操作を行いたいものです。
通知にアクションを追加してみます。
class IncomingCallService : Service() {

    companion object {

        private const val ACTION_ACCEPT = "ACTION_ACCEPT"
        private const val ACTION_REJECT = "ACTION_REJECT"
    }

    override fun onCreate() {
        super.onCreate()

        /* 通知チャンネルを作成 */

        // 通知を表示
        val notification = NotificationCompat.Builder(this, "incoming_call")
                .setSmallIcon(R.drawable.ic_call)
                .setContentText("着信通知")
                // ① 通知にアクションを設定する
                .addAction(createAcceptAction())
                .addAction(createRejectAction())
                .build()
        startForeground(1, notification)
    }

    override fun onStartCommand(intent: Intent?, flags: Int, startId: Int): Int {
        // ② 通知のアクションから実行される
        when (intent?.action) {
            ACTION_ACCEPT -> {
                /* 着信に応答する処理 */
            }
            ACTION_REJECT -> {
                /* 着信を拒否する処理 */
            }
        }
        return super.onStartCommand(intent, flags, startId)
    }

    private fun createAcceptAction(): NotificationCompat.Action {
        val intent = Intent(this, IncomingCallService::class.java)
                .setAction(ACTION_ACCEPT)
        val pendingIntent = createServiceIntent(intent)
        return NotificationCompat.Action.Builder(R.drawable.ic_call, "応答", pendingIntent)
                .build()
    }

    private fun createRejectAction(): NotificationCompat.Action {
        val intent = Intent(this, IncomingCallService::class.java)
                .setAction(ACTION_REJECT)
        val pendingIntent = createServiceIntent(intent)
        return NotificationCompat.Action.Builder(R.drawable.ic_call, "拒否", pendingIntent)
                .build()
    }

    private fun createServiceIntent(intent: Intent): PendingIntent {
        return PendingIntent.getService(this, 0, intent, PendingIntent.FLAG_UPDATE_CURRENT)
    }
}
① 通知にアクションを設定する
通知のアクションにはPendingIntentを使用します。
Intentに起動先を設定し、それをPendingIntentに詰めて通知のアクションに設定します。
今回は自身のServiceを起動先に指定します。
※ Android 7からは通知のアクションに設定したアイコンは基本的に使用されませんが、古いOSやAndroid Wearでは表示されるため必要です。
https://android-developers.googleblog.com/2016/06/notifications-in-android-n.html
② 通知のアクションから実行される
PendingIntent経由でonStartCommandが実行されます。
選択されたアクションに応じた処理をここで実行します。

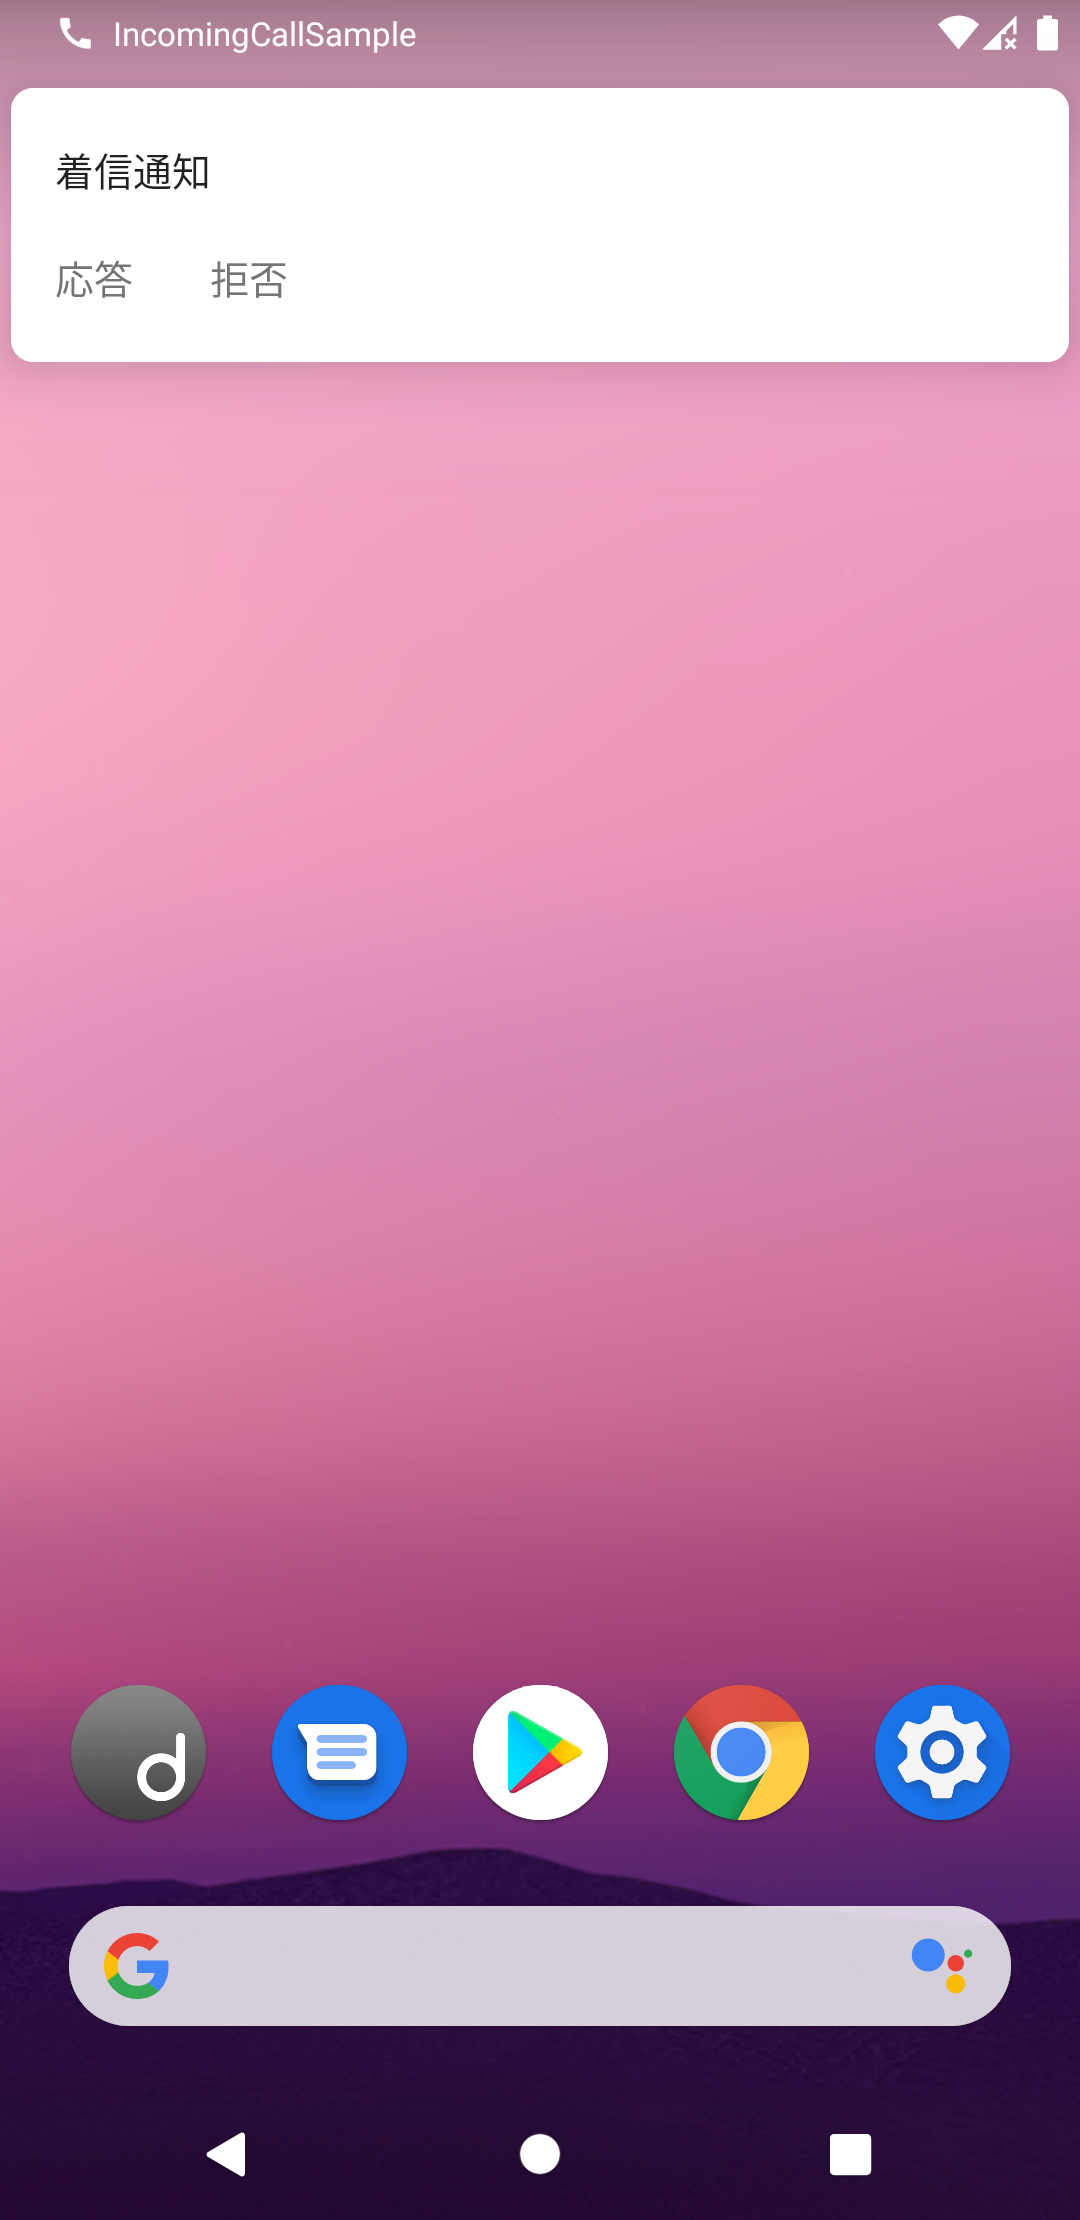
4. ヘッドアップ通知
通知は表示しましたが今のままでは通知欄にさり気なく表示されるだけなので、着信があったことに気づかないかもしれません。
通知の重要度を上げると、ヘッドアップ通知と呼ばれるものになり、画面上部に覆い被さるように通知が表示されます。
通常の通知よりも目立つことになるので、着信などの重要な通知の場合にはこちらの設定をしておきましょう。
class IncomingCallService : Service() {

    ~~~

    override fun onCreate() {
        super.onCreate()

        // 通知チャンネルを作成
        if (Build.VERSION.SDK_INT >= Build.VERSION_CODES.O) {
            val channel = NotificationChannel(
                    "incoming_call",
                    "通話の着信通知",
                    NotificationManager.IMPORTANCE_HIGH // ① 通知チャンネルの重要度
            )
            val notifications = getSystemService(NOTIFICATION_SERVICE) as NotificationManager
            notifications.createNotificationChannel(channel)
        }

        // 通知を表示
        val notification = NotificationCompat.Builder(this, "incoming_call")
                .setSmallIcon(R.drawable.ic_call)
                .setContentText("着信通知")
                .setPriority(NotificationCompat.PRIORITY_HIGH) // ② 通知の重要度
                .setCategory(NotificationCompat.CATEGORY_CALL) // ③ 通知のカテゴリ
                .addAction(createAcceptAction())
                .addAction(createRejectAction())
                .build()
        startForeground(1, notification)
    }

    ~~~

}
① 通知チャンネルの重要度
② 通知の重要度
重要度を上げるとヘッドアップ通知と呼ばれるものになり、画面上部に覆いかぶさるように通知が表示されます。
通知チャンネルが存在するAndroid 8以上の場合は通知チャンネルの重要度、そうでないAndroid 7以下の場合は通知の重要度が適用されるので両方を設定しておきましょう。
③ 通知のカテゴリ
通知にはCATEGORY_ALARMやCATEGORY_REMINDERなどのシステム上の種別を設定することができます。
種別を設定しておくことで、サイレントモードでも適切に通知を表示することができます。
CATEGORY_CALLも用意されているので、今回は着信通知ということでこちらを設定しておきましょう。
着信画面の表示
着信時の通知については今までの実装で一通り形になりました。
しかし通知だけでは表現できる内容に限りがあります。
例えば通話の着信であればマイクの権限を取得するために画面が必要になることもあるでしょう。
以下では着信画面を表示する場合の実装を追加していきます。
1. 通知からの画面起動
単純に通知から画面を起動する場合は、通知にActivityのIntentを設定すれば実現可能です。
val notification = NotificationCompat.Builder(this, "incoming_call")
        .setSmallIcon(R.drawable.ic_call)
        .setContentText("着信通知")
        .setPriority(NotificationCompat.PRIORITY_HIGH)
        .setCategory(NotificationCompat.CATEGORY_CALL)
        .addAction(createAcceptAction())
        .addAction(createRejectAction())
        .setContentIntent(createActivityIntent()) // ① 通知タップ時の設定
        .build()

private fun createActivityIntent(): PendingIntent {
    val intent = Intent(this, MainActivity::class.java)
    return PendingIntent.getActivity(this, 0, intent, PendingIntent.FLAG_UPDATE_CURRENT)
}
① 通知タップ時の設定
起動する画面のPendingIntentを設定します。
今回は仮としてMainActivity(初期画面)を使用しています。
この実装により、通知をタップすると画面が起動するようになります。
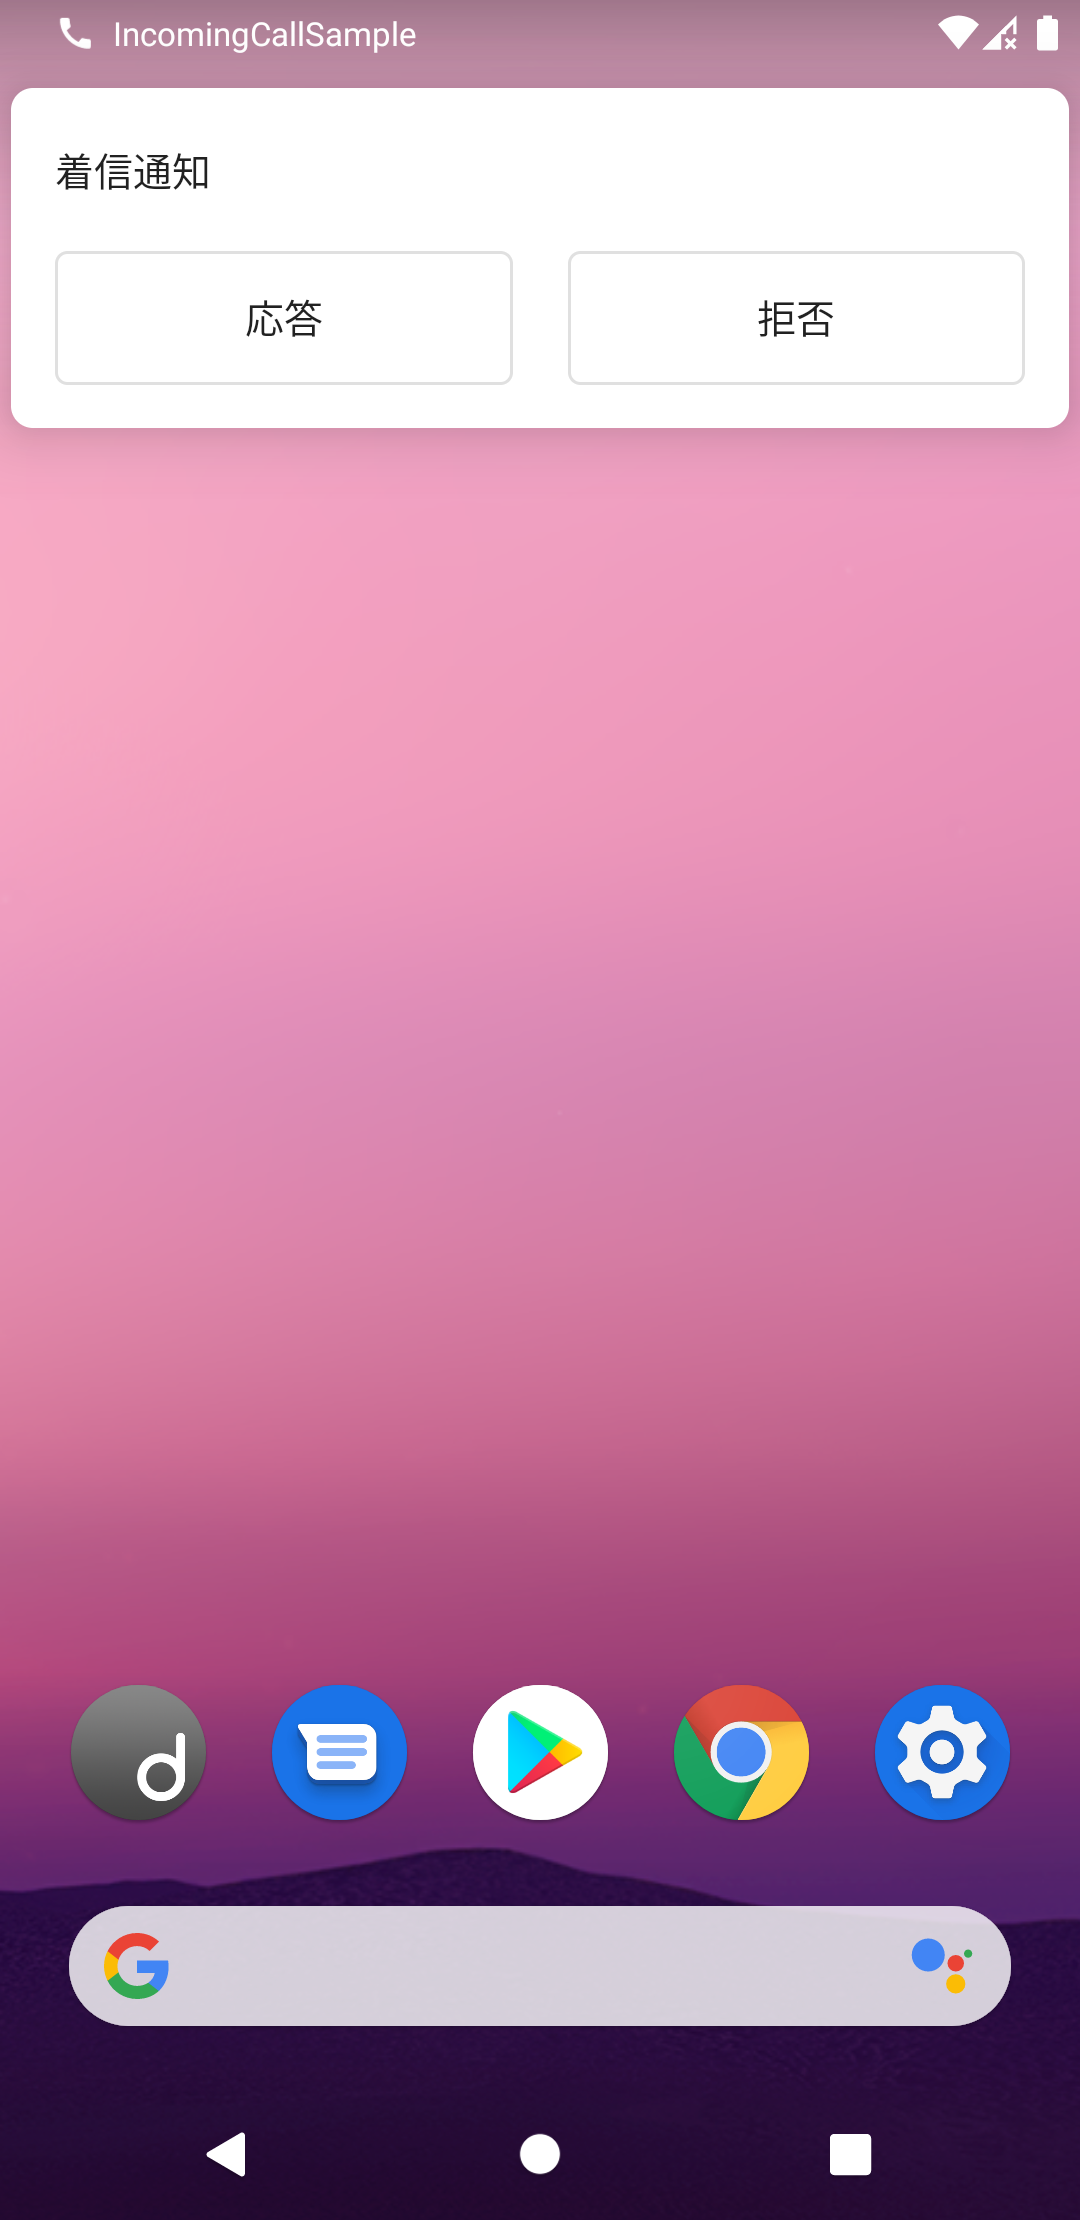
2. FullscreenIntentの使用
目覚まし時計や通話の着信など、ユーザが即時に対応する必要のある通知にはFullscreenIntentを使用することができます。
FullscreenIntentには下記の特徴があります。
-
ContentIntentを設定したときと同様に、通知のタップ時に画面を起動する - ヘッドアップ通知に近い表示だが、アクションが強調され画面上部に表示され続ける
余談ではありますが、私は当初FullscreenIntentという名称やドキュメントの内容から「通知の表示時にFullscreenIntentに指定した画面を起動する」という認識でいました。
しかし実態は上記の通り「通知を画面上部に表示し続け、通知のタップ時にFullscreenIntentに指定した画面を起動する」というもので、イメージとは異なる挙動に悩まされました。 ![]()
val notification = NotificationCompat.Builder(this, "incoming_call")
        .setSmallIcon(R.drawable.ic_call)
        .setContentText("着信通知")
        .setPriority(NotificationCompat.PRIORITY_HIGH)
        .setCategory(NotificationCompat.CATEGORY_CALL)
        .addAction(createAcceptAction())
        .addAction(createRejectAction())
        .setFullScreenIntent(createActivityIntent(), true) // ① FullscreenIntentを設定
        .build()
<!-- Android 10からはFullScreenIntentの使用に宣言が必要 -->
<uses-permission android:name="android.permission.USE_FULL_SCREEN_INTENT" />
① FullscreenIntentを設定
前項でのContentIntentの設定と同様に、起動する画面のPendingIntentを設定します。
まとめ
着信通知を行う場合の要点を下記にまとめます。
- ForegroundServiceで通知のライフサイクルを管理する
- 通知にアクションを設定して通知から対応できるようにする
- 通知のカテゴリと重要度を適切に設定する
- FullscreenIntentを使用して即時性を高める
通話の着信のようにユーザが即時に対応する必要がある通知では、それを容易にするための設定をしておくことが重要です。
ただし、通知の重要度を不当に高くしたりむやみにヘッドアップ通知を多様したりすることはユーザの体験を損ねアプリの忌避に繋がるので、用途に合った設定をするようにしましょう。
用法用量を守って素敵なAndroidライフを!
エキサイトではステキな仲間たちを募集中です ![]()
https://www.wantedly.com/companies/excite