双方向データバインディングが必要になって調べたので、備忘録として残しておきます。
双方向データバインディングとは
Databindingは、レイアウトファイルに画面に表示するデータをバインド出来る機能のこと。
もう少し乱暴に言うと、あるデータを使うようにレイアウトのxmlファイルでよしなに定義しておいて、アプリ実行時にそのデータをレイアウトにまるっと渡すと、表示に反映する部分のコードを書かなくて良くなるというちょっと便利な手法です。
あんまりやりすぎると逆に可読性下がるのでやり過ぎは注意ですが、便利なので慣れるととても使い勝手が良い機能です。特にLiveDataと組み合わせると、プログラム内で変更した値の表示を反映させるコードを書かずとも反映されるようになるため非常に便利です。
しかし、これは基本的に「表示するデータ」を指定するもので、アプリならばたいていはユーザーからのアクション、入力を何かしら受け付ける画面があると思います。
そんなとき、ユーザーが入力したデータもまた、LiveDataに自動的に入れたいなーという時に使うのは、「双方向データバインディング」です。データ→表示 だけでなく、(ユーザー入力によって変更された)表示→データ の2方向でデータバインディングしたいので、「双方向」データバインディングとなるわけです。
ちなみに英語だと Two-way Data Bindingになるようです。
やりたいこと
以下のようなRadioGroupで囲ったRadioButtonの選択状況を、LiveDataとDatabindingしたい。
ユーザーの選択変更がLiveDataに反映もされるよう、双方向データバインディングがしたい。
<?xml version="1.0" encoding="utf-8"?>
<layout xmlns:android="http://schemas.android.com/apk/res/android"
    xmlns:app="http://schemas.android.com/apk/res-auto"
    xmlns:tools="http://schemas.android.com/tools">

    <data>
        <variable
            name="viewmodel"
            type="com.example.twoway.binding.MainViewModel" />
    </data>

    <androidx.constraintlayout.widget.ConstraintLayout
        android:layout_width="match_parent"
        android:layout_height="match_parent"
        tools:context=".MainActivity">


        <RadioGroup
            android:id="@+id/radioGroup"
            android:layout_width="wrap_content"
            android:layout_height="wrap_content"
            app:layout_constraintBottom_toBottomOf="parent"
            app:layout_constraintEnd_toEndOf="parent"
            app:layout_constraintStart_toStartOf="parent"
            app:layout_constraintTop_toTopOf="parent">

            <RadioButton
                android:id="@+id/radioA"
                android:layout_width="match_parent"
                android:layout_height="wrap_content"
                android:text="Type A" />

            <RadioButton
                android:id="@+id/radioB"
                android:layout_width="match_parent"
                android:layout_height="wrap_content"
                android:text="Type B" />

            <RadioButton
                android:id="@+id/radioC"
                android:layout_width="match_parent"
                android:layout_height="wrap_content"
                android:text="Type C" />
        </RadioGroup>

        <TextView
            android:id="@+id/textView"
            android:layout_width="0dp"
            android:layout_height="0dp"
            android:layout_marginStart="8dp"
            android:layout_marginTop="16dp"
            android:layout_marginEnd="8dp"
            android:text="TextView"
            app:layout_constraintBottom_toBottomOf="parent"
            app:layout_constraintEnd_toEndOf="parent"
            app:layout_constraintStart_toStartOf="parent"
            app:layout_constraintTop_toBottomOf="@+id/radioGroup" />
    </androidx.constraintlayout.widget.ConstraintLayout>
</layout>

環境など
| ツールなど | バージョンなど |
|---|---|
| MacBook Pro 2017 | macOS Catallina |
| Android Studio | 3.6.3 |
| Kotlin | 1.3.71 |
その他のバージョンなどは以下のbuild.gradleをご参考下さい。
buildscript {
    ext.kotlin_version = '1.3.71'
    ext.lifecycleVersion = "2.2.0"
    ext.gradle_version = '3.6.3'
    repositories {
        google()
        jcenter()

    }
    dependencies {
        classpath "com.android.tools.build:gradle:$gradle_version"
        classpath "org.jetbrains.kotlin:kotlin-gradle-plugin:$kotlin_version"

        // NOTE: Do not place your application dependencies here; they belong
        // in the individual module build.gradle files
    }
}

allprojects {
    repositories {
        google()
        jcenter()

    }
}

task clean(type: Delete) {
    delete rootProject.buildDir
}
apply plugin: 'com.android.application'
apply plugin: 'kotlin-android'
apply plugin: 'kotlin-android-extensions'
apply plugin: 'kotlin-kapt'

android {
    compileSdkVersion 29
    buildToolsVersion "29.0.3"

    dataBinding {
        enabled true
    }

    defaultConfig {
        applicationId "com.example.twoway.binding"
        minSdkVersion 23
        targetSdkVersion 29
        versionCode 1
        versionName "1.0"

        testInstrumentationRunner "androidx.test.runner.AndroidJUnitRunner"
    }

    buildTypes {
        release {
            minifyEnabled false
            proguardFiles getDefaultProguardFile('proguard-android-optimize.txt'), 'proguard-rules.pro'
        }
    }

    kotlinOptions {
        jvmTarget = '1.8'
    }
}

dependencies {
    implementation fileTree(dir: 'libs', include: ['*.jar'])
    implementation "org.jetbrains.kotlin:kotlin-stdlib-jdk7:$kotlin_version"
    implementation 'androidx.appcompat:appcompat:1.2.0'
    implementation 'androidx.core:core-ktx:1.3.2'
    implementation 'androidx.constraintlayout:constraintlayout:2.0.4'
    testImplementation 'junit:junit:4.12'
    androidTestImplementation 'androidx.test.ext:junit:1.1.1'
    androidTestImplementation 'androidx.test.espresso:espresso-core:3.2.0'

    implementation 'com.google.android.material:material:1.2.1'

    //ViewModel and liveData
    implementation "androidx.lifecycle:lifecycle-extensions:$lifecycleVersion"
    kapt "androidx.lifecycle:lifecycle-compiler:$lifecycleVersion"
    implementation 'androidx.fragment:fragment-ktx:1.2.5'

    //Databinding
    kapt "androidx.databinding:databinding-common:$gradle_version"
}
普通にデータバインディング
単方向データバインディング(データ→表示)するときはこう書きます。
RadioGroup内のラジオボタンを選択させる属性がcheckedButtonなので、ここにバインディングしてやります。
     <RadioGroup
            android:id="@+id/radioGroup"
            android:layout_width="wrap_content"
            android:layout_height="wrap_content"
            android:checkedButton="@{viewmodel.radioType}"
MainViewModelはこんなクラスになってます。
class MainViewModel : ViewModel() {
    var radioType = MutableLiveData(R.id.radioA)
}
いずれ双方向でやりとりしたいのでradioTypeはpublicなMutableです。
MainActivityでバインディングの設定をするのを忘れないように。
class MainActivity : AppCompatActivity() {

    private val viewModel: MainViewModel by viewModels()

    override fun onCreate(savedInstanceState: Bundle?) {
        super.onCreate(savedInstanceState)

        val binding: ActivityMainBinding =
            DataBindingUtil.setContentView(this, R.layout.activity_main)

        binding.lifecycleOwner = this
        binding.viewmodel = viewModel

        viewModel.radioType.observe(this, Observer {
            textView.text = "Radio selected: $it"
        })
    }
}
LiveDataをMainActivityで監視して、変わったらTextViewを書き変えようとしています。
(ここもLiveDataに出来ると言えばそうなのですが今回の本筋ではないのでやっていません)
なお、初期コードにあるsetContentView()を消し忘れるとデータバインディングがまともに動かないという不具合に数時間頭を悩ませることになるのでご注意を。
実行するとradioAにチェックが最初から付いていますが、これがデータバインディングでMainViewModel#radioTypeの初期値R.id.radioAが入っている証拠になります。

でも、radioTypeの変更を監視しているのに、選択ボタンを変えてもテキストが変わらないことに気付くと思います。これは、まだ逆方向の表示→データへのバインディングが出来ていないからです。
ここを、Kotlin/Javaのコードは増やさずに、変えてくれるようにしたい。双方向データバインディングしたいのです。
実現方法
1 一番単純な方法
Stackoverflowの回答に挙がっていた手法です。
通常、データバインディングでは、android:checkedButton="@{viewmodel.radioType)}"のように@{}を使いますが、双方向にするときは、"@={}"とします。
        <RadioGroup
            android:id="@+id/radioGroup"
            android:layout_width="wrap_content"
            android:layout_height="wrap_content"
            android:checkedButton="@={viewmodel.radioType}"
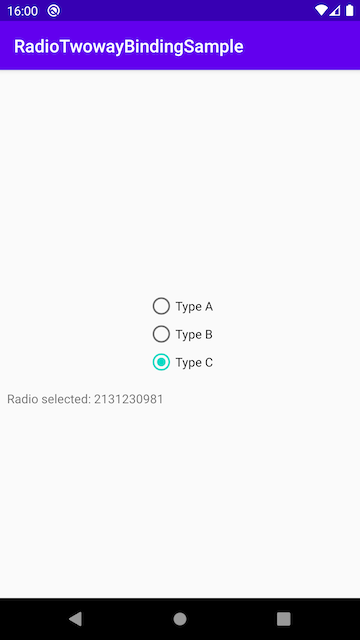
ラジオボタンの選択を変えると、テキストの中身も変わります。
2 Enumと連携する
idでもいいのですが、リソースidを貰ってもコードで利用するときには不便です。たいてい、こういうのはデータクラスとかに持って利用すると思いますし、そういう場合にはEnumとか用意すると思うので、それと連携するようにしたいところです。
見つけたのはこちらの方法。
https://medium.com/enpassio/two-way-data-binding-e9f50e2b76aa
データバインディングには、特定の属性に対するバインド関数を指定できるBindingAdapterという便利な方法がありますが、それに似ています。
Androidでは、@InverseMethodというアノテーションで、双方向データバインディング向けの関数の用意がちゃんと出来るようになっているということですね。
今回の要件を満たすように作っていきます。
まず、Enumを用意します。
    enum class RadioType {
        TYPE_A,
        TYPE_B,
        TYPE_C,
    }
そして、ラジオボタンのリソースidからRadioTypeに変換する関数と、その逆を行う関数を用意します。
@file:JvmName("BindingUtils")

package com.example.twoway.binding

import androidx.databinding.InverseMethod


@InverseMethod("buttonIdToType")
fun typeToButtonId(radioType: MainViewModel.RadioType): Int {
    var selectedButtonId = -1

    radioType?.run {
        selectedButtonId = when (this) {
            MainViewModel.RadioType.TYPE_A -> R.id.radioA
            MainViewModel.RadioType.TYPE_B -> R.id.radioB
            MainViewModel.RadioType.TYPE_C -> R.id.radioC
        }
    }

    return selectedButtonId
}

fun buttonIdToType(selectedButtonId: Int): MainViewModel.RadioType? {
    var type: MainViewModel.RadioType? = null
    when (selectedButtonId) {
        R.id.radioA -> {
            type = MainViewModel.RadioType.TYPE_A
        }
        R.id.radioB -> {
            type = MainViewModel.RadioType.TYPE_B
        }
        R.id.radioC -> {
            type = MainViewModel.RadioType.TYPE_C
        }
    }
    return type
}
@file:JvmName("BindingUtils")というのは私も初めて見たのですが、BindingUtils.buttonIdToTypeとして、JavaでいうBindingUtilsクラスのstatic関数みたいに呼び出せるようになるみたいです。
これを、レイアウトファイルに設定します。
            <variable
                name="viewmodel"
                type="com.example.twoway.binding.MainViewModel" />

            <import type="com.example.twoway.binding.BindingUtils" />
        </data>
RadioGroupでの設定方法です。
android:checkedButton="@={BindingUtils.typeToButtonId(viewmodel.radioType)}"
何となく分かりますね。
BindingUtils.typeToButtonIdでradioTypeから該当するリソースidを得て、そのidをチェックする、という設定になっています。
逆方向については、@InverseMethodで指定したbuttonIdToTypeが自動的に使われることになります。
MainViewModelでは、radioTypeに入れる初期値をEnumに変えなければなりません。
var radioType = MutableLiveData(RadioType.TYPE_A)
TextViewの表示が変わりました。
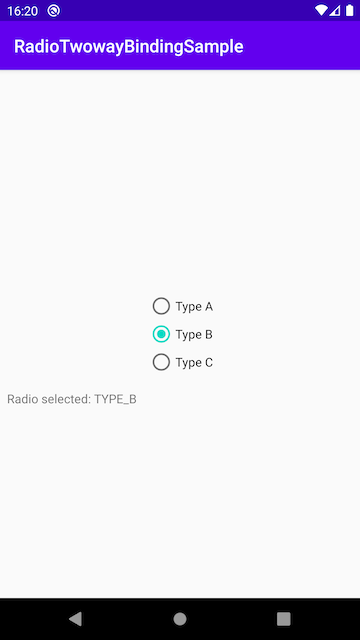
これで双方向データバインディングがRadioGroupで出来るようになりました。
以上です。
参考
双方向データバインディングについて、基本的なことはDeveloperガイドに書いてあり、EditTextやCheckbox等であれば十分分かるのですが、RadioGroup/RadioButtonについては分からず、上記サイトを参考にした次第です。
一応紹介しておきます。
プロジェクト
今回の記事に使ったプロジェクトは以下にあります。