Ruby on Rails での開発に必要な環境構築について書きました
Vagrantを使った環境構築についての情報は非常に豊富ですが、初心者なので情報の取捨選択ができずかなり苦労したので、自分の為の忘備録でもあります
まだまだ未熟な為、間違っている点などあるかもしれないのでご指摘等はどんどんお願いします汗
参考にしたURLは最下部にまとめています
0. 環境とバージョン
-
macOS Mojave 10.14.6
-
VirtualBox 6.0
-
Vagrant 2.2.4
-
CentOS 6.7
-
Ruby 2.4.0
-
Ruby on Rails 5.1.6
-
rbenv 1.1.2-2-g4e92322
-
Node.js v4.9.1
1. VirtualBox, Vagrant
-
ローカルで仮想サーバを立てれる
-
ローカルPCを汚さずに様々な環境を構築できる
VirtualBox, Vagrant インストール
下記からダウンロード
Vagrant Box 選択
-
仮想サーバのOSをパッケージ化したもの
-
Vagrantfileで指定する
-
今回はbento/centos-6.7 を使用
下記ページでVagrantで使用する仮想マシンのBoxを選択する
作業ディレクトリ作成
-
作業ディレクトリ、仮想サーバ用のディレクトリ作成
-
ディレクトリ名はお好みで
-
今回は作業ディレクトリはVagrant,仮想マシン用のディレククトリ名は
centos67に設定
$ mkdir Vagrant
$ cd Vagrant
$ mkdir centos67
Vagrantfile 生成, Box追加
Boxを追加し、Vagrantfileを生成
$ vagrant init bento/centos-6.7
Vagrantfile 修正
Vagrantでは下記のような設定が可能
-
ipアドレス
-
メモリ
-
ポート番号
-
VurtualBox GUI でのマシン名
今回はipアドレスの設定だけ行っています
生成されたVagrantfileをエディタで修正
# -*- mode: ruby -*-
# vi: set ft=ruby :

# All Vagrant configuration is done below. The "2" in Vagrant.configure
# configures the configuration version (we support older styles for
# backwards compatibility). Please don't change it unless you know what
# you're doing.
Vagrant.configure("2") do |config|
  # The most common configuration options are documented and commented below.
  # For a complete reference, please see the online documentation at
  # https://docs.vagrantup.com.

  # Every Vagrant development environment requires a box. You can search for
  # boxes at https://vagrantcloud.com/search.
  config.vm.box = "bento/centos-6.7"

'↑Boxが設定されている'

  # Disable automatic box update checking. If you disable this, then
  # boxes will only be checked for updates when the user runs
  # `vagrant box outdated`. This is not recommended.
  # config.vm.box_check_update = false

  # Create a forwarded port mapping which allows access to a specific port
  # within the machine from a port on the host machine. In the example below,
  # accessing "localhost:8080" will access port 80 on the guest machine.
  # NOTE: This will enable public access to the opened port
  # config.vm.network "forwarded_port", guest: 80, host: 8080

  # Create a forwarded port mapping which allows access to a specific port
  # within the machine from a port on the host machine and only allow access
  # via 127.0.0.1 to disable public access
  # config.vm.network "forwarded_port", guest: 80, host: 8080, host_ip: "127.0.0.1"

  # Create a private network, which allows host-only access to the machine
  # using a specific IP.
  config.vm.network "private_network", ip: "192.168.33.10"

'↑コメントを外し、ipアドレスを設定'

  # Create a public network, which generally matched to bridged network.
  # Bridged networks make the machine appear as another physical device on
  # your network.
  # config.vm.network "public_network"

  # Share an additional folder to the guest VM. The first argument is
  # the path on the host to the actual folder. The second argument is
  # the path on the guest to mount the folder. And the optional third
  # argument is a set of non-required options.
  # config.vm.synced_folder "../data", "/vagrant_data"

'↑共有フォルダのディレクトリを変更するにはここを変更'

  # Provider-specific configuration so you can fine-tune various
  # backing providers for Vagrant. These expose provider-specific options.
  # Example for VirtualBox:
  #
  # config.vm.provider "virtualbox" do |vb|
  #   # Display the VirtualBox GUI when booting the machine
  #   vb.gui = true
  #
  #   # Customize the amount of memory on the VM:
  #   vb.memory = "1024"

'↑メモリを変更する場合はここを変更'
'vb.name = "Box名" を追加することでVirtualBox GUI上の名前を指定できる'

  # end
  #
  # View the documentation for the provider you are using for more
  # information on available options.

  # Enable provisioning with a shell script. Additional provisioners such as
  # Puppet, Chef, Ansible, Salt, and Docker are also available. Please see the
  # documentation for more information about their specific syntax and use.
  # config.vm.provision "shell", inline: <<-SHELL
  #   apt-get update
  #   apt-get install -y apache2
  # SHELL
end
Vagrant 起動
-
Vagrantfileのあるディレクトリでコマンド実行
-
場合によってはエラーが出る可能性アリ
$ vagrant up
# vagrant status
.
.
Current machine states:

default                   running (virtualbox)
runningと表示されれば正常に仮想サーバが立ち上がっています
Vagrant 共有フォルダ設定
-
Vagrantはhost、guest間でファイルを同期できる
-
guest側作業ディレクトリと同期する事でhost側で好みのエディタで作業できる
共有フォルダのデフォルトの設定
-
host: Vagrantfileがあるディレクトリ (今回の場合だと
/Vagrant/centos67) -
guest:
/vagrant(/home/vagrantではないので間違えないように)
デフォルトの設定とは別に共有フォルダの設定をすることでhost側で使い慣れたエディタで編集し, guest側に同期することが可能
共有フォルダの設定追加
ここで作成するディレクトリ
host側は自動生成するので作成しなくてok
-
host:
/Users/your_user_name/Vagrant/centos67/your_workspace -
guest:
/home/vagrant/centos67/your_workspace
Vagrantfileのあるディレクトリに移動
$ cd Vagrant
$ cd centos67
$ ls
Vagrantfile
Vagrantfileをviで開く
$ vi Vagrantfile
下記のようにVagrantfileを修正
# Share an additional folder to the guest VM. The first argument is
# the path on the host to the actual folder. The second argument is
# the path on the guest to mount the folder. And the optional third
# argument is a set of non-required options.
config.vm.synced_folder "/Users/your_user_name/Vagrant/centos67/your_workspace", "/home/vagrant/centos67/your_workspace", create: "true"

'↑共有フォルダのディレクトリを変更するにはここを変更'
host側で/Users/your_user_name/Vagrant/centos67/your_workspaceに共有フォルダが作成されているか確認
正常に設定されていればフォルダが作成されているはずです
共有フォルダの設定追加の注意点
-
host側は
create: "true"でディレクトリは自動生成される -
上記の設定を行うとguest側の共有フォルダが
/vagrantと/home/vagrant/centos67/your_workspaceの2つに増える。
つまり、host側:/Users/your_user_name/Vagrant/centos67/your_workspace内のファイルがguest側:/vagrantと/home/vagrant/centos67/your_workspaceどちらにも同期されるということ -
ディレクトリのパスは絶対パスで設定する
2. Git
-
バージョン管理ツール
-
ツールのインストールにも必要
Vagrantに接続し、下記コマンドでインストール
$ vagrant ssh
$ cd /home/vagrant/centos67/your_workspace
$ sudo yum -y update
$ sudo yum install git
$ git --version
git version 1.7.1
Gitのバージョンが表示されればok
最新版のGitが使いたい場合はこちらを参考
今回はそのままのバージョンで進めます
3. rbenv
-
Rubyのバージョン管理ツール
-
複数の開発環境がある場合に他の環境に影響を与えず異なるバージョンのRubyを使うことが可能
rbenv インストール
Vagrantに接続し、下記コマンドでインストール
$ vagrant ssh
$ cd /home/vagrant/centos67/your_workspace
$ git clone git://github.com/sstephenson/rbenv.git ~/.rbenv
rbenv パス設定
コマンドで使えるように.bash-profileにパスを通します
$ echo 'export PATH="$HOME/.rbenv/bin:$PATH"' >> ~/.bash_profile
.bash-profileと.bashrcの使い分けはこちらを参考
rbenv init を追加
コマンド実行時にrbenv initを実行することでrbenvを使えるようにする
$ echo 'eval "$(rbenv init -)"' >> ~/.bash_profile
rbenv コマンドが使用可能か確認
$ rbenv -v
rbenv 1.1.2-2-g4e92322
上記のようにバージョンが返ってきたらok
bash: rbenv: コマンドが見つかりませんと返ってきた場合は下記の2つを試してください
-
ssh再接続
-
$ exec $SHELL
4. ruby-build
-
rbenv installコマンドを使えるようにするツール - rbenv同様、Rubyのインストールに必要
ruby-build インストール
Vagrantに接続し、下記コマンドでインストール
$ vagrant ssh
$ cd /home/vagrant/centos67/your_workspace
$ git clone git://github.com/sstephenson/ruby-build.git ~/.rbenv/plugins/ruby-build
ruby-build パス設定
rbenvと同様に.bash-profileにパスを通します
$ echo 'export PATH="$HOME/.rbenv/plugins/ruby-build/bin:$PATH"' >> ~/.bash_profile
ruby-build 使用可能か確認
$ ruby-build
Usage: ruby-build [-kpv] <definition> <prefix>
       ruby-build --definitions
       ruby-build --version

  -k/--keep        Do not remove source tree after installation
  -p/--patch       Apply a patch from stdin before building
  -v/--verbose     Verbose mode: print compilation status to stdout
  -4/--ipv4        Resolve names to IPv4 addresses only
  -6/--ipv6        Resolve names to IPv6 addresses only
  --definitions    List all built-in definitions
  --version        Show version of ruby-build`
上記のようにUsageが表示されればok
表示されない場合はrbenvと同様にssh再接続してください
5. Ruby
-
rbenvを使いRubyをインストールする
-
今回は2.4.0を使用
インストール
Vagrantに接続し、使用するRubyのバージョンを調べます
$ vagrant ssh
$ cd /home/vagrant/centos67/your_workspace
$ rbenv install -l
rbenvを使いインストールします
$ rbenv install 2.4.0
インストール時エラー
私の環境ではrbenv install 2.4.0実行後、以下のようなエラーメッセージが表示されました
BUILD FAILED (CentOS release 6.10 (Final) using ruby-build 20190828-2-gd2a7eef)

Inspect or clean up the working tree at /tmp/ruby-build.20190916221029.16267
Results logged to /tmp/ruby-build.20190916221029.16267.log

Last 10 log lines:
The Ruby openssl extension was not compiled.
The Ruby readline extension was not compiled.
The Ruby zlib extension was not compiled.
ERROR: Ruby install aborted due to missing extensions
Try running `yum install -y openssl-devel readline-devel zlib-devel` to fetch missing dependencies.
必要なツールを追加してから再度実行してください的な事が書いています
Try running `yum install -y openssl-devel readline-devel zlib-devel` to fetch missing dependencies.
インストール時エラー 原因
Rubyインストールに必要な以下のツールがインストールされていなかった
-
openssl-devel
-
readline-devel
-
zlib-devel
インストール時エラー 解決策
エラーメッセージに従いコマンドを実行, Rubyの再インストール
$ sudo yum install -y openssl-devel readline-devel zlib-devel
$ rbenv install 2.4.0
インストール成功しました
バージョン確認
$ rbenv versions
2.4.0
rbenv のバージョンが表示されればok
バージョン指定
Rubyのバージョン指定するとrubyコマンドが使用可能になります
$ rbenv global 2.4.0
$ ruby -v
ruby 2.4.0p0 (2016-12-24 revision 57164) [x86_64-linux]
指定したバージョンが表示されればokです
バージョン指定 補足
rbenvを使ったバージョン指定にはglobal, localなど複数の指定方法があります
-
global: システム全体で使うバージョン指定
-
local: 特定のディレクトリでのバージョン指定(プロジェクト毎にバージョンを切り替える等)
今回はglobalで設定しました
詳細は下記を参考
6. Bundler
-
RubyライブラリGemの管理ツール
-
Bundler自身もGemのひとつ
-
依存性のあるGemも一緒に管理してくれる
-
設定はGemfileに記述する
-
bundlerはGemでインストール, それ以外のGem(Rails含む)はBundler経由でインストールすると管理が楽らしい?
-
Gemコマンド自体はRubyをインストールした時点で使用可能
詳しくはこちらを参考
インストール
Vagrantに接続し、Gem経由でBundlerをインストール
$ vagrant ssh
$ cd /home/vagrant/centos67/your_workspace
$ gem install bundler
$ bundler -v
Bundler version 2.0.2
バージョンが返ってくればok
7. Rails
-
Rubyのフレームワーク
-
Rails自体もGemの一つでGemコマンド, Bundleコマンドどちらでもインストール可能
-
Gemfileでバージョンを管理する
Railsのインストールするディレクトリについて
Railsのインストールは多くの情報が溢れていますが、私のように素人にはどの方法が自分に合っているのか理解するのに時間が掛かりました
こちらの記事が非常に参考になります
インストール
上記URLのような方法を試してみたかったですが、Rails自体に慣れていないので今回はディレクトリを指定しないシンプルな方法でインストールします
Vagrant接続、作業ディレクトリに移動し最初のGemの内容を確認する
$ vagrant ssh
$ cd /home/vagrant/centos67/your_workspace
$ gem list

*** LOCAL GEMS ***

bigdecimal (default: 1.3.0)
bundler (2.0.2)
did_you_mean (1.1.0)
io-console (default: 0.4.6)
json (default: 2.0.2)
minitest (5.10.1)
net-telnet (0.1.1)
openssl (default: 2.0.2)
power_assert (0.4.1)
psych (default: 2.2.2)
rake (12.0.0)
rdoc (default: 5.0.0)
test-unit (3.2.3)
xmlrpc (0.2.1)
当たり前ですがまだRailsは入っていません
Railsをインストールします
$ gem install rails -v 5.1.6`
再度、Gemを確認
$ gem list

*** LOCAL GEMS ***

actioncable (5.1.6)
.
.
rails (5.1.6)
.
.
railsとその他のGemが入りました
Rails new
作業ディレクトリに移動し、バージョン指定してrails newする
$ vagrant ssh
$ cd /home/vagrant/centos67/your_workspace
$ rails _5.1.6_ new your_app_name
$ ls
your_app_name
Railsアプリが作成されました
8. sqlite3
-
Railsにデフォルトで設定されているデータベース
-
Gemfileで管理されている
-
rails new実行時にbundle installも実行されるので同時にインストールされる
インストールされているか確認
$ sqlite3 --version
3.6.20
バージョンが表示されればok
rails new でエラー
私の環境ではrails new時にbundle installも同時に行われる為、下記のようなエラーが出ました
In Gemfile:
  sqlite3
         run  bundle exec spring binstub --all
Could not find gem 'sqlite3' in any of the gem sources listed in your Gemfile.
Run `bundle install` to install missing gems.
sqlite3でエラーが出ているようです
指示にあるようにbundle updateとbundle installを試します
$ bundle install
.
.
To see why this extension failed to compile, please check the mkmf.log which can be found here:

  /home/vagrant/.rbenv/versions/2.4.0/lib/ruby/gems/2.4.0/extensions/x86_64-linux/2.4.0-static/sqlite3-1.4.1/mkmf.log

extconf failed, exit code 1

Gem files will remain installed in /home/vagrant/.rbenv/versions/2.4.0/lib/ruby/gems/2.4.0/gems/sqlite3-1.4.1 for inspection.
Results logged to /home/vagrant/.rbenv/versions/2.4.0/lib/ruby/gems/2.4.0/extensions/x86_64-linux/2.4.0-static/sqlite3-1.4.1/gem_make.out

An error occurred while installing sqlite3 (1.4.1), and Bundler cannot continue.
Make sure that `gem install sqlite3 -v '1.4.1' --source 'https://rubygems.org/'` succeeds before bundling.

In Gemfile:
  sqlite3
bundle updateも試しましたがエラーに変化はありません
が、エラーコードをもう一度よく見てみると...
current directory: /home/vagrant/.rbenv/versions/2.4.0/lib/ruby/gems/2.4.0/gems/sqlite3-1.3.13/ext/sqlite3
/home/vagrant/.rbenv/versions/2.4.0/bin/ruby -r ./siteconf20190920-5019-1ps6yit.rb extconf.rb
checking for sqlite3.h... no
sqlite3.h is missing. Try 'brew install sqlite3',
'yum install sqlite-devel' or 'apt-get install libsqlite3-dev'
and check your shared library search path (the
location where your sqlite3 shared library is located).
*** extconf.rb failed ***
Could not create Makefile due to some reason, probably lack of necessary
libraries and/or headers.  Check the mkmf.log file for more details.  You may
need configuration options.
sqlite3が入っていないので、brewコマンドかyumコマンド、aptコマンドでsqlite-develをインストールしろと書いてあります
sqlite3.h is missing. Try 'brew install sqlite3',
'yum install sqlite-devel' or 'apt-get install libsqlite3-dev'
sqlite-devel インストール
yumコマンドでsqlite-develをインストール
$ sudo yum install sqlite-devel
再度bundle installを実行
$ bundle install
.
.
Bundle complete! 14 Gemfile dependencies, 64 gems now installed.
Use `bundle info [gemname]` to see where a bundled gem is installed.
sqlite3が入ったか確認
$ bundle list
.
.
* sqlite3 (1.3.13)
sqlite-develをインストールすることで解決しました
原因
sqlite-develがインストールされていない
sqlite-devel 補足
Rails 5.2.3ではこのエラーは解決しているようです
9. Node.js
-
Rails3.1以降ではJavaScriptランタイムが必要らしいので要インストール
-
サーバーサイトでのJavaScript実行環境で必要
-
Node.js以外にもtherubyracerなどでもok
-
インストールしていないと
rails serverでJavaScriptランタイムエラーが出る
$ cd /home/vagrant/centos67/your_workspace/your_app
$ rails server
.
.
/home/vagrant/.rbenv/versions/2.4.0/lib/ruby/gems/2.4.0/gems/execjs-2.7.0/lib/execjs/runtimes.rb:58:in `autodetect': Could not find a JavaScript runtime. See https://github.com/rails/execjs for a list of available runtimes. (ExecJS::RuntimeUnavailable)
JavaScriptランタイムがインストールされていないというエラーが表示された場合は、GitHubのexecjsページにあるインストール可能なランタイムの一覧からJavaScriptランタイムを入手してください。個人的にはNode.jsがオススメです。
参照元: RailsTutorilal.jp
原因
RailsTutorialにもあるようにRailsを使うにはnode.js等のJavaScriptランタイムが必要らしいです
JavaScriptランタイムとは
- Rubyスクリプトからjavascriptコードを実行するための仕組み
- ExecJSがjavascriptエンジンを自動検索(=autodetect)する
対策
Node.jsやtherubyracerなどのExecJSランタイムをインストールする
インストール
今回はNode.jsをyumコマンドでインストールします
$ sudo rpm -Uvh https://rpm.nodesource.com/pub_4.x/el/7/x86_64/nodesource-release-el7-1.noarch.rpm
$ sudo yum -y install nodejs
インストールされたのでRailsサーバ起動します
$ rails server
=> Booting Puma
.
.
Use Ctrl-C to stop
Railsサーバが無事起動しました
10. ブラウザからアクセス
Vagrantfileでipアドレスを確認
 .
 .
config.vm.network "private_network", ip: "192.168.33.10"
 .
 .
Vagrantのipアドレスは192.168.33.10と確認できました
ipアドレスを指定してRailsサーバを起動
サーバが起動してる場合は以下のコマンドは不要です
$ rails server -b 192.168.33.10
=> Booting Puma
.
.
* Listening on tcp://192.168.33.10:3000
Use Ctrl-C to stop
Railsサーバが起動しました
単にrails serverだけでもok
表示されたhttp://192.168.33.10:3000にブラウザからアクセスします
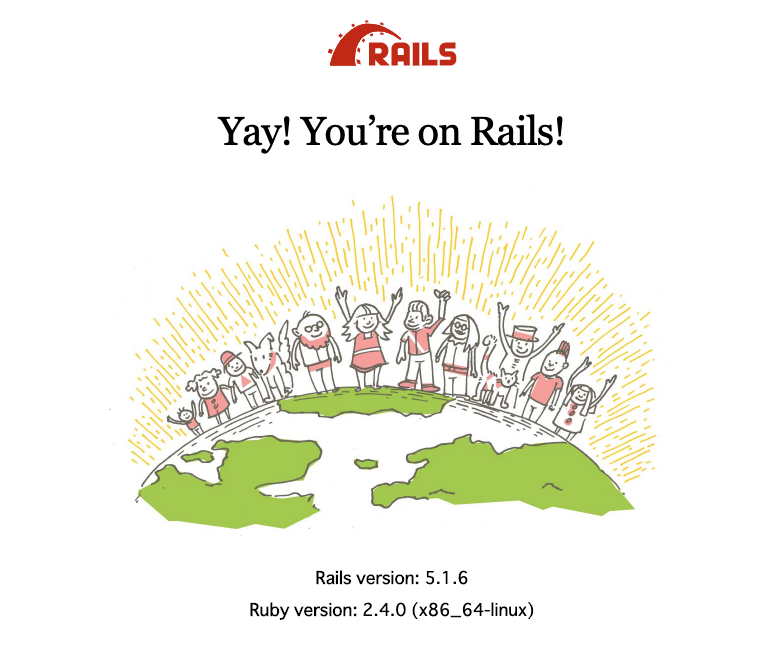
上記のような画面が出力されればokです
RailsTutorialをローカル環境で学習する時に最初の難関になるのが環境構築です
私はエラーまみれになって3回挫折しました笑
構築する環境や使うツールのバージョンによって想定外のエラーが出てしまうのが環境構築の難しいところです
エラーには必ず原因がありますので、原因を一つ一つ潰していけば必ずエラーは解決できますので焦らずマイペースに頑張ってほしいです
非常に長い記事になってしまいましたが、同じように悩んでいる方に少しでも役に立てればと思います
11.参考にしたURL