私向けではありますが、メモとして残しておきます。
Windows 11、Visual Studio 2022でも可能です。
全く同じ手順で進めてください。
はじめに
Windows Terminalというターミナルソフトで、Developer PowerShell for VS 2019を起動できるようにする手順を記しています。
Developer PowerShell for VS 2019って何?
Visual Studio 2019での開発やコンパイルを、コマンドプロンプトやPowerShellといったターミナル上でもできるようになります。
あんまり需要があるかどうか分からないけれど、GUIのようなIDEで開発したくない人にはお勧めです。 私のようにコンソール画面が好きなCUIっ子に向けて発信。
環境
以下の通りになります。
- Windows 10
- Windows TerminalはWindows専用のソフトです。
- Visual Studio 2019
- 【ここ】からインストールできます。
- Windows Terminal
- 【Microsoft Store】からインストールできます。
Windows TerminalでVisual Studio手順
- Windows Terminalを開きます。
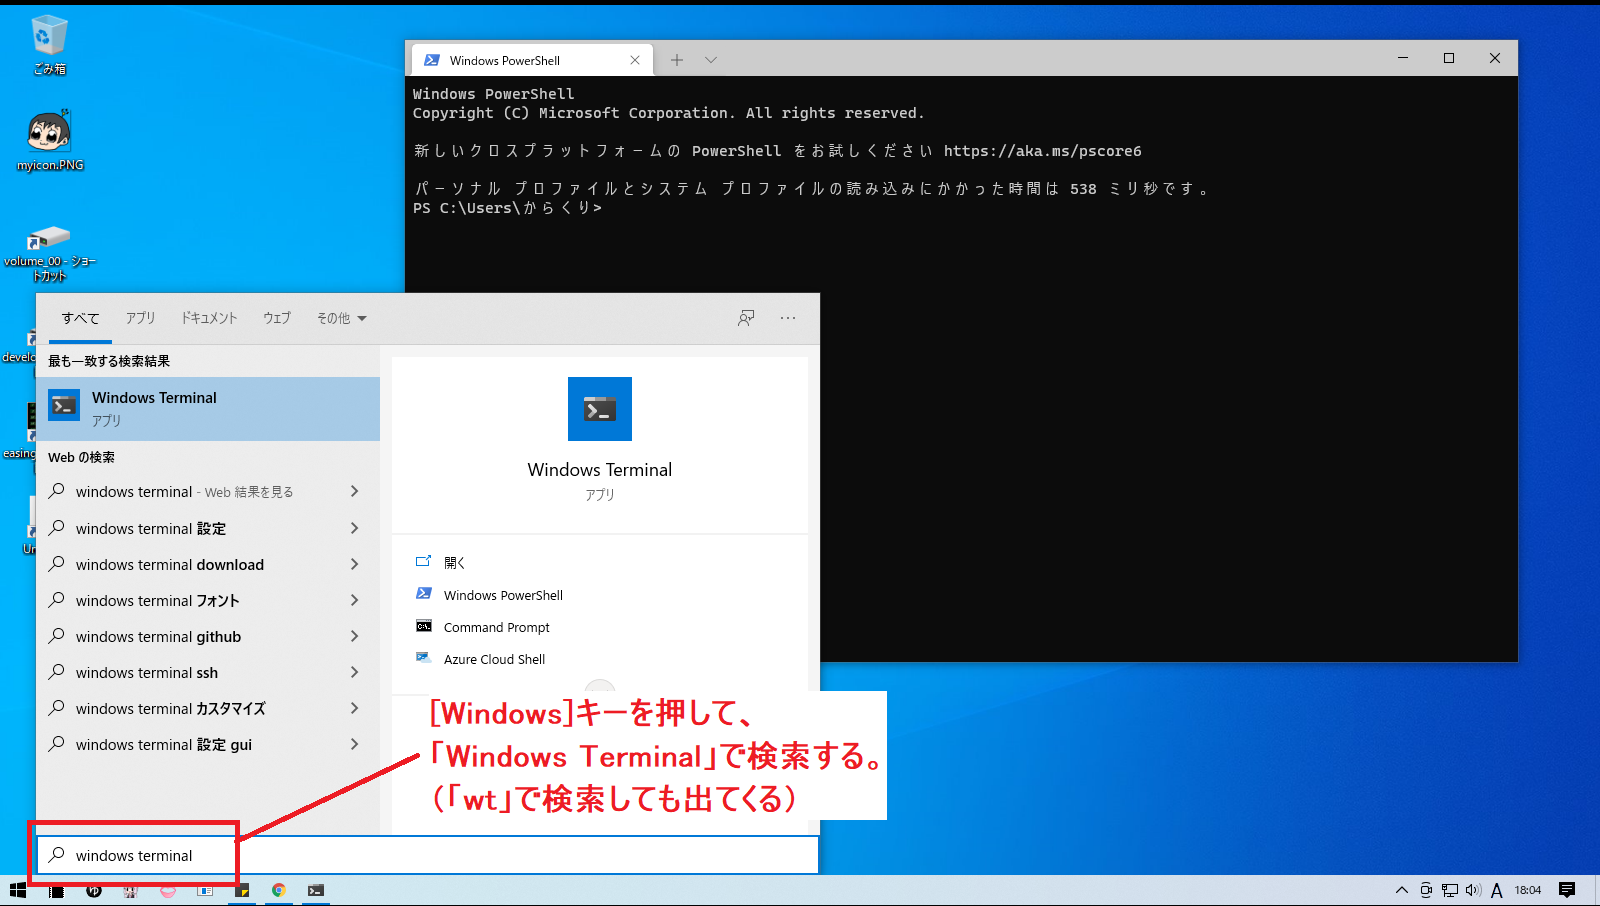
- ウィンドウ上部にある
∨→設定を開き、JSONファイルを開くをクリックします。
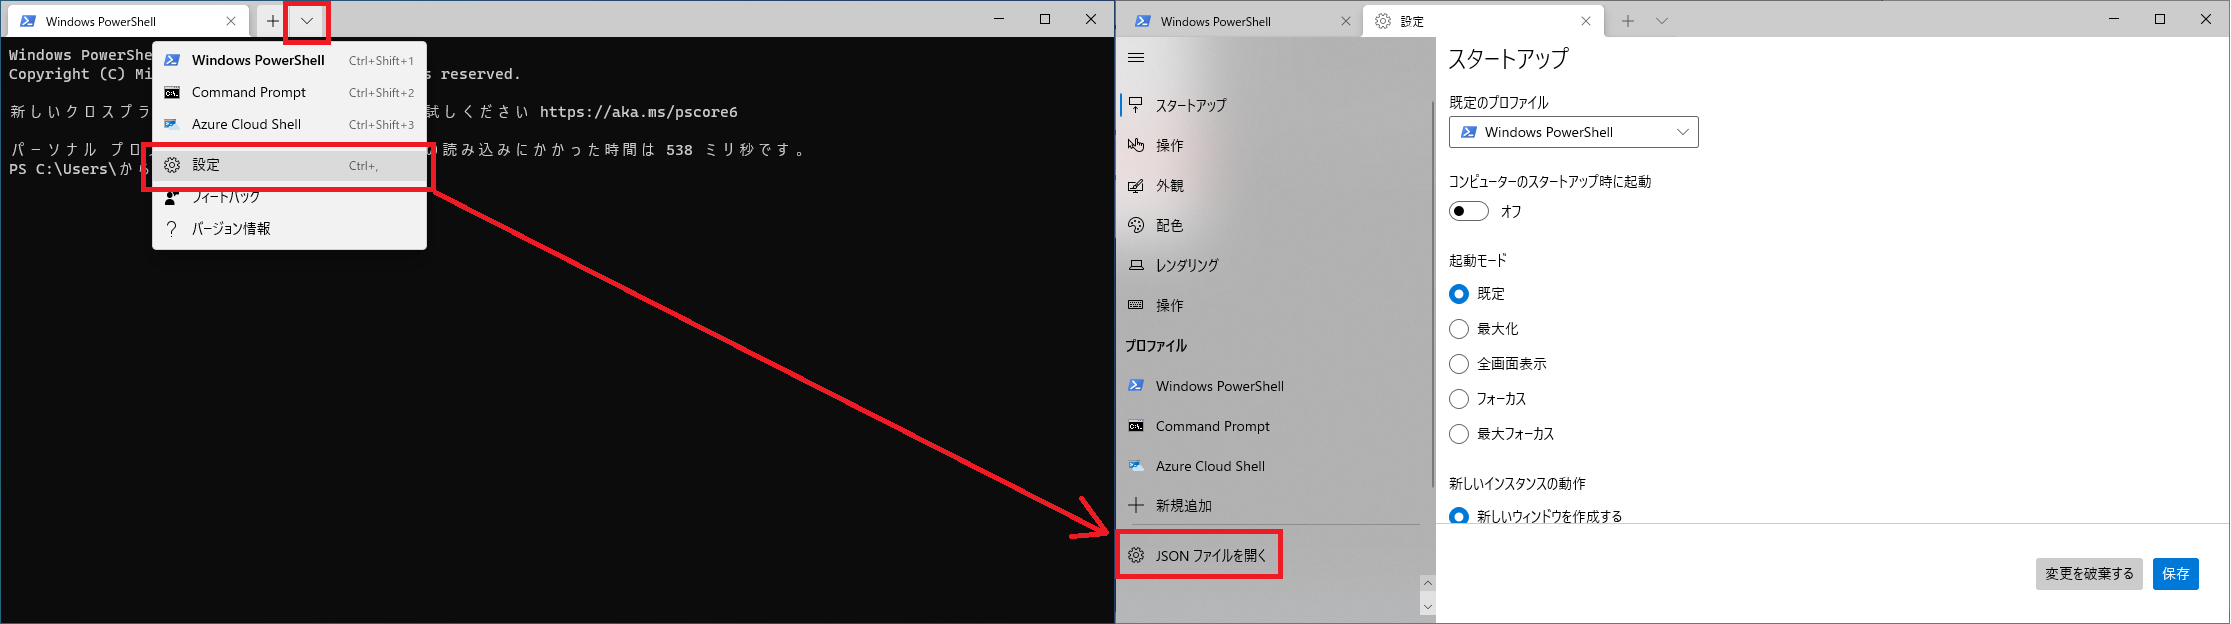
-
profiles→listブロックの最後に以下をコピー&ペーストで追加して保存します。,(カンマ) を入れるのも忘れずに!!
settings.json
    "profiles":
    {
        ~~~ (略) ~~~

        "list":
        [
           ~~~ (略) ~~~

           // 以下を追加する
            ,{
                "commandline": "powershell.exe -noe -c \"&{$vsPath = &(Join-Path ${env:ProgramFiles(x86)} '\\Microsoft Visual Studio\\Installer\\vswhere.exe') -property installationpath; Import-Module (Join-Path $vsPath 'Common7\\Tools\\Microsoft.VisualStudio.DevShell.dll'); Enter-VsDevShell -VsInstallPath $vsPath -SkipAutomaticLocation -DevCmdArguments '-arch=amd64 -host_arch=amd64'}\"",
                "name": "(64bit) Developer PowerShell for VS 2019"
            },
			{
                "commandline": "powershell.exe -noe -c \"&{$vsPath = &(Join-Path ${env:ProgramFiles(x86)} '\\Microsoft Visual Studio\\Installer\\vswhere.exe') -property installationpath; Import-Module (Join-Path $vsPath 'Common7\\Tools\\Microsoft.VisualStudio.DevShell.dll'); Enter-VsDevShell -VsInstallPath $vsPath -SkipAutomaticLocation}\"",
                "name": "(32bit) Developer PowerShell for VS 2019"
            }

- Windows Terminalを再起動し、ウィンドウ上部にある
∨をクリックして(●●bit)Developer PowerShell...の2項目が追加いるか確認します。
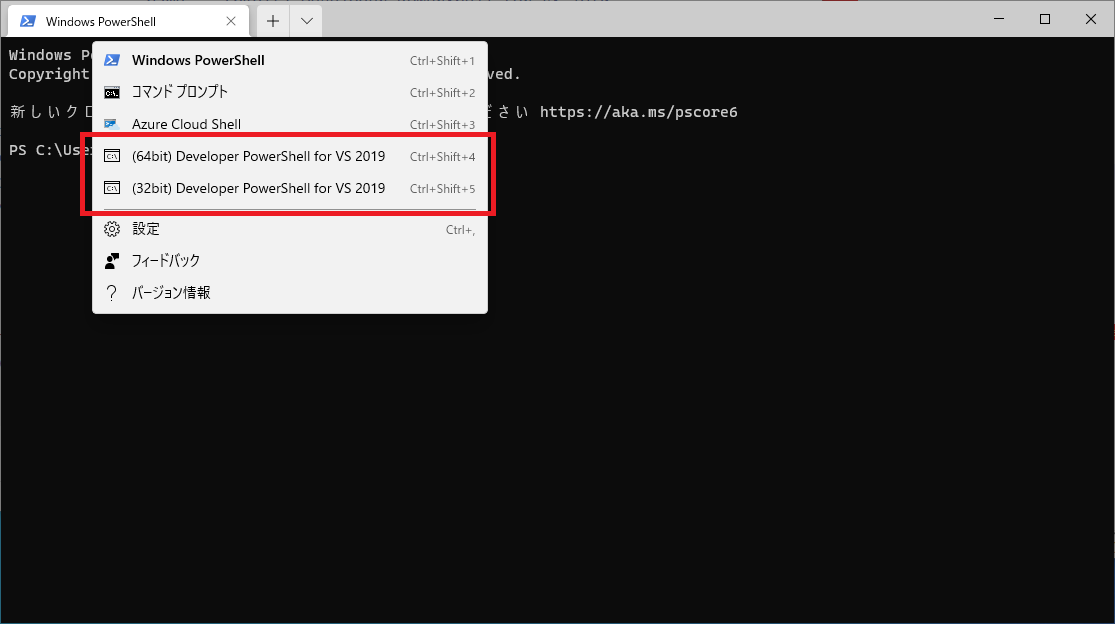
- 以下のような画面になればOKです。

- ちなみに32bitと64bitの違いを確認するには
clコマンドを実行すれば分かります。
