はじめに
個人開発にて、GitHub Actionを使用してDocker環境下におけるテストの自動化を行いました。
自動テストを書いた後に、「なんか便利そう」という気持ちで実装を始めましたが、必要な設定の全貌が掴めず、時間を大幅に溶かしてしまいました…💦
これから実装する方に向けて、コードを見ながら流れを掴んでいただけるように記載していきます!
私はプログラミング学習中で、初学者です。
内容に間違いがあるかもしれませんので、もし間違いがあれば教えていただけると幸いです。
GitHub Actionsとは
GitHub Actionsは、あらかじめ定義した処理と条件の組合せを自動化するGitHubの機能です。
今回は、リポジトリへのプッシュをトリガとして、YAML ファイルに定義したテスト(Rspec)と体裁チェック(Rubocop)を自動で実行します。
環境
- Ruby 3.2.3
- Ruby on Rails 7.1.3
※前提として、RspecやRubocopの実行に必要なGemや設定などは導入済みであるものとします。
手順
1. GitHub Actionの導入
2. main.ymlの作成((1)~(9)に分けて説明)
1. GitHub Actionの導入
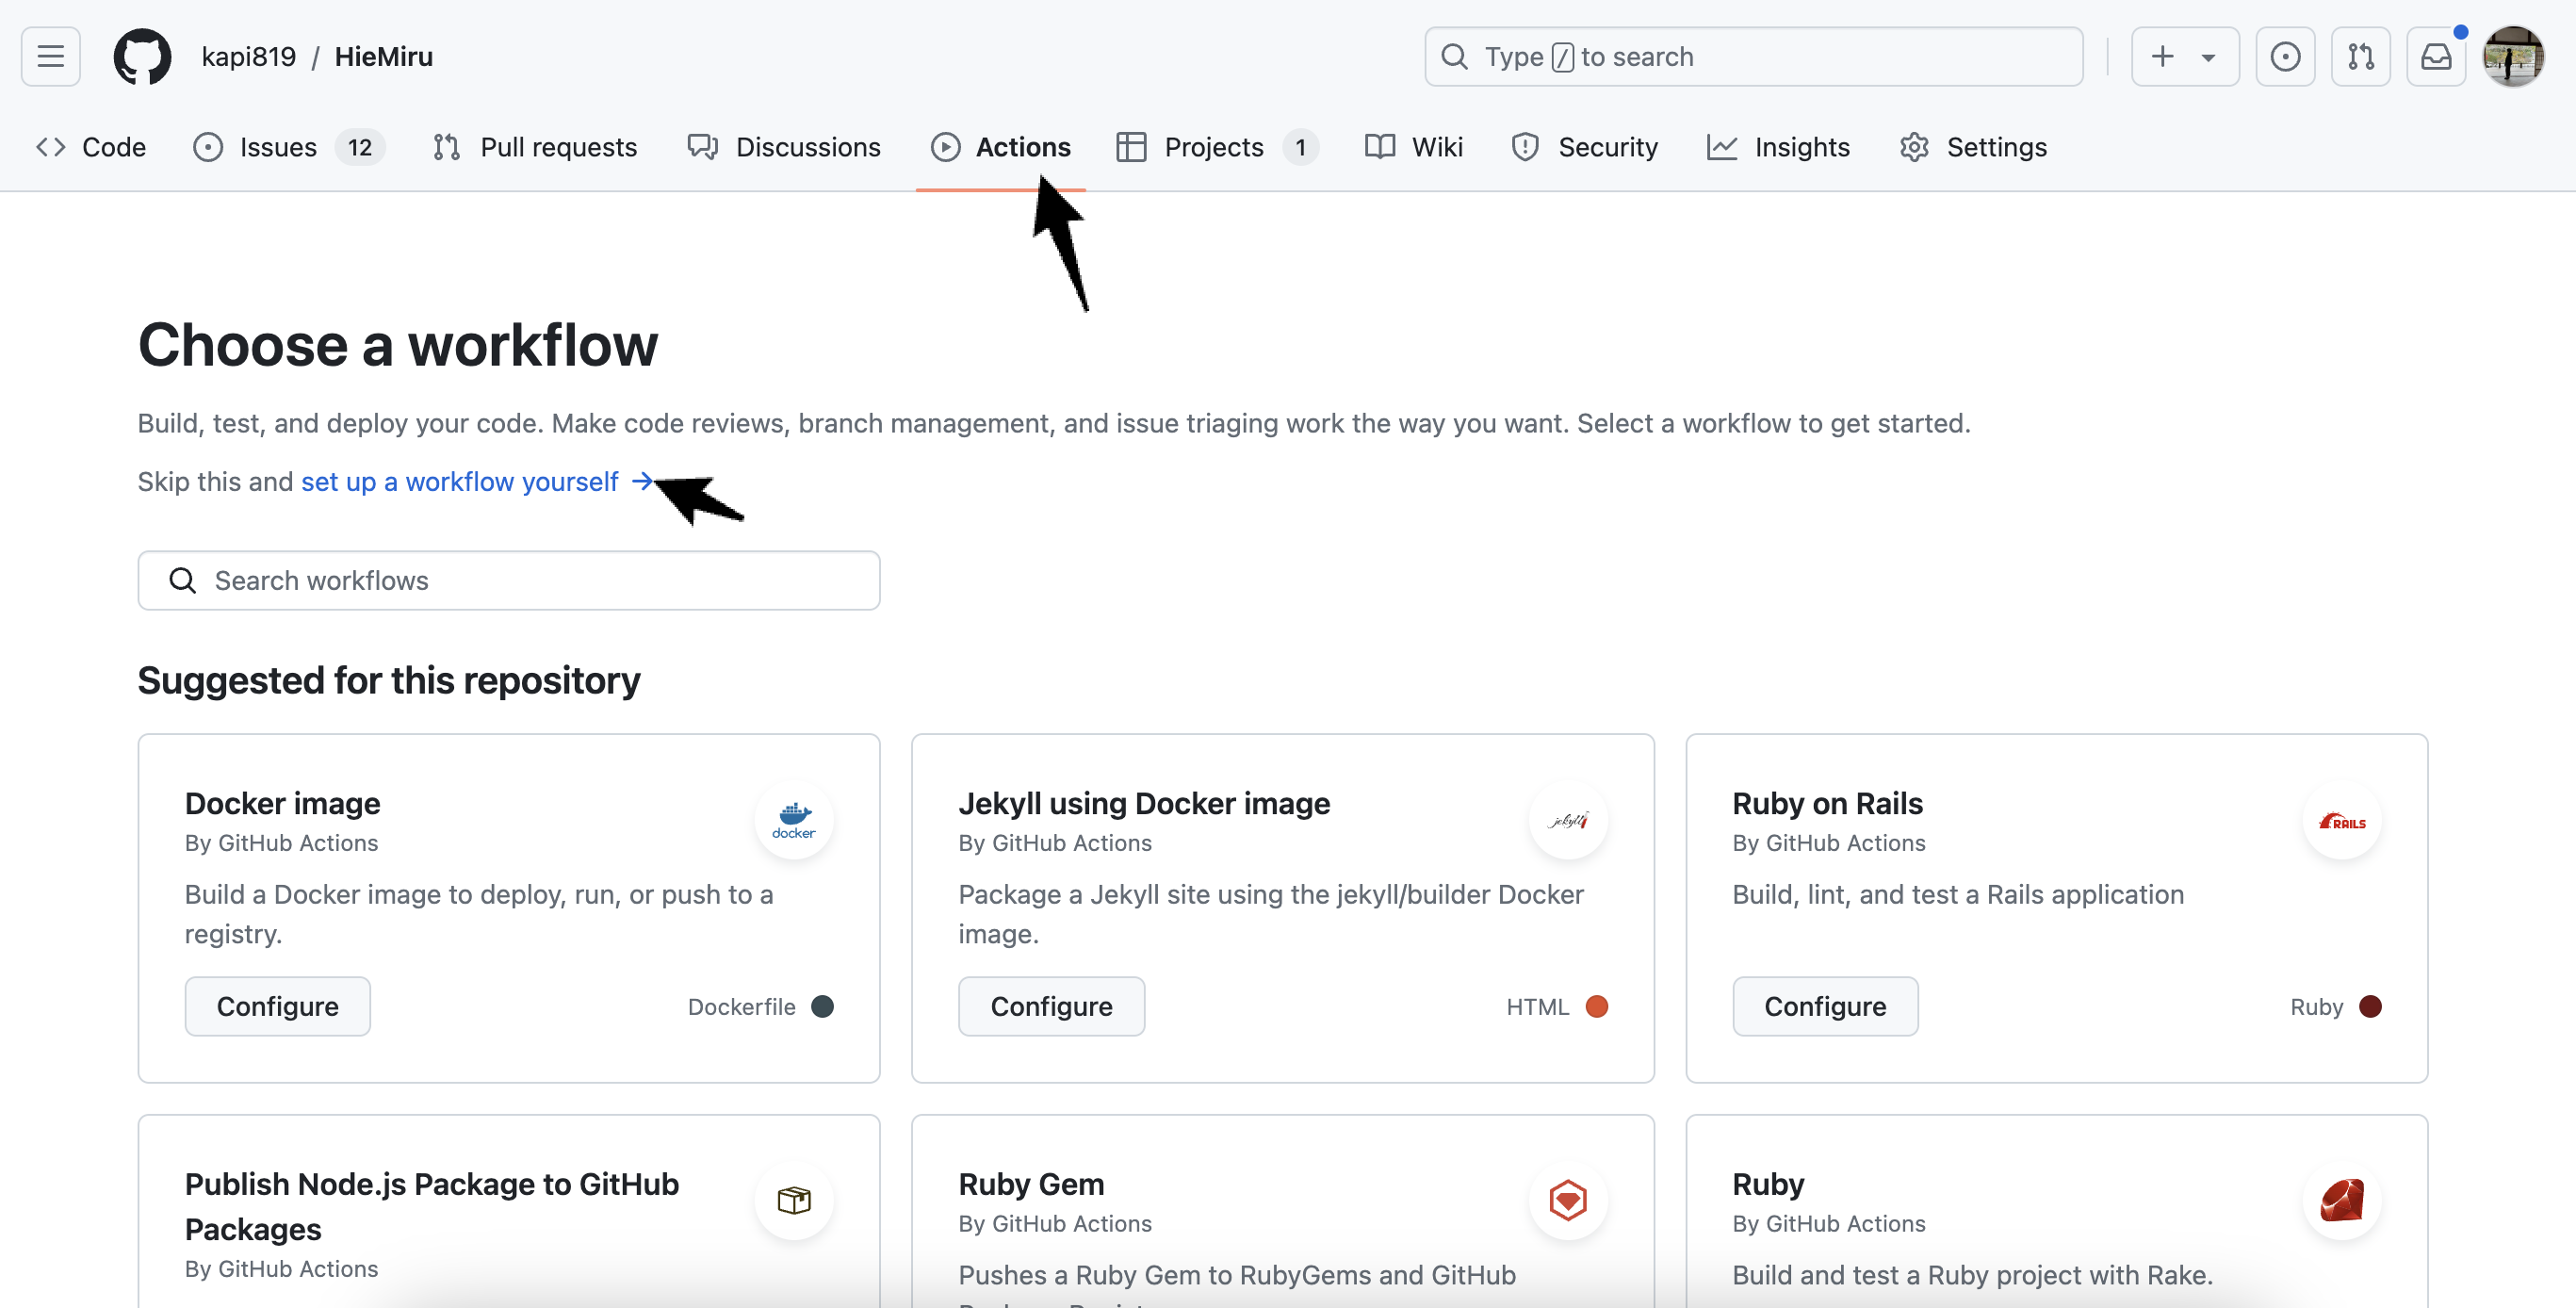
まず、Actionsタブを開くとこの画面が出てくるので、set up a workflow yourselfを押して下さい。

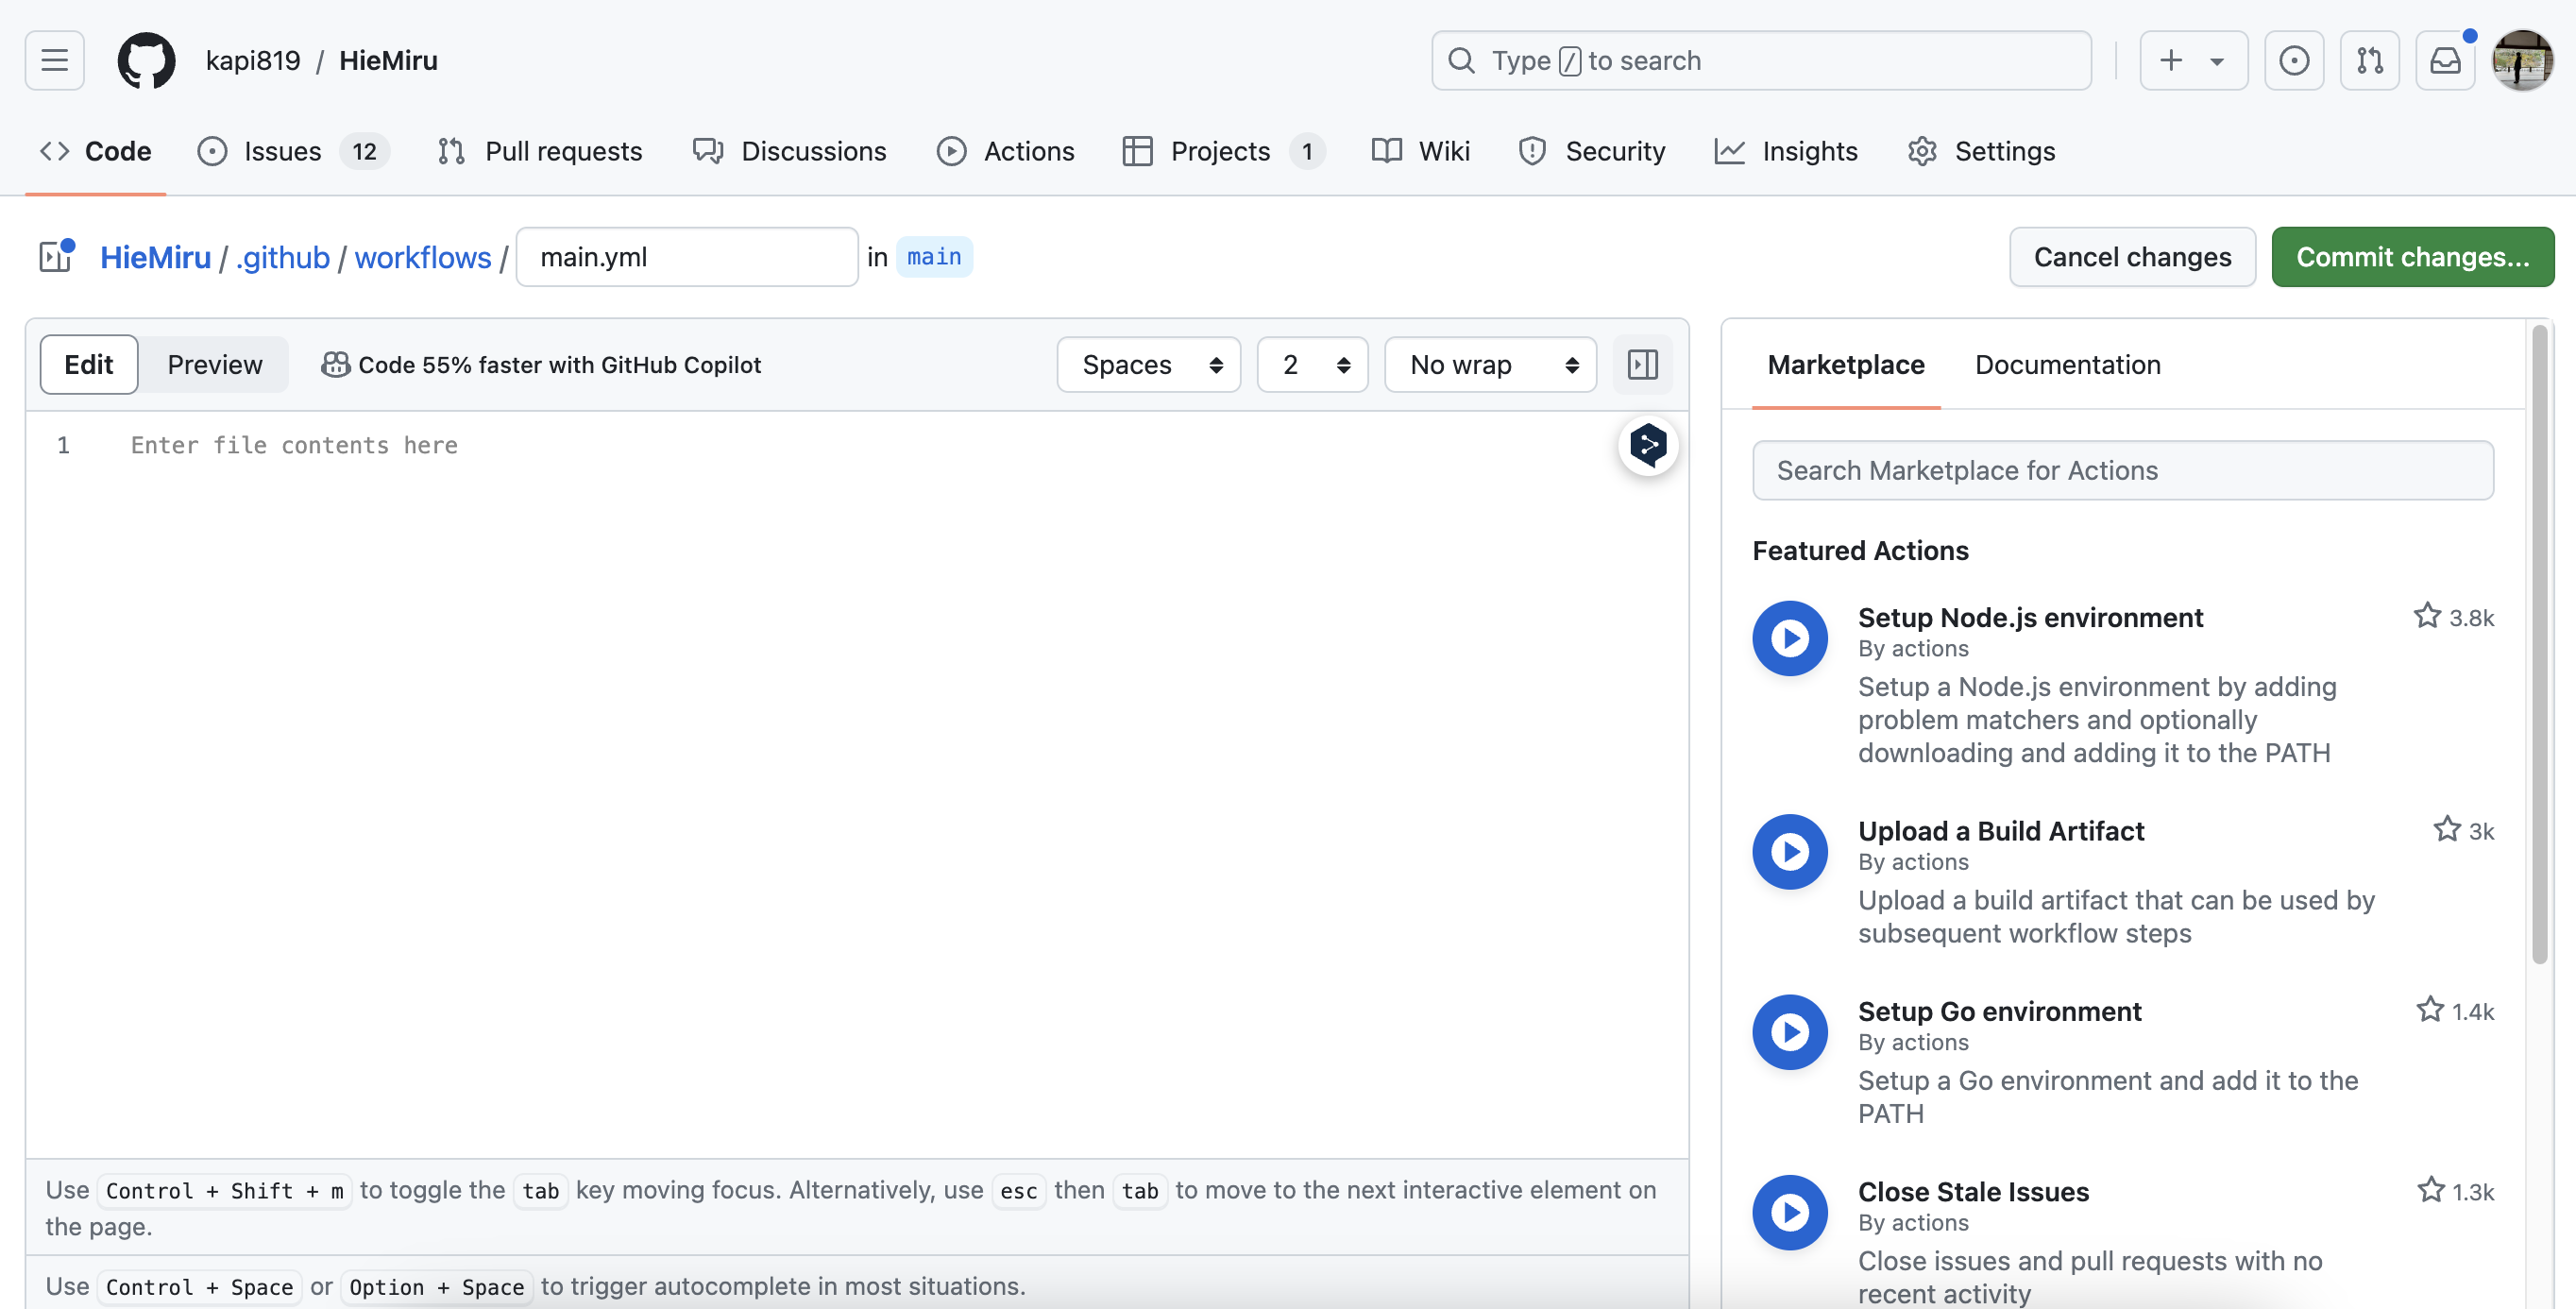
このような画面が出て来るので、YAML ファイルを編集していきます。

2. main.ymlの作成
今回作成するRspec(Capybara)、Rubocopを自動化するmain.yml、database.yml.ciは以下のように記述しています。
非常に長くなってしまったので、コードの後ろに(1)等の数字を付けて、説明していきます!
name: Run rspec, rubocop          (1)

on:
  push:                           (2)

env:
  RENDER_DB_URL: ${{secrets.RENDER_DB_URL}}      (3)

jobs:
  rspec:
    runs-on: ubuntu-latest
    timeout-minutes: 10
    services:
      postgres:
        env:
          POSTGRES_PASSWORD: password
          POSTGRES_DB: test
        image: postgres
        ports:
          - 5432:5432
      chrome:
        image: seleniarm/standalone-chromium:latest
        ports:
          - 4445:4444            (4)

    steps:
      - name: Checkout code
        uses: actions/checkout@v2

      - name: Set up Ruby
        uses: ruby/setup-ruby@v1
        with:
          bundler-cache: true

      - name: Set up Chrome
        uses: browser-actions/setup-chrome@v1
        with:
          chrome-version: 120
          install-dependencies: true            (5)

      - name: Cache node modules
        uses: actions/cache@v2
        with:
          path: node_modules
          key: ${{ runner.os }}-node-${{ hashFiles('**/yarn.lock') }}
          restore-keys: |
            ${{ runner.os }}-node-                      (6)

      - name: Bundler and gem install
        run: |
          gem install bundler
          bundle install --jobs 4 --retry 3 --path vendor/bundle

      - name: Yarn install
        run: yarn install --check-files                 (7)

      - name: Check for port conflicts and set CAPYBARA_PORT
        run: |
          PORT=4444
          if lsof -i:$PORT; then
            echo "Port $PORT is in use, killing the process"
            lsof -ti:$PORT | xargs kill -9
          fi
          CAPYBARA_PORT=3001
          echo "CAPYBARA_PORT=$CAPYBARA_PORT" >> $GITHUB_ENV
          echo "DEBUG: Capybara port set to $CAPYBARA_PORT"     (8)

      - name: Database create and migrate
        run: |
          cp config/database.yml.ci config/database.yml
          bundle exec rails db:create RAILS_ENV=test
          bundle exec rails db:migrate RAILS_ENV=test

      - name: assets precompile
        run: bundle exec rake assets:precompile RAILS_ENV=test

      - name: Run tests
        run: |
          bundle exec rspec
        env:
          SELENIUM_DRIVER_URL: http://localhost:4445/wd/hub
          CAPYBARA_PORT: ${{ env.CAPYBARA_PORT }}              (9)

  rubocop:
    runs-on: ubuntu-latest
    timeout-minutes: 10
    steps:
      - name: Checkout code
        uses: actions/checkout@v2

      - name: Set up Ruby
        uses: ruby/setup-ruby@v1
        with:
          bundler-cache: true

      - name: Run rubocop
        run: bundle exec rubocop
test:
  adapter: postgresql
  encoding: unicode
  username: postgres
  password: password
  host: localhost
  database: myapp_test
以下に各コードの説明をしていきます。(GitHub公式ドキュメントはこちら)
(1)name: Run rspec, rubocop
name:は、リポジトリの [アクション] タブに表示されるワークフローの名前になります。
(2)on: push:
on:は、GitHub Actionsをいつ動かすのかを設定するものになります。今回は、プッシュ時に実行するよう設定します。
(3)env: RENDER_DB_URL: ${{secrets.RENDER_DB_URL}}
env:は、ワークフロー全体に環境変数を定義することが出来、GitHub公式ドキュメントのこちらを参考にして、RENDER_DB_URLをリポジトリ上に定義しています。
(4)
jobs:
  rspec:
    runs-on: ubuntu-latest
    timeout-minutes: 10
    services:
      postgres:
        env:
          POSTGRES_PASSWORD: password
          POSTGRES_DB: test
        image: postgres
        ports:
          - 5432:5432
      chrome:
        image: seleniarm/standalone-chromium:latest
        ports:
          - 4445:4444
-
jobs:は、ワークフローの一連の処理を定義します。今回は、rspec:とrubocop:の二つの処理を定義しています。 -
services:は、ワークフローでDBに接続してテストを行うために必要なサービスコンテナを表しています。
サービスコンテナとは、GitHub Action上で使う専用のDockerコンテナ(今回はPostgreSQL)のことで、専用のコンテナを立ち上げて、そのコンテナを利用してテストを行います。 -
postgres:は、自身のリポジトリ上のconfig/database.yml、compose.ymlに合わせて記載をしています。 -
chrome:は、自身のリポジトリ上のcompose.ymlに合わせているものの、ポート番号を4444:4444と設定したところ、実行時にAddress already in use - bind(2) for "10.1.0.91" port 4444 (Errno::EADDRINUSE)とエラーが表示されているため、4445:4444と設定しています。
(5)
    steps:
      - name: Checkout code
        uses: actions/checkout@v2

      - name: Set up Ruby
        uses: ruby/setup-ruby@v1
        with:
          bundler-cache: true

      - name: Set up Chrome
        uses: browser-actions/setup-chrome@v1
        with:
          chrome-version: 120
          install-dependencies: true
-
steps:は、jobs:中にどのような流れで、下に定義しているname:を実行するかを設定しています。 - テストを実行する環境を作るため、
actions/checkout@v2で自身のリポジトリをダウンロードし、ruby/setup-ruby@v1でrubyを実行出来る環境を作り、browser-actions/setup-chrome@v1でテストが実行出来るようにchromeブラウザをダウンロードしています。
(6)
      - name: Cache node modules
        uses: actions/cache@v2
        with:
          path: node_modules
          key: ${{ runner.os }}-node-${{ hashFiles('**/yarn.lock') }}
          restore-keys: |
            ${{ runner.os }}-node-
actions/cache@v2を使って、今回はnode_modulesの依存関係をキャッシュして、次回以降に依存関係を再利用出来るため、次回以降の実行時間が短縮されます。
キャッシュアクションを使用する際の流れ
まず、指定したkeyに基づいて完全に当てはまるキャッシュを見つけた場合、pathにキャッシュされたファイルが復元されます。また、別のブランチからキャッシュを復元する場合等の理由で、部分的に一致する可能性がある場合は、restore-keysを使用して、keyでの指定同様、pathにファイルが復元されます。(GitHub公式ドキュメントのこちらを参照)
(7)
      - name: Bundler and gem install
        run: |
          gem install bundler
          bundle install --jobs 4 --retry 3 --path vendor/bundle

      - name: Yarn install
        run: yarn install --check-files
テストを実行する環境を作るため、yarnをインストールし、gem のバージョン等を管理する bundlerをインストールしています。
(8)
      - name: Check for port conflicts and set CAPYBARA_PORT
        run: |
          PORT=4444
          if lsof -i:$PORT; then
            echo "Port $PORT is in use, killing the process"
            lsof -ti:$PORT | xargs kill -9
          fi
          CAPYBARA_PORT=3001
          echo "CAPYBARA_PORT=$CAPYBARA_PORT" >> $GITHUB_ENV
          echo "DEBUG: Capybara port set to $CAPYBARA_PORT"
GitHub Actionsの実行時に、main.ymlで定義をしているchromeと、リポジトリ上のspec/rails_helper.rbで定義しているCapybaraのポート番号が被っていることによるエラーが発生していたので、以上の(8)を追記をしましたが、エラーが発生していなければ、記載は不要かもしれません。
(9)
      - name: Database create and migrate
        run: |
          cp config/database.yml.ci config/database.yml
          bundle exec rails db:create RAILS_ENV=test
          bundle exec rails db:migrate RAILS_ENV=test

      - name: assets precompile
        run: bundle exec rake assets:precompile RAILS_ENV=test

      - name: Run tests
        run: |
          bundle exec rspec
        env:
          SELENIUM_DRIVER_URL: http://localhost:4445/wd/hub
          CAPYBARA_PORT: ${{ env.CAPYBARA_PORT }}
テストを実行する環境を作るため、database.yml.ciで記載しているテスト実行用のデータベースファイルの内容をコピーし、データベースを作成して、マイグレーションを実行した後、アセット(画像、CSS、JavaScriptなど)をコンパイルしてテストを実行しています。
rubocop:の内容は、上記のrspec:の説明内容と被るため、割愛させていただきます。
以上の内容をコミットして、GitHub Actionsでの設定は終了となります!🎉🎉
おわりに
文字に起こしてみることで、実装する際に理解が不足していた点を気づくことができました。
未だ勉強不足な点が多く、引き続き学習していきたいと思います。
お忙しい中、最後まで読んでいただきありがとうございました。
参考資料