リストと詳細の表示
ヒーローを表示する
今回、10人のヒーローのデータを表示します。
データベースの代わりに新しいファイルを作成して、ヒーローの情報を記述します。
$ cd src/app
$ touch mock-heroes.ts
import {Hero} from './hero'

export const HEROES : Hero[] = [
    { id: 11, name: 'Dr Nice' },
    { id: 12, name: 'Narco' },
    { id: 13, name: 'Bombasto' },
    { id: 14, name: 'Celeritas' },
    { id: 15, name: 'Magneta' },
    { id: 16, name: 'RubberMan' },
    { id: 17, name: 'Dynama' },
    { id: 18, name: 'Dr IQ' },
    { id: 19, name: 'Magma' },
    { id: 20, name: 'Tornado' }
];
このヒーローのデータをリストとして表示したいです。
そのためにまず、tsファイルでHTMLに表示するためのプロパティを作っていきます。
heroes = HEROES;//これを追加する
ですが、heroesプロパティには配列でヒーローのデータが格納されているので、Angularのfor文を使ってヒーローのデータをそれぞれ表示していきます。
<h2>My Heroes</h2>
<ul class="heroes">
  <li *ngFor="let hero of heroes">//ここがfor文
    <span class="badge">{{hero.id}}</span> {{hero.name}}
  </li>
</ul>
tsファイルで定義したheroesをheroという変数を作って代入していきます。

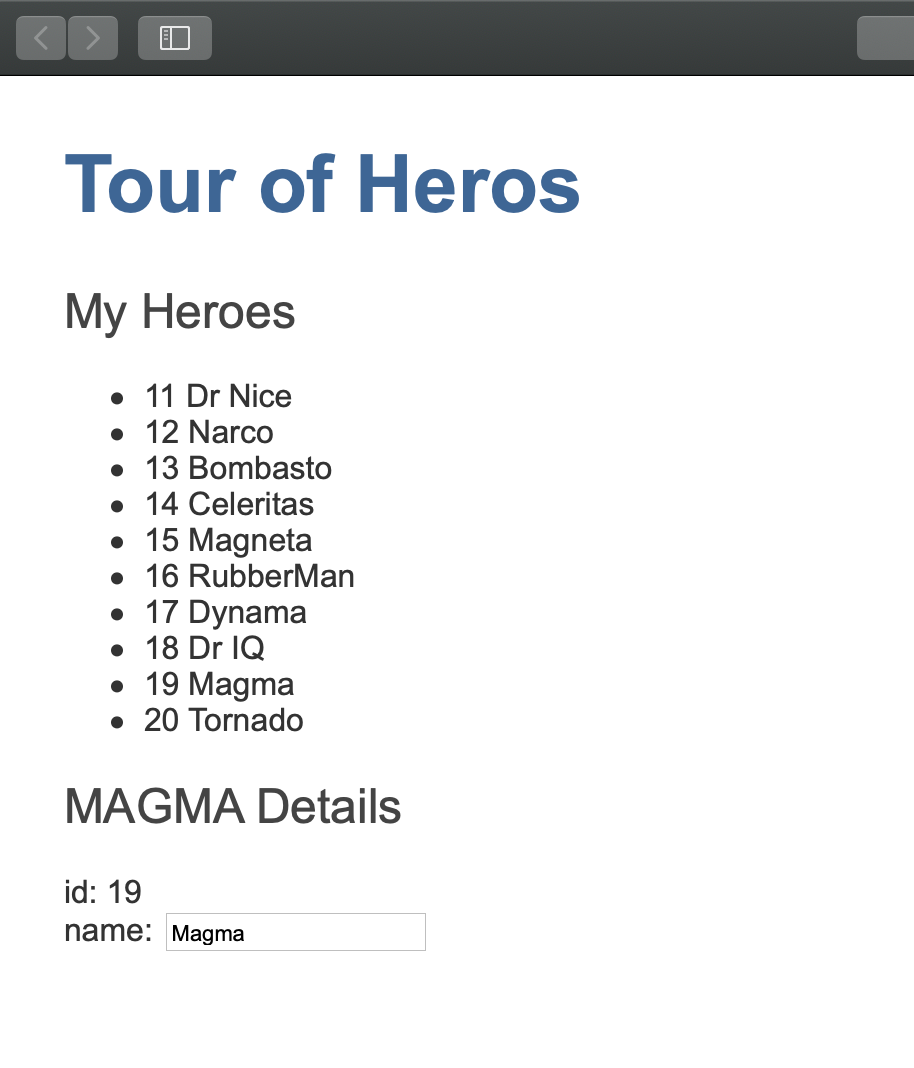
このようにヒーローのリストができました。
クリック時に詳細の表示
次にクリックされたヒーローの詳細を表示するようにします。
<li *ngFor="let hero of heroes" (click)="onSelect(hero)">
liタグにクリックイベントを追加します。
こうすると、クリック時にonSelect(hero)式、つまり関数的なものが発動されます。この関数をtsファイルで定義していきます。
export class HeroesComponent implements OnInit {

  heroes = HEROES;
  selectedHero: Hero;//ここを追加

  constructor() { }

  ngOnInit() {
  }

  onSelect(hero: Hero): void {//ここを追加
    this.selectedHero = hero;
  }

}
このようにクリックされたヒーローのデータがselectHeroに格納されます。
次に詳細を表示するHTMLファイルを作ります。
<div *ngIf="selectedHero">

  <h2>{{selectedHero.name | uppercase}} Details</h2>
  <div><span>id: </span>{{selectedHero.id}}</div>
  <div>
    <label>name:
      <input [(ngModel)]="selectedHero.name" placeholder="name"/>
    </label>
  </div>

</div>
リスト部分の下にこれを記述します。
ここで*ngIfはAngularのif文です。今回のコードでこのif文が無いとエラーが発生します。
 実際にクリックしてみると、このようにヒーローの詳細が表示されます。
CSSを整える
クリックなどをわかりやすくします。
まずhtmlファイルにクラスバインディングを記述していきます。
liタグを以下のように変更します。
<li *ngFor="let hero of heroes"
  [class.selected]="hero === selectedHero"
  (click)="onSelect(hero)">
これで、hero === selectedHeroのとき、すなわちクリックされたときclass=selectedになります。
heroコンポーネント独自のCSSファイルに記述していきます。
/* HeroesComponent's private CSS styles */
.heroes {
  margin: 0 0 2em 0;
  list-style-type: none;
  padding: 0;
  width: 15em;
}
.heroes li {
  cursor: pointer;
  position: relative;
  left: 0;
  background-color: #EEE;
  margin: .5em;
  padding: .3em 0;
  height: 1.6em;
  border-radius: 4px;
}
.heroes li:hover {
  color: #607D8B;
  background-color: #DDD;
  left: .1em;
}
.heroes li.selected {
  background-color: #CFD8DC;
  color: white;
}
.heroes li.selected:hover {
  background-color: #BBD8DC;
  color: white;
}
.heroes .badge {
  display: inline-block;
  font-size: small;
  color: white;
  padding: 0.8em 0.7em 0 0.7em;
  background-color:#405061;
  line-height: 1em;
  position: relative;
  left: -1px;
  top: -4px;
  height: 1.8em;
  margin-right: .8em;
  border-radius: 4px 0 0 4px;
}

ヒーローのリストと詳細を表示することができました。