はじめに
@takjg さんの記事を参考に、hubotが動く状態まで設定する。
とてもわかり易くまとめてくれているので、コマンド打っていくだけでセットアップできる。
https://scrapbox.io/smart-home/hubotの雛形の生成
https://scrapbox.io/smart-home/hubotでRM_Mini3を操作する
https://scrapbox.io/smart-home/RM_Mini3の初期設定
https://scrapbox.io/smart-home/SlackでRM Mini3を操作する
https://scrapbox.io/smart-home/Rasberry Piの起動時にhubotも自動的に起動させる
node.jsのセットアップ
curl -fsSL https://deb.nodesource.com/setup_14.x | sudo -E bash -
sudo apt update
sudo apt install -y nodejs npm
sudo npm cache verify --force
sudo npm install npm -g
sudo npm install n -g
sudo n lts
redis
インストール
sudo apt install redis-server
データの移行
RP3で動いていたRedisのデータを移動する
(RP3)$ redis-cli save
(RP3)$ sudo ls /var/lib/redis/
 dump.rdb
dump.rdbをscpでRP4に転送する
転送する際はredisを停止させておく
hubotのセットアップ
インストール
sudo npm install -g yo generator-hubot
mkdir homebot  # 「homebot」
cd homebot
yo hubot
 ? Owner          # そのままエンター
 ? Bot name       # 「homebot」と入力
 ? Description
 ? Bot adapter    # 「slack」と入力
設定
npm install coffee-script@^1.12.6
npm install hubot-broadlink-rm --legacy-peer-deps
rm hubot-scripts.json
vim external-scripts.json
 [
              :
    "hubot-heroku-keepalive",           # この1行を削除
    "hubot-broadlink-rm",               # この1行を追加
              :
 ]
hubotのバージョンが上がって依存関係クリアできないようになっているので、古いバージョンで動かす
vim package.json
 [
              :
    "hubot": "^3.3.2",
    "hubot-slack": "^4.5.3"
              :
 ]
RM mini3のセットアップ
ここを見ながら設定する
https://scrapbox.io/smart-home/RM_Mini3の初期設定
hubotの起動
bin/hubot # hubotを起動する

homebot> [Sun Feb 09 2020 14:43:29 GMT+0900 (GMT+09:00)] INFO hubot-redis-brain: Using default redis on localhost:6379
[Sun Feb 09 2020 14:43:29 GMT+0900 (GMT+09:00)] INFO hubot-redis-brain: Data for hubot brain retrieved from Redis
Discovered Broadlink RM device at 192.168.1.xx (xx:xx:xx:xx:xx:xx)
homebot> homebot ping
homebot> PONG
Broadlinkのデバイスが見えて、PONGが帰ってきたら動いている
Hubotをslackをつなぐ
SlackにHubotを登録してTokenを取得
Slack -> メニュー -> その他管理項目 -> アプリを管理する
hubotを検索 -> homebotとして登録
設定を編集 -> HUBOT_SLACK_TOKEN=xxxxxxxxxxxxxxxxxxxxxxxxxxxxxxxxxxxxxxxをコピー
Tokenの設定
~/homebot/bin/hubotを編集
 export PATH= ...
 export HUBOT_SLACK_TOKEN=xxxxxxxxxxxxxxxxxxxxxxxxxxxxxxxxxxxxxxx    # Tokenを設定する
 exec ...
起動する
bin/hubot --adapter slack
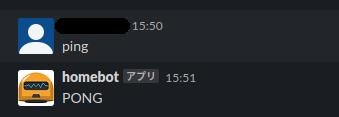
Slackで応答してくれたらOK
Hubotを自動起動する
起動スクリプトファイル作成
vim ~/homebot/bin/homebot.shを作成
 #!/bin/sh
 cd /home/pi/homebot
 sudo -u pi bin/hubot --adapter slack
chmod 755 bin/homebot.shで実行権を与える
systemdの設定ファイル作成
sudo vim /etc/systemd/system/homebot.serviceを作成
 [Unit]
 Description = homebot

 [Service]
 ExecStart=/home/pi/homebot/bin/homebot.sh
 Restart=always
 Type=simple

 [Install]
 WantedBy=multi-user.targe
有効化
systemctl list-unit-files --type=service  | grep homebot  # homebotが登録されているか確認
sudo systemctl enable homebot # 有効化する
rebootして、sudo systemctl status hubotでサービス起動していればOK
これで楽しい遠隔家電操作が可能になる
