ステート管理ライブラリ『jotai』を使うと、useStateを置き換えるだけで、グローバルステートを永続化できます!
jotai 2.0.3を使用しました
Reactアプリにおけるステートの永続化について
ページのリロードや、タブを閉じても保持したいステートがある場合、localStorageやsessionStorageに保存するのが一般的です。
その際、数値やオブジェクトのステートであっても、自動的に文字列に変換されてしまうため、JSON.parse()/JSON.stringify()メソッドを利用して、シリアライズ/デシリアライズした変換したうえで保存するのが一般的です。
そのため、jotaiを使わない場合、下記のようにカスタムフックなどを使ってステートを永続化します。
// カスタムhook
import { useEffect, useState } from 'react';

export const useLocalStorage = (key, initialValue) => {
  const [value, setValue] = useState(() => {
    const keyValue = localStorage.getItem(key);
    return keyValue ? JSON.parse(keyValue) : initialValue;
  });

  useEffect(() => {
    localStorage.setItem(key, JSON.stringify(value));
  }, [key, value]);

  return [value, setValue];
};

export default useLocalStorage;
import { useLocalStorage } from './state/auth'

const App: FC = () => {
    // 永続化したステートの利用
	const [user, setUser] = useLocalStorage('auth',null)
自前でカスタムフックを実装しても、そこまで可読性は低いわけではないですが、jotaiを使うともっとシンプルにできます。
localStorageとsessionStorageの違いとしては、sessionStorageはブラウザを閉じると消えてしまうのに対して、localStorageは意図して消さない限り残り続けます。詳細は、Window.localStorage - Web API | MDNを参照してください。
jotaiとは
JotaiはRecoilにインスパイアされた、軽量なReactアプリ用のステート管理ライブラリです。
下記のように、既存のuseStateを置き換えるだけで、グローバルなステートにできるシンプルさが大きな特徴の一つです。
// グローバルにしたいステート
const [auth,userAuth]=useState(null)

// jotaiでグローバルにしたステート
const [auth,useAuth]=useAtom('userAuth',null)
jotaiのatomWithStorageを使ったステート永続化
jotaiを使わない場合のステート永続化のサンプルコードをすでにご紹介しましたが、jotaiのutilitiesの一つであるatomWithStorageを利用すると、下記のようにuseStateを置き換えるだけでステートの永続化が可能になります。
// グローバル、かつ永続化したいステート
const [auth,userAuth]=useState(null)

// jotaiで永続化したグローバルステート
const [auth,useAuth]=atomWithStorage('userAuth',null)
これだけで、JSONへのシリアライズ/デシリアライズや、ステートの保存(デフォルトではlocalStoarge)処理もユーザー側で実装する必要がなくなりました。
すでに紹介したカスタムフックを利用したステート永続化のサンプルコードを、jotaiのatomWithStorageを使った実装に置き換えてみます。
import { atomWithStorage } from 'jotai/utils'
// 永続的なグローバルステートの定義
export const authAtom = atomWithStorage('auth', null)
import { authAtom } from './state/auth'

const App: FC = () => {
    // 永続化したグローバルステートの利用
	const [auth, setAuth]=useAtom(authAtom)
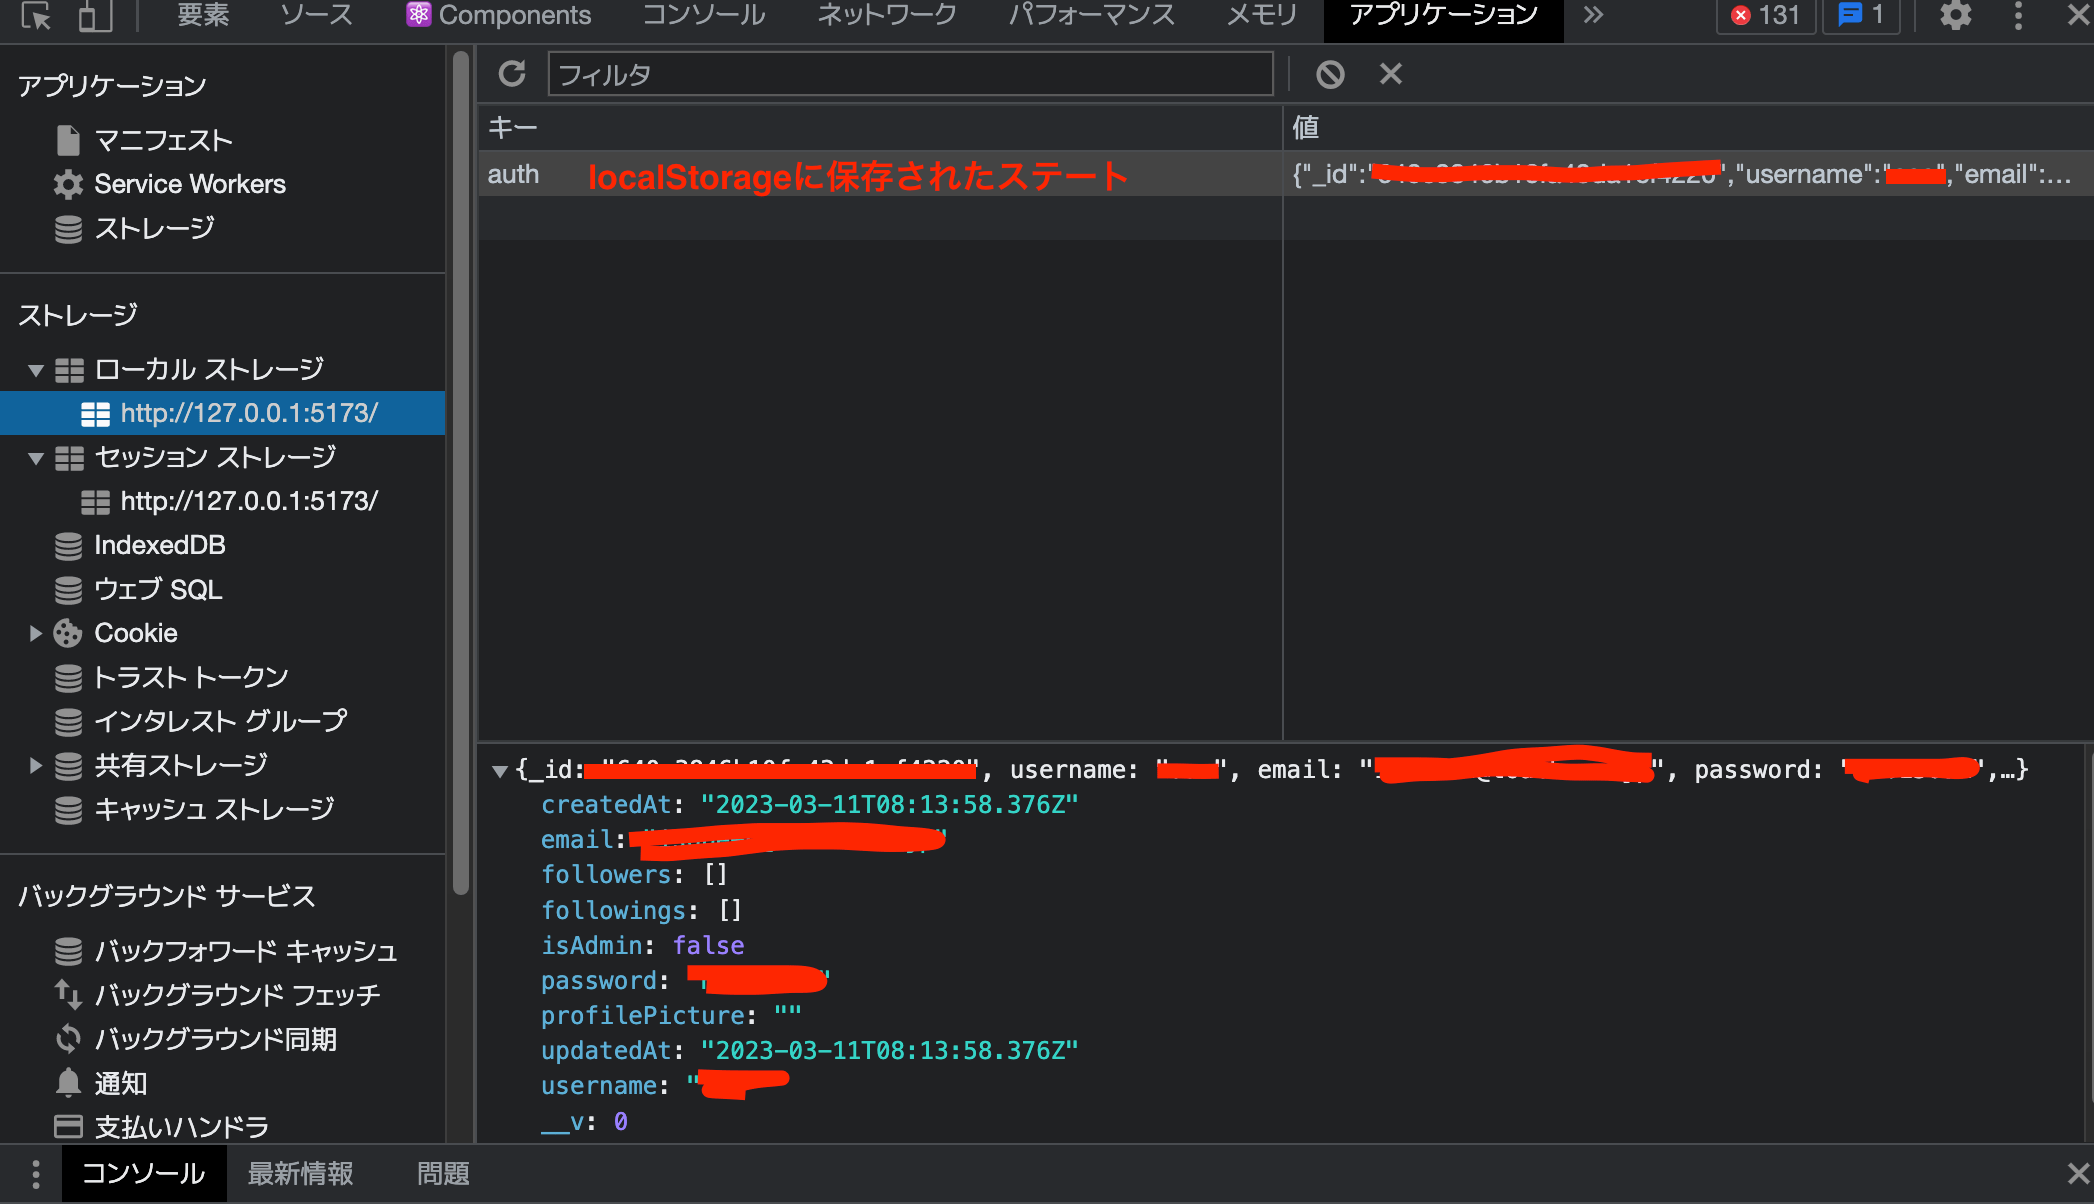
それでは、実際にlocalStorageに保存されているか試してみます。
以下のようなメールアドレスとパスワードを入力させるログインコンポーネントでログインしてみました。
import { useSetAtom } from 'jotai'

import { useRef } from 'react'
import { authAtom } from '../state/loginUser'

const Login: React.FC = () => {
    const setUser = useSetAtom(authAtom)
	const email = useRef<HTMLInputElement>(null)
	const password = useRef<HTMLInputElement>(null)
	const handleSubmit = async (e: React.FormEvent<HTMLFormElement>) => {
		e.preventDefault()
		const emailValue = email.current?.value
		const passwordValue = password.current?.value
		if (emailValue && passwordValue) {
            const res = await fetch(`/api/auth/login`, {
                method: 'POST',
                headers: { 'Content-Type': 'application/json' },
                body: JSON.stringify({ email: emailValue, password: passwordValue }),
            })
            setUser(await res.json())
        }
	}
    return(
    <>
        <form onSubmit={handleSubmit}>
            <input type="email" required placeholder="メールアドレス" ref={email}/>
            <input type="password" required placeholder="パスワード" ref={password}/>
            <button type="submit">ログイン</button>
        </form>
    </>)
}
ログインしてみると、localStorageにJSON形式でログインしたユーザー情報が保存されていることが確認できました。
まとめ
本記事では、jotaiのatomWithValueによるステート永続化の方法について紹介しました。
jotaiはuseState置き換えるだけでグローバル化できるシンプルさと使いやすいさが大きな魅力です。
加えて、今回紹介したような便利なutilitiesも活用することで、よりシンプルなコードにできるので、まだ使ったことない方はぜひ一度使ってみてこの便利さを体感してみてください。
