初めに
今回はPUSH通知を導入する方法を記事にします。
ローカル通知ではなくリモート通知です。
サーバレスでやっていきますが、firebaseやニフクラがありますが、今回はfirebaseでPUSH通知を送る方法を展開します。
※前提として有料ライセンス(AppleDeveloper)に加入していること。
環境
Xcode 11.6
Swift5
キーチェーンから証明書を取得
まず、キーチェンにアクセスしてCertificateで作成する際の必要なファイルを取得します。
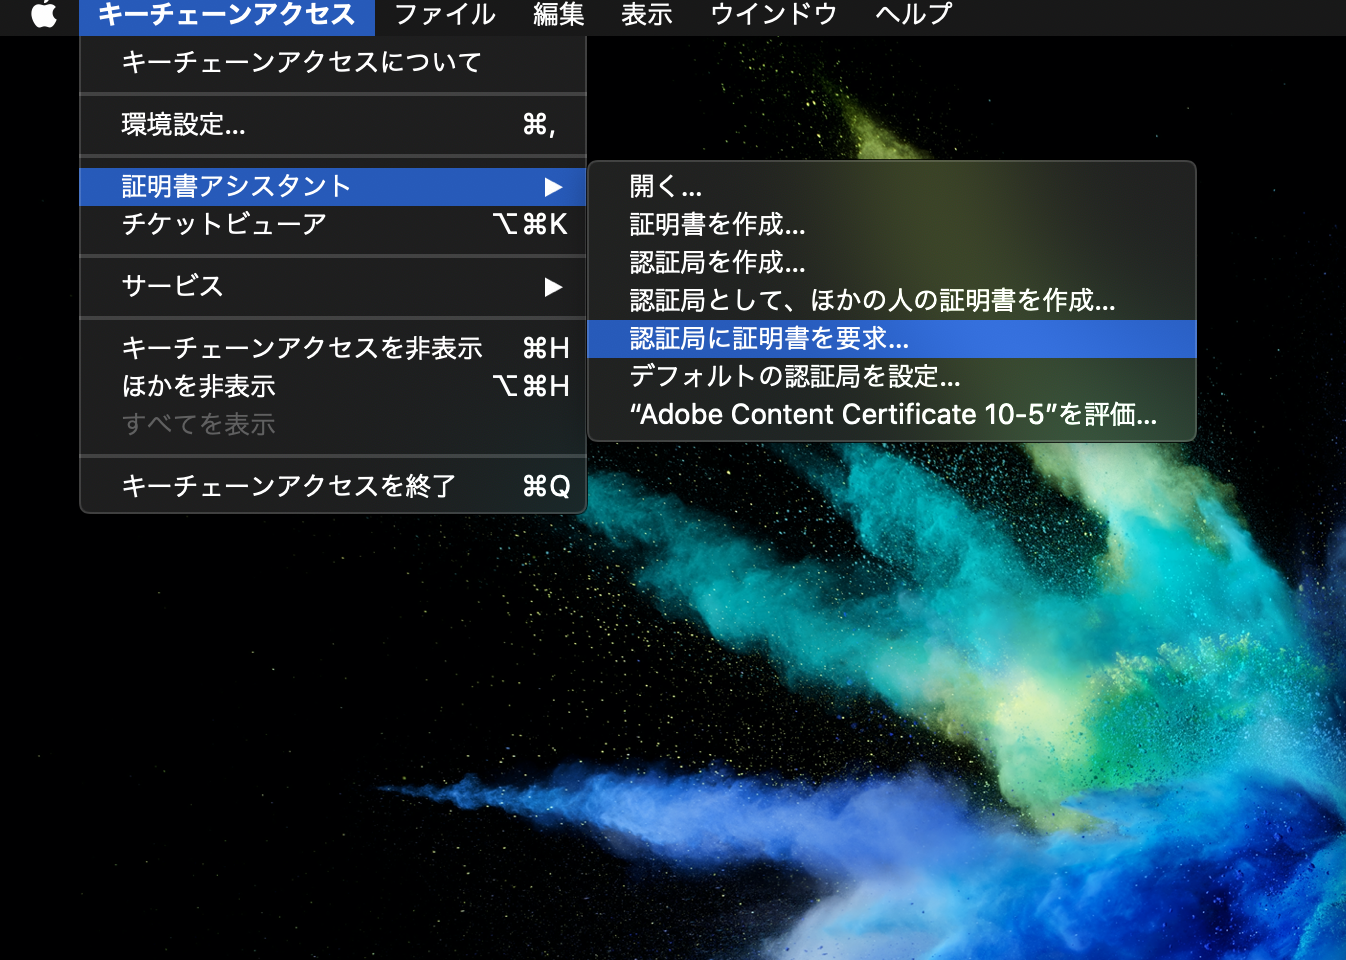
「キーチェーンアクセス」→「証明書アシスタント」→「認証局に証明書を要求」をクリック
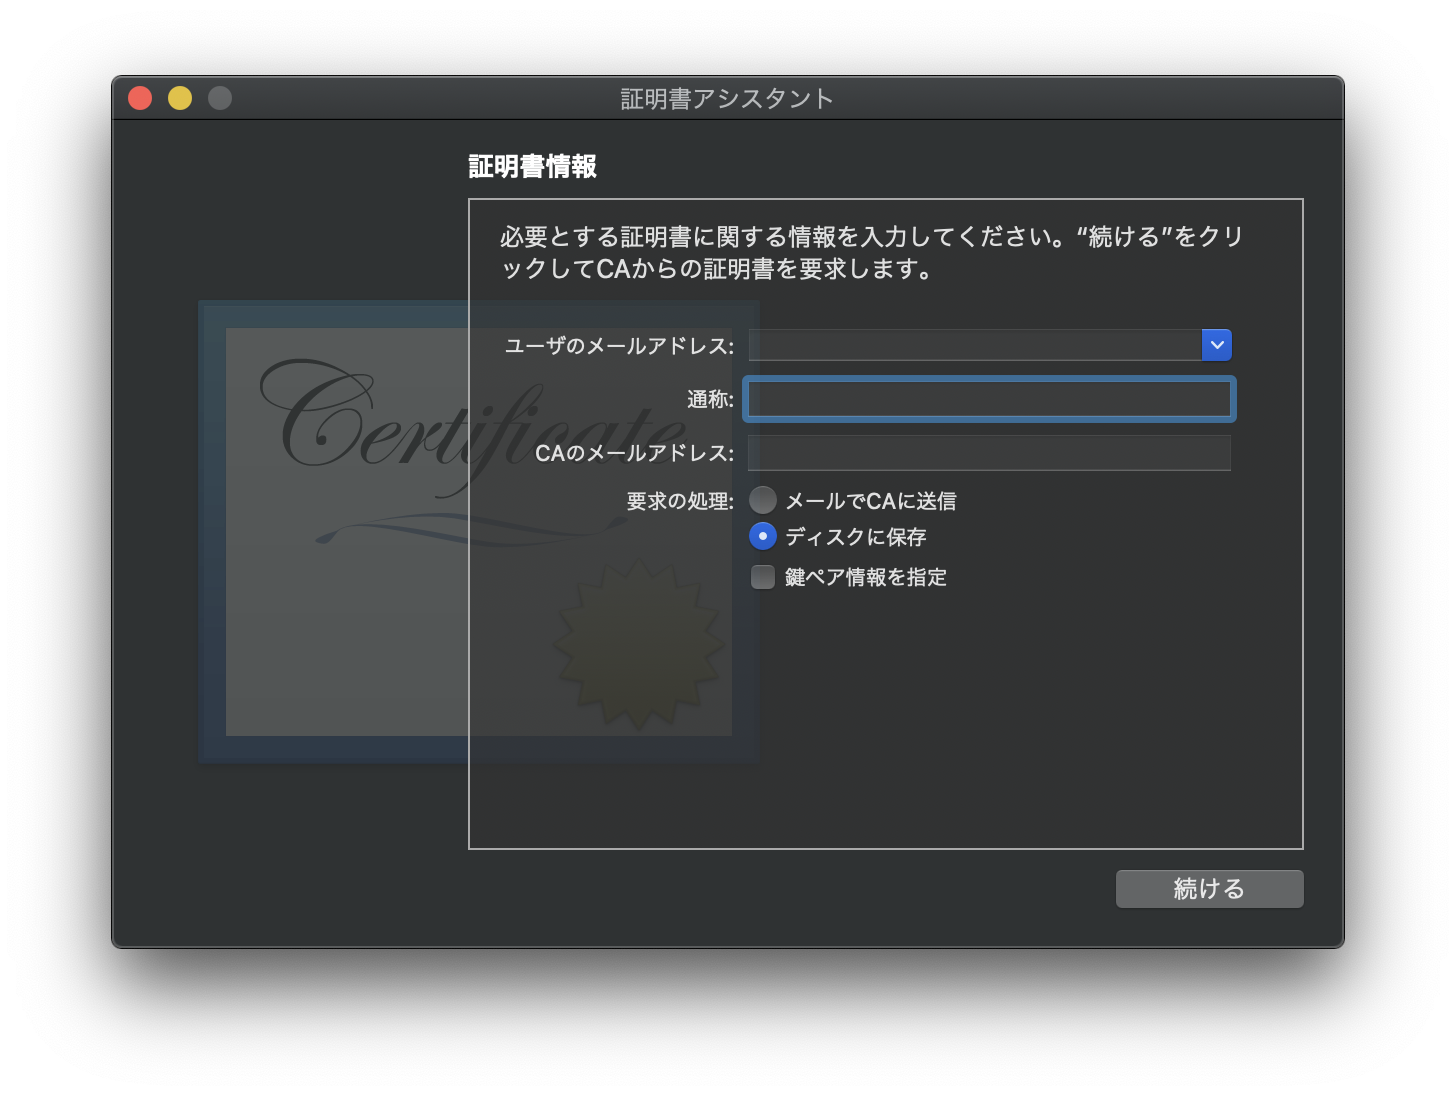
証明書アシスタントが出てくるので下記の情報を入力します。
ユーザのメールアドレス: developerのメールアドレス
通称:developerの名前
CAのメールアドレス:未記入
要求の処理:ディスクに保存
上記情報を入力した後、「続ける」を押下します。
あとはファイルの保存先を自分が分かる場所に指定して保存します。
APNs用証明書の作成手順
AppID作成
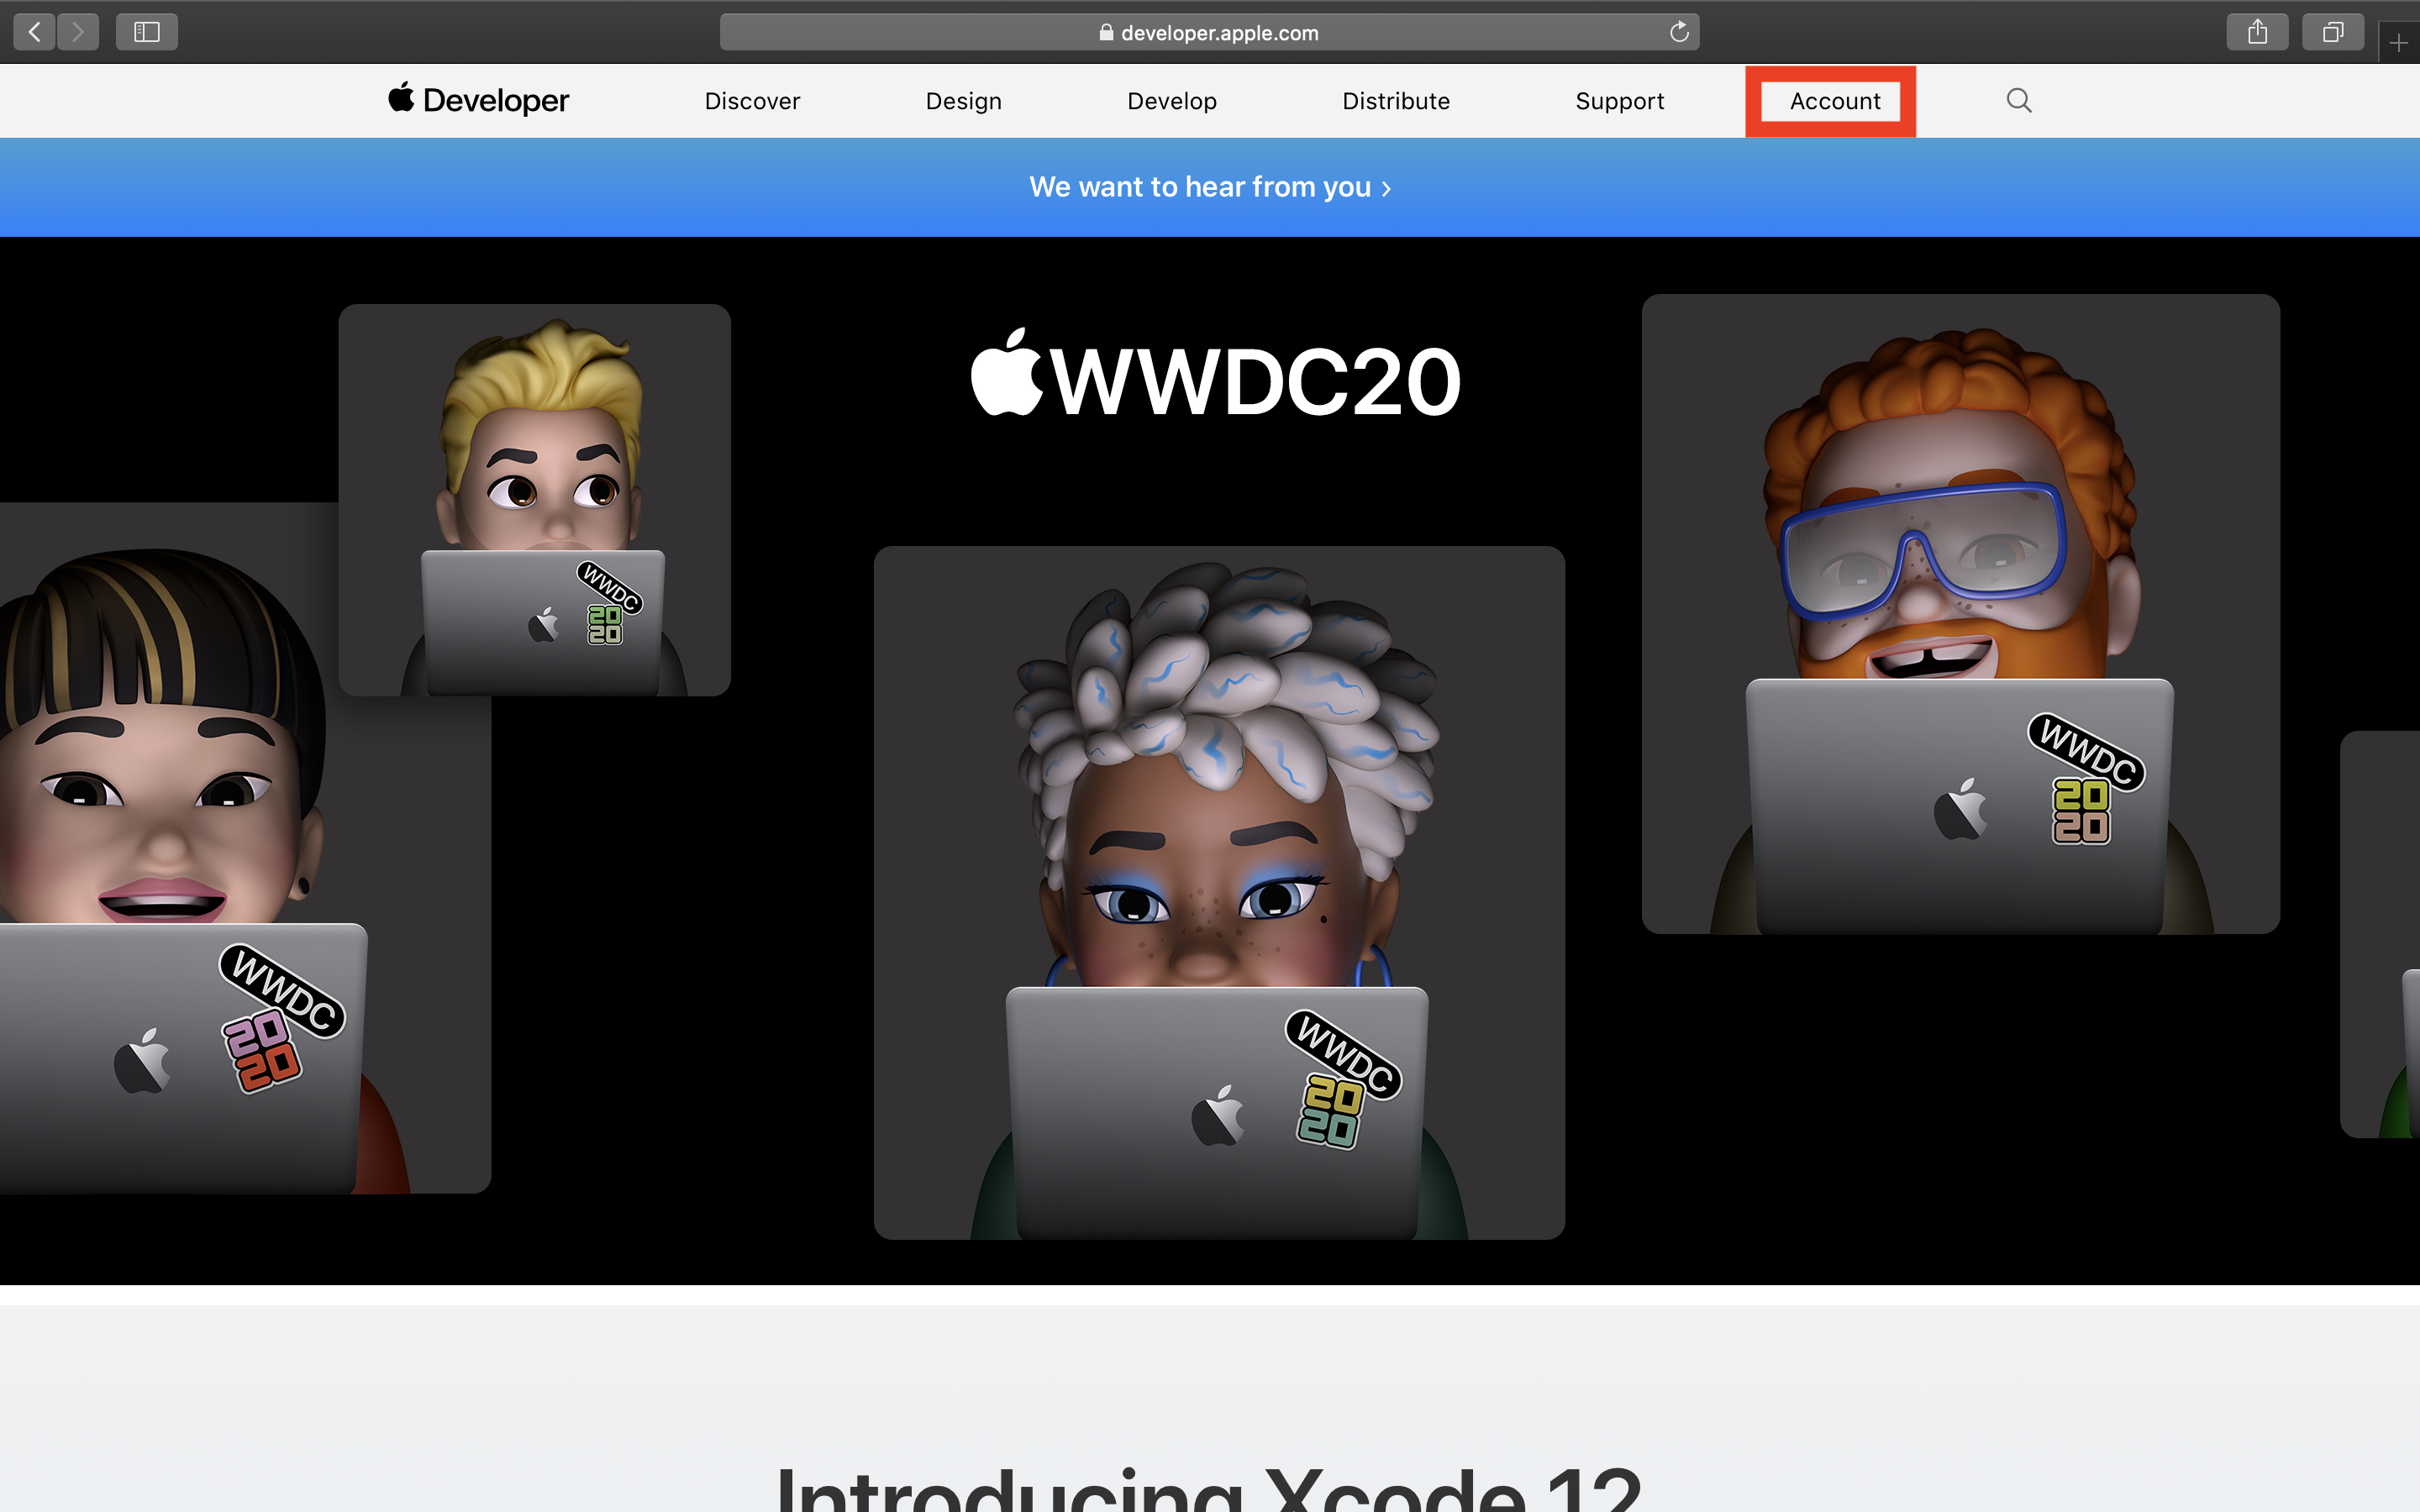
それではDeveloperサイトに行きます。
「Account」をクリック
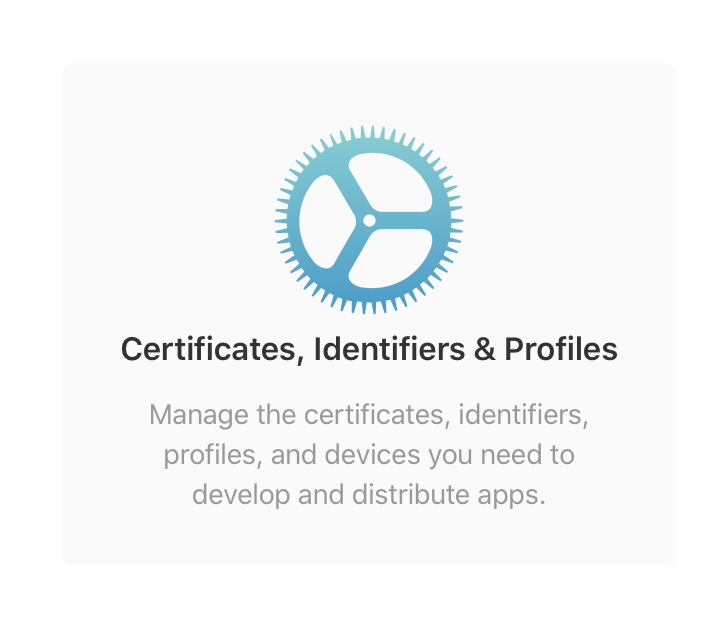
「Certificates, Identifiers & Profiles」をクリック
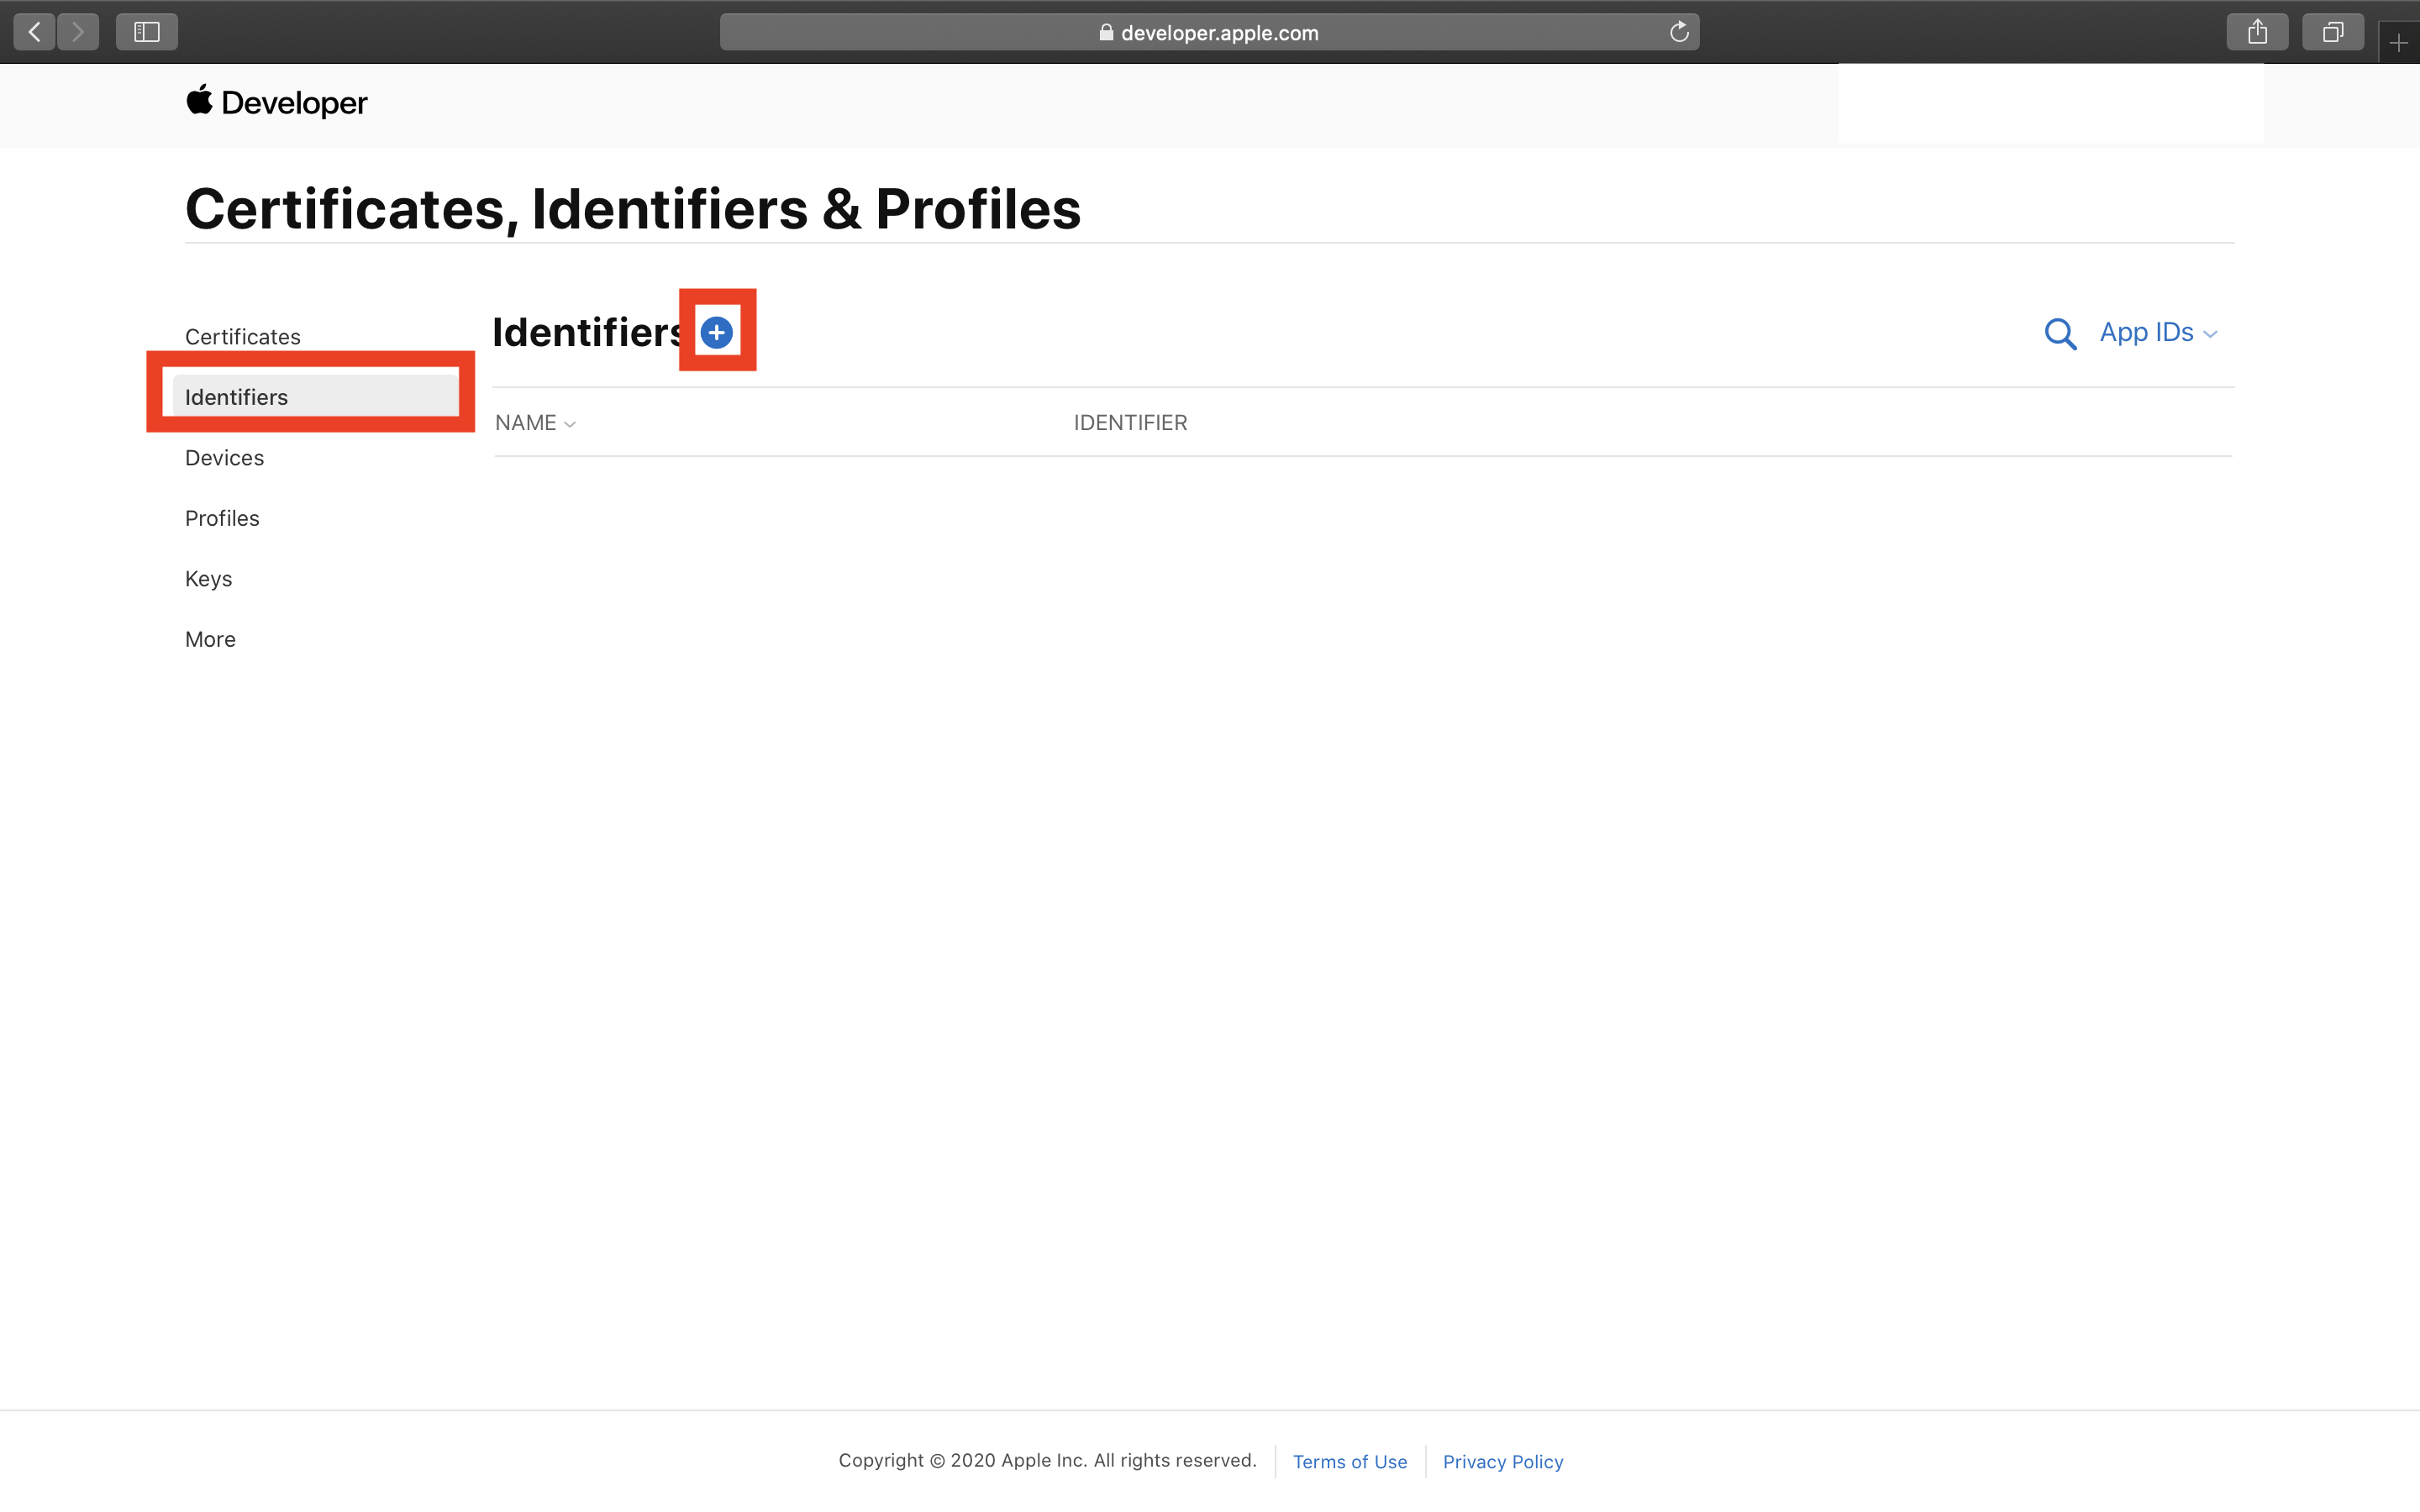
左メニューの「Identifiers」をクリック
「+」をクリック
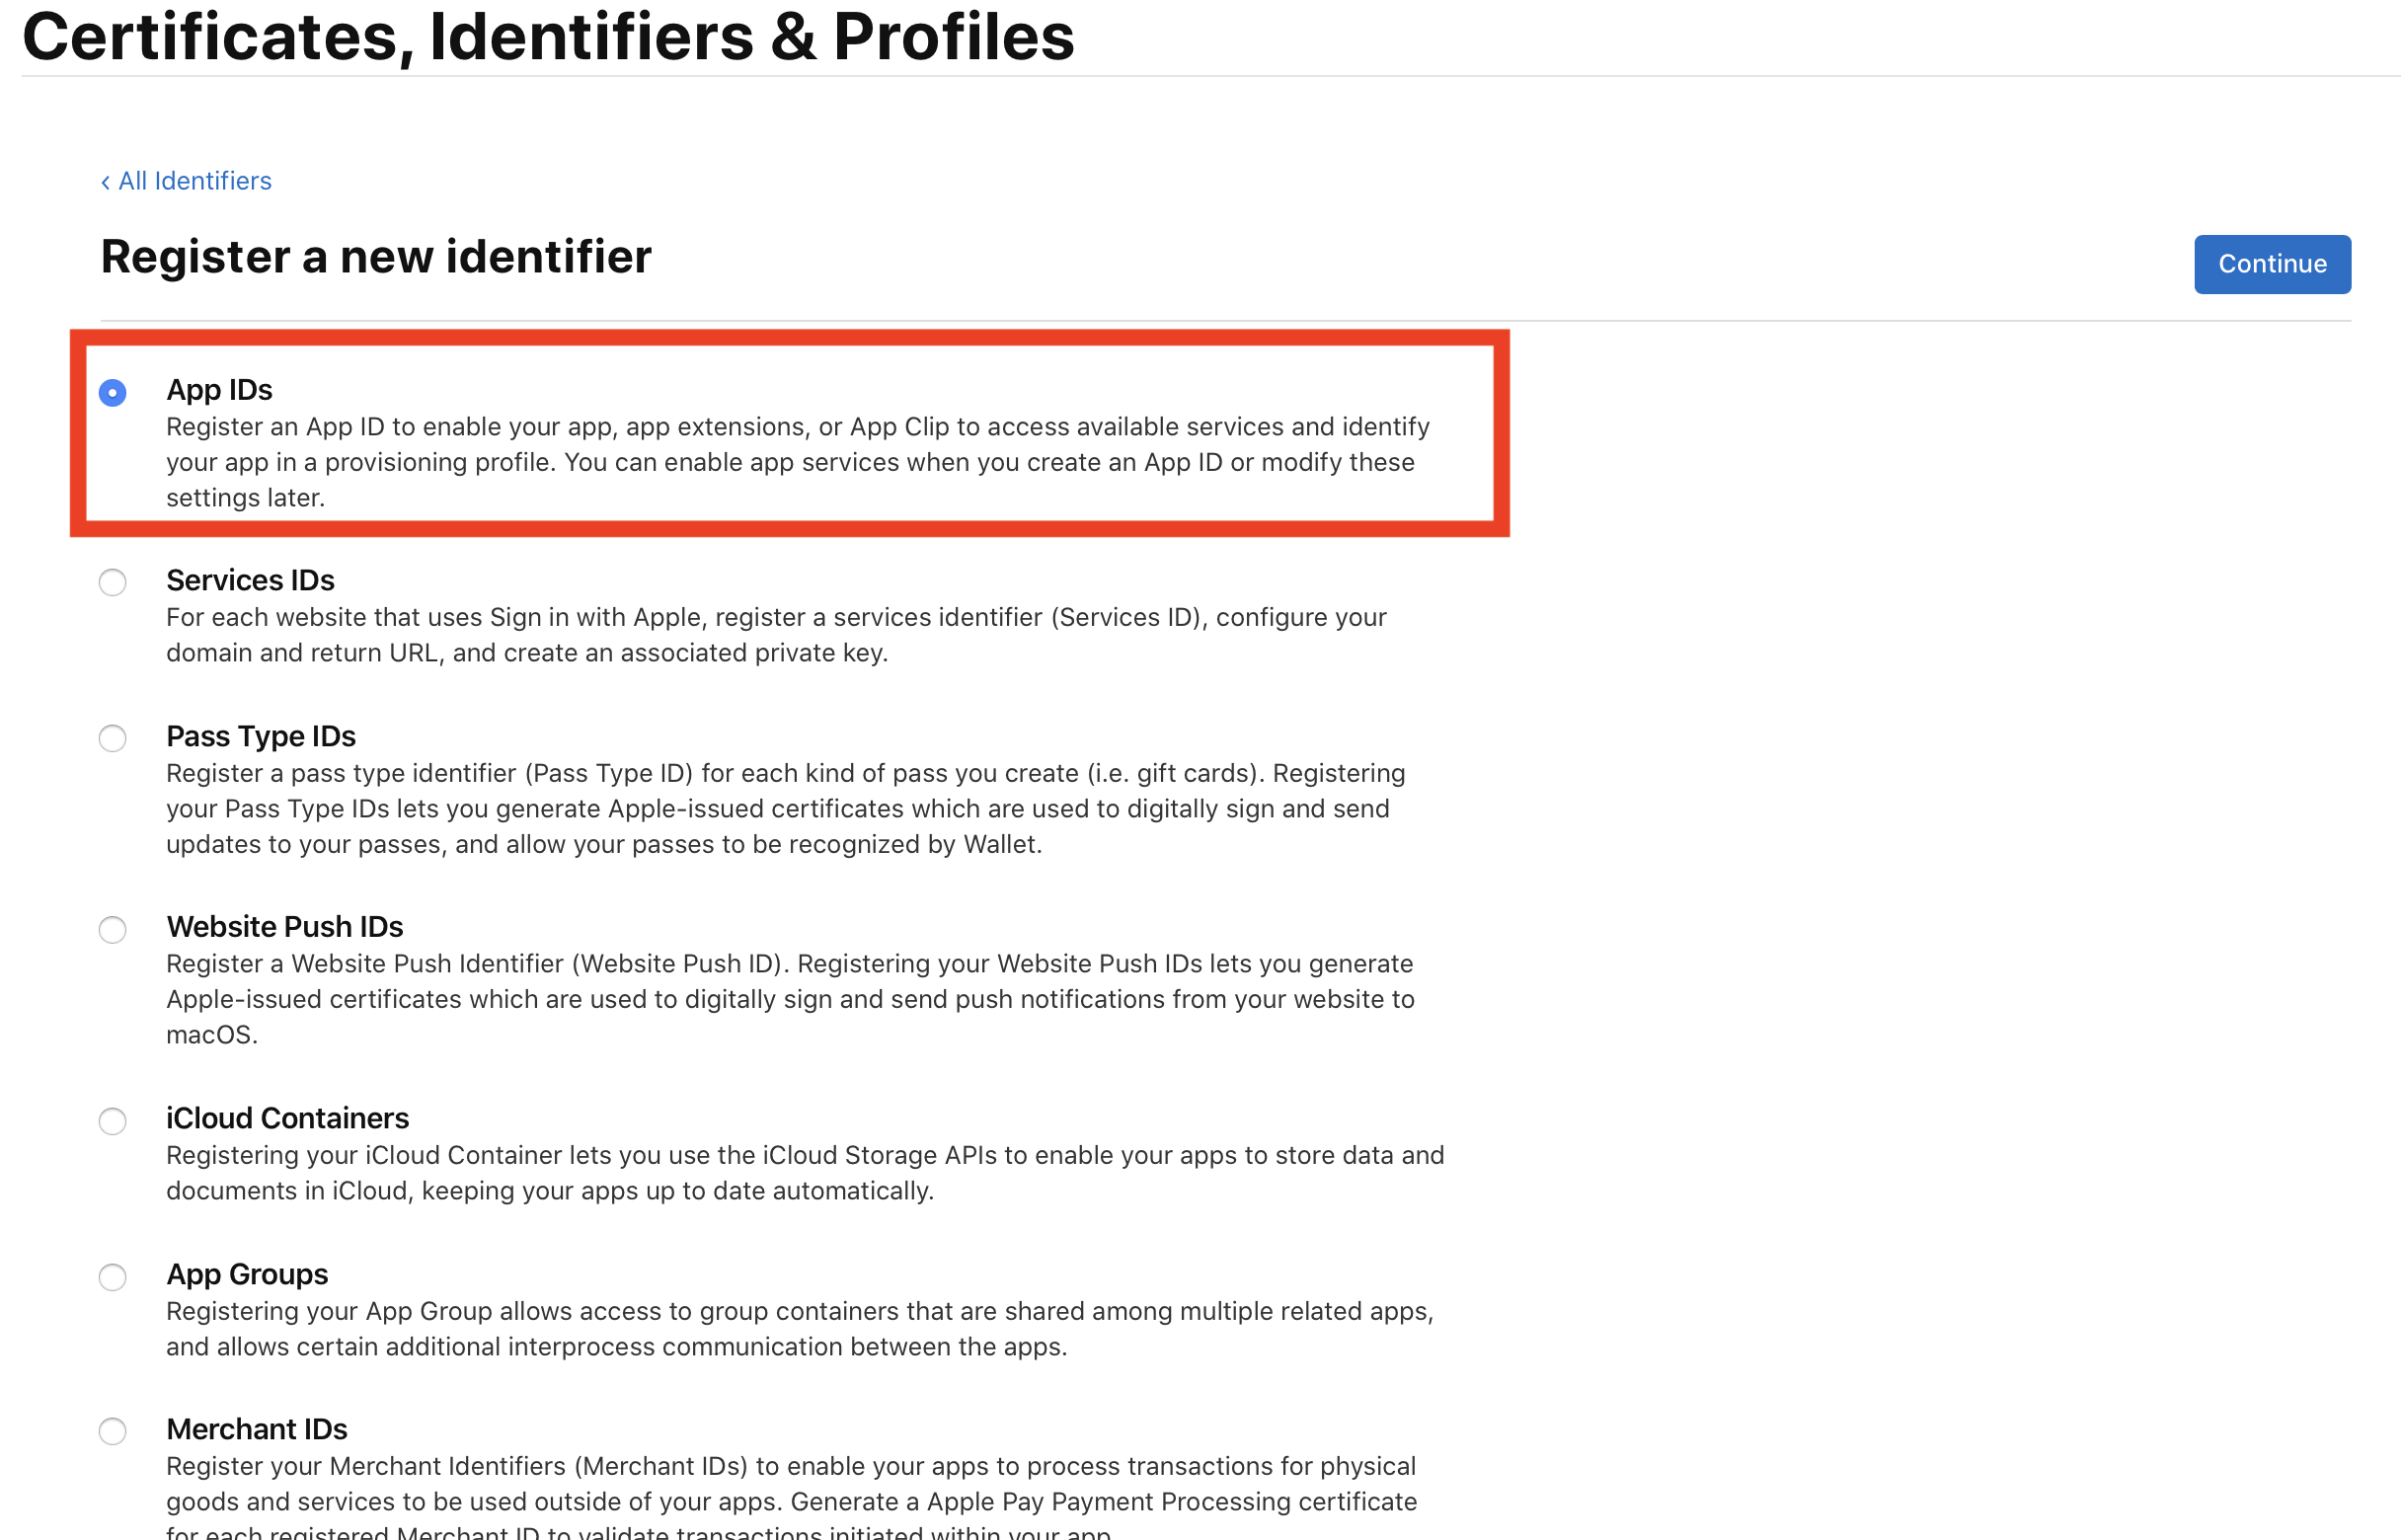
「App IDs」をクリック
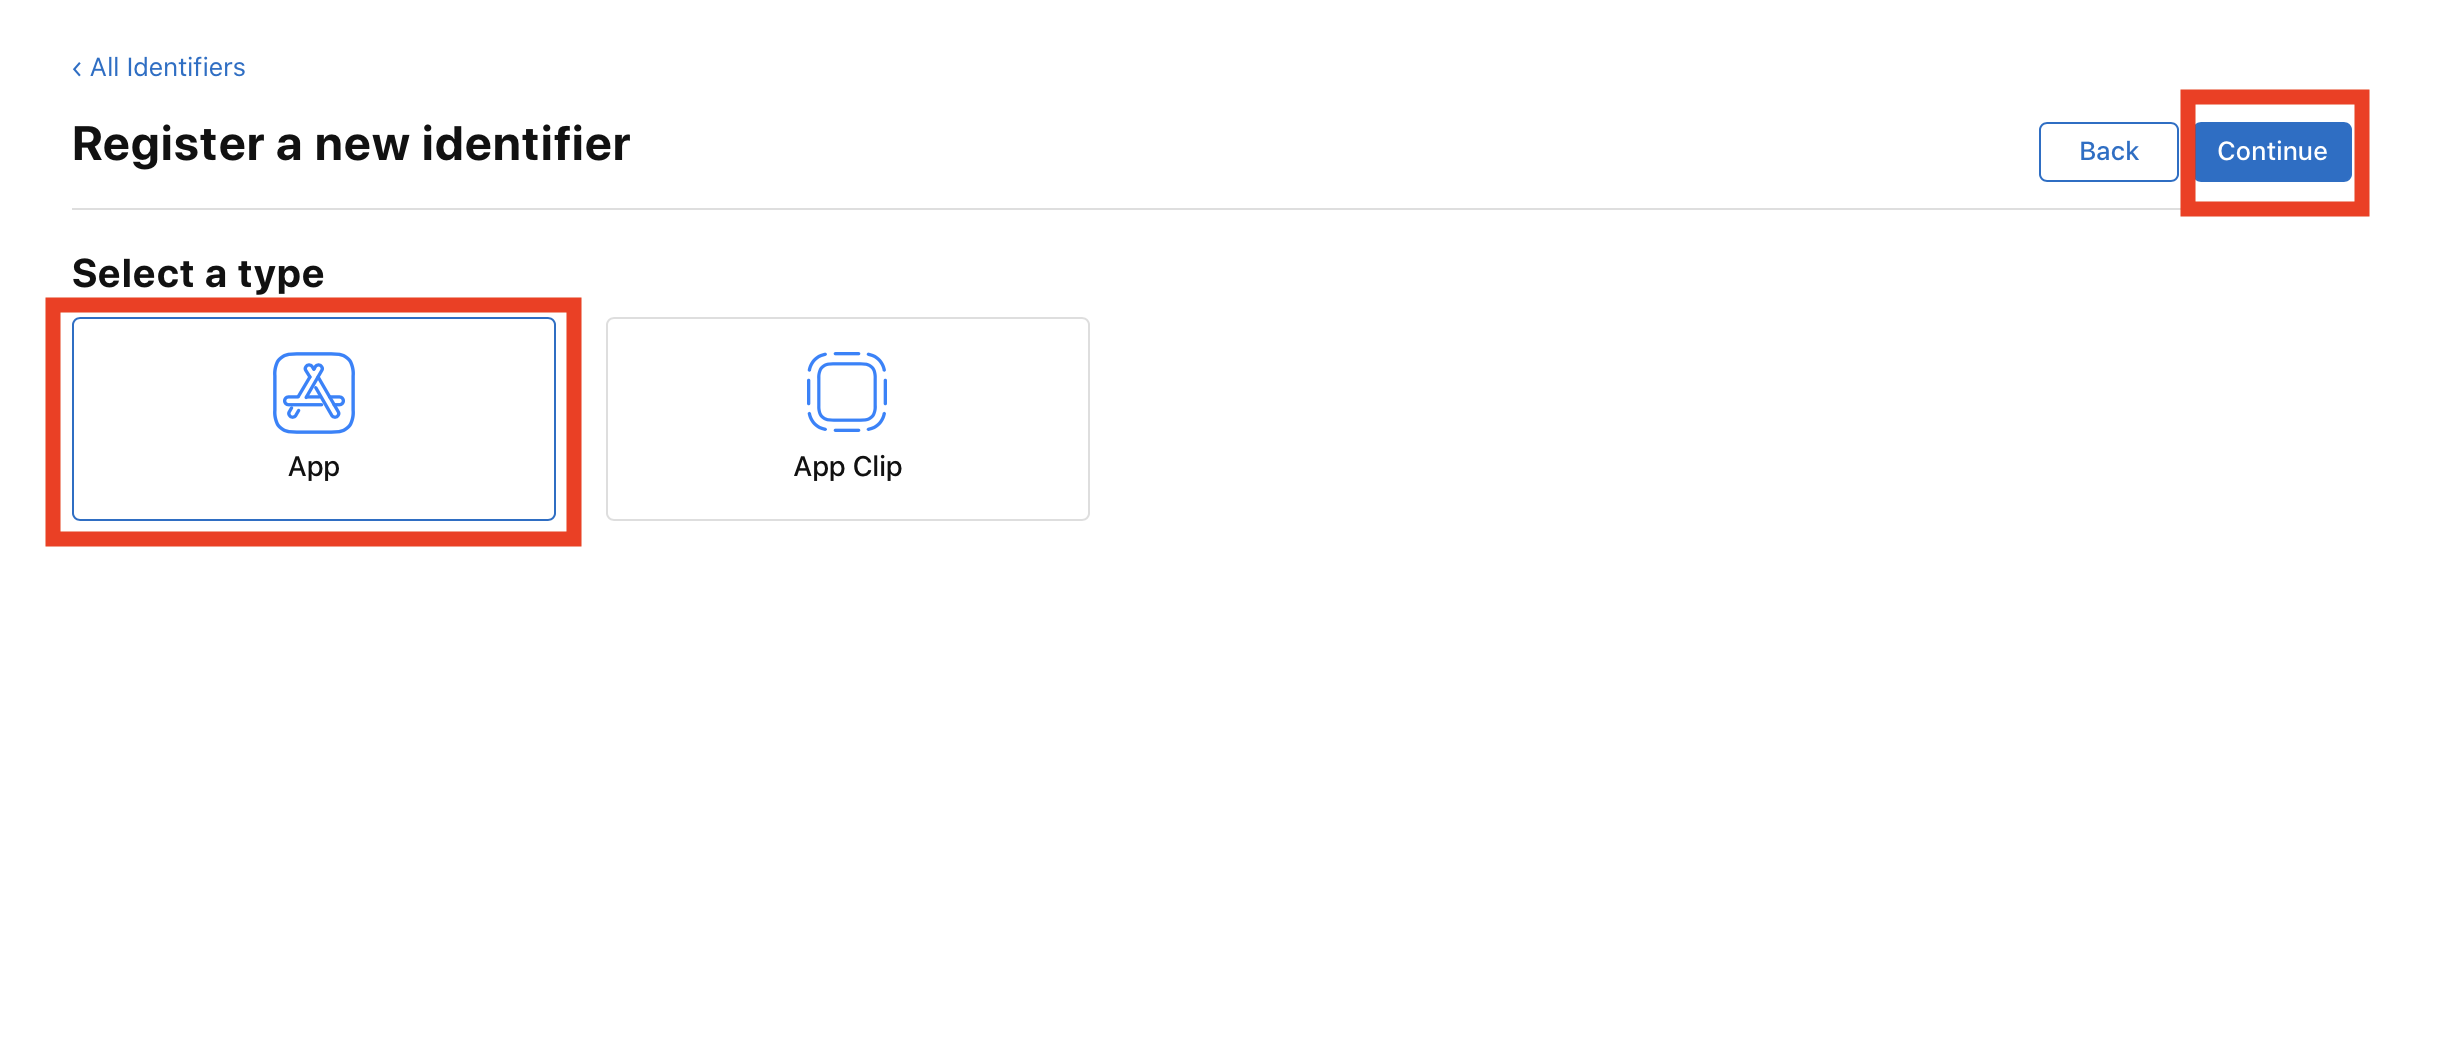
「App」をクリック
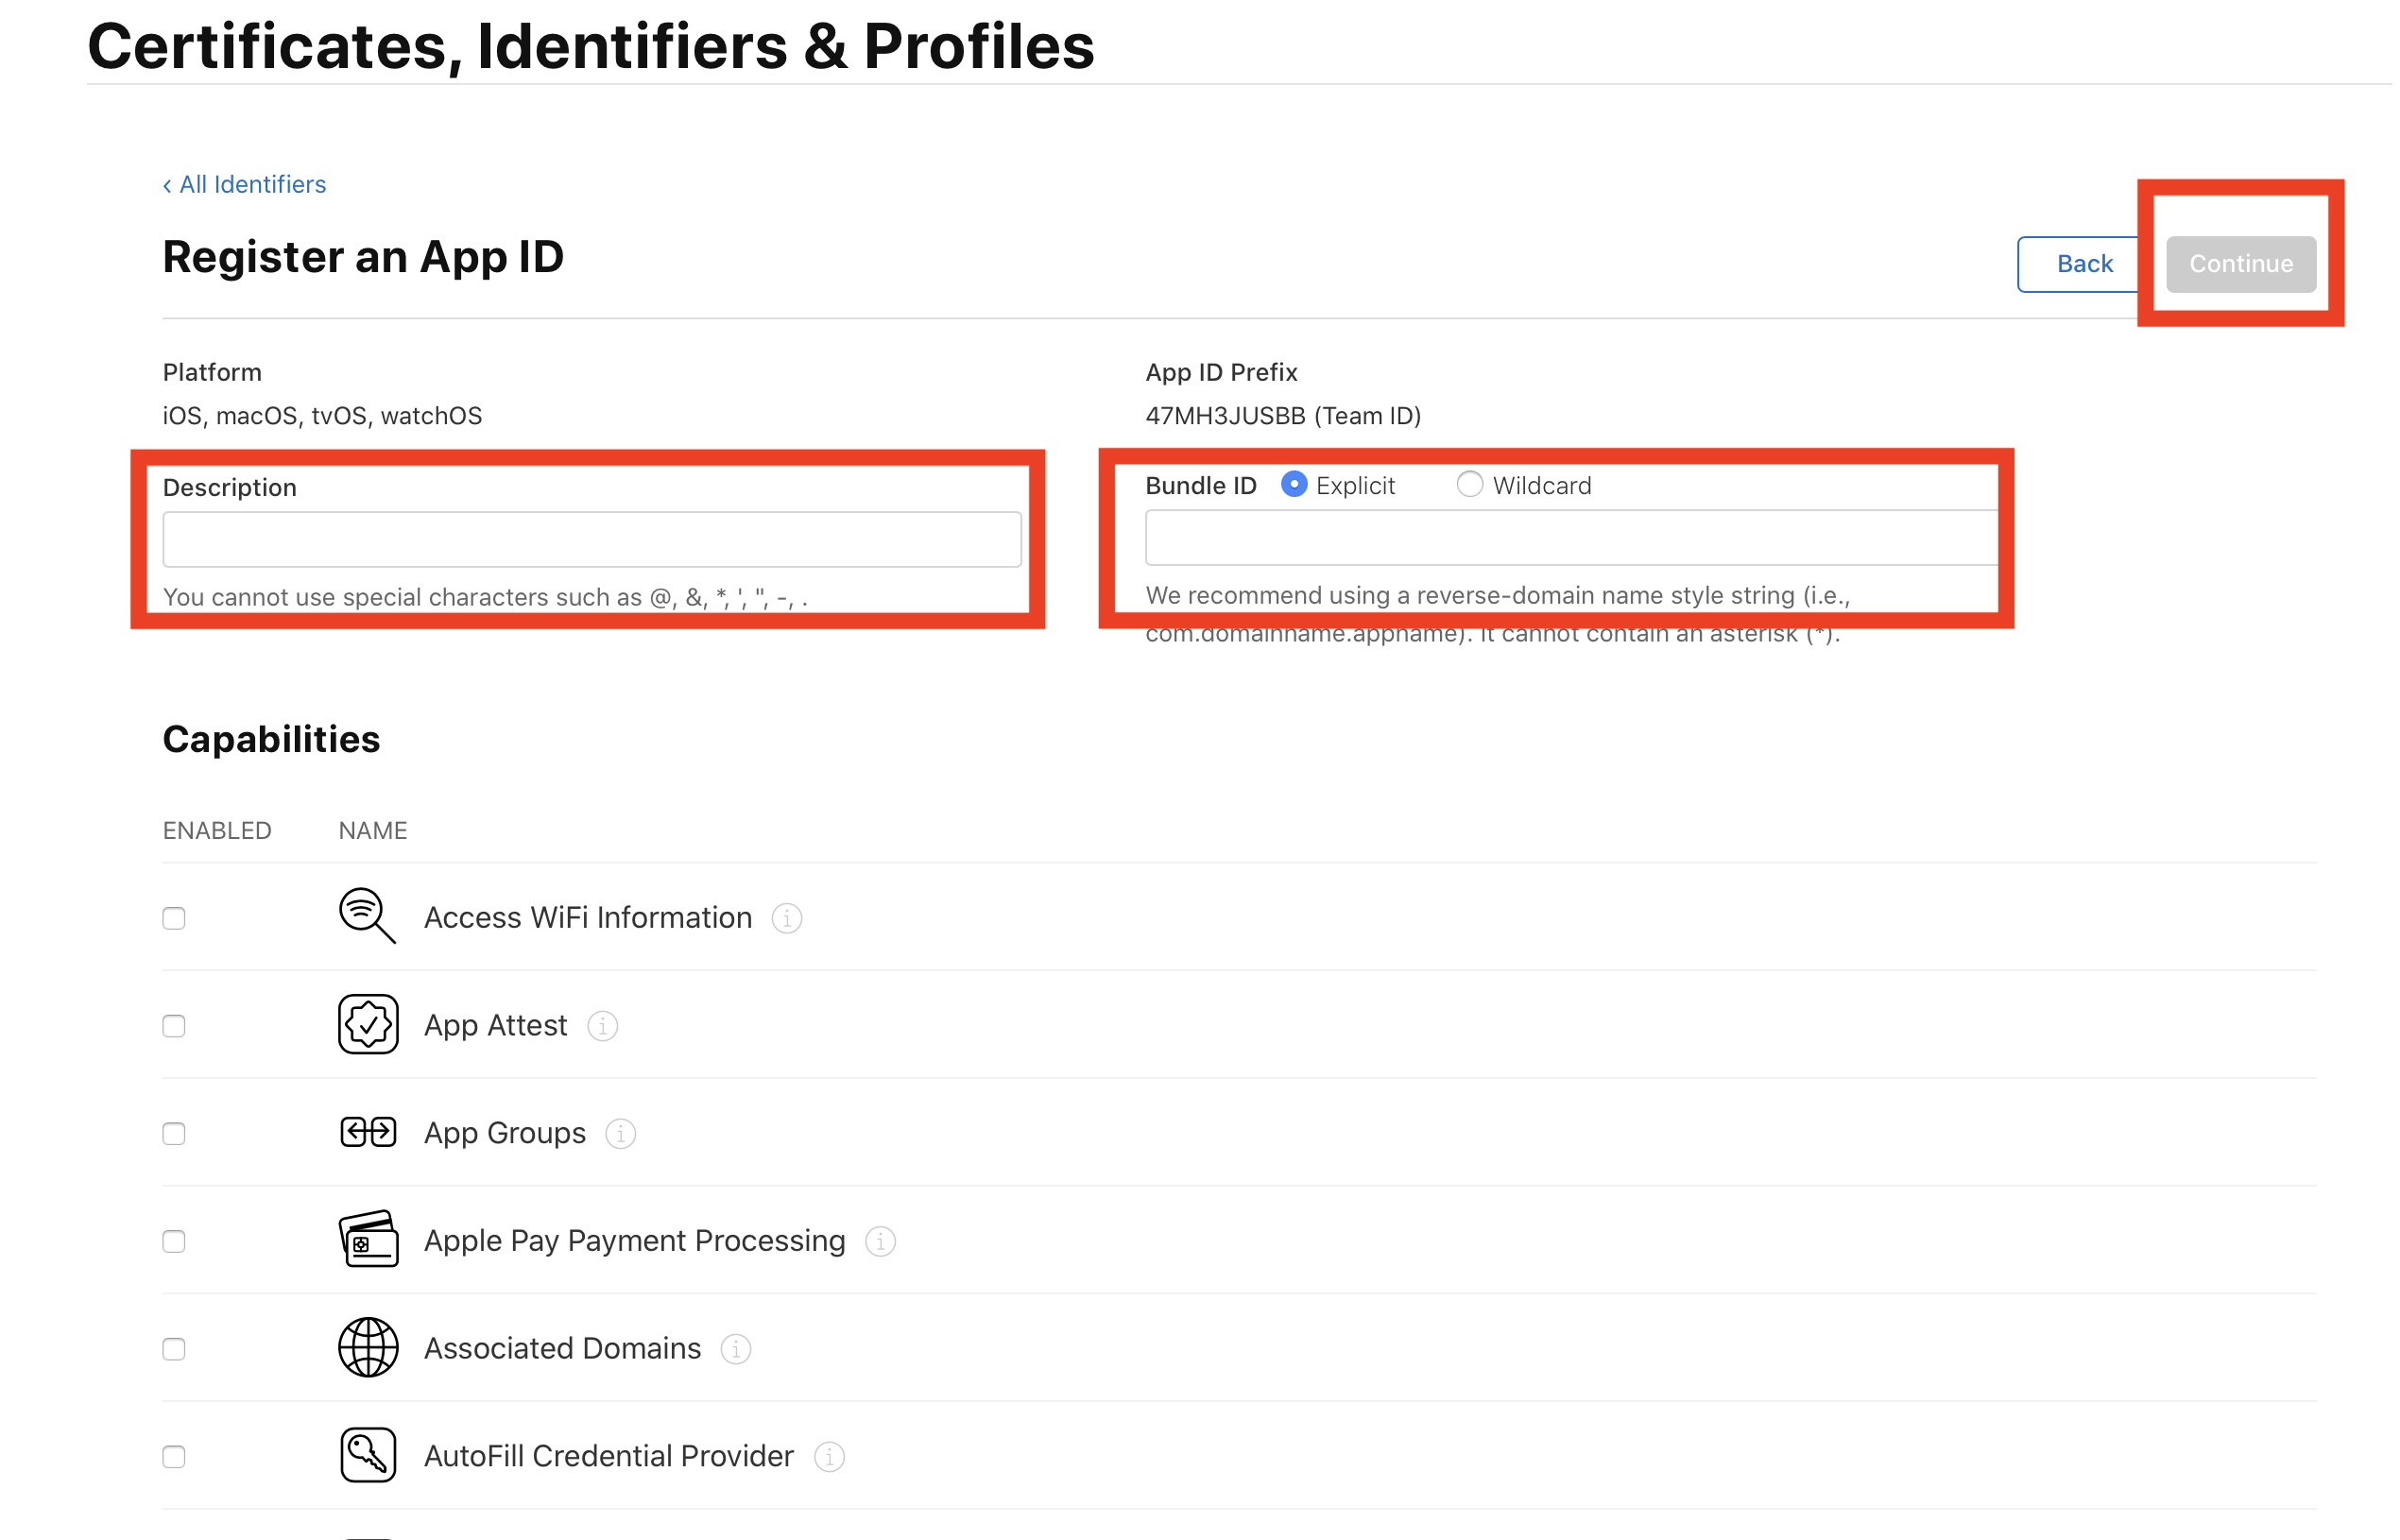
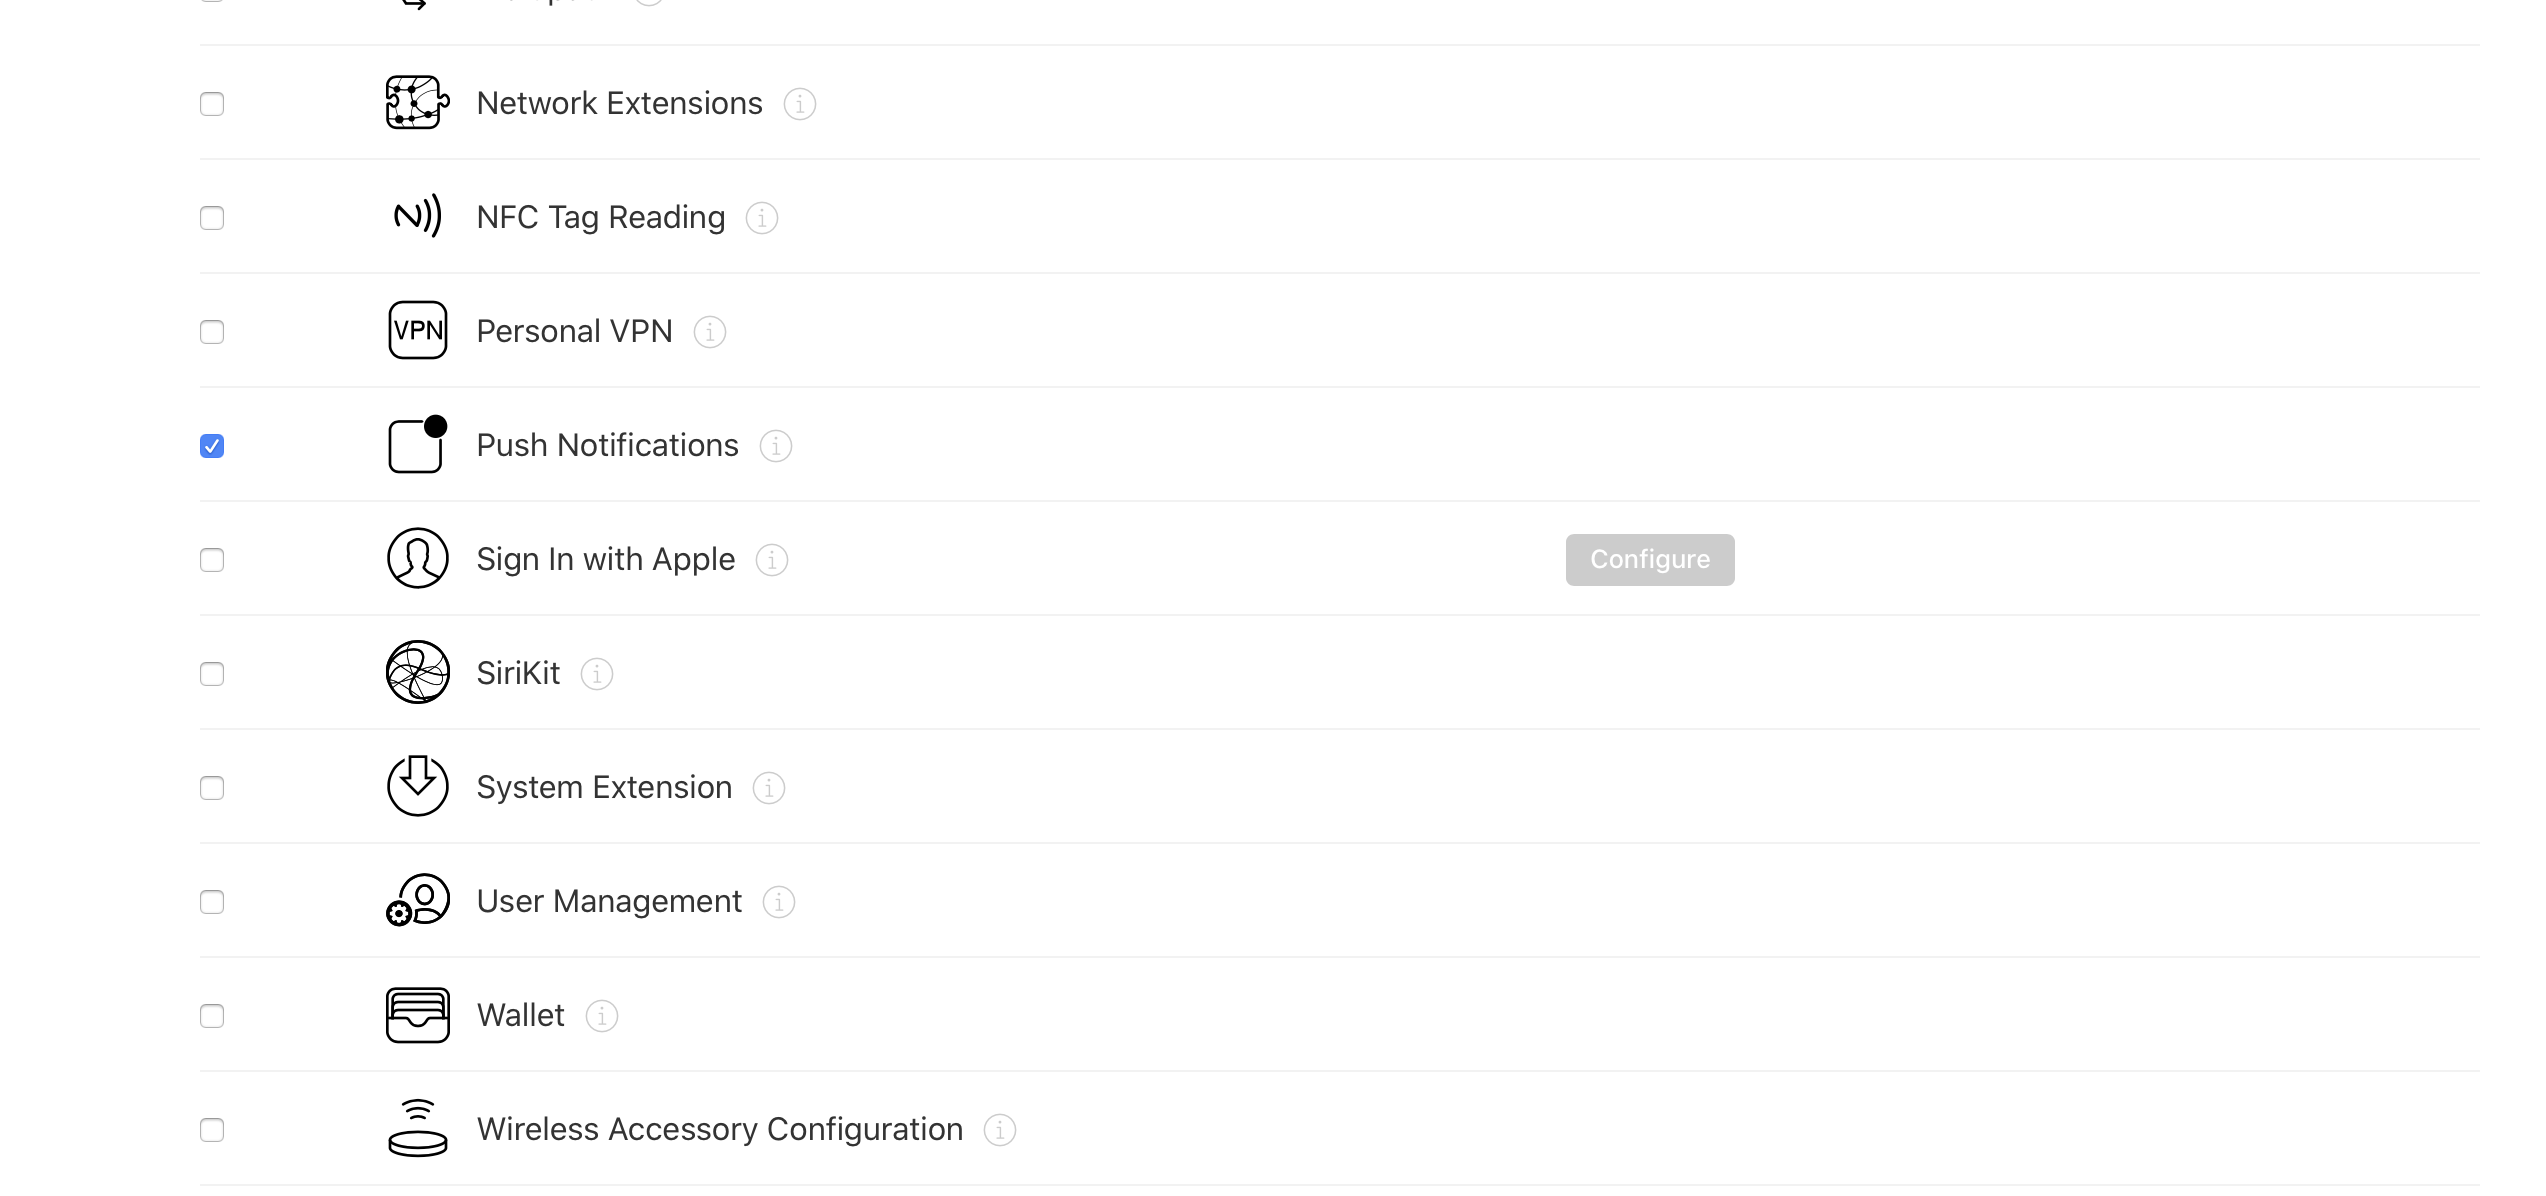
以下情報を入力します。
Description:アプリ名
Bundle ID: 作成中のバンドルID
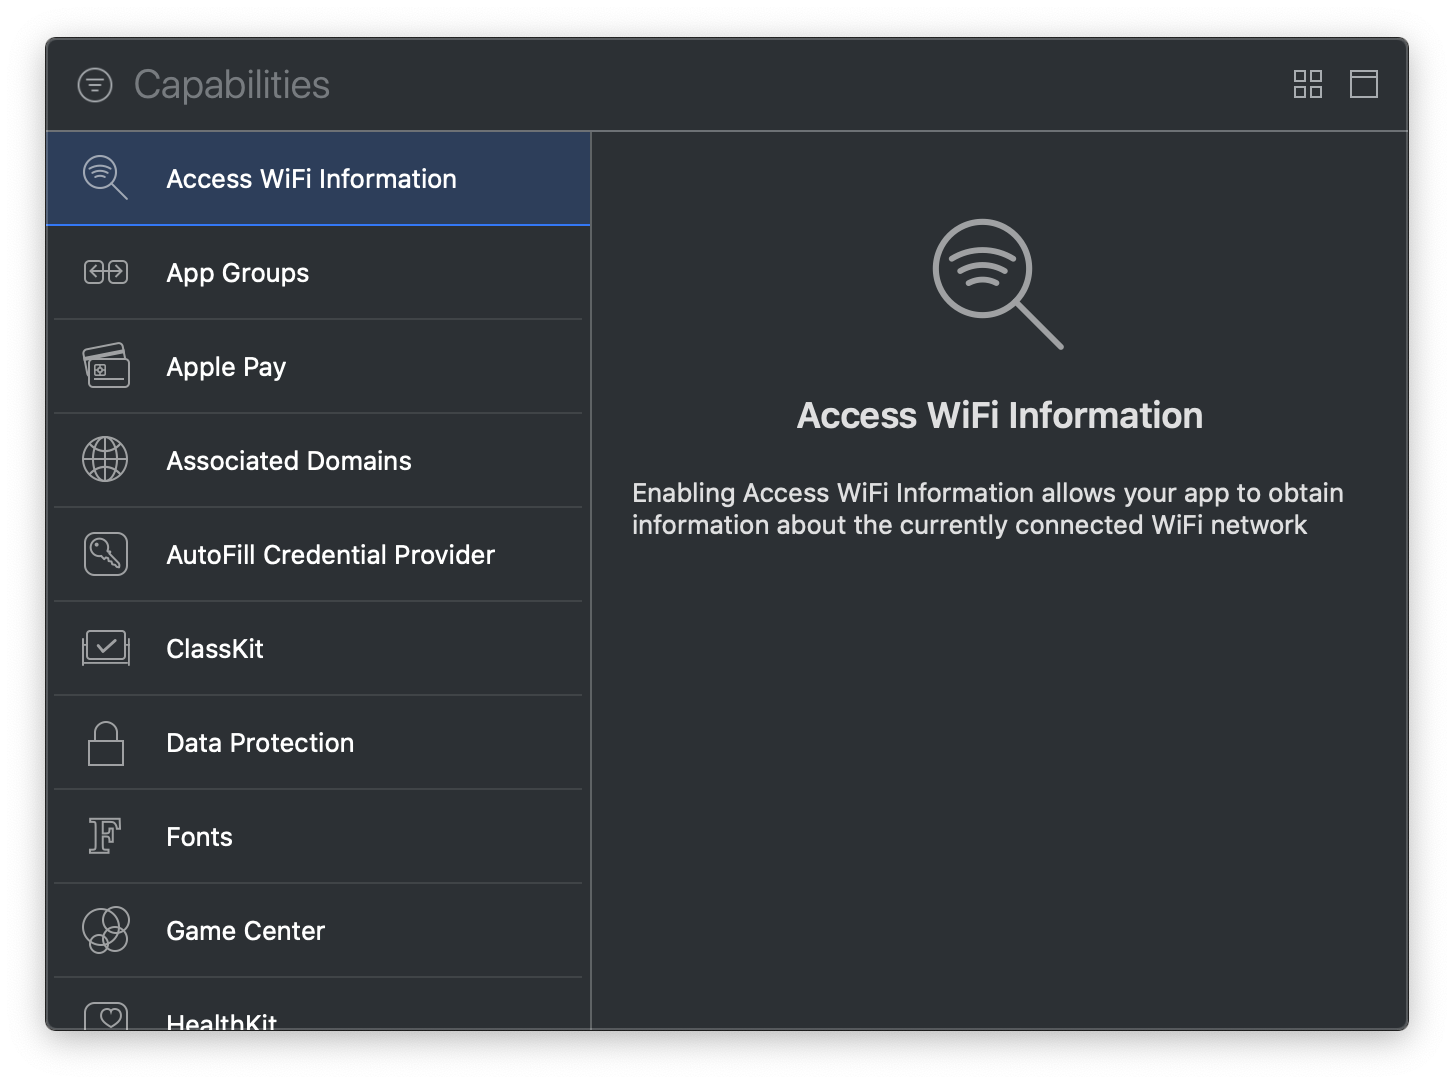
CapabilitiesからPUSH通知にチェックを入れる。
上記情報を入力したら「continue」をクッリク
ProvisioningProfile作成
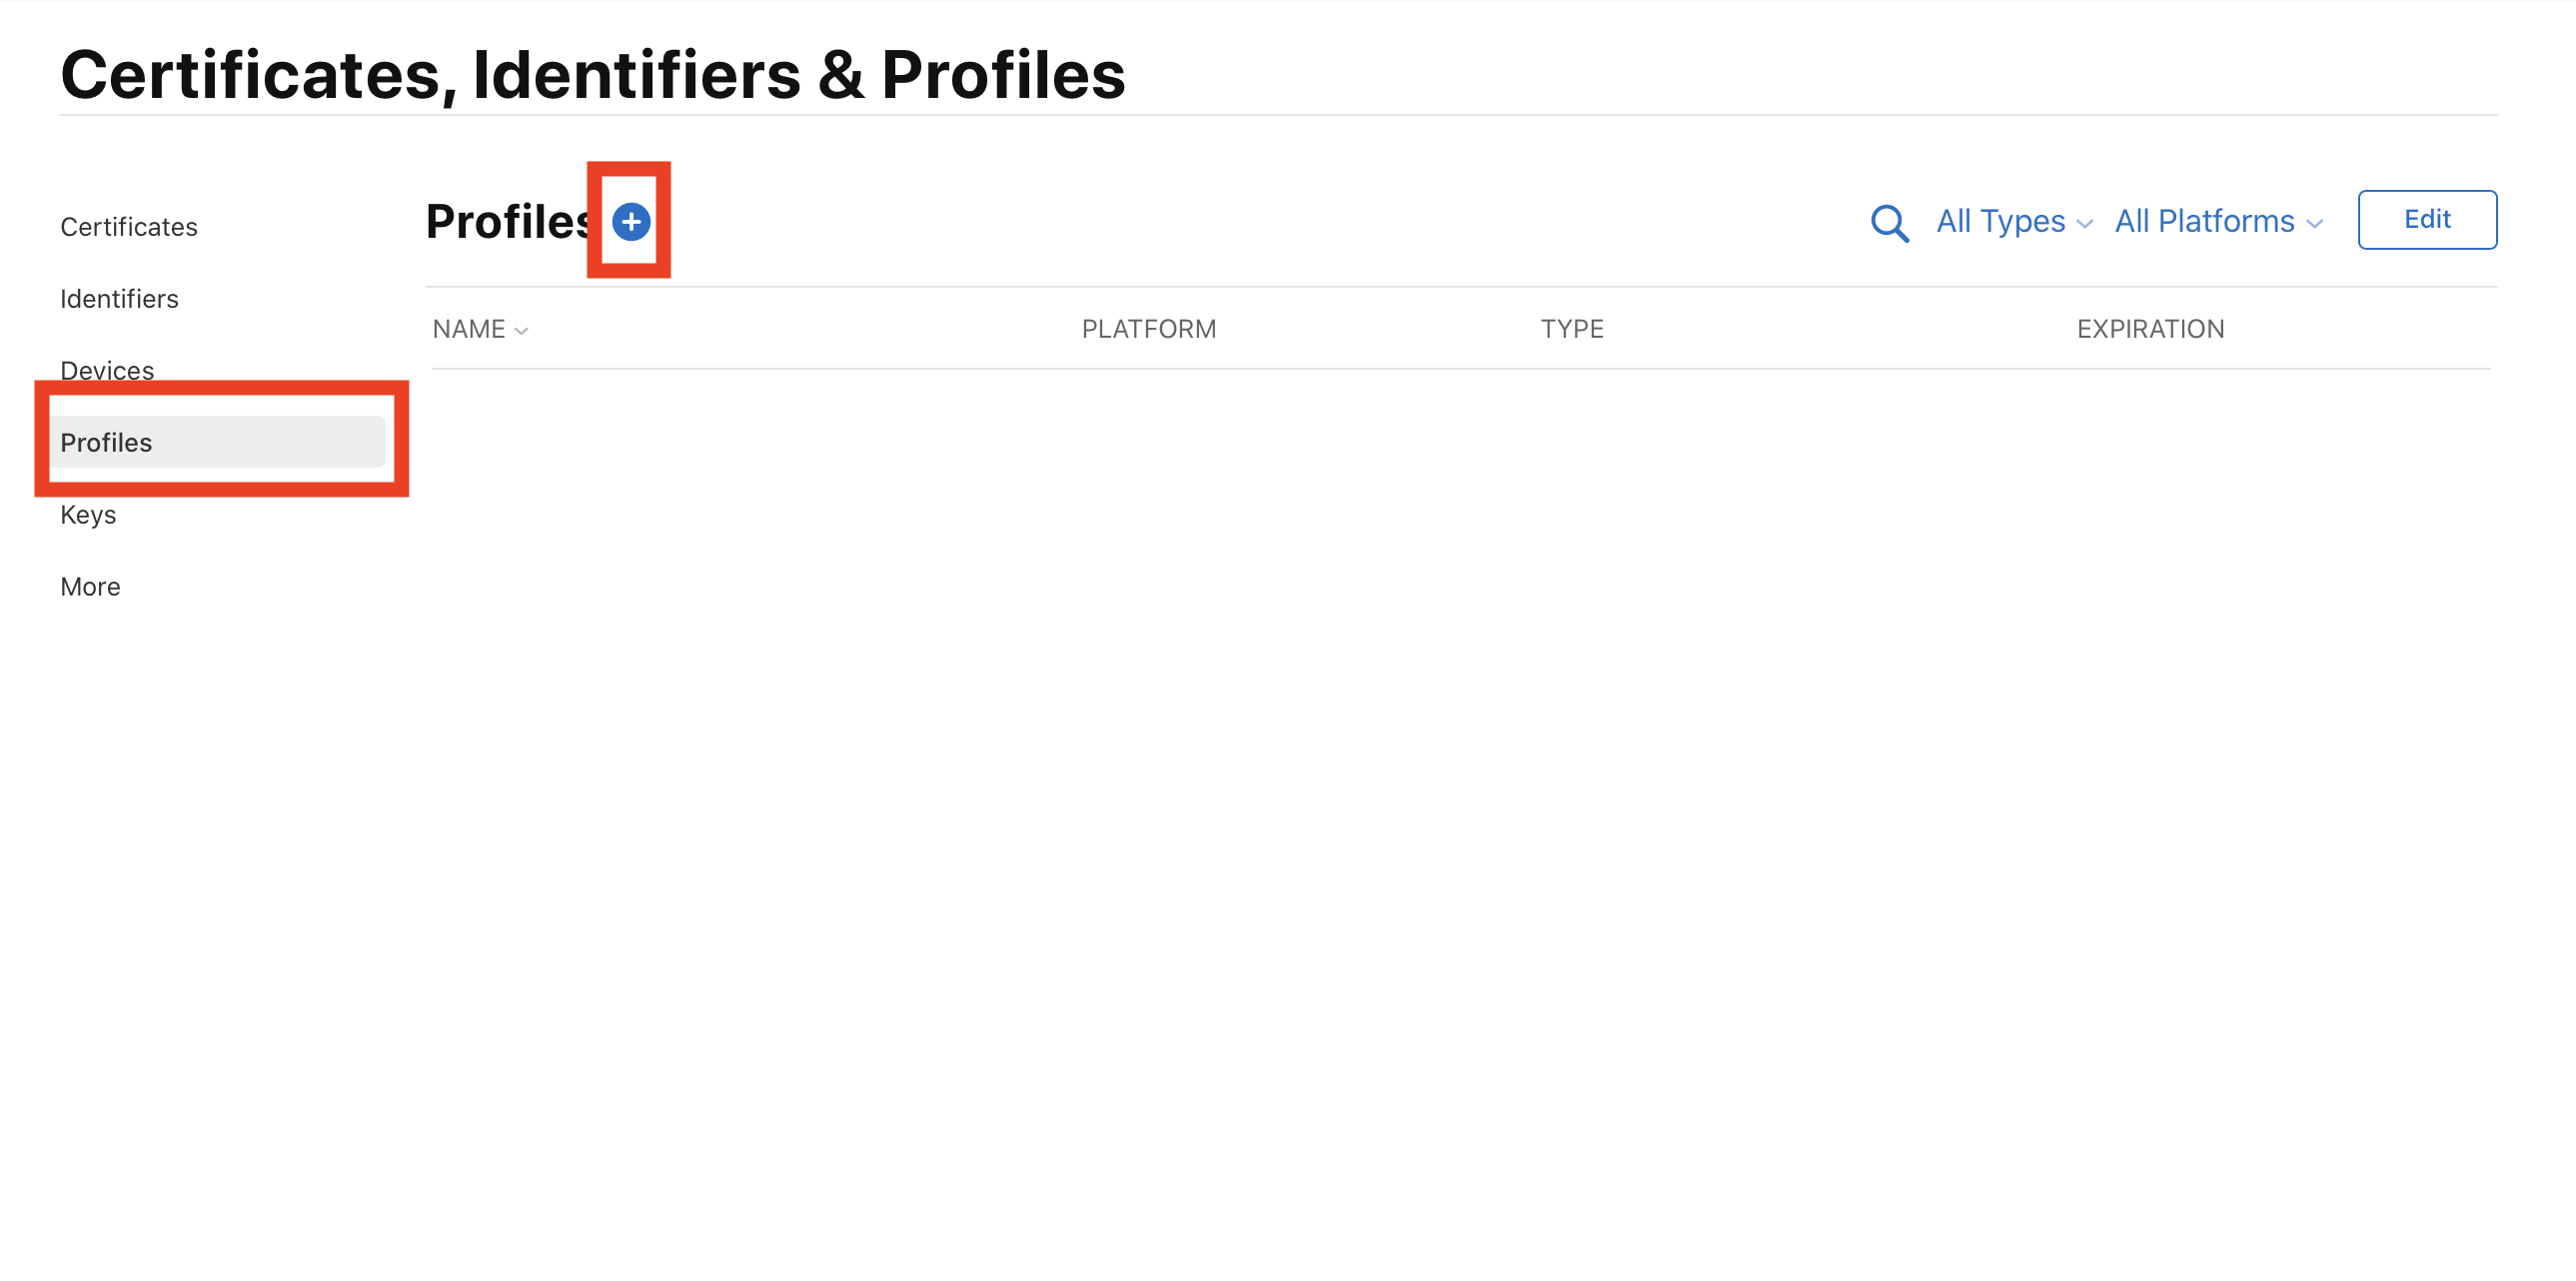
左メニューの「Profiles」をクリック
「+」をクリック
「iOS App Development」をクリック

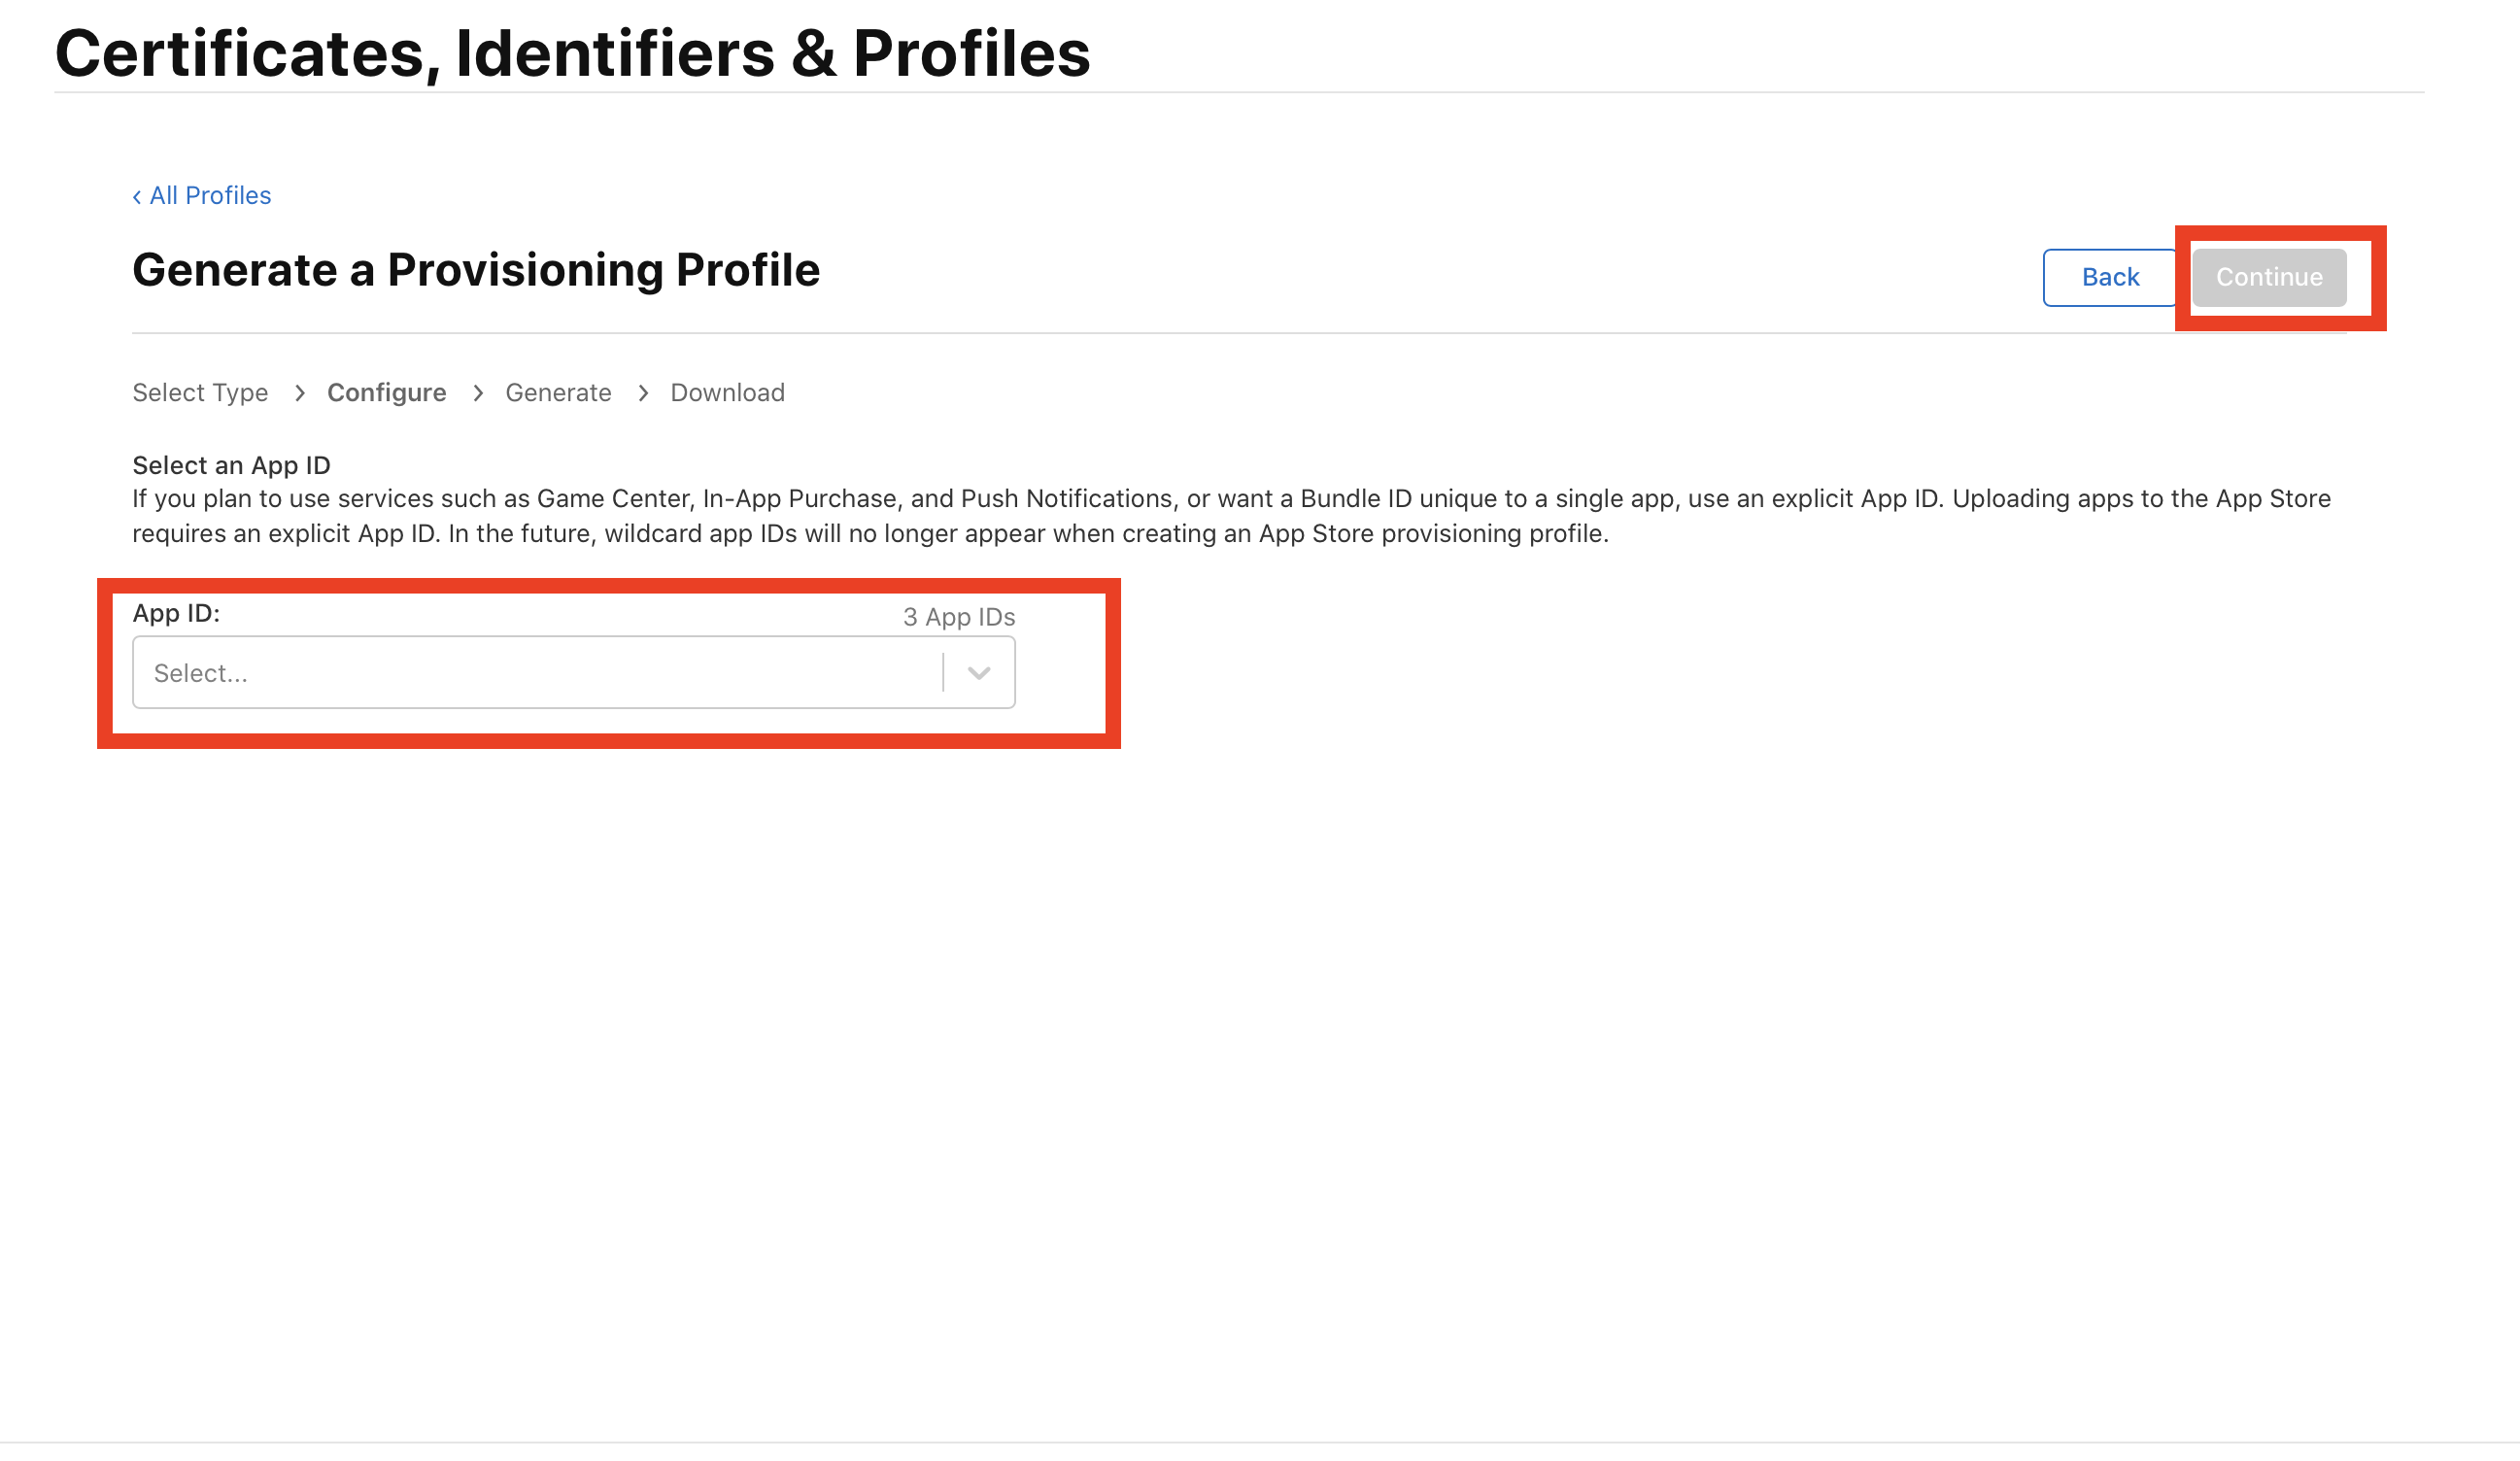
「App ID:」から「AppID作成」で作った物を選択する
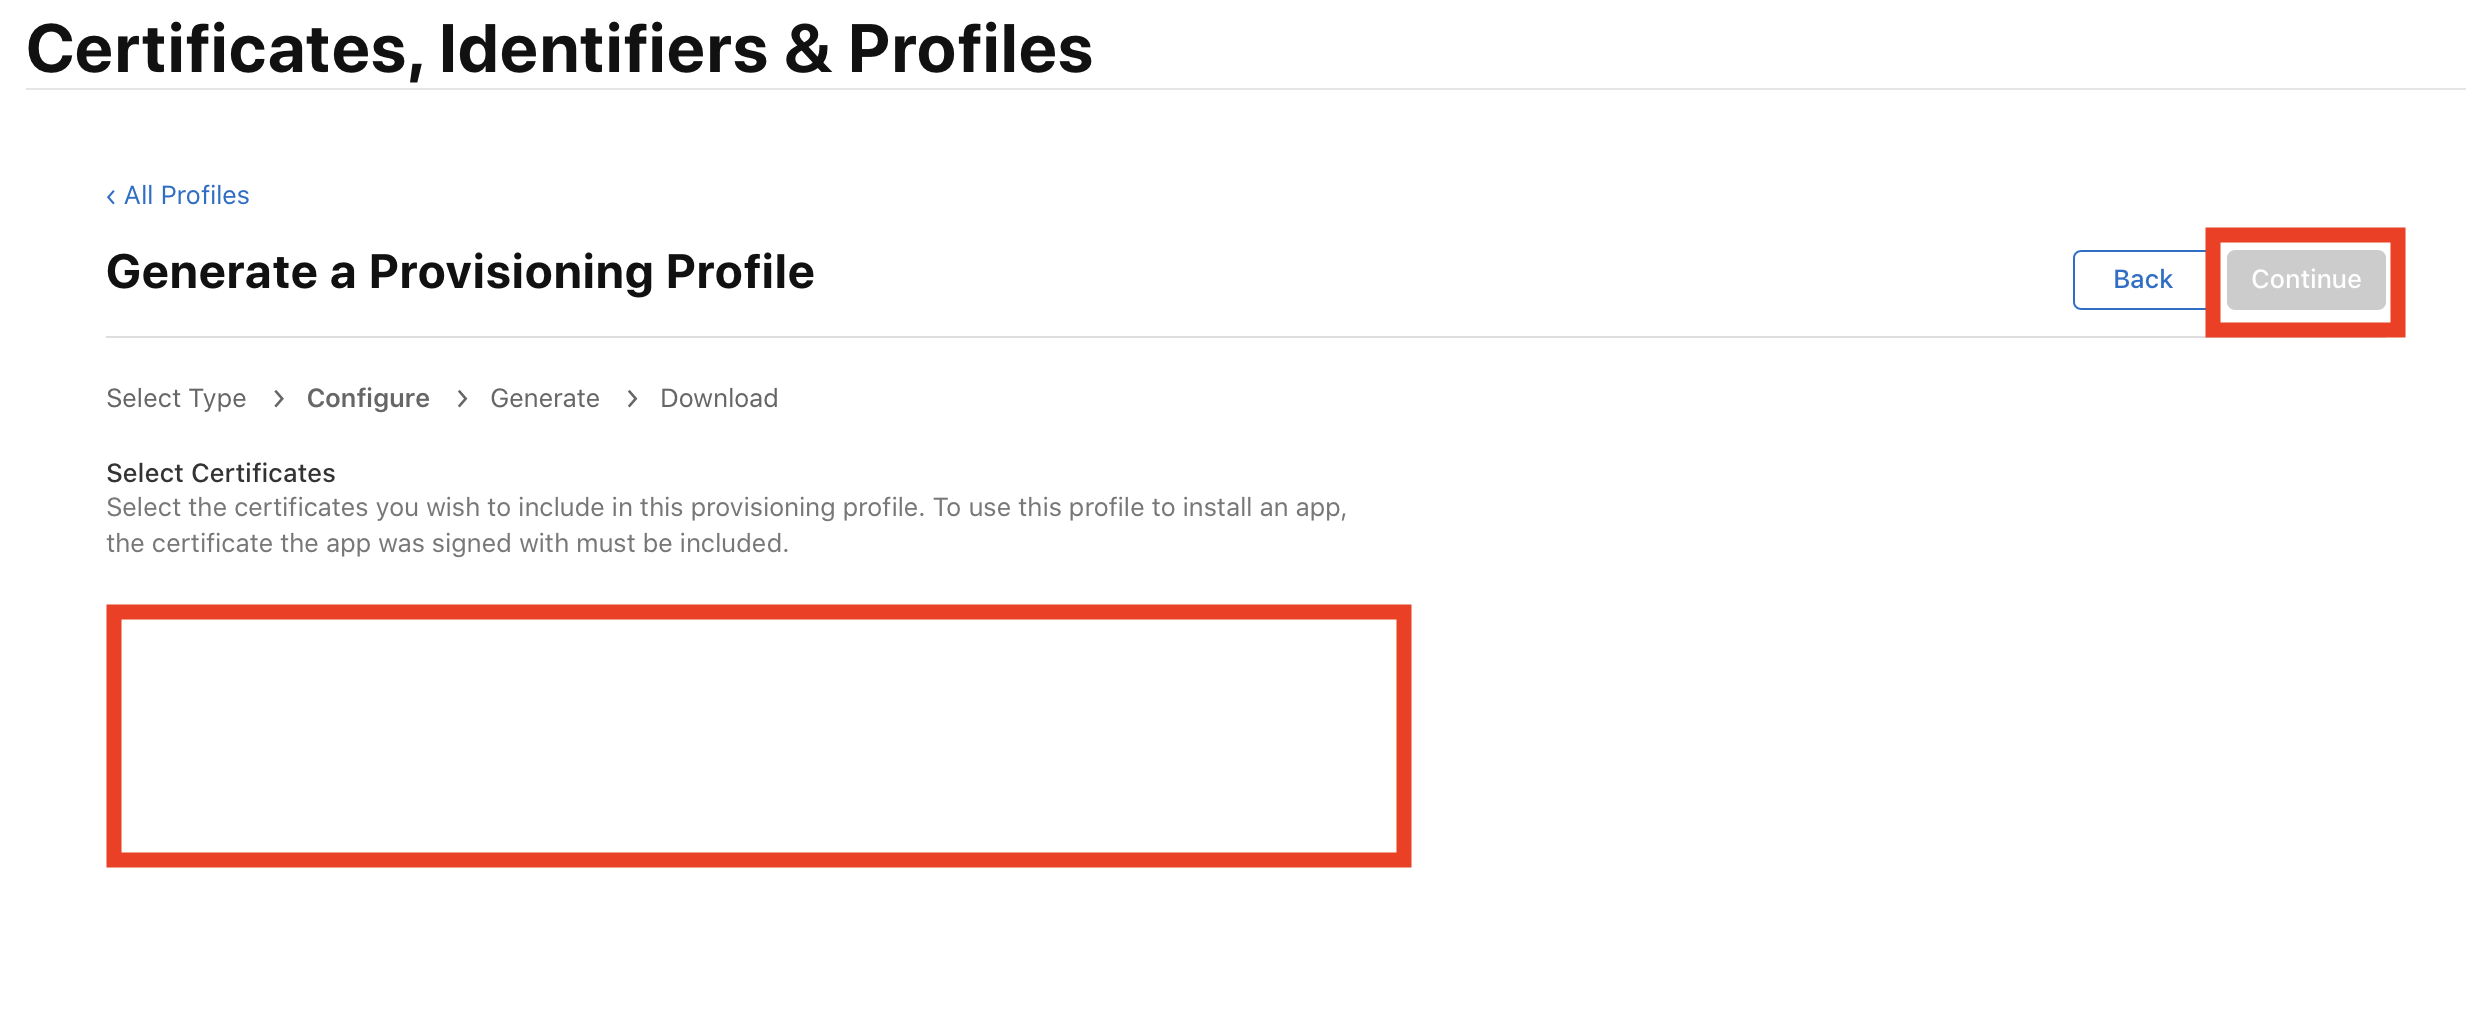
「Select Certificates」はSelecrALLで全て選択(問題なければ)
登録した端末を選択、問題なければSelctAll
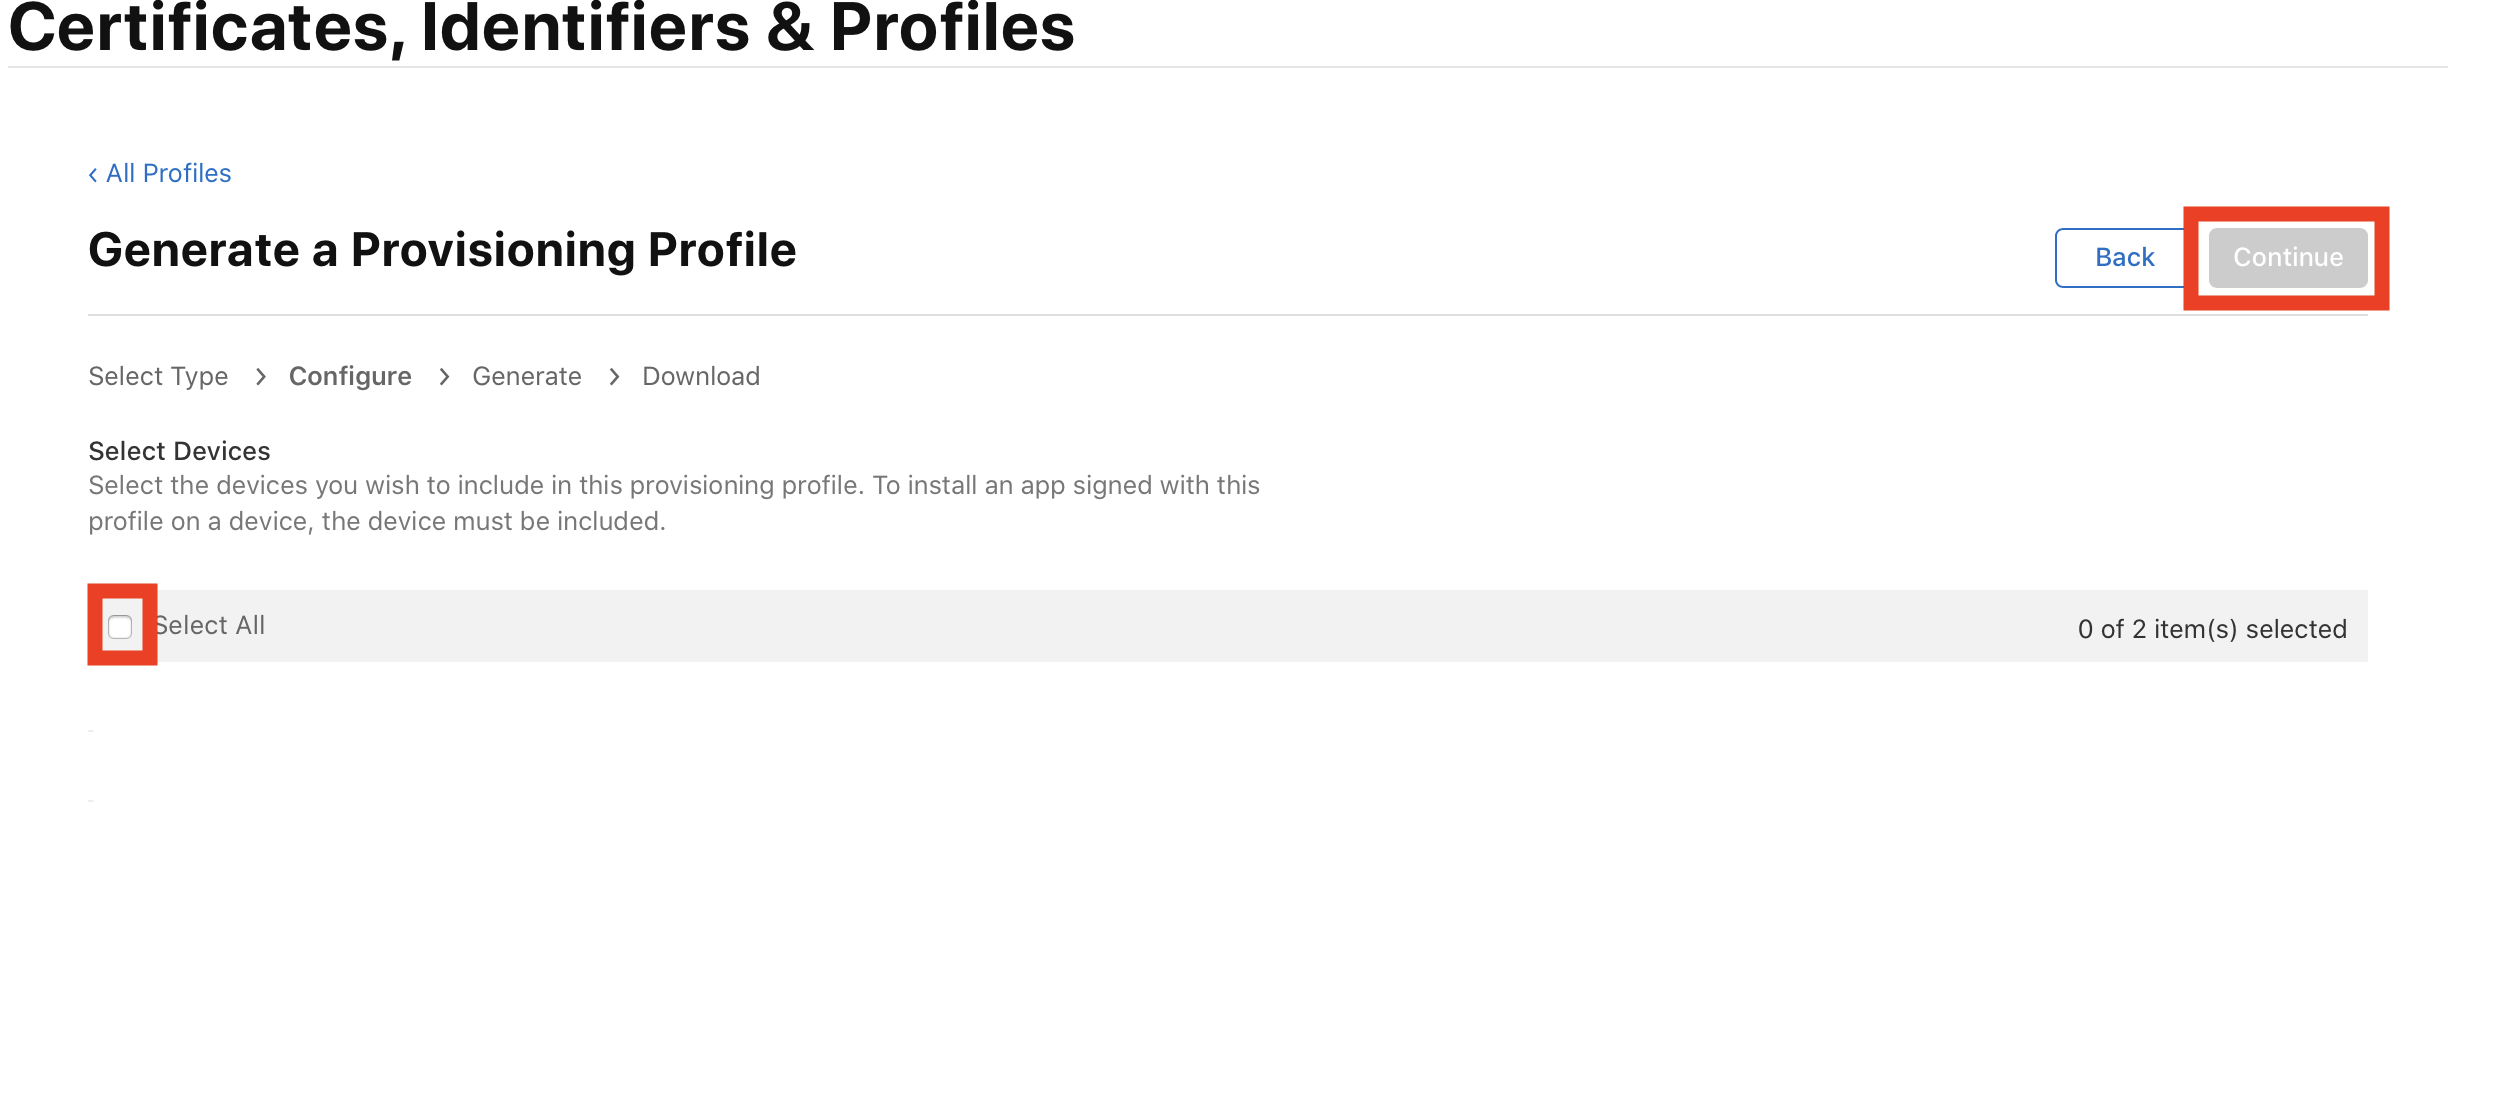
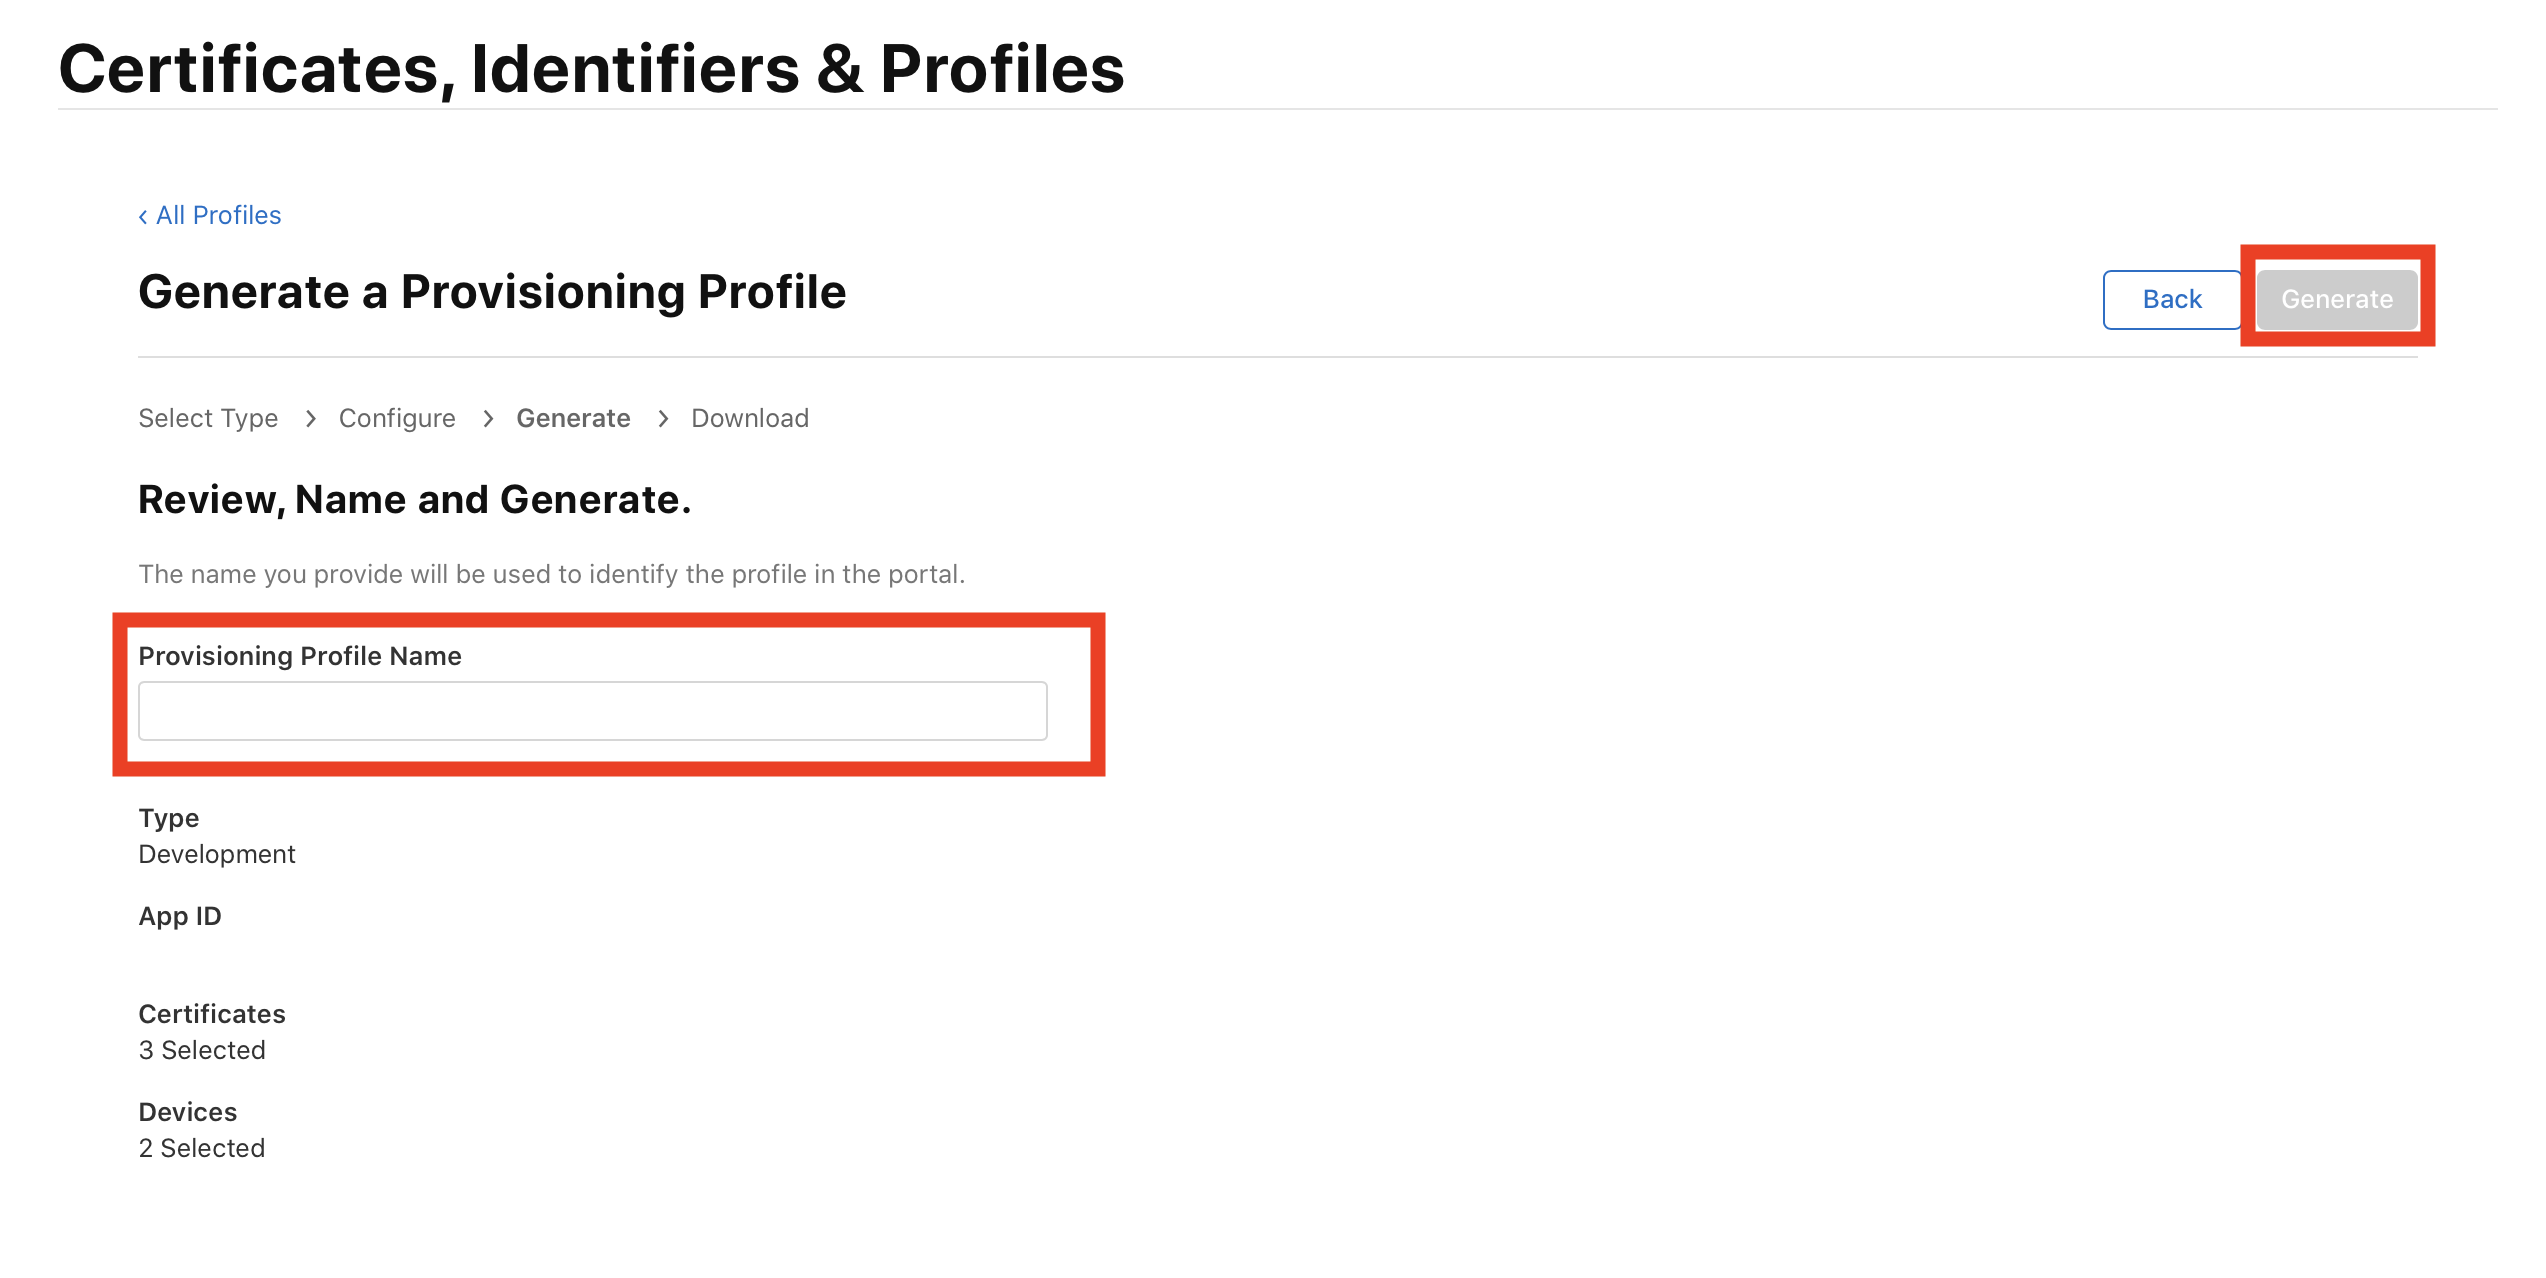
「Provisioning Profile Name」に任意の名前を入れて「Ganerete」をクリック
あとはダウンロードするだけ
Certificate作成
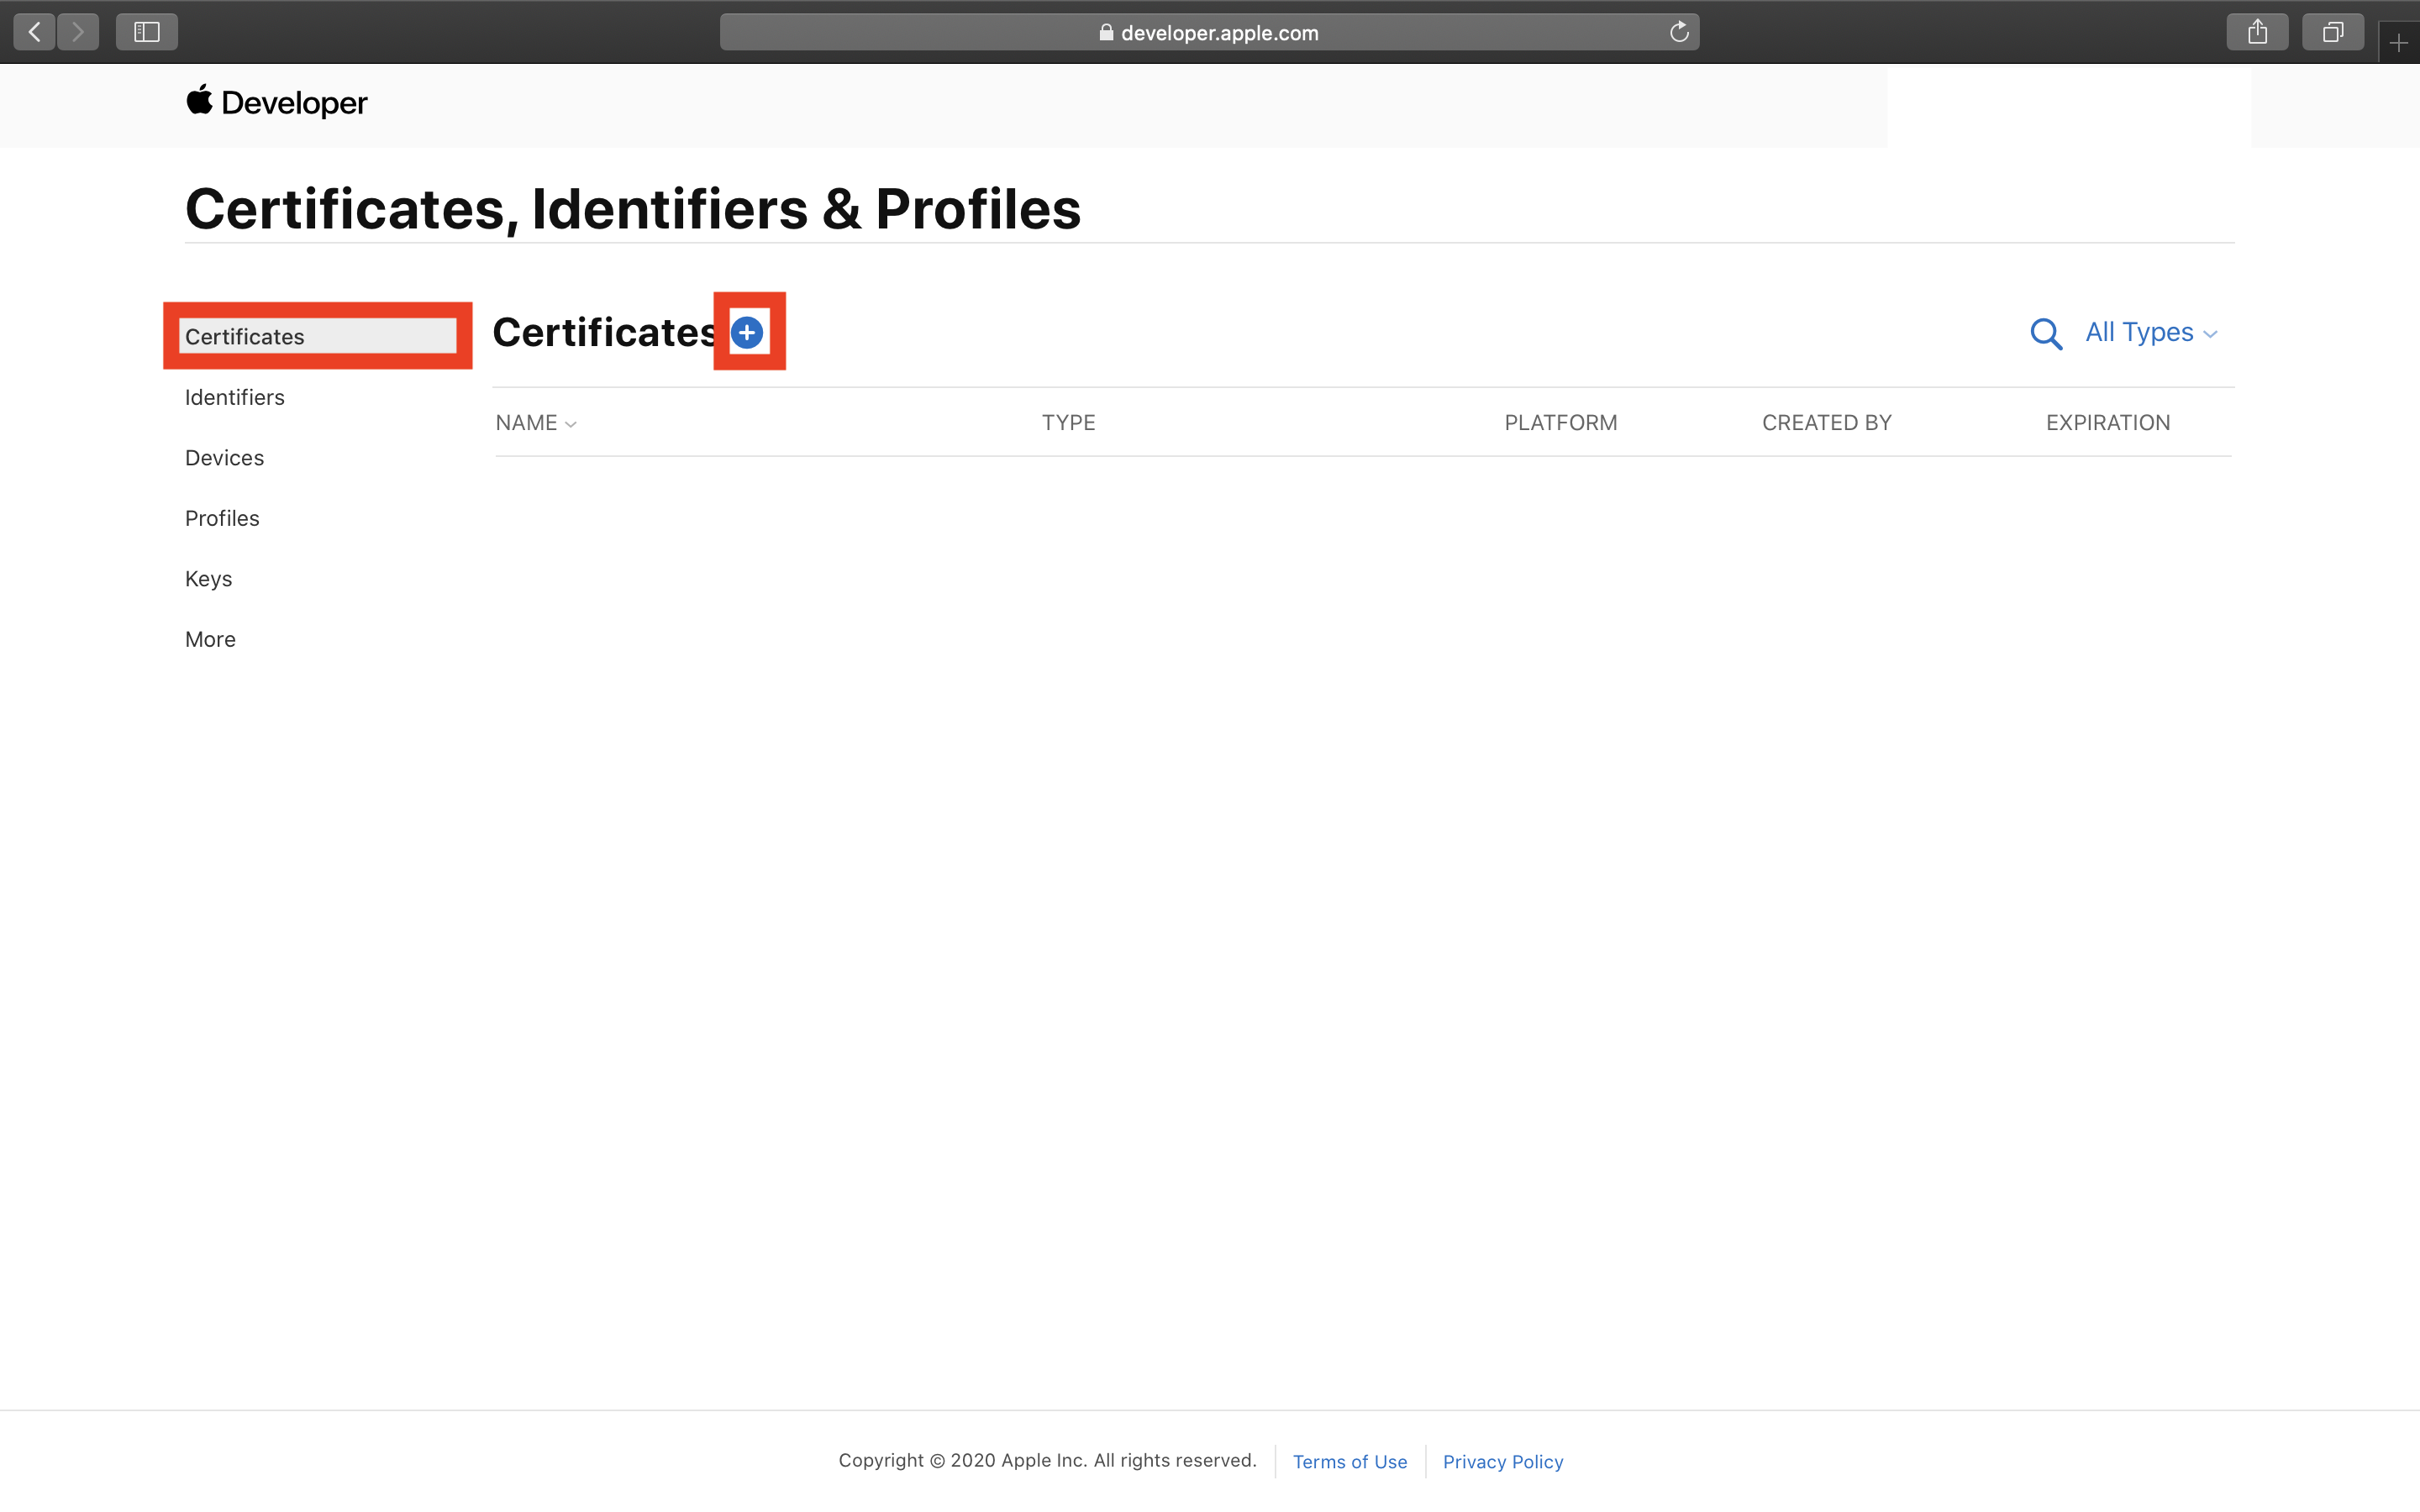
左メニューの「Certificates」をクリック
「+」をクリック
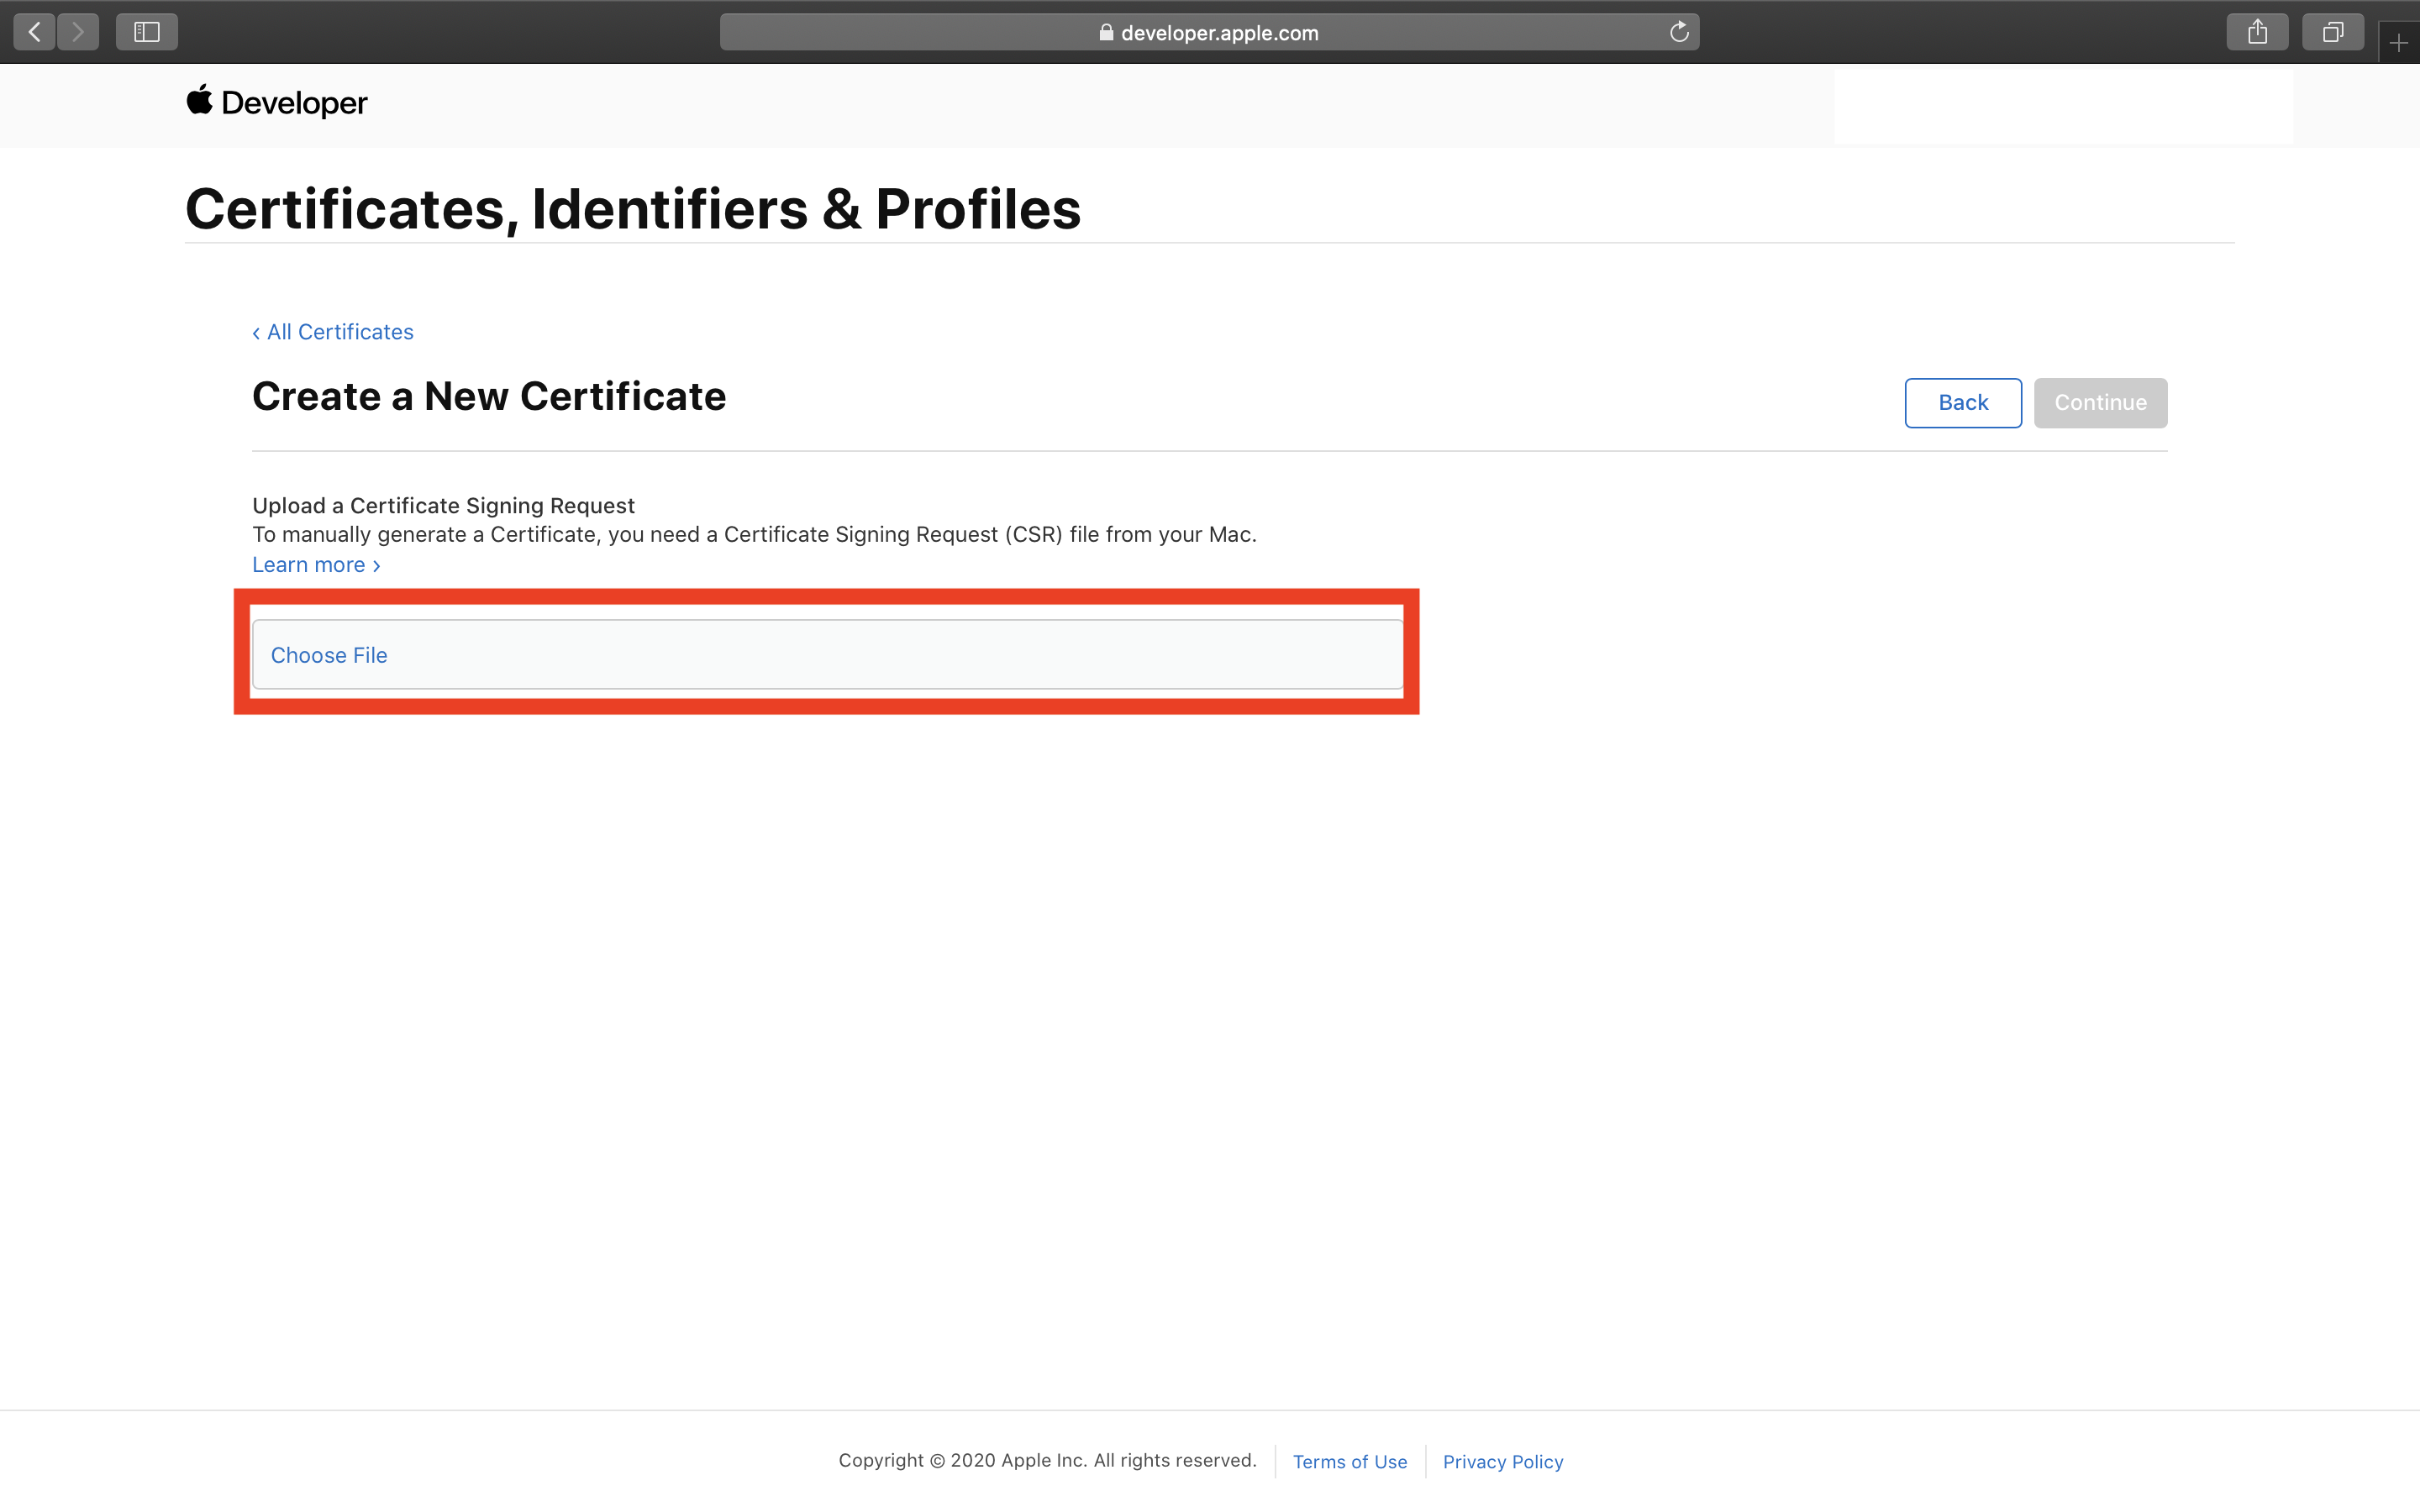
「Apple Push Notification service SSL」をクリック

「ChoseFile」をクリックし、先ほどキーチェーンで作成したファイルを選び右上の「Continue」をクリック
あとはダウンロードをするだけ
ダウンロードした物をダブルクリックする
ダウンロードした物を右クリック

「書き出す」をクリック
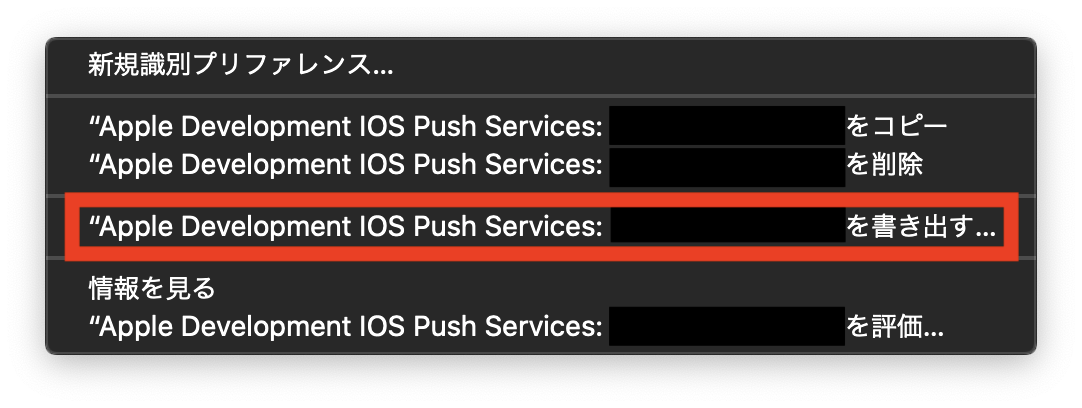
任意の場所を指定して保存

パスワードは未入力で「OK」をクリック
※証明書はあとで使うので忘れないところにおいて下さい

firebase登録
設定ボタンをクリック
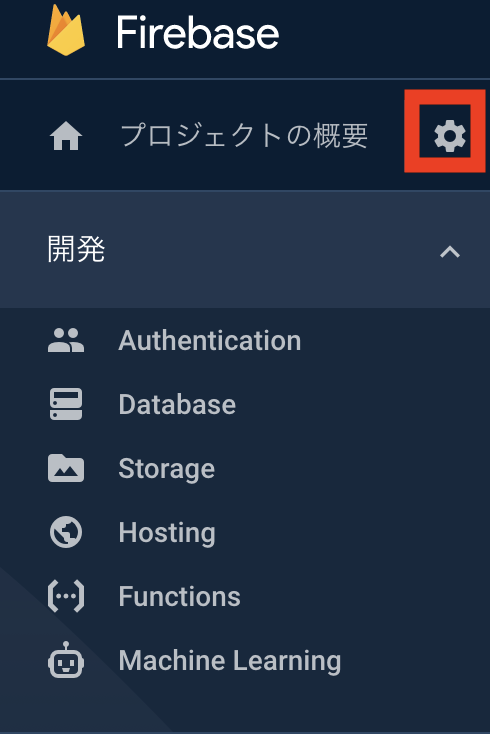
「プロジェクトを設定」をクリック

「クラウドメッセージング」をクリック

開発証明書の所で、
先ほどキーチェーンから書き出した物をアップロードする

Xcodeから設定する
Tagetの「Signing & Capability」から「Provisioning Profile」の設定をする
「ProvisioningProfile作成」で作った物を選択する

次に「Capability」をクリック

「push」検索欄に入力します。
「Push」をドラックします
続いて「BackgroundMode」のドラックします。
BackgroundModeはチェックボックスがいっぱい出てくるので、「Remote nortifications」にチェックを入れる

実装
まずAppDelegateを設定します。
import UIKit
import Firebase
import FirebaseMessaging
import UserNotifications

@UIApplicationMain
class AppDelegate: UIResponder, UIApplicationDelegate {


     var window: UIWindow?

    func application(_ application: UIApplication, didFinishLaunchingWithOptions launchOptions: [UIApplication.LaunchOptionsKey: Any]?) -> Bool {
        // Override point for customization after application launch.
        //firebase初期化
        FirebaseApp.configure()

        application.registerForRemoteNotifications()
        Messaging.messaging().delegate = self
        UNUserNotificationCenter.current().delegate = self
        return true
    }

    // クラス内の他のdelegateメソッドと同じ階層に追記
     func application(_ application: UIApplication, didReceiveRemoteNotification userInfo: [AnyHashable: Any]) {
        // Print message ID.
        if let messageID = userInfo["gcm.message_id"] {
            print("メッセージID: \(messageID)")
        }

        // Print full message.
        print(userInfo)
    }

    func application(_ application: UIApplication, didReceiveRemoteNotification userInfo: [AnyHashable: Any],
                     fetchCompletionHandler completionHandler: @escaping (UIBackgroundFetchResult) -> Void) {
        // Print message ID.
        if let messageID = userInfo["gcm.message_id"] {
            print("メッセージID: \(messageID)")
        }

        // Print full message.
        print(userInfo)

        completionHandler(UIBackgroundFetchResult.newData)
    }


    // MARK: UISceneSession Lifecycle

    func application(_ application: UIApplication, configurationForConnecting connectingSceneSession: UISceneSession, options: UIScene.ConnectionOptions) -> UISceneConfiguration {
        // Called when a new scene session is being created.
        // Use this method to select a configuration to create the new scene with.
        return UISceneConfiguration(name: "Default Configuration", sessionRole: connectingSceneSession.role)
    }

    func application(_ application: UIApplication, didDiscardSceneSessions sceneSessions: Set<UISceneSession>) {
        // Called when the user discards a scene session.
        // If any sessions were discarded while the application was not running, this will be called shortly after application:didFinishLaunchingWithOptions.
        // Use this method to release any resources that were specific to the discarded scenes, as they will not return.
    }


}
@available(iOS 10, *)
extension AppDelegate : UNUserNotificationCenterDelegate {
    // 通知を受け取った時に(開く前に)呼ばれるメソッド
   func userNotificationCenter(_ center: UNUserNotificationCenter, willPresent notification: UNNotification, withCompletionHandler completionHandler: @escaping (UNNotificationPresentationOptions) -> Void) {
       let userInfo = notification.request.content.userInfo

       if let messageID = userInfo["gcm.message_id"] {
           print("メッセージID: \(messageID)")
       }

       print(userInfo)

       completionHandler([.alert])
   }

    // 通知を開いた時に呼ばれるメソッド
   func userNotificationCenter(_ center: UNUserNotificationCenter,didReceive response: UNNotificationResponse, withCompletionHandler completionHandler: @escaping () -> Void) {
       let userInfo = response.notification.request.content.userInfo
       if let messageID = userInfo["gcm.message_id"] {
           print("メッセージID: \(messageID)")
       }

       print(userInfo)

       completionHandler()
   }

}
// MARK: - MessagingDelegate
extension AppDelegate: MessagingDelegate {
    func messaging(_ messaging: Messaging, didReceiveRegistrationToken fcmToken: String) {
        print("Firebase registration token: \(fcmToken)")
    }

    func messaging(_ messaging: Messaging, didReceive remoteMessage: MessagingRemoteMessage) {
        print("Received data message: \(remoteMessage.appData)")
    }
}
あとは任意の場所にPUSHのパーミッションダイアログ表示する
import UIKit
import UserNotifications

class ViewController: UIViewController {

    override func viewDidLoad() {
        super.viewDidLoad()

        // Do any additional setup after loading the view.
        // プッシュ通知のパーミッションダイアログ表示
        let authOptions: UNAuthorizationOptions = [.alert, .badge, .sound]
        UNUserNotificationCenter.current().requestAuthorization(options: authOptions) { _, _ in
            print("push permission finished")
        }
    }

}
Cloud Messagingで通知を送る
新しい通知をクリックし、自分の送りたい情報を送ります。
するとピコンと通知が飛びます。
※実機で確認して下さい。(developerサイトで登録した端末で確認)

最後に
今回はFirebaseを使ったPUSH通知の記事を書きました。
PUSH通知は少しでも間違える通知が届かないのでゆっくり慎重に的確にやることをお勧めします!
最後までご覧いただきありがとうございます。
この記事がどなたかの役に立てれば幸いです!