はじめに
どうも@kaneko77です。
WWDC2021が今週ありました。
月曜日の26時からだった為、定時で上がって速攻寝て25時半に起きてWWDCに備えていました。
※WWDCのEvent参照
今回はハードウェアの発表がなかったのは残念でしたが、割と面白内容になっていて早起きした甲斐あったな〜と思いました。
発表が終わった後にBeta版入れて色々試したのでその中でiOS15の変更点を今回は共有していきたいと思います。
特に私が興味がある内容に焦点を当てて記事を書いてます。
※SwiftUIについては触れないです。
※まだまだ新しい技術なので情報がネットに出回っていなく共有できない箇所がありますのでそちらご了承いただけますと幸いです。
こんな方対象
- iOS15で何ができるようになったか知りたい人
- iOSエンジニアの方
環境
Xcode: Version 13.0 beta (13A5154h)
iOSVersion: iOS15
Swift: 5.5
参考にしたサイト
- https://blog.prototypr.io/new-in-ios-15-for-product-designers-design-engineers-aa504e3374f8
- https://github.com/apple/swift/blob/main/CHANGELOG.md
- https://alejandromp.com/blog/wwdc21-notes/
- https://developer.apple.com/videos/play/wwdc2021/10059/
目次
- UISheetPresentationControllerで下からピョコってするやつめちゃくちゃ楽になった!
- UIButtonで色々できるようになった
- UIMenuにサブビューが追加された
- シンボルが追加された!
- そのほか
紹介
UISheetPresentationControllerで下からピョコってするやつ楽になった!
こちらは半Modalを簡単に実装できる物になります。
ライブラリだとこちらをよく使ってました。
以下がUISheetPresentationControllerを使ったmodal表示になります。
こちら参考に作ってます。
最初は半Modalで表示し、ボタンを押下すると普通のModalになるように作っています。

コード
まずは簡単に実装したコードを貼ります。
こちら全部コピペしてもらえれば動きます。
※iOS15からじゃないと使えないです。
表示Type(2種類)

import UIKit

class ViewController: UIViewController {

    var mainView: MainView!

    override func loadView() {
        super.loadView()
        self.mainView = MainView(frame: .zero)
        self.view = self.mainView
    }

    override func viewDidLoad() {
        super.viewDidLoad()
        // Do any additional setup after loading the view.
        self.mainView.pushButton.addTarget(self, action: #selector(tapped(_:)),for: .touchUpInside)
    }

    // MARK: タッチイベント
    @objc func tapped(_ sender : Any) {
        present(ModalViewController.init(), animated: true, completion: nil)
    }

}


class MainView: UIView {

    let hogeLabel: UILabel = {
        let label = UILabel()
        label.translatesAutoresizingMaskIntoConstraints = false
        label.text = "テストで表示"
        label.font = .boldSystemFont(ofSize: 32)
        label.textColor = .black
        label.textAlignment = .center
        return label
    }()

    let pushButton: UIButton = {
        let button = UIButton()
        button.translatesAutoresizingMaskIntoConstraints = false
        button.setTitle("「ぴょこ」っと出す", for: .normal)
        button.setTitleColor(.white, for: .normal)
        button.backgroundColor = .red
        button.layer.cornerRadius = 25
        return button
    }()

    override init(frame: CGRect) {
        super.init(frame: frame)
        self.backgroundColor = .systemGray
        setComponent()
        setConstraint()
    }

    private func setComponent(){
        [hogeLabel, pushButton].forEach{
            addSubview($0)
        }
    }

    private func setConstraint(){
        NSLayoutConstraint.activate([
            hogeLabel.topAnchor.constraint(equalTo: self.safeAreaLayoutGuide.topAnchor, constant: 50),
            hogeLabel.leadingAnchor.constraint(equalTo: self.safeAreaLayoutGuide.leadingAnchor, constant: 20),
            hogeLabel.trailingAnchor.constraint(equalTo: self.safeAreaLayoutGuide.trailingAnchor, constant: -20),

            pushButton.bottomAnchor.constraint(equalTo: self.safeAreaLayoutGuide.bottomAnchor, constant: -20),
            pushButton.heightAnchor.constraint(equalToConstant: 50),
            pushButton.leadingAnchor.constraint(equalTo: self.safeAreaLayoutGuide.leadingAnchor, constant: 20),
            pushButton.trailingAnchor.constraint(equalTo: self.safeAreaLayoutGuide.trailingAnchor, constant: -20),

        ])
    }

    required init?(coder: NSCoder) {
        fatalError("init(coder:) has not been implemented")
    }

}
import UIKit
class ModalViewController: UIViewController, UISheetPresentationControllerDelegate, ModalViewDelegate {
var mainView: ModalView!
var sheetPresentationController: UISheetPresentationController!
override func loadView() {
super.loadView()
self.mainView = ModalView(frame: .zero)
self.mainView.delegate = self
self.view = self.mainView
sheetPresentationController = presentationController as? UISheetPresentationController
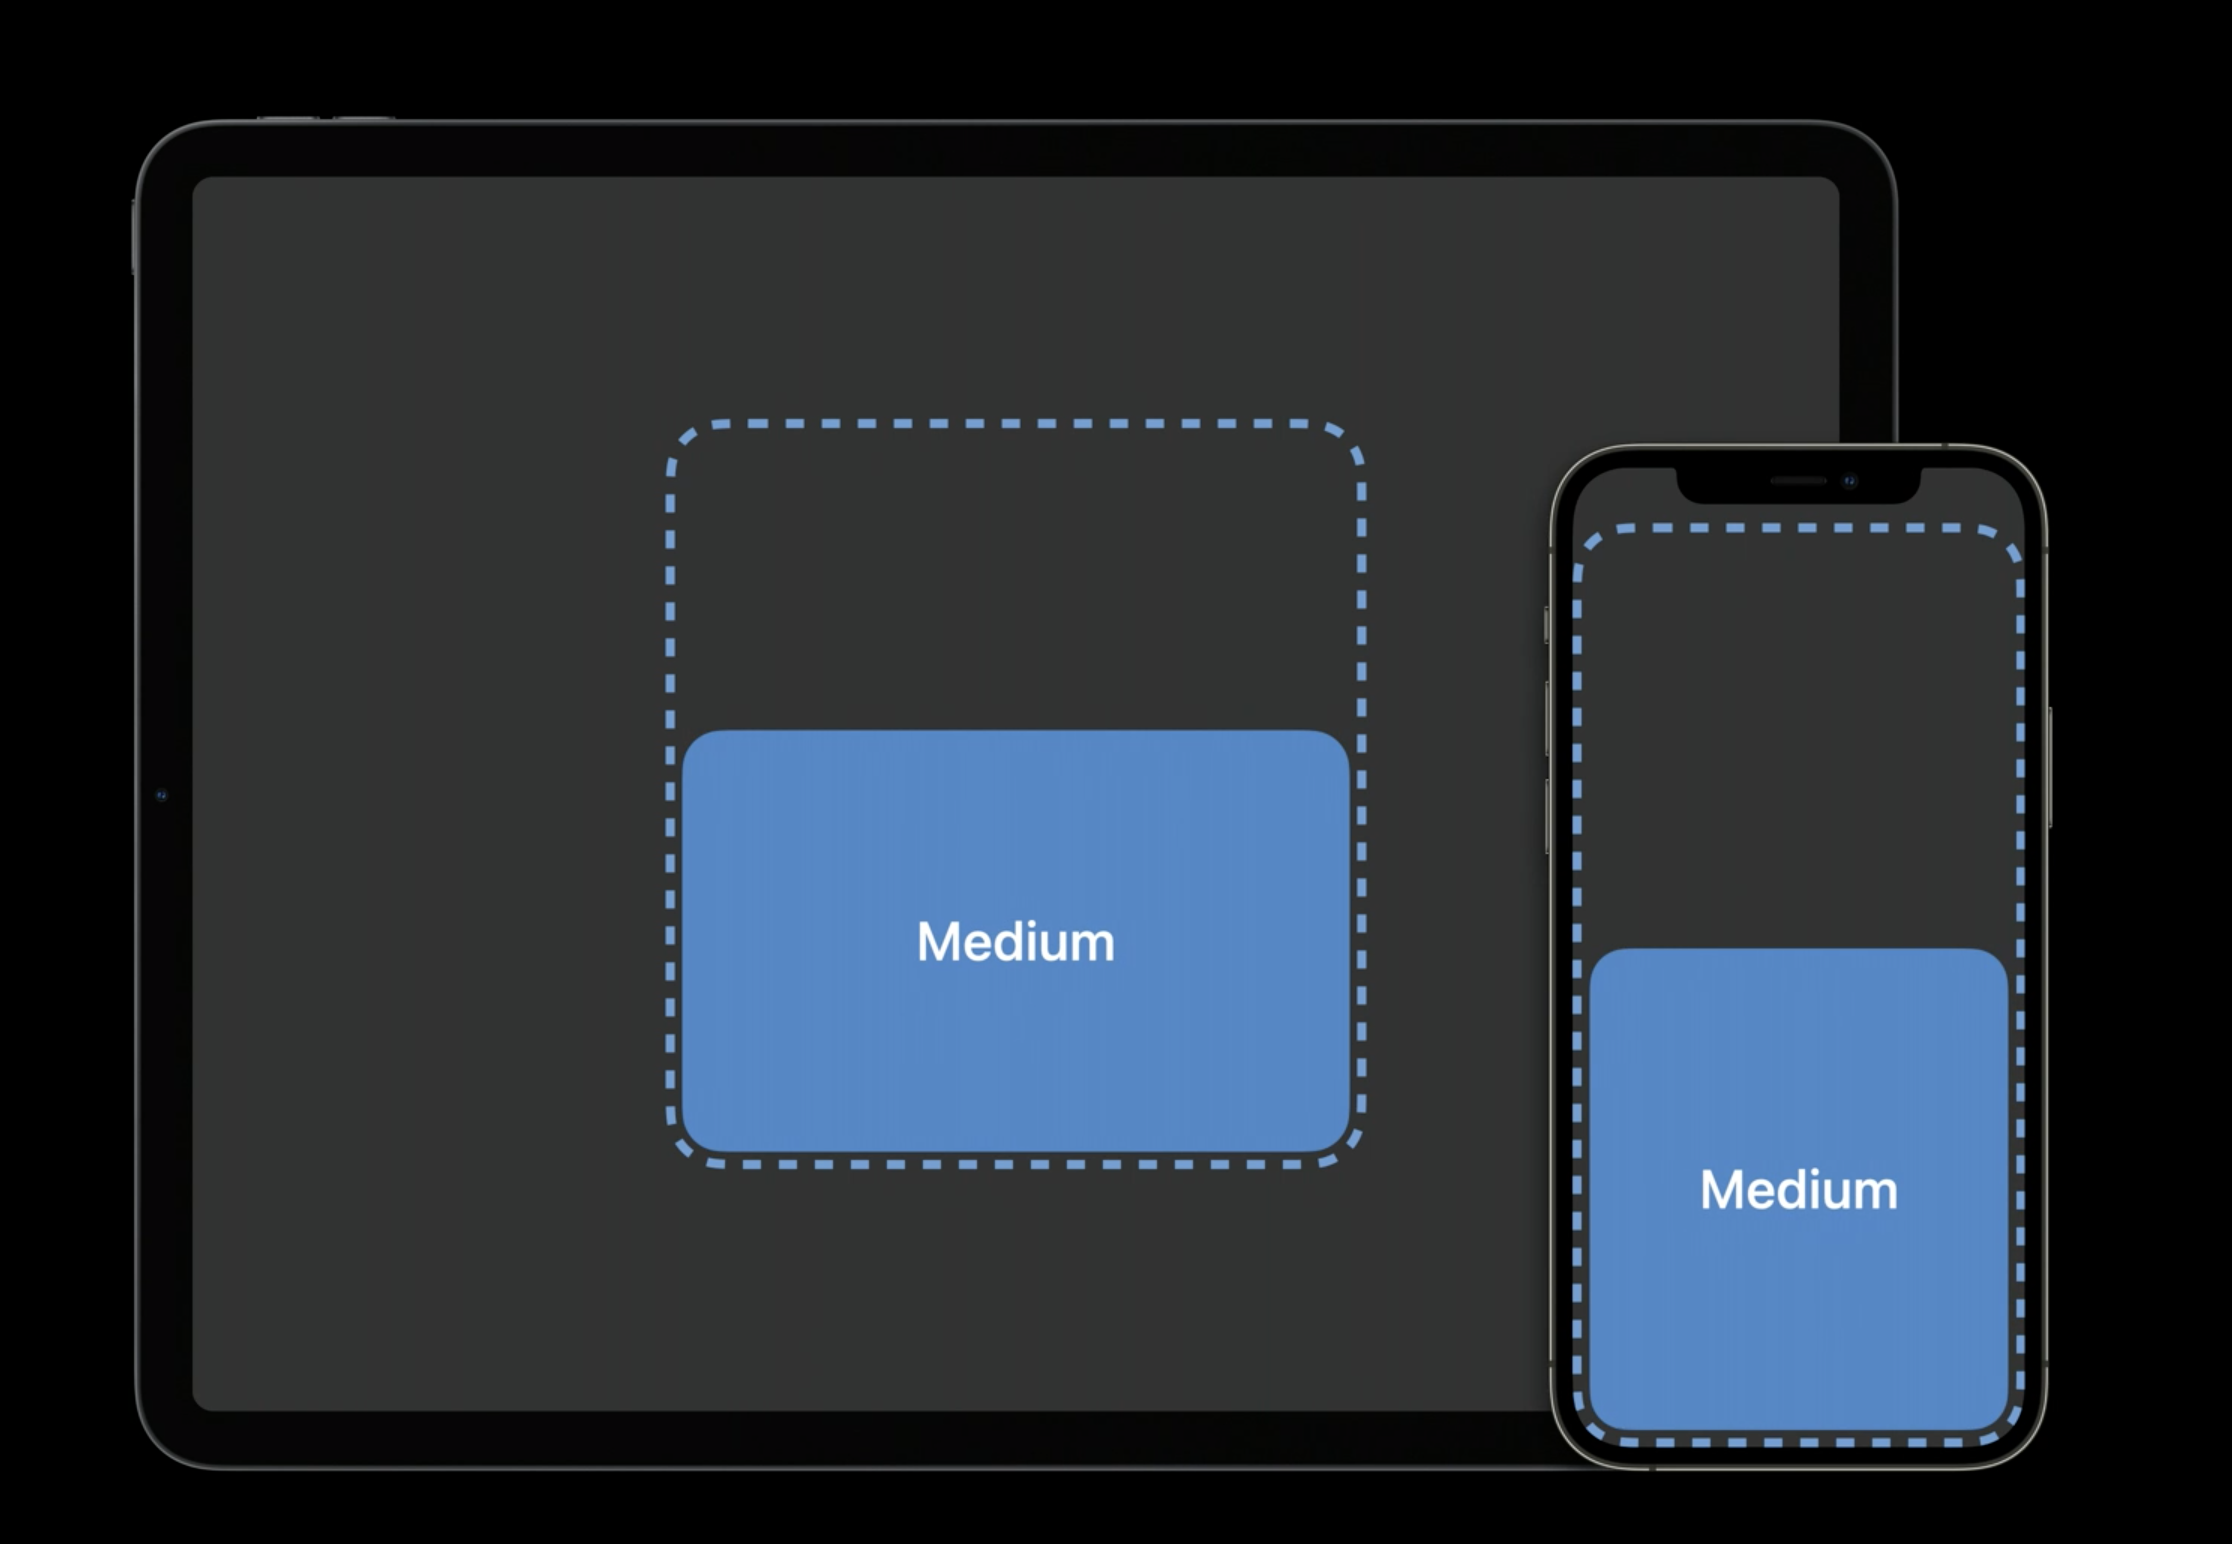
// modalのサイズ
sheetPresentationController.delegate = self
sheetPresentationController.selectedDetentIdentifier = .medium
// 上部にグラバーを表示する
sheetPresentationController.prefersGrabberVisible = true
// 高さの定義
sheetPresentationController.detents = [
.medium(),
.large()
]
// 角丸数値
let cornerRadius = 80
// modalの角丸の数値反映
self.sheetPresentationController.setValue(cornerRadius, forKey: "preferredCornerRadius")
}
override func viewDidLoad() {
super.viewDidLoad()
// Do any additional setup after loading the view.
}
// MARK: ModalViewDelegate
func onTapExpansionButton() {
self.sheetPresentationController.animateChanges {
if self.sheetPresentationController.selectedDetentIdentifier == .medium {
self.sheetPresentationController.selectedDetentIdentifier = .large
} else {
self.sheetPresentationController.selectedDetentIdentifier = .medium
}
}
}
}
protocol ModalViewDelegate: AnyObject {
func onTapExpansionButton()
}
class ModalView: UIView {
weak var delegate: ModalViewDelegate?
let hugaLabel: UILabel = {
let label = UILabel()
label.translatesAutoresizingMaskIntoConstraints = false
label.text = "テストでModalを表示する"
label.textColor = .black
label.textAlignment = .center
return label
}()
let expansion: UIButton = {
let button = UIButton()
button.setTitle("拡大・縮小", for: .normal)
button.translatesAutoresizingMaskIntoConstraints = false
button.setTitleColor(.white, for: .normal)
button.backgroundColor = .black
button.layer.cornerRadius = 16
return button
}()
override init(frame: CGRect) {
super.init(frame: frame)
self.backgroundColor = .yellow
setComponent()
setConstraint()
}
// MARK: タッチイベント
@objc func onTapExpansionButton(_ sender : Any) {
delegate?.onTapExpansionButton()
}
private func setComponent(){
[hugaLabel, expansion].forEach{ addSubview($0) }
self.expansion.addTarget(self, action: #selector(onTapExpansionButton(_:)),for: .touchUpInside)
}
private func setConstraint(){
NSLayoutConstraint.activate([
hugaLabel.topAnchor.constraint(equalTo: self.safeAreaLayoutGuide.topAnchor, constant: 50),
hugaLabel.leadingAnchor.constraint(equalTo: self.safeAreaLayoutGuide.leadingAnchor, constant: 20),
hugaLabel.trailingAnchor.constraint(equalTo: self.safeAreaLayoutGuide.trailingAnchor, constant: -20),
expansion.bottomAnchor.constraint(equalTo: self.safeAreaLayoutGuide.bottomAnchor, constant: -50),
expansion.heightAnchor.constraint(equalToConstant: 32),
expansion.leadingAnchor.constraint(equalTo: self.safeAreaLayoutGuide.leadingAnchor, constant: 20),
expansion.trailingAnchor.constraint(equalTo: self.safeAreaLayoutGuide.trailingAnchor, constant: -20)
])
}
required init?(coder: NSCoder) {
fatalError("init(coder:) has not been implemented")
}
}
説明
重要なのはここ!
コメントに書いた内容となっております。
Modalの角丸の数値は自由に変更して遊んでみてください。
// modalのサイズ
sheetPresentationController.delegate = self
sheetPresentationController.selectedDetentIdentifier = .medium
// 上部にグラバーを表示する
sheetPresentationController.prefersGrabberVisible = true
// 高さの定義
sheetPresentationController.detents = [
    .medium(),
    .large()
]
// 角丸数値
let cornerRadius = 80
// modalの角丸の数値反映
self.sheetPresentationController.setValue(cornerRadius, forKey: "preferredCornerRadius")
あとはボタンを押下した時の処理
sheetPresentationController.selectedDetentIdentifierで自分の設定した高さを持っています。
その為、こちらを変更すればあらびっくり変わります。
sheetPresentationController.animateChangesはアニメーション処理です
func onTapExpansionButton() {
    self.sheetPresentationController.animateChanges {
        if self.sheetPresentationController.selectedDetentIdentifier == .medium {
            self.sheetPresentationController.selectedDetentIdentifier = .large
        } else {
            self.sheetPresentationController.selectedDetentIdentifier = .medium
        }
    }
}
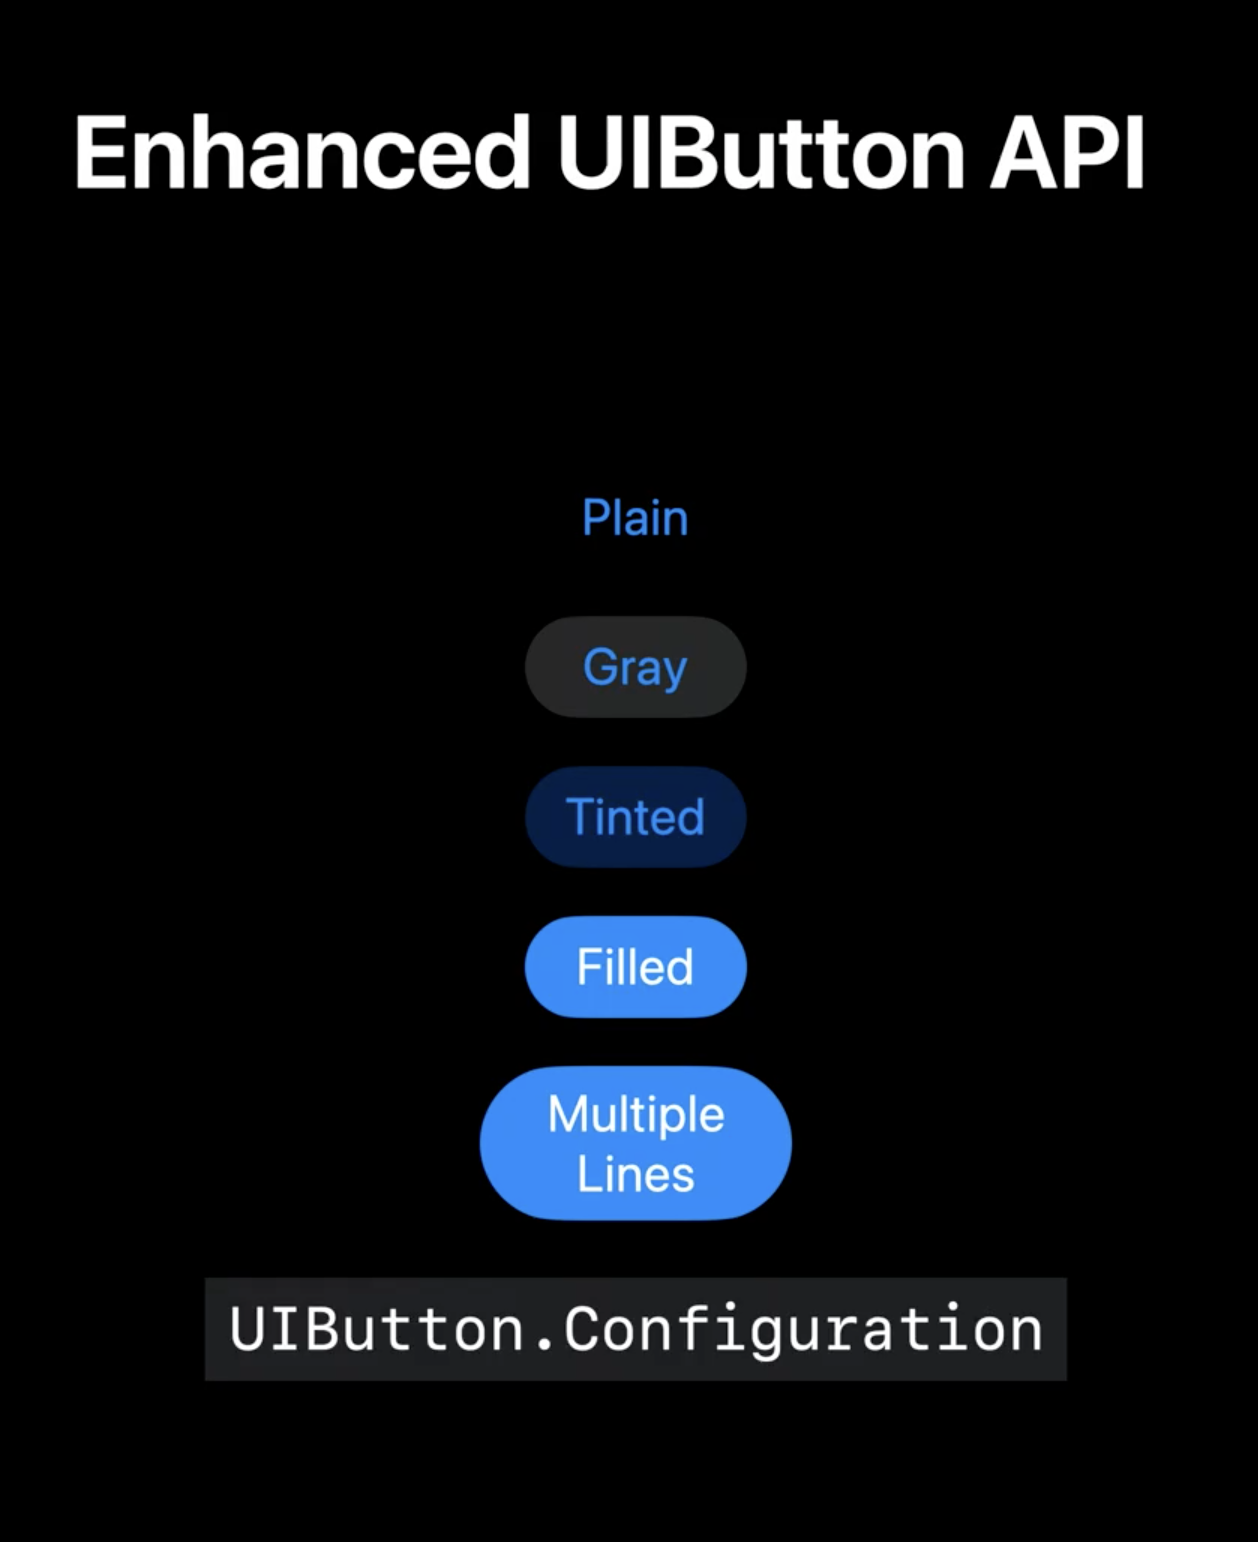
UIButtonで色々できるようになった
UIButtonで複数行がサポートされるようになった!
これまではUIButtonで複数行のテキストを表示するとなると アトリビュート を使っていたと思います。
しかし今回から楽になっちゃいました✌️
また、角丸などもcornerRadiusで定義せずとも自動でできます。

コード
let pushButton: UIButton = {
    // configの定義
    var config = UIButton.Configuration.tinted()
    // 画像の設定
    // config.image = UIImage(systemName: "person.2.circle.fill")
    // 画像どっち側に表示するか (何種類かあります。)
    // config.imagePlacement = .top
    config.buttonSize = .large
    // 角丸を自動で出す (何種類かあります。)
    config.cornerStyle = .capsule
    // 背景の設定
    config.baseBackgroundColor = .systemGreen

    let button = UIButton(configuration: config)
    button.translatesAutoresizingMaskIntoConstraints = false
    button.setTitle("「ぴょこ」っと出す\nひょっこりはん!!", for: .normal)
    button.setTitleColor(.white, for: .normal)
    return button
}()
上記のコードを適当な画面に入れることで下記のように表示されると思います。

ちなみに画像などの設定をすると以下のように表示されます😊

UIButtonでインジケータの表示ができるようになった
これまではライブラリなどを入れてログインボタンを押下したらAPIが走ってその際はクルクルさせるみたいなのをやっていましたが、Configでできるようになりました。
実演したのが以下になります。3秒でインジケータが終わるように書いています。
コード
こちらshowsActivityIndicatorの ture or false で楽に制御できます。
画像だけクルクル回るのは気にくはない感じがある(ボソッ)
// インジケーターの表示
self.mainView.pushButton.configuration?.showsActivityIndicator = true
UIMenuにサブビューが追加された
多分UIMenuってIOS13からいますよね?
割と利用シーンがわからず放置していました。ActionSheet使うわってなっていましたが、
サブビュー追加は割と私の中では使ってみたいなと思いました。
ではいきましょう。
元々は2階層のものは以下のような表示でした(iOS14.5)
 ### しかしiOS15から以下になります。
階層があるものは一発でわかるようになります
UIが進化して使いやすくなりました。🥰
### しかしiOS15から以下になります。
階層があるものは一発でわかるようになります
UIが進化して使いやすくなりました。🥰
 ### コード
適当に作りました。
iOS15になったからと言ってこの階層の設定については..... **何もやることがありません**
もう一回言います。勝手にOSがやってくれるます。その為 **何もやることはありません**
### コード
適当に作りました。
iOS15になったからと言ってこの階層の設定については..... **何もやることがありません**
もう一回言います。勝手にOSがやってくれるます。その為 **何もやることはありません**
import UIKit
// メニュー表示項目
enum MenuType: String {
    case A = "アニメ"
    case B = "食べ物"
    case C = "電話"
    case D = "スターウォーズ"
    case E = "ゴーストバスター"
}

class TestMenuViewController1: UIViewController {

    var mainView: TestMenuView1!
    var selectedMenuType: MenuType = .A

    override func loadView() {
        super.loadView()
        self.mainView = TestMenuView1(frame: .zero)
        self.view = self.mainView
    }

    override func viewDidLoad() {
        super.viewDidLoad()
        // UIMenuを設定
        self.menuSet()
    }

    private func menuSet() {
        var actions = [UIMenuElement]()
        [MenuType.A, MenuType.B, MenuType.C].forEach{ element in
            let action = UIAction(
                title: element.rawValue,
                state: self.selectedMenuType == element ? .on : .off,
                handler: { _ in
                self.selectedMenuType = element
                // stateの更新
                self.menuSet()
            })
            actions.append(action)
        }
        var subMenus = [UIAction]()
        [MenuType.D, MenuType.E].forEach{ element in
            let action = UIAction(
                title: element.rawValue,
                state: self.selectedMenuType == element ? .on : .off,
                handler: { _ in
                self.selectedMenuType = element
                // stateの更新
                self.menuSet()
            })
            subMenus.append(action)
        }
        let subMenu = UIMenu(title: "映画", children: subMenus)
        actions.append(subMenu)
        // Buttonに対してUIMenuの初期設定
        self.mainView.menuButton.menu = UIMenu(title: "", options: .displayInline, children: actions)

        self.mainView.menuButton.showsMenuAsPrimaryAction = true
        self.mainView.menuButton.setTitle( self.selectedMenuType.rawValue, for: .normal )
    }


}

class TestMenuView1: UIView {

    let hogeLabel: UILabel = {
        let label = UILabel()
        label.translatesAutoresizingMaskIntoConstraints = false
        label.text = "1個目のViewだよ!"
        label.font = .boldSystemFont(ofSize: 32)
        label.textColor = .black
        label.textAlignment = .center
        return label
    }()

    let menuButton: UIButton = {
        let button = UIButton()
        button.translatesAutoresizingMaskIntoConstraints = false
        button.setTitle("UIMenuを出す", for: .normal)
        button.setTitleColor(.white, for: .normal)
        button.backgroundColor = .red
        button.layer.cornerRadius = 25
        return button
    }()

    override init(frame: CGRect) {
        super.init(frame: frame)
        self.backgroundColor = .systemGray
        setComponent()
        setConstraint()
    }

    private func setComponent(){
        [hogeLabel, menuButton].forEach{
            addSubview($0)
        }
    }

    private func setConstraint(){
        NSLayoutConstraint.activate([
            hogeLabel.topAnchor.constraint(equalTo: self.safeAreaLayoutGuide.topAnchor, constant: 50),
            hogeLabel.leadingAnchor.constraint(equalTo: self.safeAreaLayoutGuide.leadingAnchor, constant: 20),
            hogeLabel.trailingAnchor.constraint(equalTo: self.safeAreaLayoutGuide.trailingAnchor, constant: -20),

            menuButton.bottomAnchor.constraint(equalTo: self.safeAreaLayoutGuide.bottomAnchor, constant: -20),
            menuButton.leadingAnchor.constraint(equalTo: self.safeAreaLayoutGuide.leadingAnchor, constant: 20),
            menuButton.trailingAnchor.constraint(equalTo: self.safeAreaLayoutGuide.trailingAnchor, constant: -20),

        ])
    }

    required init?(coder: NSCoder) {
        fatalError("init(coder:) has not been implemented")
    }

}
シンボルが追加された!
新しく600以上シンボルが追加されました。
こちらでDLできます。

そのほか
- 他にはTabが透明にできるようになった(まだ確認中)
- TableViewの
styleに新しいものが追加された(まだ確認中) - UIColorに
systemBrownというものが追加された茶色かな?
終わりに
多分私がまとめた内容が今回の変更点が全てではないと思います。
しかし主要な部分は抑えられていると思います。
それにしてもUIButtonが大幅に進化しましたね。こちらに全て説明されているので見てみるのも良いと思います。
個人的に下からぴょこっとちっちゃいModalViewがライブラリを使わず楽にできるようになったのは良いと思いました。
iOS15のリリース日はまだ先(予想が2021年秋頃)とのことなので世の中のiOSエンジニアさんたちは余裕を持って対応できると思います。iOS13みたいに死ぬほど作業量が増えるような修正がなくてよかったです。
ここまで読んでいただきありがとうございます。