本記事で行うこと
Web APIサーバーとReactアプリを、同じDockerイメージ内にビルドして、1つのCloud Runで同一ドメインで動かします。
これを行う動機は以下の通りです。
- CORSのプリフライトリクエスト(Preflight request)を回避したい
- 小さなアプリなら1つのCloud Runで十分かも
参考URL(感謝します)
構成
Reactアプリ配信用のnginxにリバースプロキシの設定を追加して、APIへのリクエストをWeb APIサーバーに振り分けます。
そのとき、Web APIサーバーのAPI名の前に/api/というプレフィックスを付けて、Reactアプリから「/api/{API名}」でリクエストしてもらうことにします。
- Web APIサーバー
- PORT 8081
- Reactアプリ
- PORT 8080
ソースコード
Web APIサーバー(Go言語)
用意したAPIは「GET /hello」1つで、レスポンスとして「Hello!」というテキストを返します。
package main

import (
	"fmt"
	"net/http"
)

func hello(w http.ResponseWriter, r *http.Request) {
	fmt.Fprintf(w, "Hello!")
}

func main() {
	http.HandleFunc("/hello", hello)
	err := http.ListenAndServe("localhost:8081", nil)
	if err != nil {
		panic(err)
	}
}
module server

go 1.20
Reactアプリ
ボタンをクリックすると「GET /api/hello」APIを呼んで、レスポンスを画面表示させます。
import {useState} from 'react';
import axios from "axios";

function App() {
    const [message, setMessage] = useState("");

    const handler = () => {
        (async() => {
            const url = window.location.origin.toString() + "/api/hello";
            const response = await axios.get(url);
            setMessage(response.data);
        })();
    };

    return (
        <div>
            <button onClick={handler}>
                APIを呼ぶ
            </button>
            <p>
                {message}
            </p>
        </div>
    );
}

export default App
Viteの設定
- PORTを8080に設定します。
- ローカルでもAPIサーバーへのリバースプロキシが効くように設定します。
import { defineConfig } from 'vite'
import react from '@vitejs/plugin-react'

// https://vitejs.dev/config/
export default defineConfig({
  plugins: [react()],
  server: {
    port: 8080,
    proxy: {
      '/api': {
        target: 'http://127.0.0.1:8081',
        changeOrigin: true,
        rewrite: (path) => path.replace(/^\/api/, ''),
      },
    },
  }
})
{
  "name": "client",
  "private": true,
  "version": "0.0.0",
  "type": "module",
  "scripts": {
    "dev": "vite",
    "build": "tsc && vite build",
    "preview": "vite preview"
  },
  "dependencies": {
    "axios": "^1.4.0",
    "react": "^18.2.0",
    "react-dom": "^18.2.0"
  },
  "devDependencies": {
    "@types/react": "^18.0.27",
    "@types/react-dom": "^18.0.10",
    "@vitejs/plugin-react": "^3.1.0",
    "typescript": "^4.9.3",
    "vite": "^4.1.0"
  }
}
ローカルで動作確認
- Web APIサーバーの動作確認
ブラウザで http://localhost:8080/api/hello にアクセスすると、「Hello!」と表示されました。
- Reactアプリの動作確認
ブラウザで http://localhost:8080 にアクセスして「APIを呼ぶ」ボタンをクリックすると、「Hello!」と表示されました。
ローカルのDockerで動作確認
Docker用のファイルを準備
新たに3つのファイルを用意します。
- nginx.conf
- cmd.sh
- Dockerfile
docker buildする場所のディレクトリ構成は、以下の通りです。
current directory
  ├── server/         → Web APIサーバー
  │     ├── main.go
  │     └── go.mod
  ├── client/         → Reactアプリ
  │     ├── src/
  │     │     ├── App.tsx
  │     │    (以下省略)
  │     ├── public/
  │     │     └── (省略)
  │     ├── node_modules/
  │     │     └── (省略)
  │     ├── index.html
  │     ├── package.json
  │     ├── package-lock.json
  │     ├── tsconfig.json
  │     ├── tsconfig.node.json
  │     └── vite.config.ts
  ├── nginx.conf
  ├── cmd.sh
  └── Dockerfile
nginx.conf
- Deploy React and Nginx to Cloud Run のnginx.confに、Web APIサーバーへのリバースプロキシの設定を追加した内容です。
server {
     listen       $PORT;
     server_name  localhost;

     location / {
         root   /usr/share/nginx/html;
         index  index.html index.htm;
         try_files $uri /index.html;
     }
     location /api/ {
         proxy_pass http://localhost:8081/;
     }

     gzip on;
     gzip_vary on;
     gzip_min_length 10240;
     gzip_proxied expired no-cache no-store private auth;
     gzip_types text/plain text/css text/xml text/javascript application/x-javascript application/xml;
     gzip_disable "MSIE [1-6]\.";

}
cmd.sh
- Reactアプリ配信の部分は、Deploy React and Nginx to Cloud Run のDockerfileを参考にしました。
- Web APIサーバー、Reactアプリ配信の2つをバックグラウンドで動かします。そのうち1つでも終了したら、シェルスクリプト自体を終了させます。
#!/bin/sh
set -eo pipefail

echo "exec server."
exec /app/server &

echo "exec client."
export PORT=8080
envsubst '\$PORT' < /etc/nginx/conf.d/configfile.template > /etc/nginx/conf.d/default.conf && nginx -g 'daemon off;' &

# Exit immediately when one of the background processes terminate.
echo "wait."
wait -n
Dockerfile
- Reactアプリの部分は、Deploy React and Nginx to Cloud Run のDockerfileをアレンジしました。
- 「go build environment」で、Web APIサーバーをビルドします。
- 「react build environment」で、Reactアプリをビルドします。
- ビルド結果を「run environment」にコピーして実行環境とします。
# go build environment
FROM golang:1.20-alpine as go-build
WORKDIR /app
COPY ./server ./_server
RUN go build -o server ./_server/main.go

# react build environment
FROM node:18-alpine as react-build
WORKDIR /app
COPY ./client ./
RUN npm ci
RUN npm run build

# run environment
FROM nginx:alpine
COPY nginx.conf /etc/nginx/conf.d/configfile.template

COPY --from=go-build /app/server /app/
COPY --from=react-build /app/dist /usr/share/nginx/html

EXPOSE 8080

COPY ./cmd.sh /app/
RUN chmod +x /app/cmd.sh
CMD ["/app/cmd.sh"]
docker build 例
docker build ./ -t example
docker run 例
docker run --rm --name example1 -p 8080:8080 example
動作確認
- Web APIサーバーの動作確認
ブラウザで http://localhost:8080/api/hello にアクセスすると、「Hello!」と表示されました。
- Reactアプリの動作確認
ブラウザで http://localhost:8080 にアクセスして「APIを呼ぶ」ボタンをクリックすると、「Hello!」と表示されました。
Cloud Runで動作確認
ビルド例
gcloud builds submit --tag gcr.io/your_project/exercise:your_tag
デプロイ例
gcloud run deploy exercise \
    --image gcr.io/your_project/exercise:your_tag \
    --platform managed \
    --cpu 1 \
    --max-instances 1 \
    --concurrency 1 \
    --memory 1024Mi \
    --timeout 3600 \
    --allow-unauthenticated \
    --region us-central1 \
    --service-account your_identity
動作確認
- Web APIサーバーの動作確認
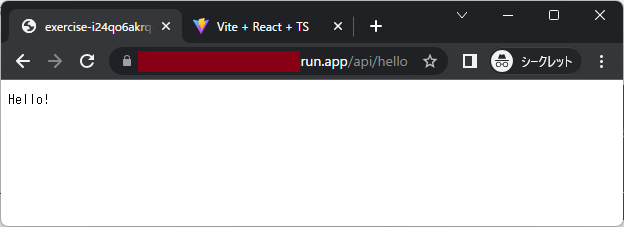
ブラウザで https://your_service_domain/api/hello にアクセスすると、「Hello!」と表示されました。
- Reactアプリの動作確認
ブラウザで https://your_service_domain にアクセスして「APIを呼ぶ」ボタンをクリックすると、「Hello!」と表示されました。


