この記事で行うこと
- PythonコードをDockerコンテナ内でテストします。
- CI(継続的インテグレーション)として、GitLab CIを使用します。
- gitサーバーとして、オンプレのGitLabを使用します。今回はローカルにDockerで導入します。
- git push時にGitLabサーバーが自動で走らせるテストに加えて、git push前にローカルでも手動でテストできるようにします。
- GitLab Runnerは2つ導入します。(1)ローカルでの手動実行用にホストに直接インストール、(2)git push後の自動実行用にDockerコンテナを起動。
- テストに使用するDockerコンテナは、都度イメージをdocker pullするのではなく、手元にある構築済のイメージを使用して起動します。
- GitLab RunnerとテストをDockerコンテナ内で動かす理由は、将来GitLabをローカルでなくリモートサーバーで動かす時に、GitLab Runnerとテストの環境もそのままクラウド等に移行させたいからです。
- コンテナからコンテナを操作する時は、DooD(Docker outside of Docker)を使用します。DooDの使用には注意が必要だそうですが(Dockerコンテナ内からホストマシンのルートを取る具体的な方法(あるいは/var/run/docker.sockを晒すことへの注意喚起))、本記事ではとりあえず使います。
参考ページ(全部読めていませんが、感謝します)
Gitlab CIでDockerベースのサービス開発のCI環境を作る
GitLab CIでテスト・ビルド・デプロイを自動化する
Dockerコンテナ内からホストマシンのルートを取る具体的な方法(あるいは/var/run/docker.sockを晒すことへの注意喚起)
GitLab-CIのRunnerでDockerのローカルイメージを使う
Self-Managed な社内 Gitlab をhttps化 したら Gitlab Runnerがうまく動かなかった件
.gitlab-ci.yml をローカルのMacで動かしたい
GitLabの導入とプロジェクト作成
では作業を開始します。
gitサーバーとして、オンプレのGitLabを使用します。今回は手っ取り早くDockerでローカルに導入します。
端末で適当なディレクトリに移動後、以下を実行します。
git clone https://github.com/sameersbn/docker-gitlab
cd docker-gitlab
docker-compose up -d
Macを使っている場合、以下のようなエラーが出ることがあります。
対処として、docker-compose.ymlを編集し、「/srv/docker」をOSユーザーがアクセスできるディレクトリに変更するのが手っ取り早いでしょう。
ERROR: for docker-gitlab_redis_1 Cannot start service redis: b'Mounts denied: \r\nThe path /srv/docker/gitlab/redis\r\nis not shared from OS X and is not known to Docker.\r\nYou can configure shared paths from Docker -> Preferences... -> File Sharing.\r\nSee https://docs.docker.com/docker-for-mac/osxfs/#namespaces for morRecreating docker-gitlab_postgresql_1 ... error
コンテナ立ち上げ後に「docker-compose ps」を実行すると、以下のように表示されました。
           Name                         Command               State                           Ports
---------------------------------------------------------------------------------------------------------------------------
docker-gitlab_gitlab_1       /sbin/entrypoint.sh app:start    Up      0.0.0.0:10022->22/tcp, 443/tcp, 0.0.0.0:10080->80/tcp
docker-gitlab_postgresql_1   /sbin/entrypoint.sh              Up      5432/tcp
docker-gitlab_redis_1        /sbin/entrypoint.sh --logl ...   Up      6379/tcp
GitLabコンテナのhttpポートが10080ですので、ブラウザで http://localhost:10080/ にアクセスします。
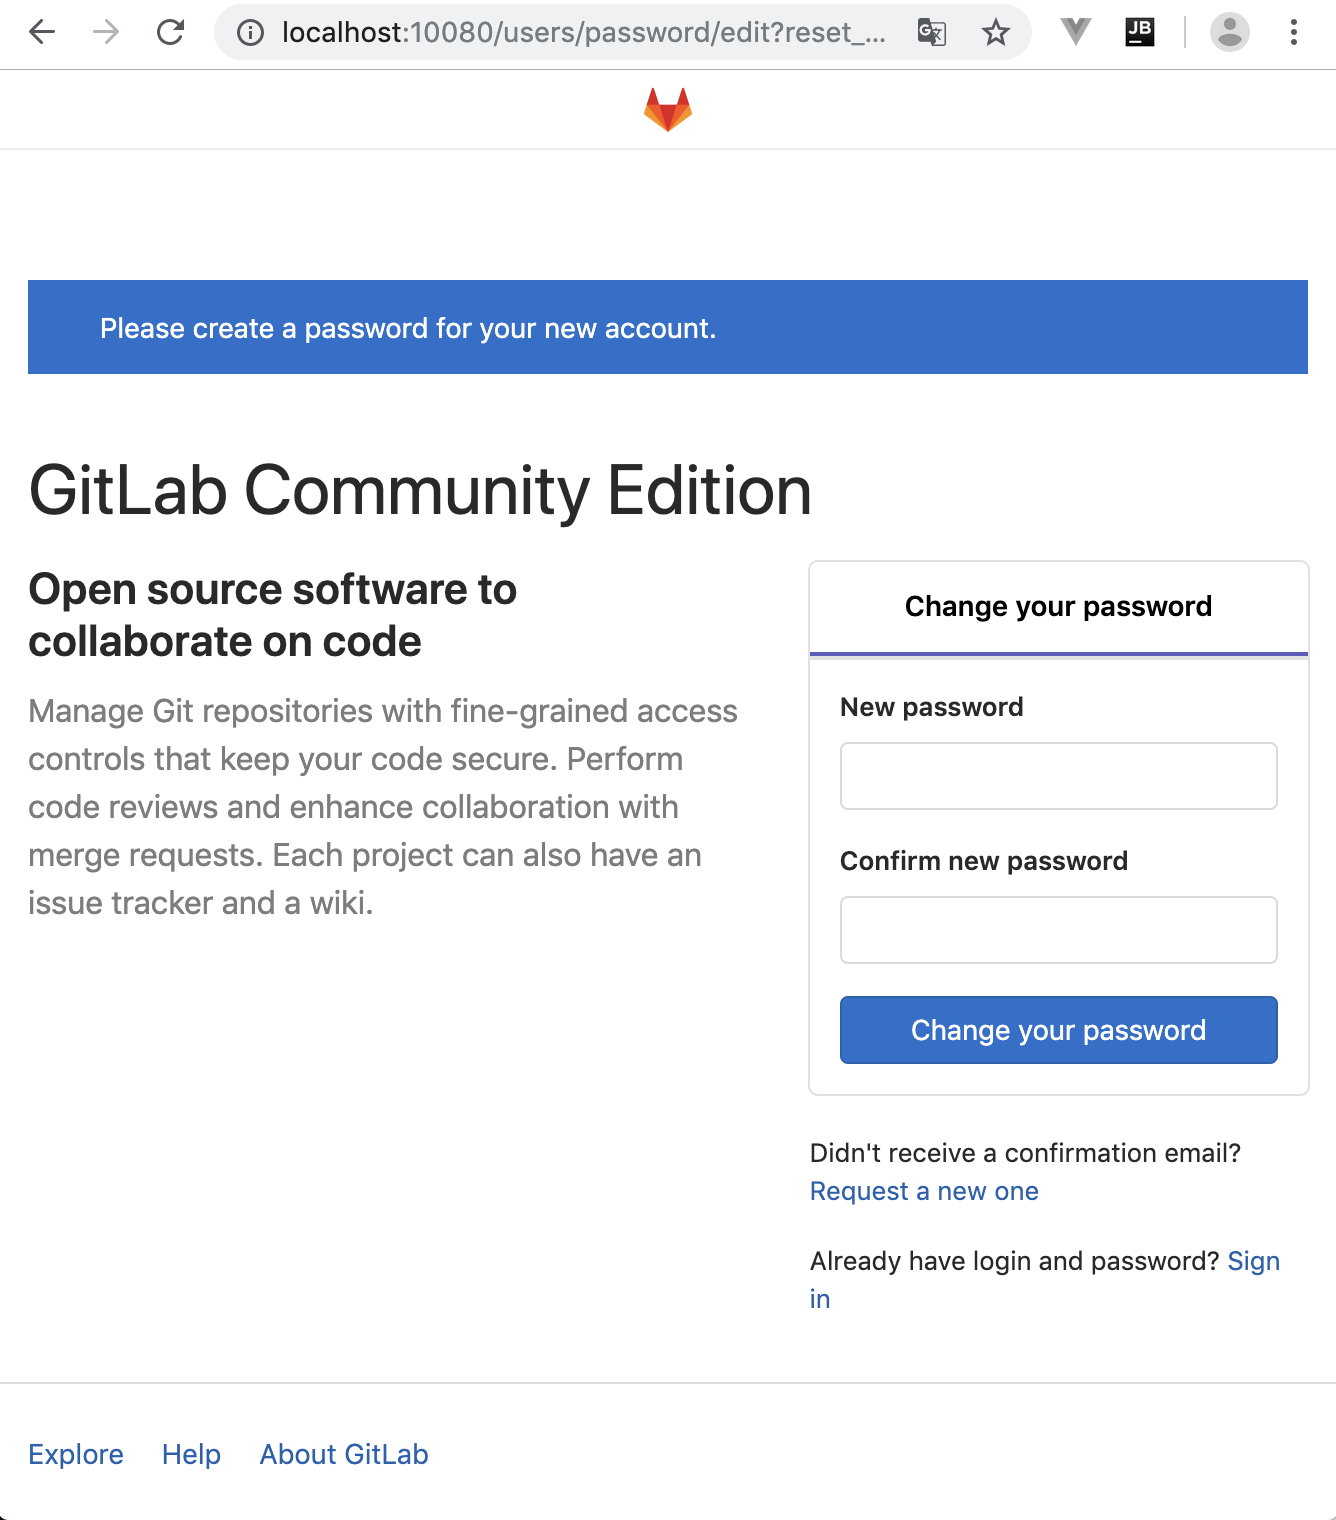
下の画面が出たら、rootのパスワードを変更します。
下の画面に行き、開発ユーザーを作成します。

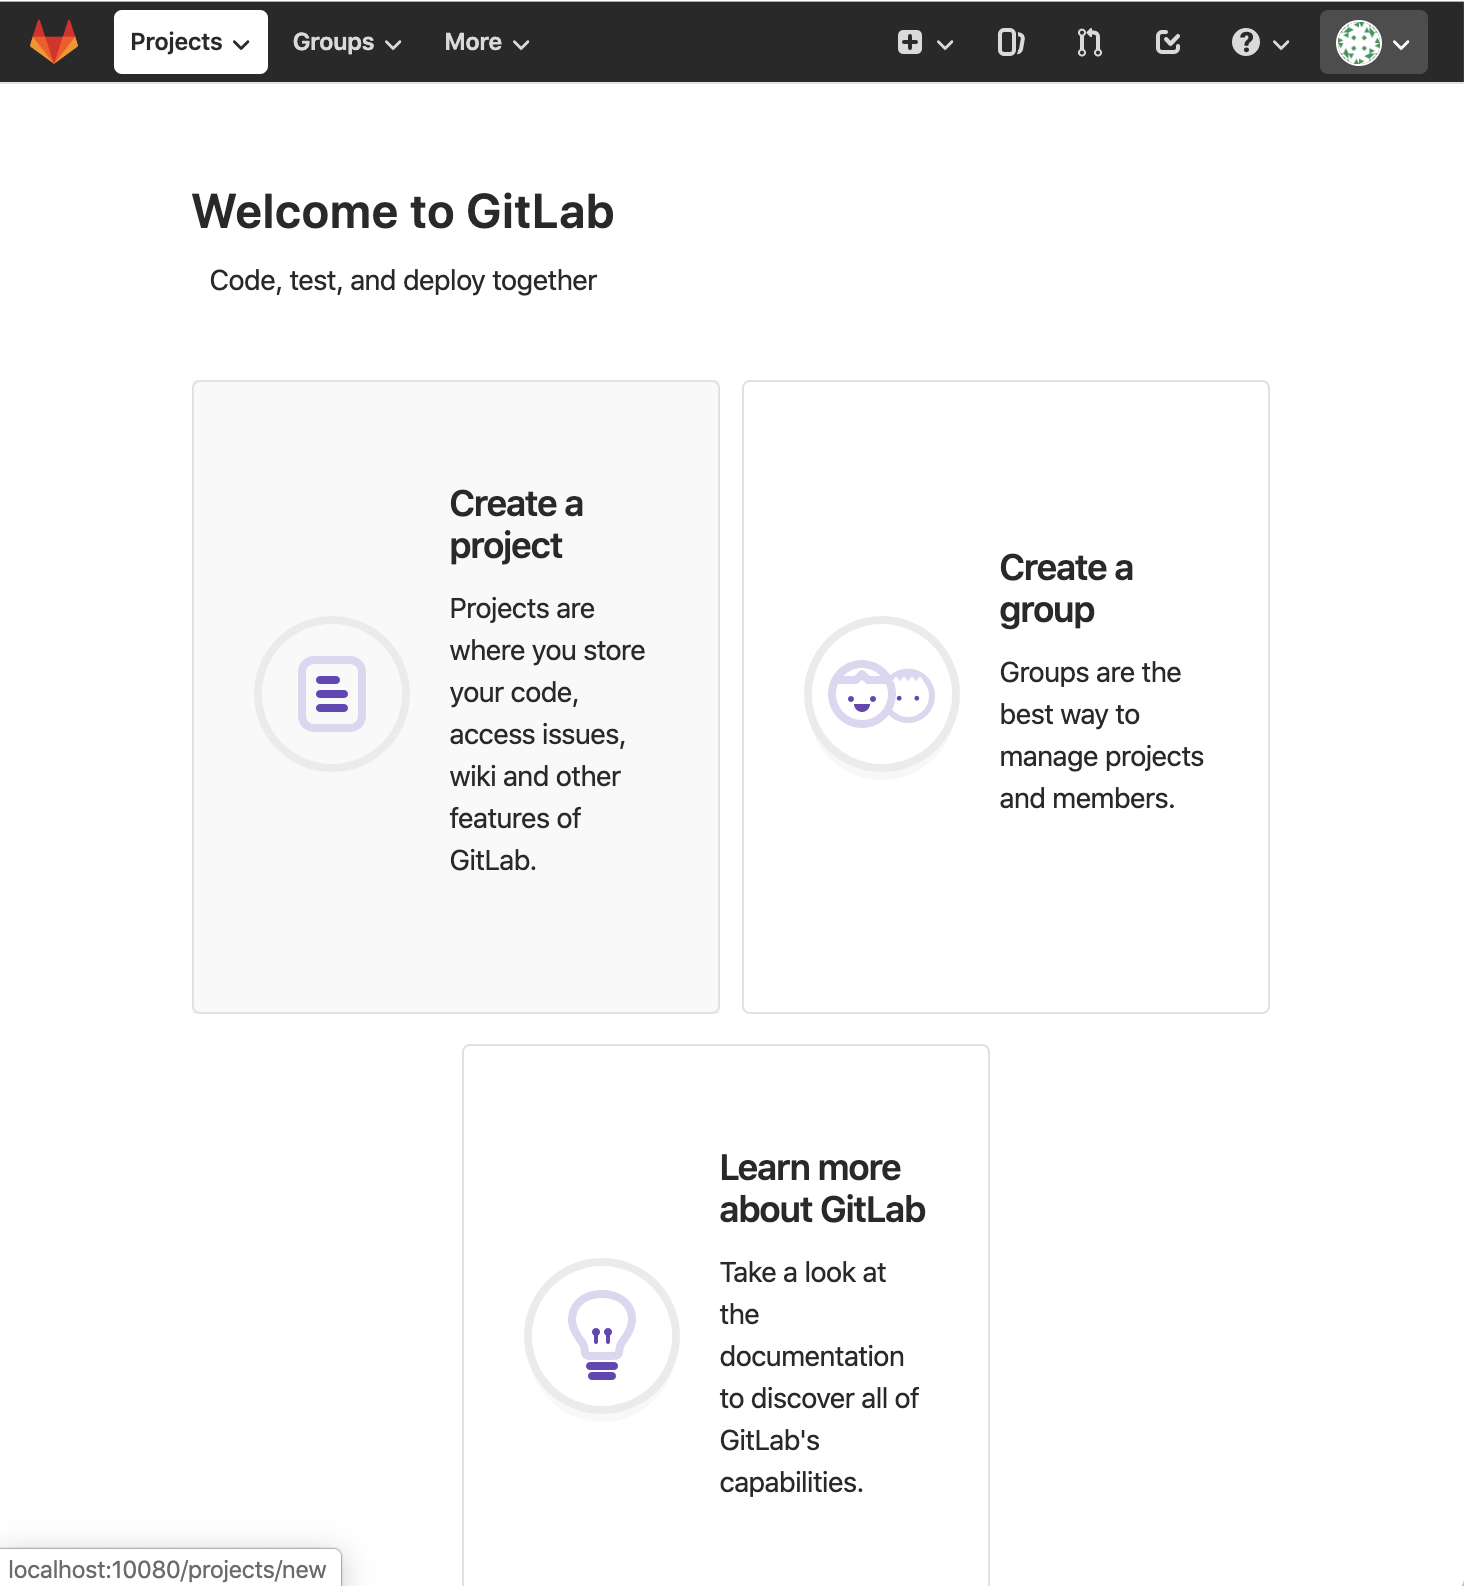
開発ユーザーでログインできたら、下の画面からCreate a projectを選択します。
本記事ではPythonソースコードとして、書籍「テスト駆動Python」に記載のサンプルコード のch1を使用します(感謝します)。
それにちなんで、プロジェクト名を「bopytest_ch1」としましたが、名前は何でも良いです。
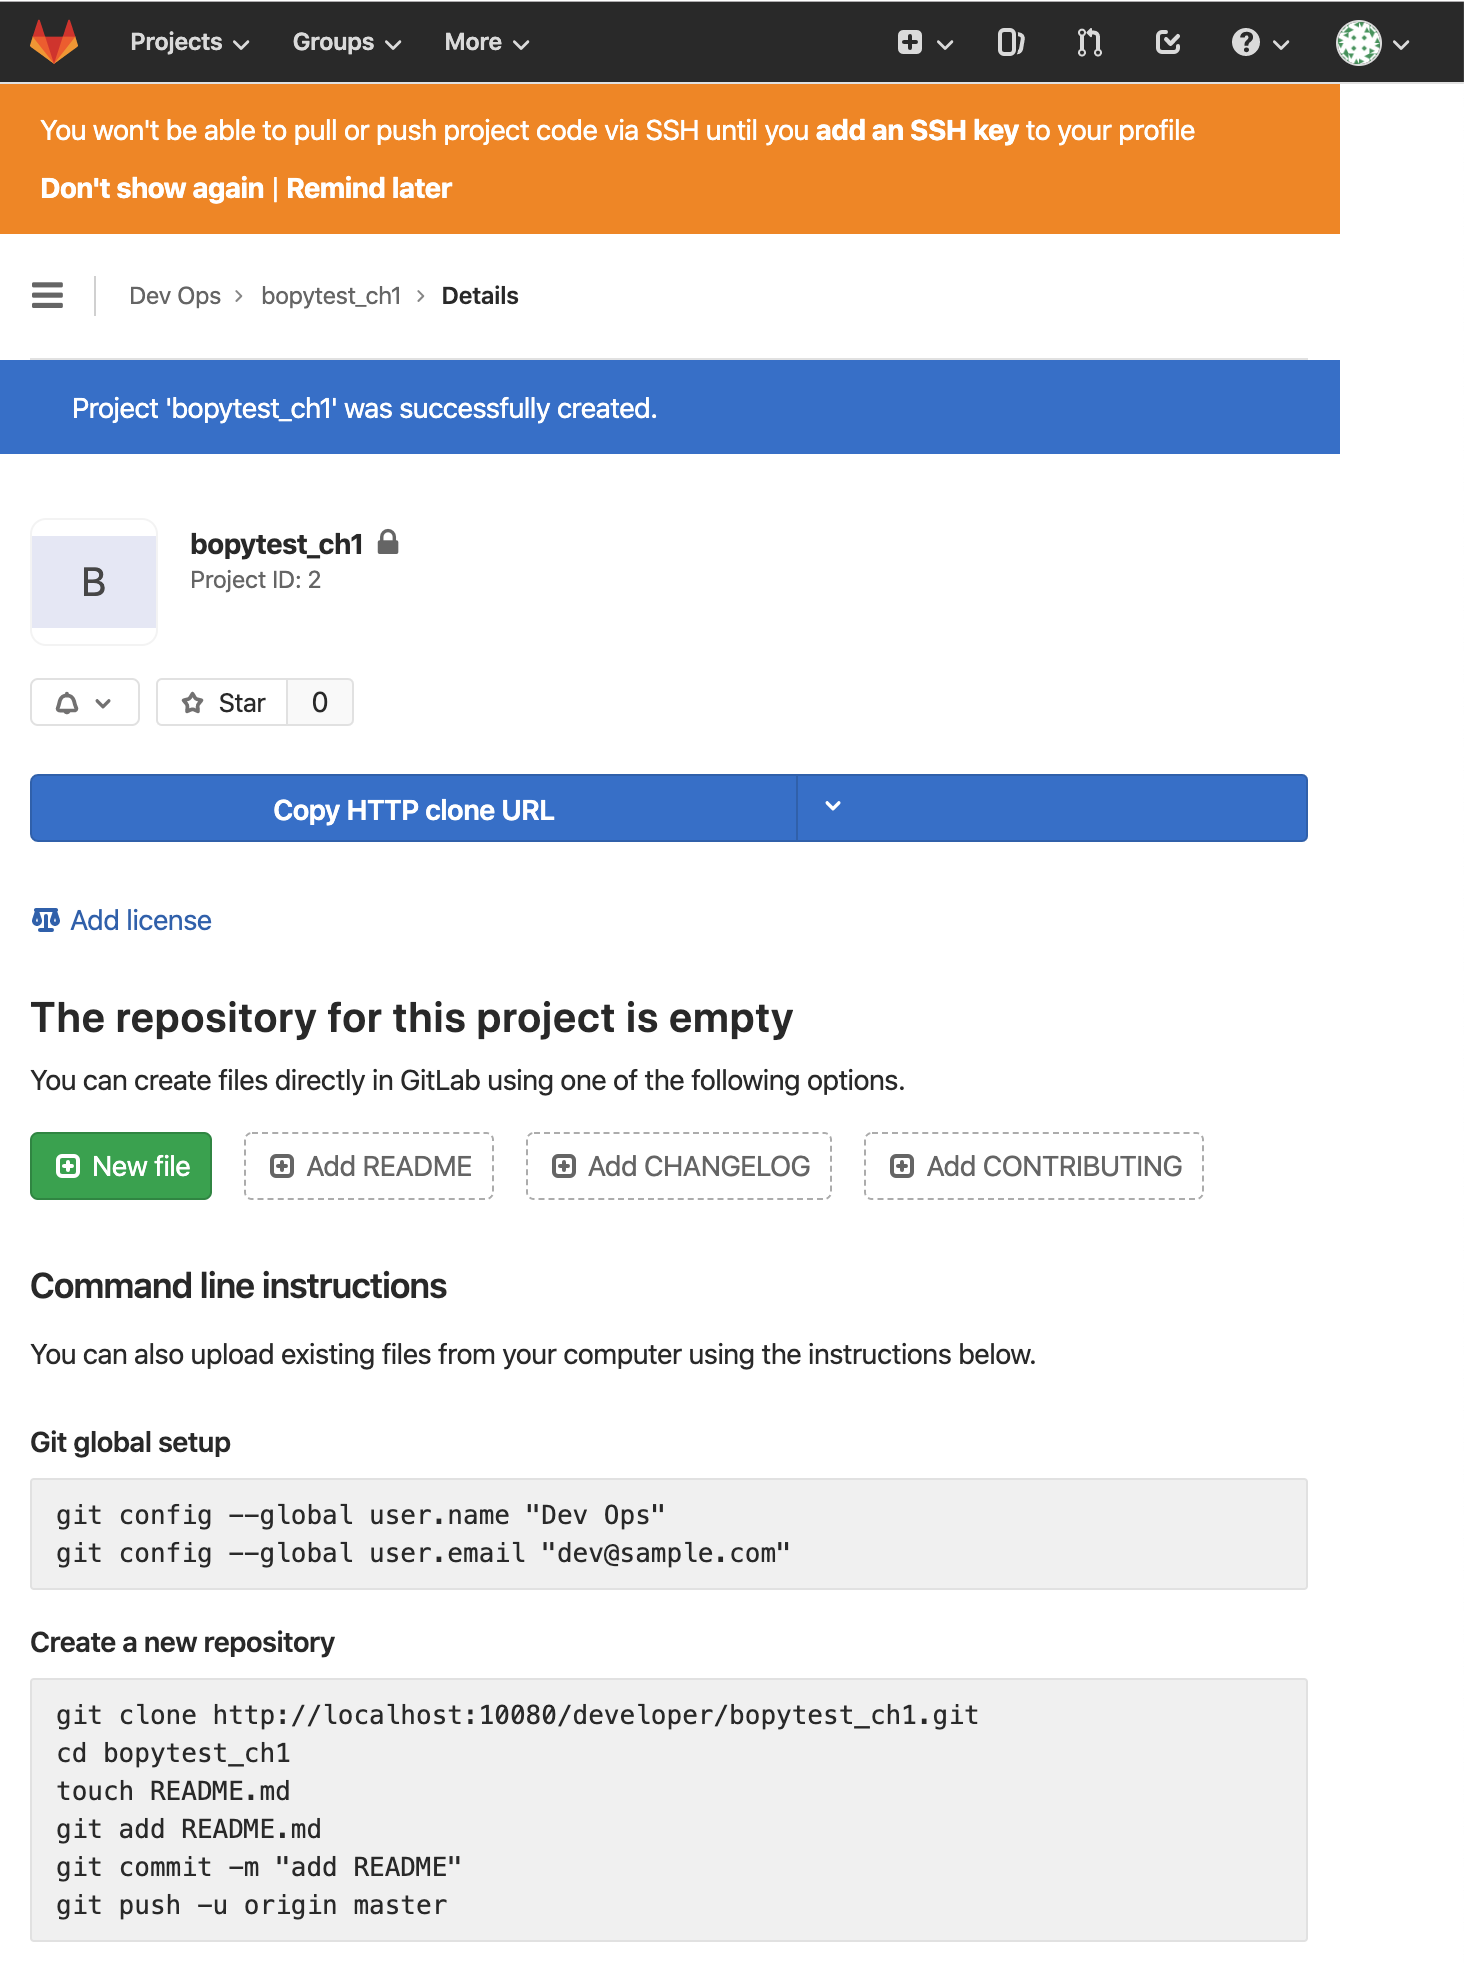
Create projectボタンを押してプロジェクトを作成します。

以下のように、プロジェクトが作成されました。
ローカルでテスト用ソースコードの準備
端末で適当なディレクトリに移動し、以下を実行して先程作った空のプロジェクトをgit cloneします。
git clone http://localhost:10080/developer/bopytest_ch1.git
cd bopytest_ch1
テストファイルの置き場所として行儀が悪いかもしれませんが、bopytest_ch1ディレクトリ(gitリポジトリのルート)の下に、以下の内容でテストファイルを作ってしまいます。
def test_passing():
    assert (1, 2, 3) == (1, 2, 3)
以下のように、pipenv等でpytestをインストールします。
pipenvでの初回インストールなので、同時にvirtual environmentも作成されました。
pipenv install pytest
自動生成されたPipfileは以下の通りです。
[[source]]
name = "pypi"
url = "https://pypi.org/simple"
verify_ssl = true

[dev-packages]

[packages]
pytest = "*"

[requires]
python_version = "3.7"
試しにpytestでテストしてみます。
pipenv run pytest -v test_one.py
以下のようにテストが通りました。
===================================== test session starts ======================================
platform darwin -- Python 3.7.4, pytest-5.3.1, py-1.8.0, pluggy-0.13.1 -- /Users/username/.local/share/virtualenvs/bopytest_ch1-KFvVvv1C/bin/python3
cachedir: .pytest_cache
rootdir: /Users/username/PycharmProjects/bopytest_ch1
collected 1 item

test_one.py::test_passing PASSED                                                         [100%]

====================================== 1 passed in 0.01s =======================================
test_one.pyはもう変更しませんので、git commitしておきます。
git add test_one.py
git commit -m "test_one.py 完成"
テスト実行用のDockerイメージをローカルで作成
行儀が悪いかもしれませんが、同じディレクトリ(gitリポジトリのルート)の下にDockerfileも作ってしまいます。
ここからリンクされているDockerfile を見ながら、以下の内容で作成しました。
FROM python:3-alpine

RUN apk update \
    && pip install --upgrade pip \
    && python3 -m pip install pytest pytest-cov

CMD ["python3"]
引き続き、Dockerイメージをビルドします。イメージ名を「bopytest_ch1」としましたが、名前は何でも良いです。
docker build -t bopytest_ch1 .
以下のように表示されて、Dockerイメージが作成されました。
Sending build context to Docker daemon  52.22kB
Step 1/3 : FROM python:3-alpine
 ---> 59acf2b3028c
Step 2/3 : RUN apk update     && pip install --upgrade pip     && python3 -m pip install pytest pytest-cov
 ---> Running in 08917176ca6d
fetch http://dl-cdn.alpinelinux.org/alpine/v3.10/main/x86_64/APKINDEX.tar.gz
fetch http://dl-cdn.alpinelinux.org/alpine/v3.10/community/x86_64/APKINDEX.tar.gz
v3.10.3-71-g50e386f088 [http://dl-cdn.alpinelinux.org/alpine/v3.10/main]
v3.10.3-68-ge1e42c5d6c [http://dl-cdn.alpinelinux.org/alpine/v3.10/community]
OK: 10342 distinct packages available
Requirement already up-to-date: pip in /usr/local/lib/python3.8/site-packages (19.3.1)
Collecting pytest
  Downloading https://files.pythonhosted.org/packages/da/ed/d22d7f06eb1107271694ed2171b9d52e8eea38d9757124e75ba13324ac77/pytest-5.3.1-py3-none-any.whl (233kB)
Collecting pytest-cov
  Downloading https://files.pythonhosted.org/packages/b9/54/3673ee8be482f81527678ac894276223b9814bb7262e4f730469bb7bf70e/pytest_cov-2.8.1-py2.py3-none-any.whl
Collecting py>=1.5.0
  Downloading https://files.pythonhosted.org/packages/76/bc/394ad449851729244a97857ee14d7cba61ddb268dce3db538ba2f2ba1f0f/py-1.8.0-py2.py3-none-any.whl (83kB)
Collecting pluggy<1.0,>=0.12
  Downloading https://files.pythonhosted.org/packages/a0/28/85c7aa31b80d150b772fbe4a229487bc6644da9ccb7e427dd8cc60cb8a62/pluggy-0.13.1-py2.py3-none-any.whl
Collecting wcwidth
  Downloading https://files.pythonhosted.org/packages/7e/9f/526a6947247599b084ee5232e4f9190a38f398d7300d866af3ab571a5bfe/wcwidth-0.1.7-py2.py3-none-any.whl
Collecting packaging
  Downloading https://files.pythonhosted.org/packages/cf/94/9672c2d4b126e74c4496c6b3c58a8b51d6419267be9e70660ba23374c875/packaging-19.2-py2.py3-none-any.whl
Collecting more-itertools>=4.0.0
  Downloading https://files.pythonhosted.org/packages/5c/1d/3df99de956abb96305956e09e6a1fa955883295e1f28808f9c97b3d5364d/more_itertools-8.0.0-py3-none-any.whl (40kB)
Collecting attrs>=17.4.0
  Downloading https://files.pythonhosted.org/packages/a2/db/4313ab3be961f7a763066401fb77f7748373b6094076ae2bda2806988af6/attrs-19.3.0-py2.py3-none-any.whl
Collecting coverage>=4.4
  Downloading https://files.pythonhosted.org/packages/85/d5/818d0e603685c4a613d56f065a721013e942088047ff1027a632948bdae6/coverage-4.5.4.tar.gz (385kB)
Collecting pyparsing>=2.0.2
  Downloading https://files.pythonhosted.org/packages/c0/0c/fc2e007d9a992d997f04a80125b0f183da7fb554f1de701bbb70a8e7d479/pyparsing-2.4.5-py2.py3-none-any.whl (67kB)
Collecting six
  Downloading https://files.pythonhosted.org/packages/65/26/32b8464df2a97e6dd1b656ed26b2c194606c16fe163c695a992b36c11cdf/six-1.13.0-py2.py3-none-any.whl
Building wheels for collected packages: coverage
  Building wheel for coverage (setup.py): started
  Building wheel for coverage (setup.py): finished with status 'done'
  Created wheel for coverage: filename=coverage-4.5.4-cp38-none-any.whl size=170507 sha256=d3665a3a0effbdc986e7cc706bba755367bf179f9474e808c5a7ea78c2c514fa
  Stored in directory: /root/.cache/pip/wheels/3d/78/f3/27ada0157c9551bcc19de14154a4a83db09bbe275c6765f283
Successfully built coverage
Installing collected packages: py, pluggy, wcwidth, pyparsing, six, packaging, more-itertools, attrs, pytest, coverage, pytest-cov
Successfully installed attrs-19.3.0 coverage-4.5.4 more-itertools-8.0.0 packaging-19.2 pluggy-0.13.1 py-1.8.0 pyparsing-2.4.5 pytest-5.3.1 pytest-cov-2.8.1 six-1.13.0 wcwidth-0.1.7
Removing intermediate container 08917176ca6d
 ---> 4793ce025832
Step 3/3 : CMD ["python3"]
 ---> Running in d89f321e7c73
Removing intermediate container d89f321e7c73
 ---> 8d7b94c4ea9a
Successfully built 8d7b94c4ea9a
Successfully tagged bopytest_ch1:latest
GitLab CIの設定ファイル「.gitlab-ci.yml」の準備
同じディレクトリ(gitリポジトリのルート)の下に、以下の内容で.gitlab-ci.ymlを作成します。
image: bopytest_ch1

test:
  stage: test
  tags:
    - docker
  script:
    - pytest -v
ローカルでテストの手動実行(Mac使用)
(追記 2019-12-05)
gitlab-runnerをローカルで動かす場合、.gitlab-ci.ymlのすべての機能がexecでサポートされているわけではないそうです。
参考:
.gitlab-ci.yml をローカルのMacで動かしたい
GitLab Runner commands #gitlab-runner exec
(追記 end)
GitLab Runnerを使用して、ローカルでテストを手動実行してみます。
本記事ではMacを使用していますので、以下のようにMacに直にGitLab Runnerをインストールしました。
各OSへのインストール方法は こちら。
brew install gitlab-runner
git commitされているけど、git pushされていない状態で、GitLab Runnerを起動してみます。
gitlab-runnerコマンドのdocker-pull-policyオプションで「if-not-present」を指定し、先程作成した手元のDockerイメージを使用してテストが行われるようにします。
参考:GitLab-CIのRunnerでDockerのローカルイメージを使う
gitlab-runner exec docker test --docker-pull-policy "if-not-present"
以下のようにテストが通りました。
手元のDockerイメージ「bopytest_ch1」が使用され、そのコンテナ内でテストが実行されていることがわかります。
Runtime platform                                    arch=amd64 os=darwin pid=3583 revision=577f813d version=12.5.0
fatal: ambiguous argument 'HEAD~1': unknown revision or path not in the working tree.
Use '--' to separate paths from revisions, like this:
'git <command> [<revision>...] -- [<file>...]'
Running with gitlab-runner 12.5.0 (577f813d)
Using Docker executor with image bopytest_ch1 ...
Using locally found image version due to if-not-present pull policy
Using docker image sha256:8d7b94c4ea9a5cf5cf70191cc2f39b21a7f0ea670cc4b6ea66529d4b27e4eeeb for bopytest_ch1 ...
Running on runner--project-0-concurrent-0 via Foo.local...
Fetching changes...
Initialized empty Git repository in /builds/project-0/.git/
Created fresh repository.
From /Users/username/PycharmProjects/bopytest_ch1
 * [new branch]      master     -> origin/master
Checking out fd44bd91 as master...

Skipping Git submodules setup
$ pytest -v
============================= test session starts ==============================
platform linux -- Python 3.8.0, pytest-5.3.1, py-1.8.0, pluggy-0.13.1 -- /usr/local/bin/python3
cachedir: .pytest_cache
rootdir: /builds/project-0
plugins: cov-2.8.1
collecting ... collected 1 item

test_one.py::test_passing PASSED                                         [100%]

============================== 1 passed in 0.02s ===============================
Job succeeded
git push後のテストの自動実行
引き続き、git push時にGitLabサーバーが自動でテストを走らせるようにします。
まず、GitLab Runnerを設定するためにトークンが必要ですので、GitLabから取得します。
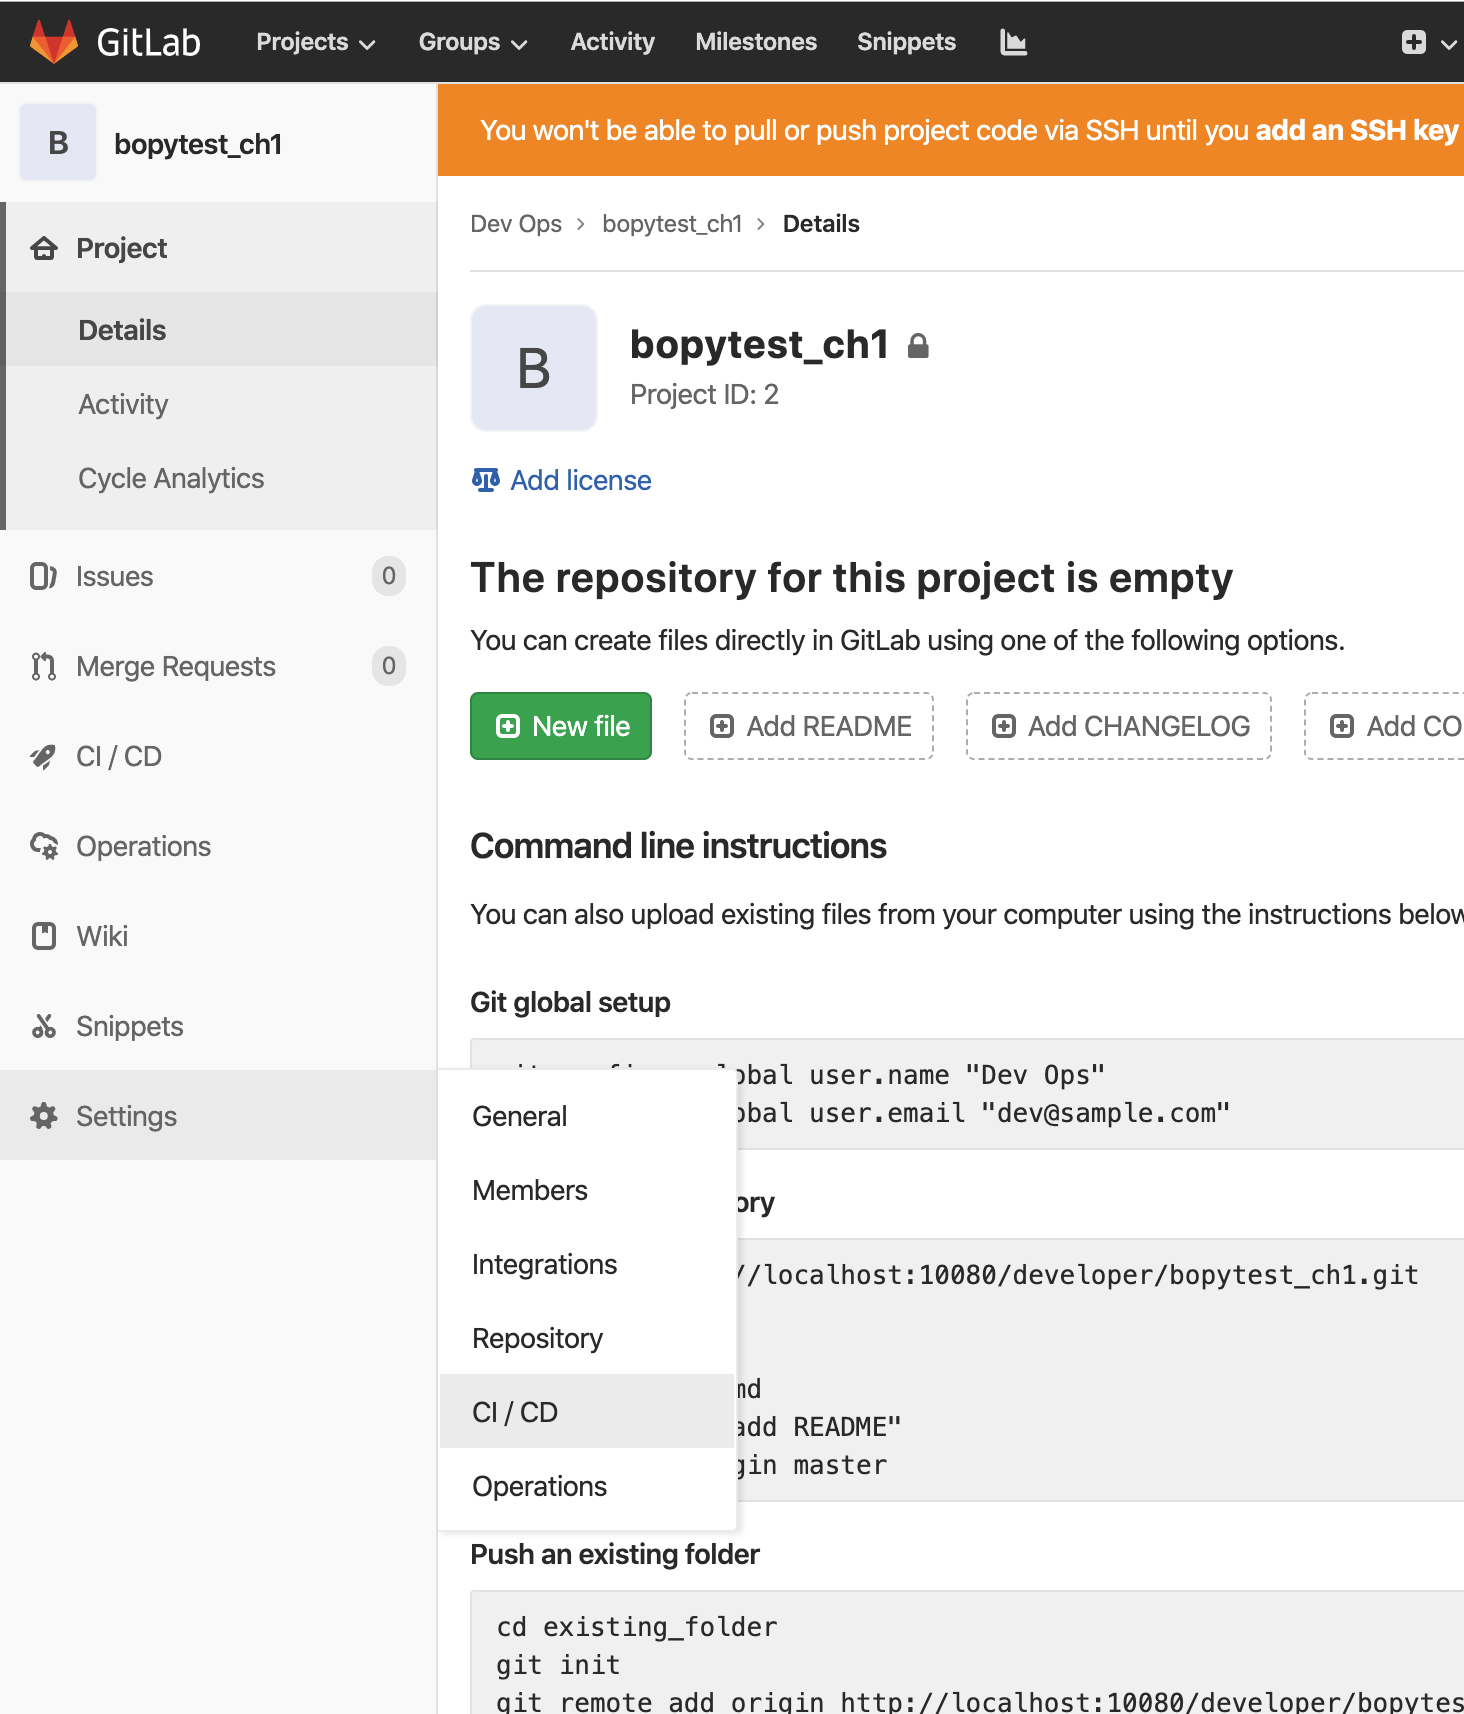
以下のように、ブラウザでbopytest_chプロジェクトに入り、Settings → CI/CD を選択します。
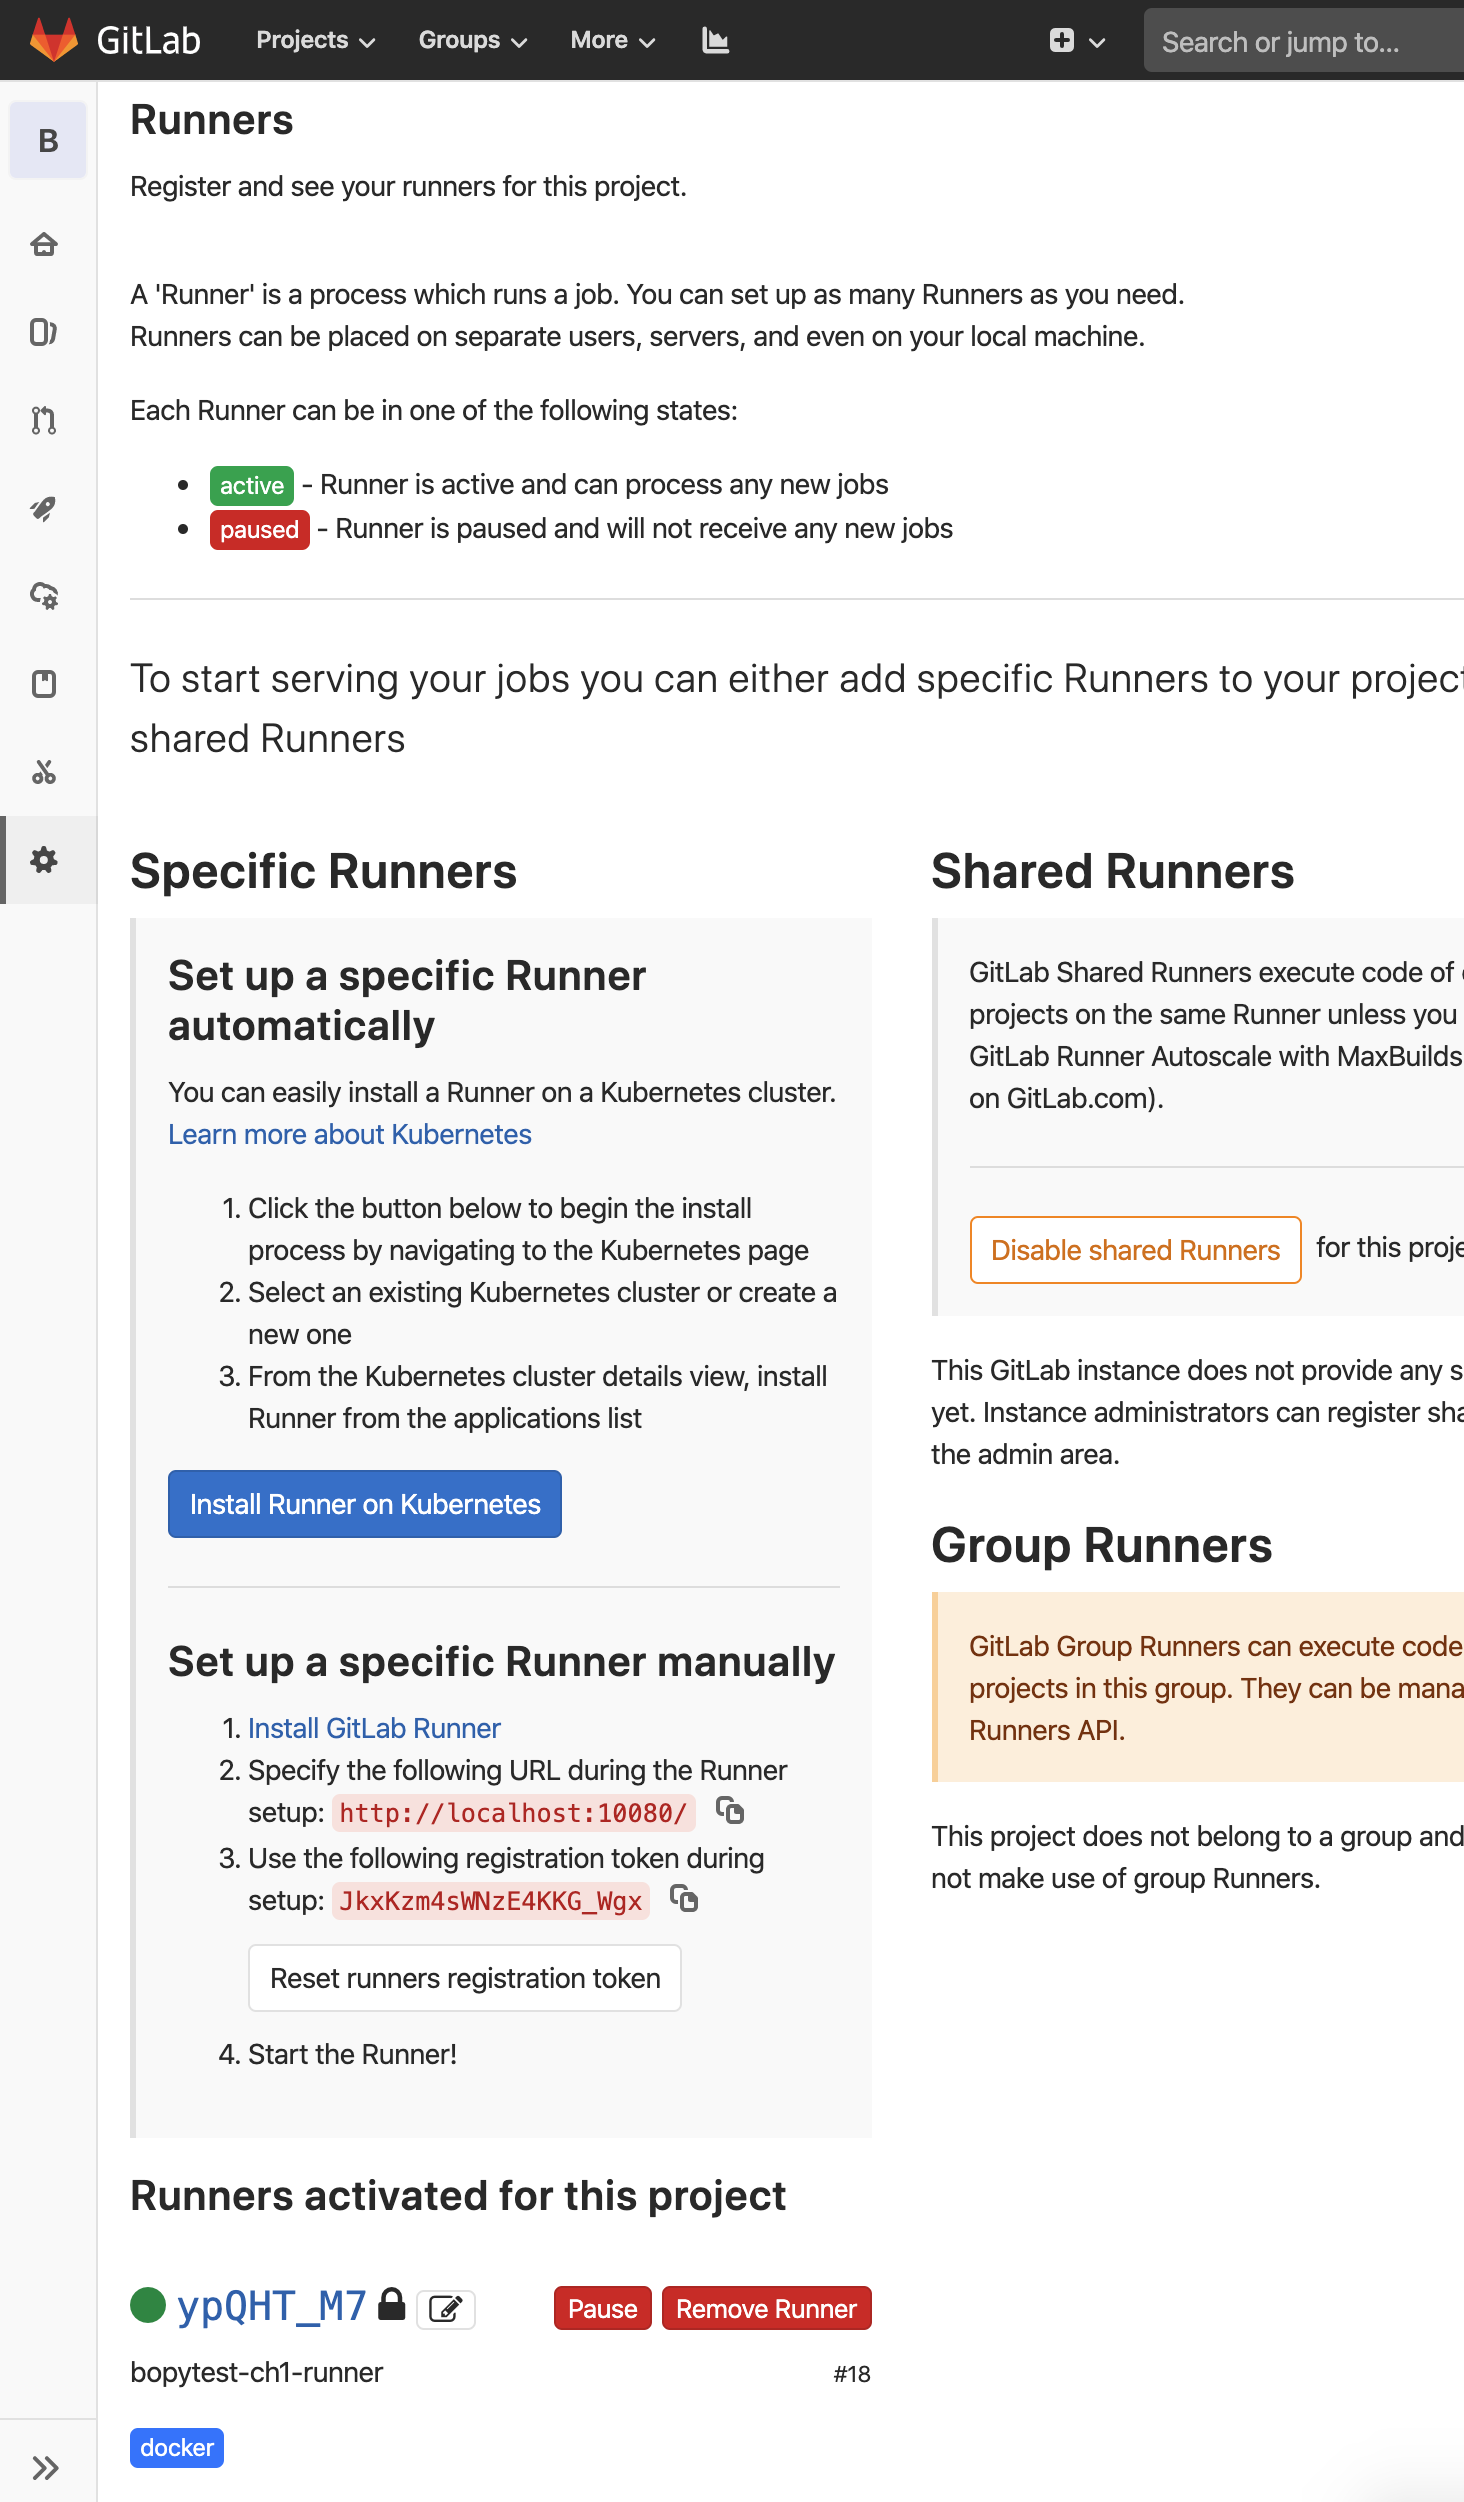
RunnersのExpandボタンを押します。
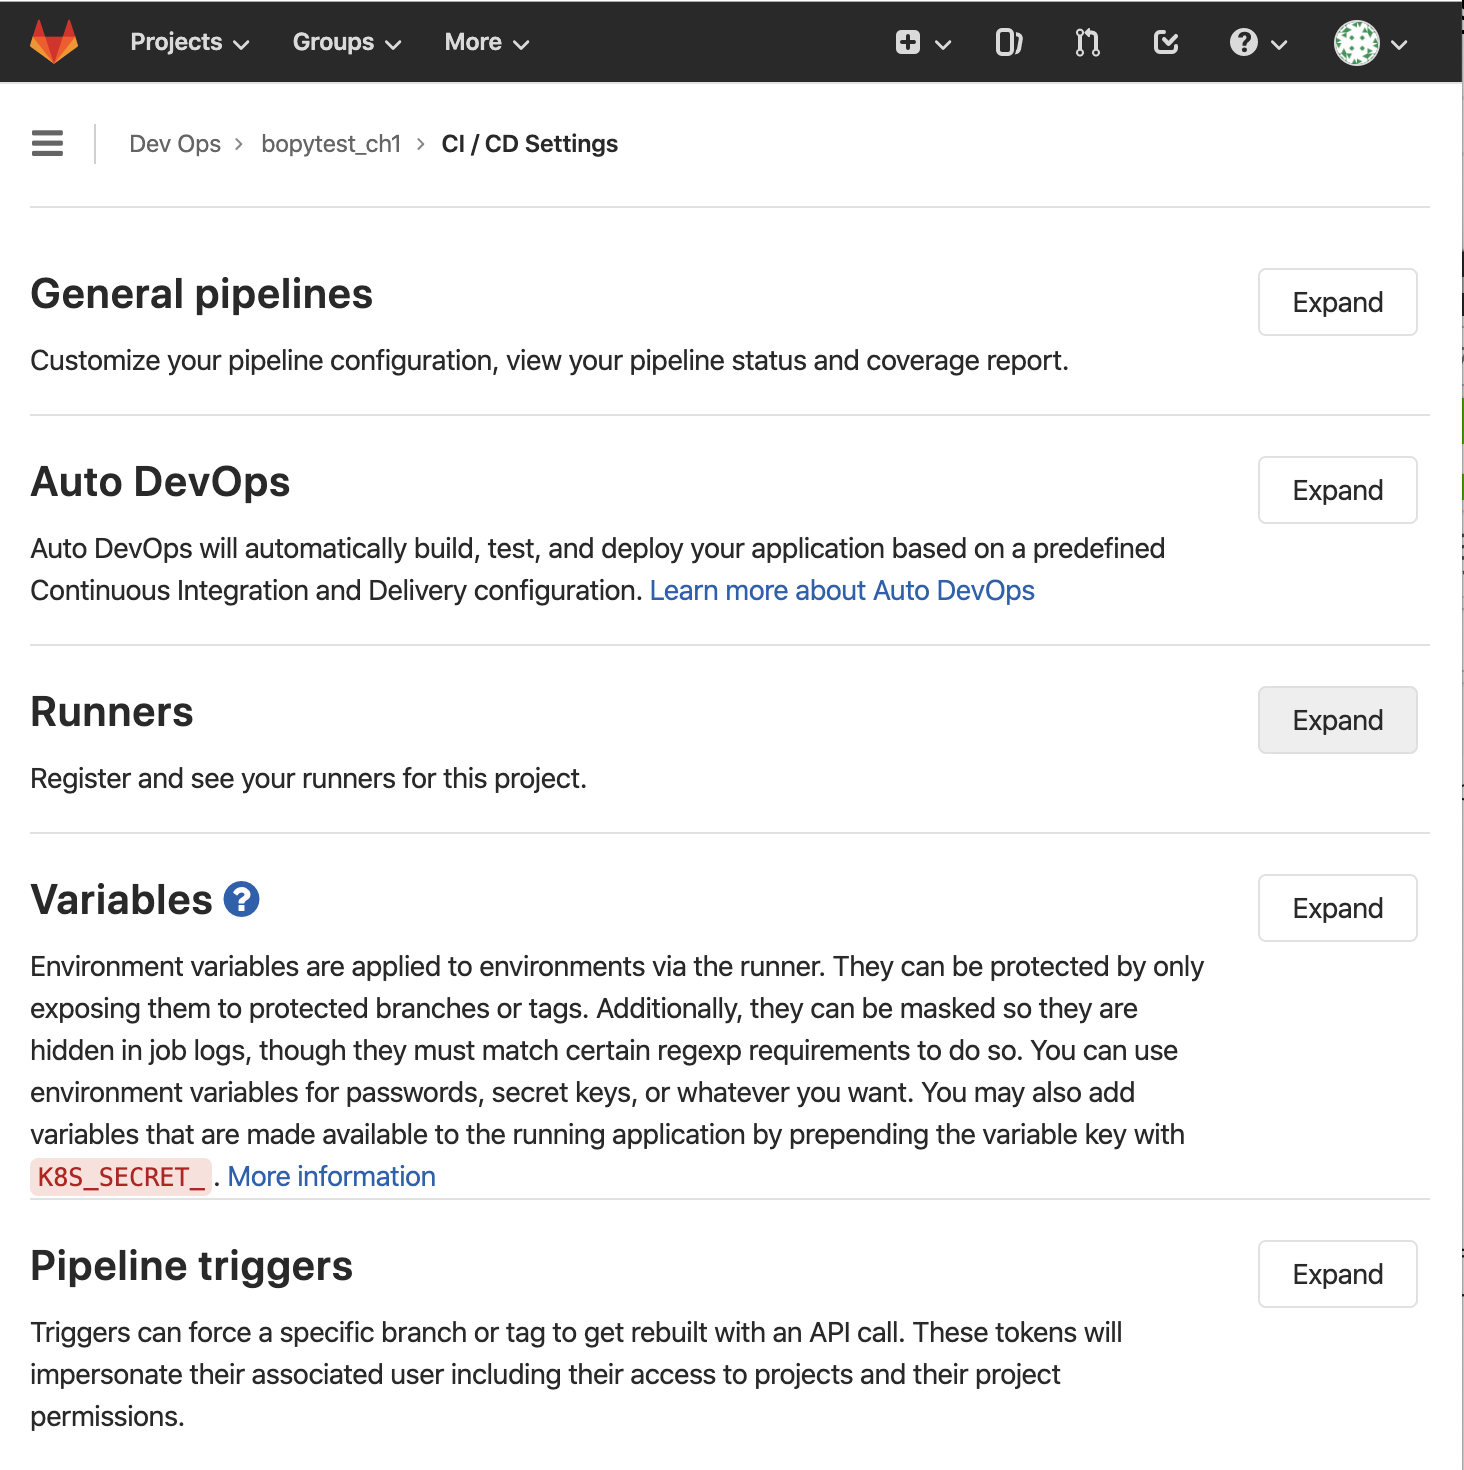
「Set up a specific Runner manually」の部分にトークンが表示されていますので、クリップボードにコピーします。

本記事で使用するGitLab Runnerのトークンは「JkxKzm4sWNzE4KKG_Wgx」です。
先ほど、ローカルでのテスト手動実行用に、Macに直にGitLab Runnerをインストールして実行しました。
それとは別に、GitLabサーバーに自動実行してもらうGitLab RunnerをDockerで起動します。
端末で適当なディレクトリの下に「gitlab_runner/bopytest_ch1」サブディレクトリを作成することにします。
mkdir -p gitlab_runner/bopytest_ch1
cd gitlab_runner/bopytest_ch1
そのディレクトリ配下に、以下の内容でdocker-compose.ymlを作成します。
volumesの「/var/run/docker.sock:/var/run/docker.sock」の部分は、DooD(Docker outside of Docker)を使用するために必要な設定です。
DooD参考:Building Docker images with GitLab CI/CD
version: '3'
services:
  runner:
    image: gitlab/gitlab-runner
    restart: always
    volumes:
      - /var/run/docker.sock:/var/run/docker.sock
      - ./config:/etc/gitlab-runner
以下を実行して、GitLab RunnerのDockerコンテナを起動します。
docker-compose up -d
以下を実行して、GitLab RunnerをGitLabに登録します。
今回、GitLabサーバーのIPアドレスは「 http://localhost:10080/ 」でした。
また、本記事の環境では、Dockerコンテナ内からホスト(localhost)に「172.17.0.1」でアクセスできています。
オプション説明:
- url:GitLabサーバーのアドレス
- clone-url:git cloneする時にアクセスされるGitLabサーバーのアドレス
- registration-token:GitLabから取得したトークン
- name:任意の名前
- executor:今回はDockerコンテナ内でテストジョブを動かす
- docker-image:テストを動かすDockerイメージ
- tag-list:.gitlab-ci.ymlのtagsに紐付け
- docker-volumes:今回はDooD(Docker outside of Docker)を使用するために必要な設定を入れている
- docker-pull-policy:今回は都度docker pullするのではなく、手元にDockerイメージがあればそれを使用
オプション参考:
Self-Managed な社内 Gitlab をhttps化 したら Gitlab Runnerがうまく動かなかった件
Building Docker images with GitLab CI/CD
GitLab-CIのRunnerでDockerのローカルイメージを使う
docker-compose exec runner gitlab-runner register -n \
   --url "http://172.17.0.1:10080/" \
   --clone-url "http://172.17.0.1:10080/" \
   --registration-token "JkxKzm4sWNzE4KKG_Wgx" \
   --name bopytest-ch1-runner \
   --executor "docker" \
   --docker-image "bopytest_ch1" \
   --tag-list docker \
   --docker-volumes "/var/run/docker.sock:/var/run/docker.sock" \
   --docker-pull-policy "if-not-present"
以下のように表示されて、GitLab Runnerの登録が成功しました。
Runtime platform                                    arch=amd64 os=linux pid=14 revision=577f813d version=12.5.0
Running in system-mode.

Registering runner... succeeded                     runner=JkxKzm4s
Runner registered successfully. Feel free to start it, but if it's running already the config should be automatically reloaded!
また、configディレクトリ配下にconfig.tomlが以下の内容で生成されました。
concurrent = 1
check_interval = 0

[session_server]
  session_timeout = 1800

[[runners]]
  name = "bopytest-ch1-runner"
  url = "http://172.17.0.1:10080/"
  token = "ypQHT_M7UcY74iHdb9ZQ"
  executor = "docker"
  clone_url = "http://172.17.0.1:10080/"
  [runners.custom_build_dir]
  [runners.docker]
    tls_verify = false
    image = "bopytest_ch1"
    privileged = false
    disable_entrypoint_overwrite = false
    oom_kill_disable = false
    disable_cache = false
    volumes = ["/var/run/docker.sock:/var/run/docker.sock", "/cache"]
    pull_policy = "if-not-present"
    shm_size = 0
  [runners.cache]
    [runners.cache.s3]
    [runners.cache.gcs]
ブラウザでRunnersを再表示させると、以下のように下方の「Runners activated for this project」の部分に、先程登録したbopytest-ch1-runnerが見つかりました。
それではgit pushしてテストが自動実行されるか確かめてみます。
自動実行のために、ファイル「.gitlab-ci.yml」をリポジトリに追加する必要があります。
以下のようにgit pushまで実行します。
git add .gitlab-ci.yml
git commit -m ".gitlab-ci.yml 新規"
git push
GitLabサーバーが自動でテストを走らせたか確認します。
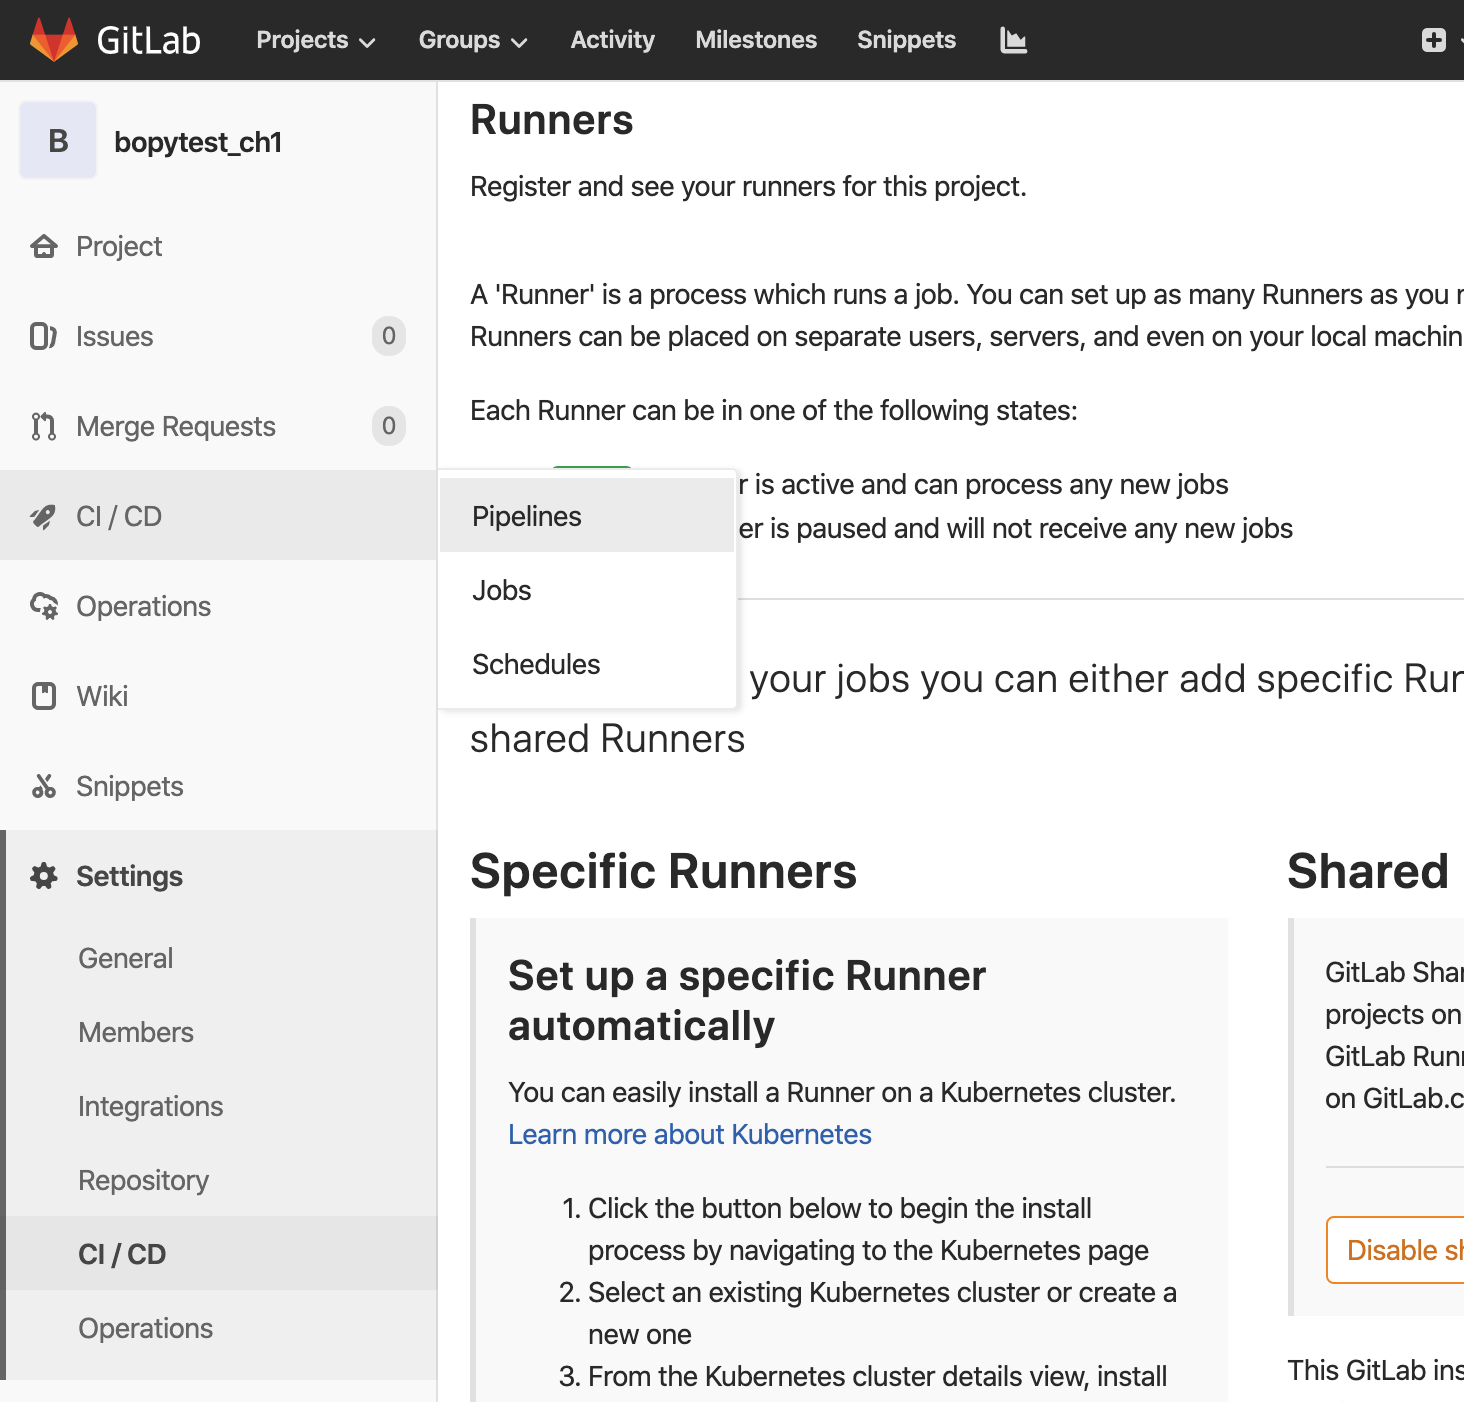
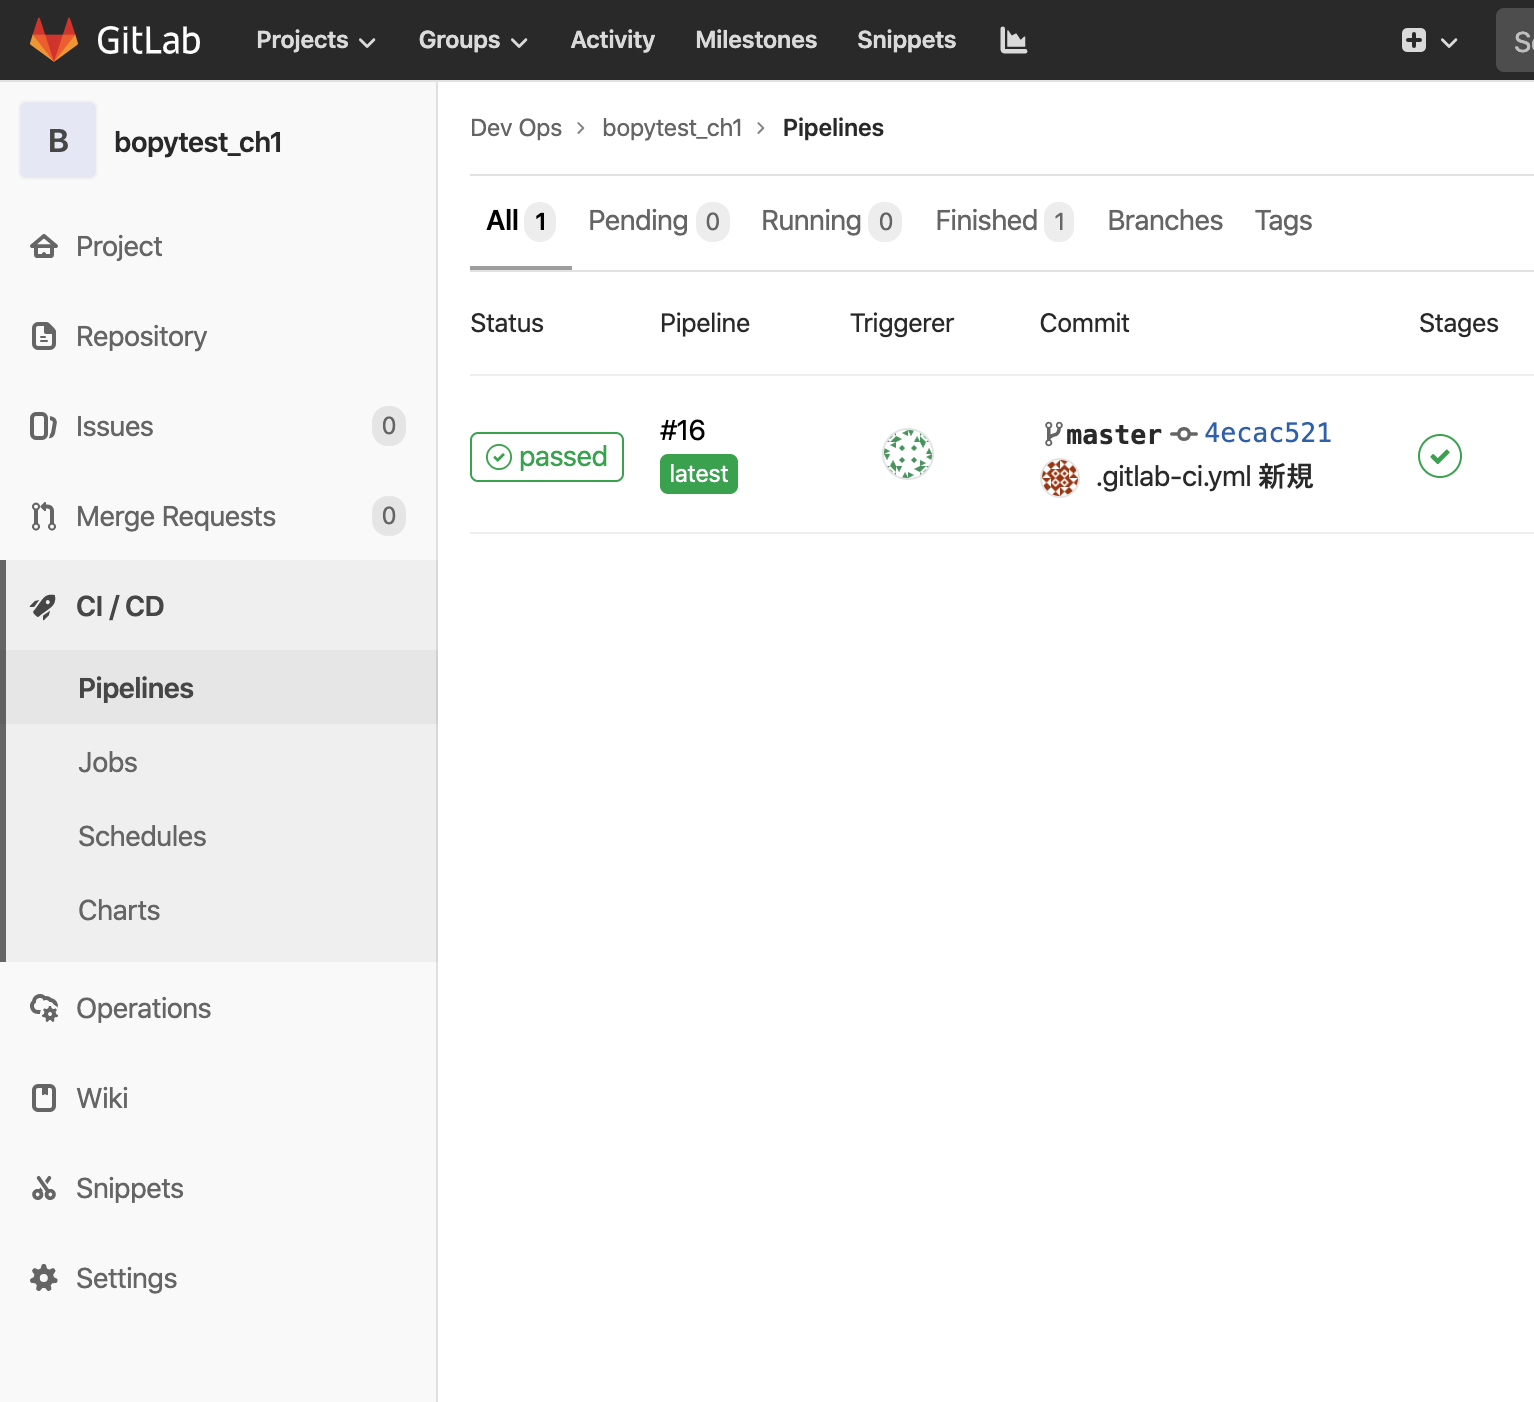
以下のようにbopytest_chプロジェクトに入り、CI/CD → Pipelines を選択します。
以下のように表示されました。テストが自動実行され、Statusはpassedになっていました。
CI/CD → Jobs を選択してみます。
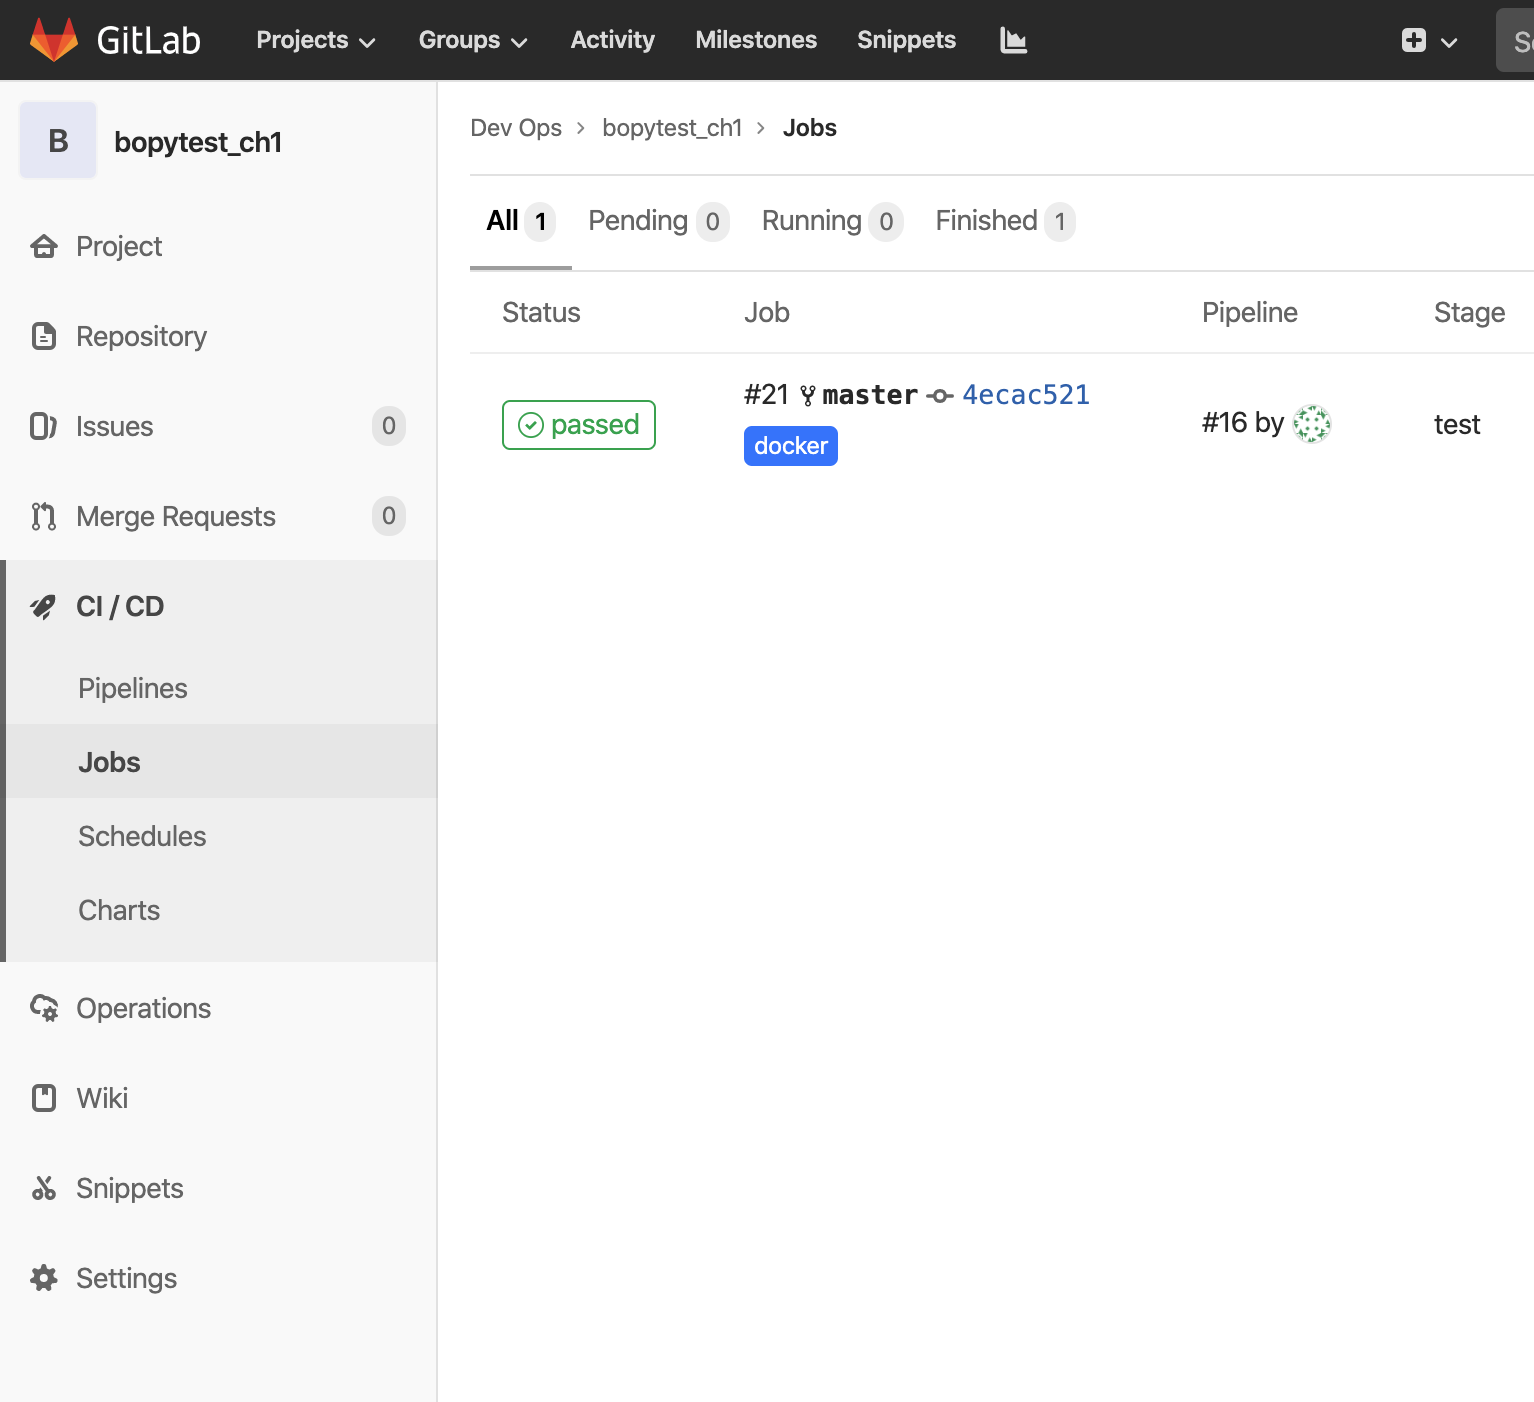
Statusのpassedの部分をクリックすると、以下のようにコンソール出力が見られます。

一度エラーが発生していますが(赤字)、その後リトライしてテストが通っています。
メッセージを読むと、登録したGitLab Runner「bopytest-ch1-runner」が使用され、手元のテスト用Dockerイメージ「bopytest_ch1」も使用され、そのコンテナ内でテストが通ったことが確認できます。
メッセージのコピペは以下の通り。
Running with gitlab-runner 12.5.0 (577f813d)
  on bopytest-ch1-runner ypQHT_M7
Using Docker executor with image bopytest_ch1 ...
ERROR: Preparation failed: Cannot connect to the Docker daemon at unix:///var/run/docker.sock. Is the docker daemon running? (cache_container.go:111:141s)
Will be retried in 3s ...
Using Docker executor with image bopytest_ch1 ...
Using locally found image version due to if-not-present pull policy
Using docker image sha256:8d7b94c4ea9a5cf5cf70191cc2f39b21a7f0ea670cc4b6ea66529d4b27e4eeeb for bopytest_ch1 ...
Running on runner-ypQHT_M7-project-2-concurrent-0 via a211f459e198...
Fetching changes with git depth set to 50...
Initialized empty Git repository in /builds/developer/bopytest_ch1/.git/
Created fresh repository.
From http://172.17.0.1:10080/developer/bopytest_ch1
 * [new branch]      master     -> origin/master
Checking out 4ecac521 as master...

Skipping Git submodules setup
$ pytest -v
============================= test session starts ==============================
platform linux -- Python 3.8.0, pytest-5.3.1, py-1.8.0, pluggy-0.13.1 -- /usr/local/bin/python3
cachedir: .pytest_cache
rootdir: /builds/developer/bopytest_ch1
plugins: cov-2.8.1
collecting ... collected 1 item

test_one.py::test_passing PASSED                                         [100%]

============================== 1 passed in 0.04s ===============================
Job succeeded
以上です。