ubuntu 20.04を導入したのでその手順をまとめておく。
インストールは、VirtualBoxの仮想マシンを予め作成の上、ISOイメージをマウントして進めた。
インストーラ入手
ubuntuのインストーラ入手先はこちら。
記事執筆時点での最新版20.04 LTSを入手した。
※LTS:LTSはlong-term support(長期サポート)の略称です。2025年 4 月までの5 年間、無料のセキュリティアップデートおよびメンテナンスアップデートが保証されています。(こぴぺ)
インストール手順
インストールはGUIで行った。入力するのはユーザ名程度。ディスクはカスタマイズせず標準で選択したところ、UEFIモードでインストールされた。
インストール後のディスク構成
VirtalBoxに割り当てた仮想ディスクサイズは16GBのVDI形式。dfとfdsikコマンドの表示は下記の通り。
$ df -h
Filesystem      Size  Used Avail Use% Mounted on
udev            1.6G     0  1.6G   0% /dev
tmpfs           325M  1.4M  324M   1% /run
/dev/sda5        16G  7.4G  7.1G  51% /
tmpfs           1.6G     0  1.6G   0% /dev/shm
tmpfs           5.0M  4.0K  5.0M   1% /run/lock
tmpfs           1.6G     0  1.6G   0% /sys/fs/cgroup
/dev/loop0       55M   55M     0 100% /snap/core18/1880
/dev/loop1       56M   56M     0 100% /snap/core18/1944
/dev/loop2      256M  256M     0 100% /snap/gnome-3-34-1804/36
/dev/loop3      218M  218M     0 100% /snap/gnome-3-34-1804/60
/dev/loop4       63M   63M     0 100% /snap/gtk-common-themes/1506
/dev/loop5       65M   65M     0 100% /snap/gtk-common-themes/1514
/dev/loop6       50M   50M     0 100% /snap/snap-store/467
/dev/loop7       52M   52M     0 100% /snap/snap-store/518
/dev/loop8       30M   30M     0 100% /snap/snapd/8542
/dev/loop9       32M   32M     0 100% /snap/snapd/10492
/dev/sda1       511M  4.0K  511M   1% /boot/efi
tmpfs           325M   36K  325M   1% /run/user/125
tmpfs           325M  8.0K  325M   1% /run/user/1000
$ sudo fdisk /dev/sda
:
コマンド (m でヘルプ): p
ディスク /dev/sda: 16 GiB, 17179869184 バイト, 33554432 セクタ
Disk model: VBOX HARDDISK
単位: セクタ (1 * 512 = 512 バイト)
セクタサイズ (論理 / 物理): 512 バイト / 512 バイト
I/O サイズ (最小 / 推奨): 512 バイト / 512 バイト
ディスクラベルのタイプ: dos
ディスク識別子: 0x89cd8bc1

デバイス   起動 開始位置 最後から   セクタ サイズ Id タイプ
/dev/sda1  *        2048  1050623  1048576   512M  b W95 FAT32
/dev/sda2        1052670 33552383 32499714  15.5G  5 拡張領域
/dev/sda5        1052672 33552383 32499712  15.5G 83 Linux
バージョン確認
確認方法は2種類。/etc/lsb-releaseで十分だが、パスを覚えやすいのは/etc/os-releaseか。
$ cat /etc/lsb-release
DISTRIB_ID=Ubuntu
DISTRIB_RELEASE=20.04
DISTRIB_CODENAME=focal
DISTRIB_DESCRIPTION="Ubuntu 20.04.1 LTS"
$ cat /etc/os-release
NAME="Ubuntu"
VERSION="20.04.1 LTS (Focal Fossa)"
ID=ubuntu
ID_LIKE=debian
PRETTY_NAME="Ubuntu 20.04.1 LTS"
VERSION_ID="20.04"
HOME_URL="https://www.ubuntu.com/"
SUPPORT_URL="https://help.ubuntu.com/"
BUG_REPORT_URL="https://bugs.launchpad.net/ubuntu/"
PRIVACY_POLICY_URL="https://www.ubuntu.com/legal/terms-and-policies/privacy-policy"
VERSION_CODENAME=focal
UBUNTU_CODENAME=focal
rootパスワード設定
ubuntuはデフォルトでrootにパスワードが設定されず、su - が出来ない。以下の通り設定する。
$ sudo passwd root
新しいパスワード:
新しいパスワードを再入力してください:
passwd: パスワードは正しく更新されました
ネットワーク設定
インストール直後、デフォルトで下記の通りIPアドレスが振られ、NATインターフェースが作成されてインターネット接続が可能だ。
$ ip addr
1: lo: <LOOPBACK,UP,LOWER_UP> mtu 65536 qdisc noqueue state UNKNOWN group default qlen 1000
    link/loopback 00:00:00:00:00:00 brd 00:00:00:00:00:00
    inet 127.0.0.1/8 scope host lo
       valid_lft forever preferred_lft forever
    inet6 ::1/128 scope host
       valid_lft forever preferred_lft forever
2: enp0s3: <BROADCAST,MULTICAST,UP,LOWER_UP> mtu 1500 qdisc fq_codel state UP group default qlen 1000
    link/ether 08:00:27:5b:a0:4c brd ff:ff:ff:ff:ff:ff
    inet 10.0.2.15/24 brd 10.0.2.255 scope global dynamic noprefixroute enp0s3
       valid_lft 58625sec preferred_lft 58625sec
    inet6 fe80::6a5e:debe:3fe6:d921/64 scope link noprefixroute
       valid_lft forever preferred_lft forever
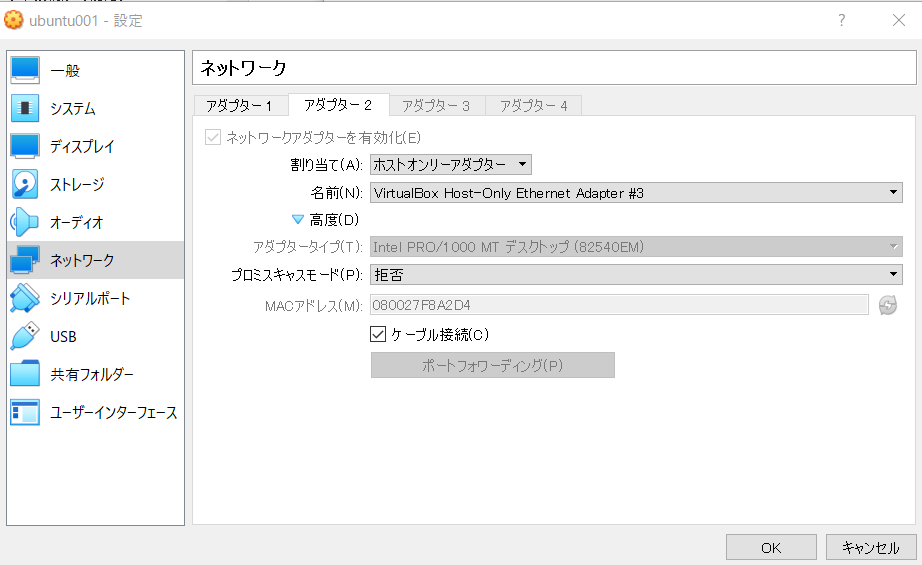
端末からのTeraTermアクセスのため、VirtualBox側でホストオンリーアダプタを設定する。ネットワークアドレスは端末側と、ubuntu側で同じセグメントの異なるアドレスにすること。
ubuntu側もGUIで設定。 network設定ファイルはどこだろう・・・
DNS設定
DNSも設定されていて、名前解決も可能だ。ほとんど設定することがない。
$ nslookup google.com
Server:         127.0.0.53
Address:        127.0.0.53#53

Non-authoritative answer:
Name:   google.com
Address: 172.217.174.110
Name:   google.com
Address: 2404:6800:4004:80b::200e
DNSサーバのアドレスは 127.0.0.53が指定されている。このアドレスは特殊で、systemd-resolvedの設定を参照しに行く。
$ sudo cat /etc/resolv.conf
# This file is managed by man:systemd-resolved(8). Do not edit.
#
# This is a dynamic resolv.conf file for connecting local clients to the
# internal DNS stub resolver of systemd-resolved. This file lists all
# configured search domains.
#
# Run "resolvectl status" to see details about the uplink DNS servers
# currently in use.
#
# Third party programs must not access this file directly, but only through the
# symlink at /etc/resolv.conf. To manage man:resolv.conf(5) in a different way,
# replace this symlink by a static file or a different symlink.
#
# See man:systemd-resolved.service(8) for details about the supported modes of
# operation for /etc/resolv.conf.

nameserver 127.0.0.53
options edns0 trust-ad
systemd-resolvedの設定は、NAT接続先の端末のゲートウェイアドレスが設定されていた。VirtualBox導入端末のネット接続環境に依存するようだが、変更する理由もないため今回はそのままに。
kana@kana-VirtualBox:~$ systemd-resolve --status
Global
       LLMNR setting: no
MulticastDNS setting: no
  DNSOverTLS setting: no
      DNSSEC setting: no
    DNSSEC supported: no
          DNSSEC NTA: 10.in-addr.arpa
                      16.172.in-addr.arpa
                      168.192.in-addr.arpa
                      17.172.in-addr.arpa
                      18.172.in-addr.arpa
                      19.172.in-addr.arpa
                      20.172.in-addr.arpa
                      21.172.in-addr.arpa
                      22.172.in-addr.arpa
                      23.172.in-addr.arpa
                      24.172.in-addr.arpa
                      25.172.in-addr.arpa
                      26.172.in-addr.arpa
                      27.172.in-addr.arpa
                      28.172.in-addr.arpa
                      29.172.in-addr.arpa
                      30.172.in-addr.arpa
                      31.172.in-addr.arpa
                      corp
                      d.f.ip6.arpa
                      home
                      internal
                      intranet
                      lan
                      local
                      private
                      test

Link 3 (enp0s8)
      Current Scopes: none
DefaultRoute setting: no
       LLMNR setting: yes
MulticastDNS setting: no
  DNSOverTLS setting: no
      DNSSEC setting: no
    DNSSEC supported: no

Link 2 (enp0s3)
      Current Scopes: DNS
DefaultRoute setting: yes
       LLMNR setting: yes
MulticastDNS setting: no
  DNSOverTLS setting: no
      DNSSEC setting: no
    DNSSEC supported: no
  Current DNS Server: 192.168.11.1
         DNS Servers: 192.168.11.1
          DNS Domain: ~.
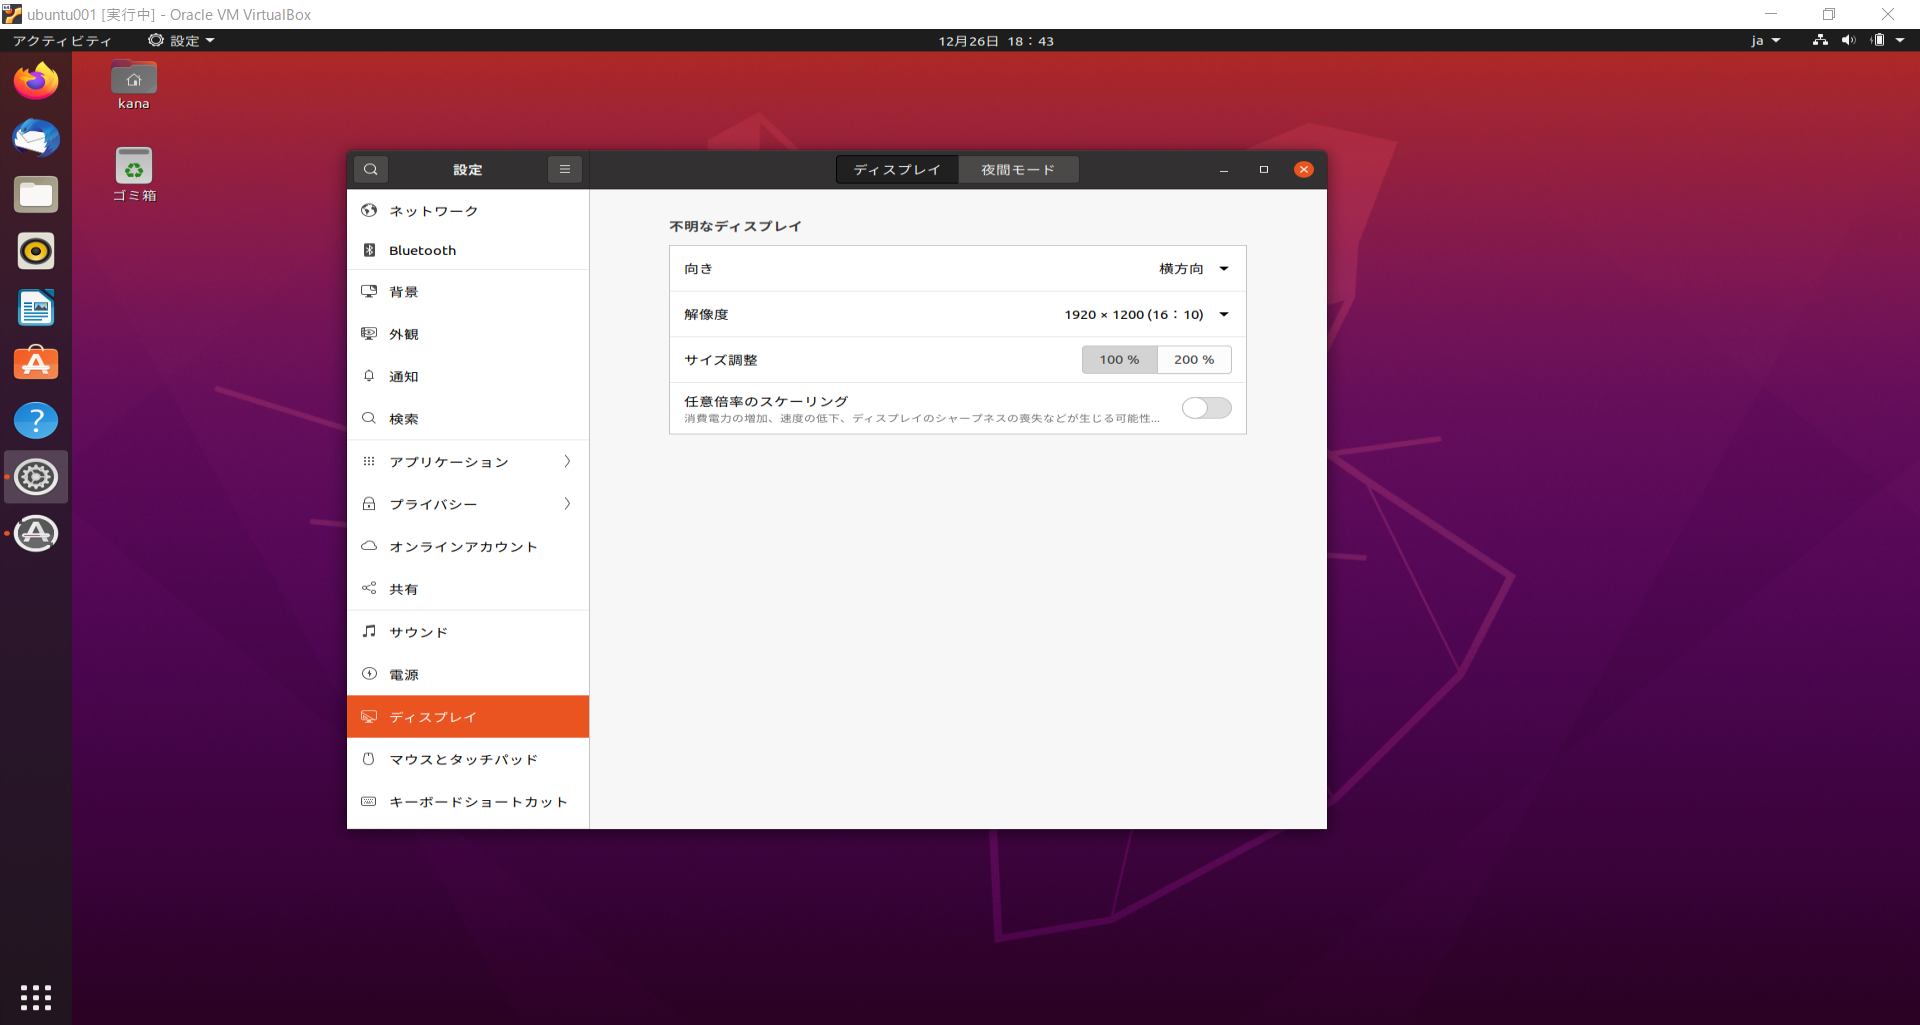
X-Windowのディスプレイ表示サイズ
デフォルトの800x600は見にくいので、適切なサイズに設定しよう。

ソフトウェアアップデート
VirtualNBoxのコンソール側の表示で、ubuntuのソフトウェアアップデートが可能であるとの通知が表示されたため、念のため更新しておく。
手動で表示する場合は、左下のメニューから`ソフトウェアの更新を選択すると良い。
適用には環境によってかなり時間がかかるので、何かしらの合間にやると良い。30分~1時間は見積もっておく。最新化後、ソフトウェアの更新を開くと、以下のダイアログボックスが表示される。
openssh-serverを導入
ubuntuのパッケージ管理コマンドはaptであり、以下のように導入する。
$ sudo apt-get install openssh-server
パッケージ導入後、確認はサービス起動状態を確認しよう。
$ sudo systemctl status sshd
● ssh.service - OpenBSD Secure Shell server
     Loaded: loaded (/lib/systemd/system/ssh.service; enabled; vendor preset: enabled)
     Active: active (running) since Sat 2020-12-26 10:48:19 JST; 8h ago
       Docs: man:sshd(8)
             man:sshd_config(5)
    Process: 634 ExecStartPre=/usr/sbin/sshd -t (code=exited, status=0/SUCCESS)
   Main PID: 644 (sshd)
      Tasks: 1 (limit: 3829)
     Memory: 4.6M
     CGroup: /system.slice/ssh.service
             mq644 sshd: /usr/sbin/sshd -D [listener] 0 of 10-100 startups
まとめ
最低限の設定という事で、ここから先は用途に合わせてセッティングされて頂ければと思います。初級者の方の参考になれば幸いです。
読んでいただき、ありがとうございました。


