ここ最近DeepLearning関連のコードを書いていなかったので、
最新のDeepLearningの実装やお作法、Stable Diffusionの実装などをStable Diffusionのレポジトリ通して、この際お勉強.
ソースコード
CompVis/stable-diffusion
参考文献
仕組みなどは下記で簡単に抑えた上でコードを確認.
本家サイト
Stable Diffusion with 🧨 Diffusers
日本語解説系
日本語
【概要速修】Stable Diffusion(テキストから画像生成)はどうやって実現するのかざっくり仕組みを知る(DiffusionModel,Deep Learninig)【機械学習解説動画】
下記で概要を押さえてからコード見たから、大分読みやすかった.
Top Directory (ざっと)
まず一番上のフォルダで目についたものを確認.
Model Cardとは
GithubのRepositoryを見ていると目に付くModelCardとは下記に説明がある
Model cards are files that accompany the models and provide handy information. Under the hood, model cards are simple Markdown files with additional metadata. Model cards are essential for discoverability, reproducibility, and sharing! You can find a model card as the README.md file in any model repo.
とのことで、つまり
モデルカードは、モデルに付随する便利な情報を提供するファイル。内部的には、モデルカードは追加のメタデータを含む単純なMarkdownファイルです。モデルカードは、見つけやすさ、再現性、および共有に不可欠です。モデルカードは、どのモデルリポジトリでも README.md ファイルとして見つけることができます。
ということ. 中身は
- 学習に使ったデータ
- 評価の結果
- 倫理的なポイント、制約
などが記載
environment.yaml
conda用の環境設定ファイル
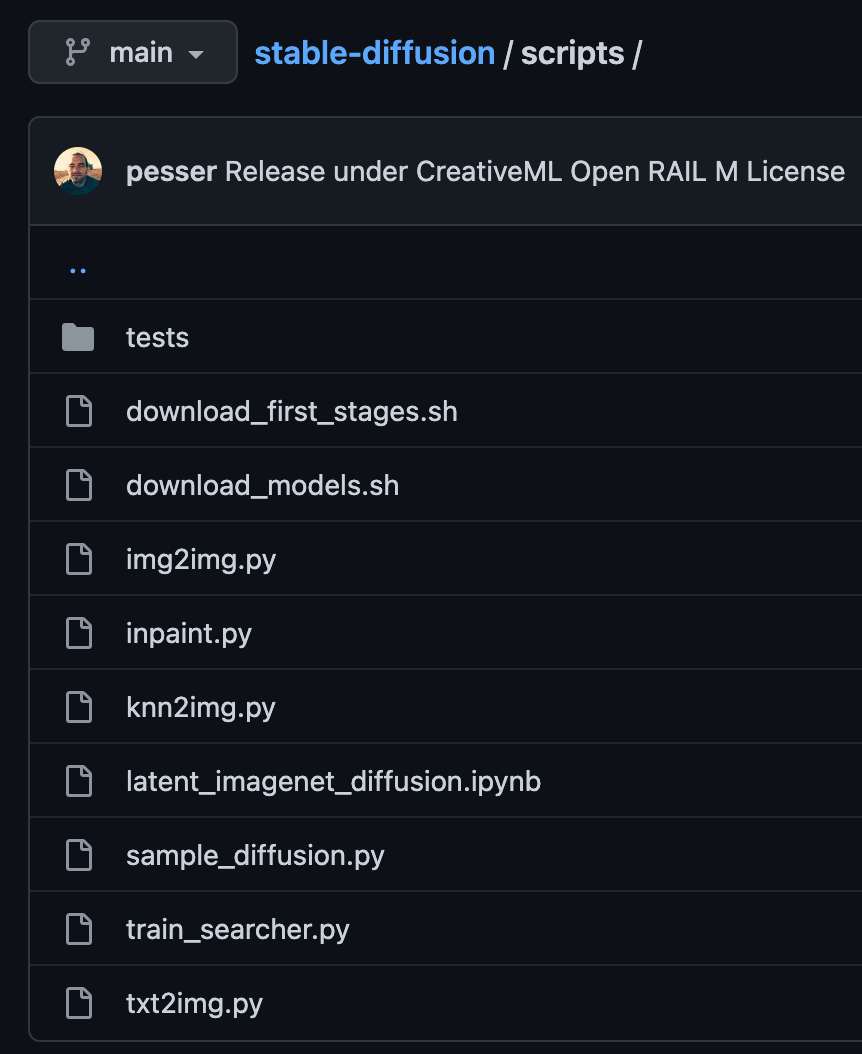
scriptsフォルダ
ここに、デモを実行するためのスクリプトが入っている.
| ファイル名 | 内容 |
|---|---|
| img2img | 画像から画像への変換 |
| inpaint | マスク部分の画像補完 |
| txt2img | 文字列から画像の生成 |
| knn2img | 文字列から画像検索 |
(knn2img自信なし. 詳しくは下記参照)
コードを読んでく
txt2img.py
いよいよこっからがソースコードの中身の確認.
引数
    parser.add_argument(
        "--ckpt",
        type=str,
        default="models/ldm/stable-diffusion-v1/model.ckpt",
        help="path to checkpoint of model",
    )
ckptでモデルのファイルを指定. 通常はv1のモデル.
    parser.add_argument(
        "--seed",
        type=int,
        default=42,
        help="the seed (for reproducible sampling)",
    )
シードを与えて、同じ画像をサンプリングできるようにする.
    parser.add_argument(
        "--ddim_steps",
        type=int,
        default=50,
        help="number of ddim sampling steps",
    )
Diffusion Model のStep数を変更する
などあり.
メイン処理
    if opt.laion400m:
        print("Falling back to LAION 400M model...")
        opt.config = "configs/latent-diffusion/txt2img-1p4B-eval.yaml"
        opt.ckpt = "models/ldm/text2img-large/model.ckpt"
        opt.outdir = "outputs/txt2img-samples-laion400m"
LAION 400Mはオープンなデータセットでそれをもとに学習したモデルを使うかどうか
seed_everything(opt.seed)
Pytorchで再現性を制御するためにseedをセット.
    config = OmegaConf.load(f"{opt.config}")
    model = load_model_from_config(config, f"{opt.ckpt}")
OmegaConfは設定系を扱いやすくするためのライブラリ.
modelのロードはckptファイルからtorch.loadで読み込み
    device = torch.device("cuda") if torch.cuda.is_available() else torch.device("cpu")
    model = model.to(device)
cudaかデバイスかの選択
    if opt.plms:
        sampler = PLMSSampler(model)
    else:
        sampler = DDIMSampler(model)
DiffuseModelのサンプルの選択肢、PLMかDDIM. 何もしなければDDIMが選択.
    print("Creating invisible watermark encoder (see https://github.com/ShieldMnt/invisible-watermark)...")
    wm = "StableDiffusionV1"
    wm_encoder = WatermarkEncoder()
    wm_encoder.set_watermark('bytes', wm.encode('utf-8'))
どうやらウォーターマークを画像に書き込んでいる.しかもinvisible watermarkなるもので、リンク先によれば、
離散ウェーブレット変換と離散コサイン変換を使って画像に書き込んでいる模様.
クリップされたりするとダメみたいだが、それ以外の加工なら耐えられるらしい.(明るくするなどしてもOK)
完全に防げるわけではなく、あくまでちょっと対策できるよという形.
                for n in trange(opt.n_iter, desc="Sampling"):
                    for prompts in tqdm(data, desc="data"):
                        uc = None
                        if opt.scale != 1.0:
                            uc = model.get_learned_conditioning(batch_size * [""])
                        if isinstance(prompts, tuple):
                            prompts = list(prompts)
                        c = model.get_learned_conditioning(prompts)
                        shape = [opt.C, opt.H // opt.f, opt.W // opt.f]
                        samples_ddim, _ = sampler.sample(S=opt.ddim_steps,
                                                         conditioning=c,
                                                         batch_size=opt.n_samples,
                                                         shape=shape,
                                                         verbose=False,
                                                         unconditional_guidance_scale=opt.scale,
                                                         unconditional_conditioning=uc,
                                                         eta=opt.ddim_eta,
                                                         x_T=start_code)
与えた複数の文字列を使って、文字列ごとにencodeして、Diffusion Modelのサンプリングを行なっている.
cと書かれているのが条件付けのために渡す特徴.
get_learned_conditioningで生成されるが、この関数は、
    def get_learned_conditioning(self, c):
        if self.cond_stage_forward is None:
            if hasattr(self.cond_stage_model, 'encode') and callable(self.cond_stage_model.encode):
                c = self.cond_stage_model.encode(c)
                if isinstance(c, DiagonalGaussianDistribution):
                    c = c.mode()
            else:
                c = self.cond_stage_model(c)
        else:
            assert hasattr(self.cond_stage_model, self.cond_stage_forward)
            c = getattr(self.cond_stage_model, self.cond_stage_forward)(c)
        return c
cond_stage_modelは設定から読み込まれるが、設定しているyamlを確認すると
FrozenCLIPTextEncoderが指定されている.
やはり、ここが文字列を特徴量に変換している部分.
                        x_samples_ddim = model.decode_first_stage(samples_ddim)
                        x_samples_ddim = torch.clamp((x_samples_ddim + 1.0) / 2.0, min=0.0, max=1.0)
                        x_samples_ddim = x_samples_ddim.cpu().permute(0, 2, 3, 1).numpy()
画像にするために処理している. decode_first_stageはencode_first_stageと同様に最初に画像と潜在変数を変換する処理の部分.
VQModelInterface, 何も変換しないIdentityFirstStage, AutoencoderKLの3つの選択肢がある.
コードを見てきた感じ以下のようになっていた.
class VQModel(pl.LightningModule):
    def encode(self, x):
        h = self.encoder(x)
        h = self.quant_conv(h)
        quant, emb_loss, info = self.quantize(h)
        return quant, emb_loss, info

    def decode(self, quant):
        quant = self.post_quant_conv(quant)
        dec = self.decoder(quant)
        return dec
VQモデルはベクトル量子化VAEのこと. 近年自然画像を作るのに使われる
class AutoencoderKL(pl.LightningModule):
    def forward(self, input, sample_posterior=True):
        posterior = self.encode(input)
        if sample_posterior:
            z = posterior.sample()
        else:
            z = posterior.mode()
        dec = self.decode(z)
        return dec, posterior
AutoEncoder KLって何のことだろうと思ったが、通常のVAEのこと.
x_checked_image, has_nsfw_concept = check_safety(x_samples_ddim)
これは、画像が問題ないかを弾くための部分.
sampler.sampleの中身
主に
らへん
まずは下記. DDIMの実装を確認.
self.make_schedule(ddim_num_steps=S, ddim_eta=eta, verbose=verbose)
これはDiffusion ModelのStepごとのノイズの掛け方などの設定をおこなっている部分.
その後に,ddim_samplingを呼び出して実際の複数ステップのsamplingをしている.
        if x_T is None:
            img = torch.randn(shape, device=device)
        else:
            img = x_T
まず処理するx_Tがなければ、ノイズから潜在変数を生成する.
すでに前回の分があればそれをimgにセット.
imgと書かれているが、渡ってきているのは潜在変数で画像としての意味は持たない. (おそらく元々は画像を入れるのが想定されていたため)
        for i, step in enumerate(iterator):
            index = total_steps - i - 1
            ts = torch.full((b,), step, device=device, dtype=torch.long)


            if mask is not None:
                assert x0 is not None
                img_orig = self.model.q_sample(x0, ts)  # TODO: deterministic forward pass?
                img = img_orig * mask + (1. - mask) * img


            outs = self.p_sample_ddim(img, cond, ts, index=index, use_original_steps=ddim_use_original_steps,
                                      quantize_denoised=quantize_denoised, temperature=temperature,
                                      noise_dropout=noise_dropout, score_corrector=score_corrector,
                                      corrector_kwargs=corrector_kwargs,
                                      unconditional_guidance_scale=unconditional_guidance_scale,
                                      unconditional_conditioning=unconditional_conditioning)
ここが実際のStepごとのsample処理をしている部分.
でp_sample_ddimの中のapply_model. DDIMSamplerはコンストラクタでmodelを渡されているのでそれで実行.
        if unconditional_conditioning is None or unconditional_guidance_scale == 1.:
            e_t = self.model.apply_model(x, t, c)
至る所でcond_stage_keyが使われており、どのような条件付きの学習をするかで分岐が切られている.
今回もmodelを適用しているのは下記だが、事前にcond_stage_keyごとに前処理が行われている.
            # apply model by loop over crops
            output_list = [self.model(z_list[i], t, **cond_list[i]) for i in range(z.shape[-1])]
モデルの情報はyamlの次の部分から読み込まれている. これがDDPMに渡されて、modelが作られそれをもとにsampleでのapplyが実行される.
    unet_config:
      target: ldm.modules.diffusionmodules.openaimodel.UNetModel
      params:
        image_size: 32 # unused
        in_channels: 4
        out_channels: 4
        model_channels: 320
        attention_resolutions: [ 4, 2, 1 ]
        num_res_blocks: 2
        channel_mult: [ 1, 2, 4, 4 ]
        num_heads: 8
        use_spatial_transformer: True
        transformer_depth: 1
        context_dim: 768
        use_checkpoint: True
        legacy: False
self.modelに入っているのは、DiffusionWrapperクラス. 上記のyamlからデータを起こして指定されたcondで実行.
class DiffusionWrapper(pl.LightningModule):
    def __init__(self, diff_model_config, conditioning_key):
        super().__init__()
        self.diffusion_model = instantiate_from_config(diff_model_config)
        self.conditioning_key = conditioning_key
        assert self.conditioning_key in [None, 'concat', 'crossattn', 'hybrid', 'adm']


    def forward(self, x, t, c_concat: list = None, c_crossattn: list = None):
        if self.conditioning_key is None:
            out = self.diffusion_model(x, t)
        elif self.conditioning_key == 'concat':
            xc = torch.cat([x] + c_concat, dim=1)
            out = self.diffusion_model(xc, t)
        elif self.conditioning_key == 'crossattn':
            cc = torch.cat(c_crossattn, 1)
            out = self.diffusion_model(x, t, context=cc)
        elif self.conditioning_key == 'hybrid':
            xc = torch.cat([x] + c_concat, dim=1)
            cc = torch.cat(c_crossattn, 1)
            out = self.diffusion_model(xc, t, context=cc)
        elif self.conditioning_key == 'adm':
            cc = c_crossattn[0]
            out = self.diffusion_model(x, t, y=cc)
        else:
            raise NotImplementedError()


        return out
OpenAIのUnetModelを覗き見る
ここに書かれている.
The full UNet model with attention and timestep embedding.
タイムステップとAttention機構付きのFULLUnetモデル.
initの中でモデルを作っている. InputとMiddleとOutputの3パート.使っているのは
- ResBlock
- AttentionBlock
- Downsample
- Upsample
ResBlockは言わずと知れたResNetBlock. AttentionBlockがAttention機構. 実装を見るとqkvとかやってる.
Downsample、Upsampleは縮小と拡大.
ファイル拡張子
ckpt
DeepLearningのモデルデータの拡張子.
