この記事はFlutter Advent Calendar 2019の24日目の記事です。
投稿が遅くなってすみません。
普段はWebのフロントエンドをやっていますが、最近、Flutterをよく聞くのでちょっと触ってみようかと思って勢いでアドベントカレンダーに登録しました!Flutterの知識は名前聞いたことあるくらいでほぼゼロです。
とりあえず、インストールしてサンプルアプリを少し改変してみたという内容の記事ですが、フロントエンドエンジニアの視点から書いてみるので参考になれば幸いです。
作業環境
- macOS High Sierra
- Android Studio 3.5.3
インストール
オフィシャルの手順を参考に構築しました。
必要なシステム要件などが書いてありますが、Macだとほとんど標準で入ってるもののようなので、特にこの時点では他に何かをインストールしたりはしませんでした。
SDKをダウンロードして解凍。公式に倣って development フォルダを作成してそこに配置しました。
$ mkdir ~/development
$ cd ~/development
$ unzip ~/Downloads/flutter_macos_v1.12.13+hotfix.5-stable.zip
パスを通します。 .bash_profile に以下の記述を追加。
export PATH=$PATH:~/development/flutter/bin
ターミナルを再起動。
$ exec $SHELL -l
以下のコマンドを叩いて /Users/{$USER}/development/flutter/bin/flutter が返って来ればOK。
$ which flutter
flutter doctor というコマンドを叩くと、関連するツールの状況が表示されるようです。
環境が整っている項目は[✓]で、ない箇所については [✗] か [!] と表示されます。
$ flutter doctor
細かい説明のところは削ってますが、僕の環境ではこうなりました。
$ [✓] Flutter (Channel stable, v1.12.13+hotfix.5, on Mac OS X 10.13.6 17G65, locale ja-JP)
$ [✗] Android toolchain - develop for Android devices
$ [✗] Xcode - develop for iOS and macOS
$ [!] Android Studio (not installed)
$ [!] VS Code (version 1.41.1)
$ [!] Connected device
Xcodeはインストールされているのですが、古いバージョンのために[✗]になっているのかと思います。
諸事情でOSのバージョンが古いため最新のXcodeがインストールできず今回は諦めました。
iOS開発も試したかったのですが、今回はAndroidの開発を試しすのでAndroid studioをインストールしました。
もう一度 flutter doctor を実行してみると
$ [✓] Flutter (Channel stable, v1.12.13+hotfix.5, on Mac OS X 10.13.6 17G65, locale ja-JP)
$ [!] Android toolchain - develop for Android devices (Android SDK version 29.0.2)
    ✗ Android licenses not accepted.  To resolve this, run: flutter doctor --android-licenses
$ [✗] Xcode - develop for iOS and macOS
$ [!] Android Studio (version 3.5)
    ✗ Flutter plugin not installed; this adds Flutter specific functionality.
    ✗ Dart plugin not installed; this adds Dart specific functionality.
$ [!] VS Code (version 1.41.1)
$ [!] Connected device
Android toolchain はライセンスの問題で [!] になっているようだったので
$ flutter doctor --android-licenses
でライセンスに同意。
Android StudioはFlutterのプラグインが必要なようだったので、Android Studioを立ち上げて、Preference → plugin → Flutter でプラグインをインストール。この時に、Dartのプラグインも必要と聞かれるので一緒にインストールします。
ここまでやると、この状態になりました。
[✓] Flutter (Channel stable, v1.12.13+hotfix.5, on Mac OS X 10.13.6 17G65, locale ja-JP)
[✓] Android toolchain - develop for Android devices (Android SDK version 29.0.2)
[✗] Xcode - develop for iOS and macOS
[✓] Android Studio (version 3.5)
[!] VS Code (version 1.41.1)
    ✗ Flutter extension not installed; install from
      https://marketplace.visualstudio.com/items?itemName=Dart-Code.flutter
[!] Connected device
    ! No devices available
VS Code は今回は使わないのでOK。 Connected device もエミュレータを使うのでOKです。
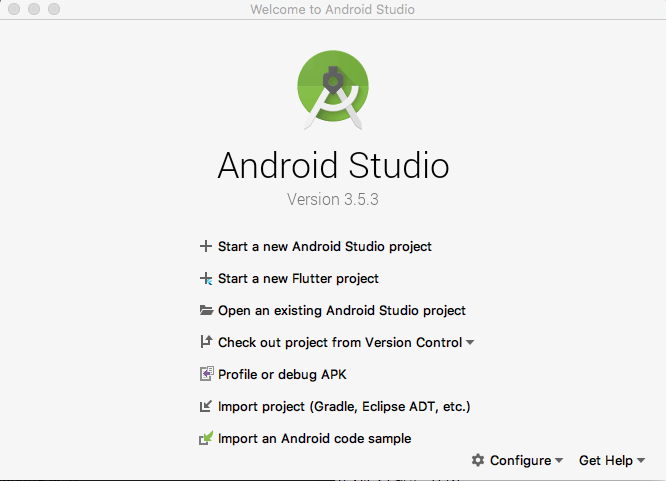
これで開発する準備ができたので、Android Studioを立ち上げます。
プロジェクト作成
Start a new Flutter project を選択。
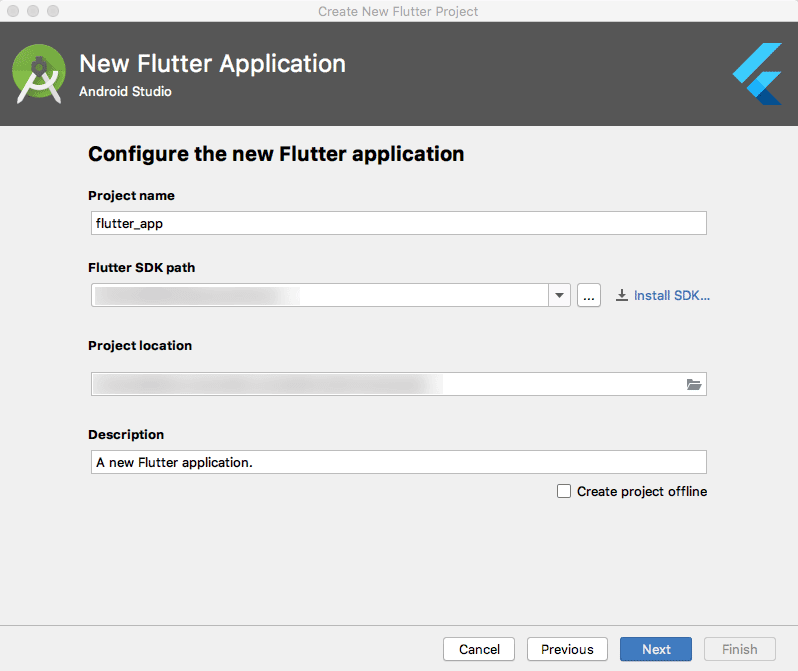
Flutter Applicationを選択。
プロジェクト名や保存場所を設定。今回はそのまま進めました。
Company domainは アプリのリリースの時にバンドルIDとして使われるもののようなので、今回はそのままexample.comで進めます。
プロジェクトが立ち上がりました!
エミュレータの設定
メニュー → Tools → AVD Managerを選択。
Your Virtual Devicesという画面が立ち上がるのでCreate Virtual Deviceからデバイスを追加します。
端末を選択してシステムをダウンロード。
途中、デフォルトの端末の向きの設定やライセンスの同意など求められましたが、全てデフォルトの設定で進めました。
Your Virtual Devicesの画面に追加した端末が表示されているので、右側の再生ボタンを押すとエミュレータが立ち上がります!
Android studioの上部のツールバーで Android SDK built for x86(mobile)が選択できるようになっているので選択。
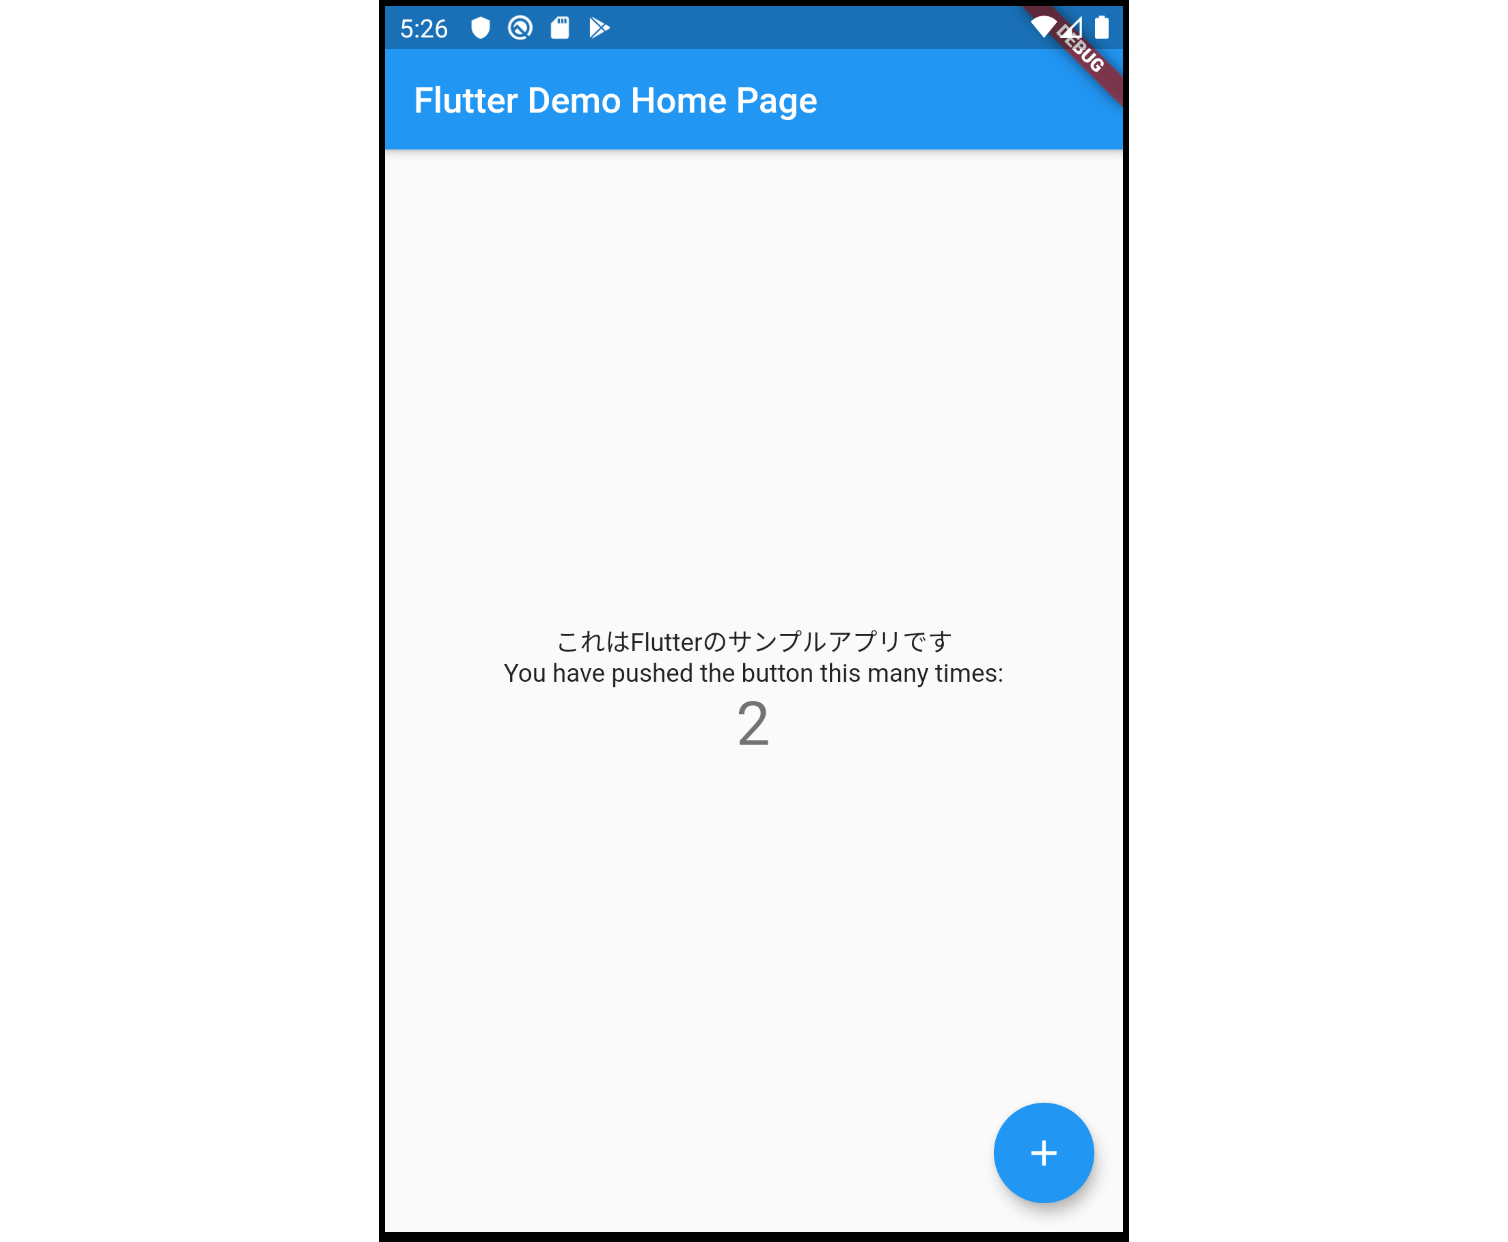
main.dart を選択して再生ボタンを押すとサンプルアプリが起動します。
初回の実行は、数分時間がかかりました。
サンプルアプリを触ってみる
Webのフロントエンドは、HTML/CSS/JSを使って書きますが、FlutterはDartだけで書いていくようです。
サンプルアプリの main.dart はコメントがたくさん入っているのですごく複雑に見えましたが、コメントを削除するとこんな感じ。
import 'package:flutter/material.dart';

void main() => runApp(MyApp());

class MyApp extends StatelessWidget {
  @override
  Widget build(BuildContext context) {
    return MaterialApp(
      title: 'Flutter Demo',
      theme: ThemeData(
        primarySwatch: Colors.blue,
      ),
      home: MyHomePage(title: 'Flutter Demo Home Page'),
    );
  }
}

class MyHomePage extends StatefulWidget {
  MyHomePage({Key key, this.title}) : super(key: key);

  final String title;

  @override
  _MyHomePageState createState() => _MyHomePageState();
}

class _MyHomePageState extends State<MyHomePage> {
  int _counter = 0;

  void _incrementCounter() {
    setState(() {
      _counter++;
    });
  }

  @override
  Widget build(BuildContext context) {
    return Scaffold(
      appBar: AppBar(
        title: Text(widget.title),
      ),
      body: Center(
        child: Column(
          mainAxisAlignment: MainAxisAlignment.center,
          children: <Widget>[
            Text(
              'You have pushed the button this many times:',
            ),
            Text(
              '$_counter',
              style: Theme.of(context).textTheme.display1,
            ),
          ],
        ),
      ),
      floatingActionButton: FloatingActionButton(
        onPressed: _incrementCounter,
        tooltip: 'Increment',
        child: Icon(Icons.add),
      ), // This trailing comma makes auto-formatting nicer for build methods.
    );
  }
}
このサンプルアプリが何をやっているのかは、Flutter はじめの一歩がめちゃくちゃ詳しく書いてくれています。
この記事によると Widget(UIレイアウトの設計図)を組み合わせてUIの階層構造(HTMLタグの入れ子に近い)を構築していくというのが本質 と書いてあって、WidgetがHTMLでいうタグみたいなものかなと思いました。
実際にIDEの右側の Flutter Inspector で Widgets のタブを見てみると、なるほど、かなりHTMLっぽいです。ここでだいぶ抵抗が薄れました。
Widetを追加してみる
テキストを増やしてみました。
children: <Widget>[
    Text(
      'これはFlutterのサンプルアプリです',
    ),
    Text(
      'You have pushed the button this many times:',
    ),
    Text(
      '$_counter',
      style: Theme.of(context).textTheme.display1,
    ),
],
ここは思った通りの挙動。
ホットリロードで、保存するだけで反映してくれるのが便利です!
テキストのスタイルを変えてみる
要素の追加ができたので、スタイルを変えてみます。
Text(
	'これはFlutterのサンプルアプリです',
	style: TextStyle(
		fontSize: 24,
		fontWeight: FontWeight.bold,
		color: Colors.red
	)
),
Text Widgetの引数にCSSっぽい感じで記述すれば変更できるようです。
とはいえ、プロパティの記述の仕方がわからなくて、ここですごく時間かかりました。
ですが、これだとインラインスタイルを書いているような感じなので、使いまわすことを考えるとclassのようにしたい。
オブジェクト(?)っぽい変数を作って、それを渡せば良いみたいです。
Widget build(BuildContext context) {

	var largeText = TextStyle(
	    fontSize: 24,
	    fontWeight: FontWeight.bold,
	    color: Colors.red
	);

	// 省略

	Text(
      'これはFlutterのサンプルアプリです',
      style: largeText
    ),

}
デフォルトで入っているカウンターの大きい文字のところは、最初に読み込んでいるマテリアルデザイン用のUIコンポーネントから参照しているようです。
style: Theme.of(context).textTheme.display1,
機能を追加してみる
サンプルは、数字を増やすカウンターアプリですが、減らす機能と、0にリセットする機能を追加してみました。
とりあえずボタンを追加します。ありそうだなと思って、Butto まで打ったら色々と候補が出てきたので FlatButton というのを使ってみました。
child: Column(
  mainAxisAlignment: MainAxisAlignment.center,
  children: <Widget>[
    Text(
      'これはFlutterのサンプルアプリです',
      style: largeText
    ),
    Text(
      'You have pushed the button this many times:',
    ),
    Text(
      '$_counter',
      style: Theme.of(context).textTheme.display1,
    ),
    FlatButton(
      color: Colors.blue,
      child: Text(
        '足す',
        style: TextStyle(
          color: Colors.white
        )
      )
    ),
    FlatButton(
      color: Colors.blue,
      child: Text(
        '引く',
        style: TextStyle(
          color: Colors.white
        )
      )
    ),
    FlatButton(
      color: Colors.blue,
      child: Text(
        'リセット',
        style: TextStyle(
          color: Colors.white
        )
      )
    )
  ],
),
こんな感じになりました。
ちなみに Row というWidgetがあるのを確認したので、横並びのボタンにできるかなと思い、こんな感じで書いてみたのですがエラーになりました。この辺はもうちょっと書き方を理解しないとダメですね…
body: Center(
  child: Column(
    mainAxisAlignment: MainAxisAlignment.center,
    children: <Widget>[
      Text(
        'これはFlutterのサンプルアプリです',
        style: largeText
      ),
      // …
    ]
  ),
  child: Row(
    children: <Widget>[
      FlatButton(
        color: Colors.blue,
        child: Text(
          '足す',
          style: TextStyle(
            color: Colors.white
          )
        )
      ),
      // …
    ],
  ),
)
それぞれのボタンに関数をセットしていけばできるだろうというところで、元々のフローティングボタンに記載があったこの部分を参考にします。
int _counter = 0;

void _incrementCounter() {
  setState(() {
    _counter++;
  });
}

// …

floatingActionButton: FloatingActionButton(
  onPressed: _incrementCounter,
  tooltip: 'Increment',
  child: Icon(Icons.add),
),
_incrementCounter という関数があって、フローティングボタンの onPressed に設定してるみたいですね。
この辺は、HTML要素に対してJSのイベントを設定しているような感じでわかりやすいです。
これを参考に、関数を作ってそれぞれのイベントに設定します。
void _incrementCounter() {
  setState(() {
    _counter++;
  });
}

void _decrementCounter() {
  setState(() {
    _counter--;
  });
}

void _resetCounter() {
  setState(() {
    _counter = 0;
  });
}

// …

FlatButton(
  onPressed: _incrementCounter,
  color: Colors.blue,
  child: Text(
    '足す',
    style: TextStyle(
      color: Colors.white
    )
  )
),
FlatButton(
  onPressed: _decrementCounter,
  color: Colors.blue,
  child: Text(
    '引く',
    style: TextStyle(
      color: Colors.white
    )
  )
),
FlatButton(
  onPressed: _resetCounter,
  color: Colors.blue,
  child: Text(
    'リセット',
    style: TextStyle(
      color: Colors.white
    )
  )
)
無事に動きました。 関数の中にある setState() は状態を更新してくれる関数のようです。
消した場合、内部的に値は変わってるけど画面に反映されませんでした。
デバッグのためにログを出したいときは?
print() でConsoleに表示することができるようでした。
コードまとめ
import 'package:flutter/material.dart';

void main() => runApp(MyApp());

class MyApp extends StatelessWidget {
  @override
  Widget build(BuildContext context) {
    return MaterialApp(
      title: 'Flutter Demo',
      theme: ThemeData(
        primarySwatch: Colors.blue,
      ),
      home: MyHomePage(title: 'Flutter Demo Home Page'),
    );
  }
}

class MyHomePage extends StatefulWidget {
  MyHomePage({Key key, this.title}) : super(key: key);

  final String title;

  @override
  _MyHomePageState createState() => _MyHomePageState();
}

class _MyHomePageState extends State<MyHomePage> {
  int _counter = 0;

  void _incrementCounter() {
    setState(() {
      _counter++;
    });
  }

  void _decrementCounter() {
    setState(() {
      _counter--;
    });
  }

  void _resetCounter() {
    setState(() {
      _counter = 0;
    });
  }

  @override
  Widget build(BuildContext context) {

    var largeText = TextStyle(
        fontSize: 24,
        fontWeight: FontWeight.bold,
        color: Colors.red
    );

    return Scaffold(
      appBar: AppBar(
        title: Text(widget.title),
      ),
      body: Center(
        child: Column(
          mainAxisAlignment: MainAxisAlignment.center,
          children: <Widget>[
            Text(
              'これはFlutterのサンプルアプリです',
              style: largeText
            ),
            Text(
              'You have pushed the button this many times:',
            ),
            Text(
              '$_counter',
              style: Theme.of(context).textTheme.display1,
            ),
            FlatButton(
              onPressed: _incrementCounter,
              color: Colors.blue,
              child: Text(
                '足す',
                style: TextStyle(
                  color: Colors.white
                )
              )
            ),
            FlatButton(
              onPressed: _decrementCounter,
              color: Colors.blue,
              child: Text(
                '引く',
                style: TextStyle(
                  color: Colors.white
                )
              )
            ),
            FlatButton(
              onPressed: _resetCounter,
              color: Colors.blue,
              child: Text(
                'リセット',
                style: TextStyle(
                  color: Colors.white
                )
              )
            )
          ],
        ),
      ),
      floatingActionButton: FloatingActionButton(
        onPressed: _incrementCounter,
        tooltip: 'Increment',
        child: Icon(Icons.add),
      ), // This trailing comma makes auto-formatting nicer for build methods.
    );
  }
}
まとめ・所感
本当はTodoアプリくらいまで作りたかったのですが、思ったより時間がかかってしまったのと記事も長くなってしまったので、また別で書こうと思います。
まだ、ちょっと触ったくらいで機能なども全然使えてませんが、Widgetを組み合わせて構築していくところに慣れれば、僕のような普段はフロントエンドをやってるエンジニアでも簡単なアプリだったら作れそうな気がしたので、もうちょっと触ってみようと思います。


