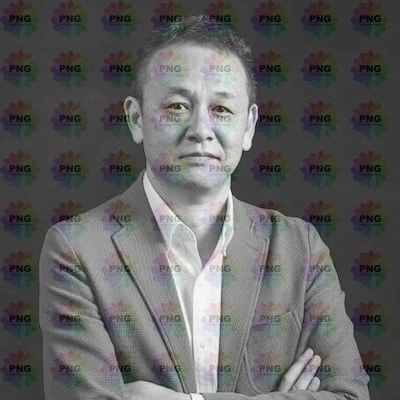
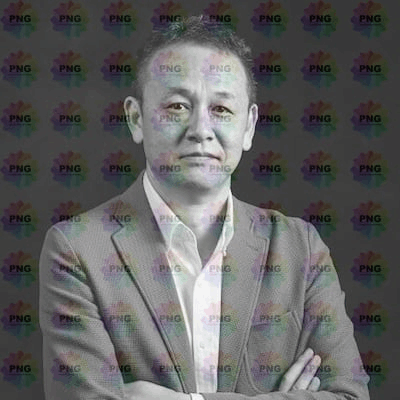
この記事では、画像のリサイズ時にさらに指定された画像を重ね合わせるウォーターマークやカンプ画像と言われる機能をやってみます。

こういった画像で、お金を払うと綺麗な以下の画像が手に入るような仕組みを簡単に構築可能です。

従来このような画像の作成はあらかじめバッチ処理に実行しておき、オリジナル画像に加えて処理後画像もストレージに保存する必要があるため、手間とコストのかかる作業でしたが、Image Resizingを用いることで簡単に実装が可能です。
環境設定
この機能はWorkersのみで実装が可能です。URLパラメータ経由では処理ができないことに注意して下さい。前回の記事では
https://image-resize.harunobukameda.workers.dev/width=300&image=/icons/apache_pb2.gif
のように、CloudflareがWorkersの検証用にデフォルトで割り当てるドメインharunobukameda.workers.devで作業を行いましたが、この機能を用いる場合、このデフォルトドメインでは動作しないことに注意してください。ユーザー専用ドメインにImage Resizingサービスの権利が割り当てられ、そのドメインで動作するWorkersがその機能を使うことができる、という構成です。
Workersにドメインを割り当てる
こちらの記事でWorkersにドメインを割り当てる方法を紹介しています。Workersには単純にharunobukameda.workers.devに対しするCNAMEをセットするだけでは独自ドメインで動作しないことに注意してください。
方法は2種類(Routes形式とCustom Domain形式)あります。
Routes形式;URLパス単位で呼び出すWorkersの制御が可能
Custom Domain形式:ドメイン単位でCNAMEを設定(シンプルな方法)
この記事ではCustom Domainを使います。Custom Domainを用いる場合、Routes形式と異なり、DNS RecordでCNAMEを設定しておく必要がない分より作業はシンプルです。
Wrangler.tomlに以下を記載しwrangler publishを行うのみです。
routes = [
        { pattern = "image-resize.harunobukameda.labrat.online", custom_domain = true }
]
こうすることにより従来のドメイン(harunobukameda.workers.dev)ではアクセスが行えなくなります。

DNS Recordの設定画面は以下のようになります。

この画面ではこのレコードの修正を行うことはできず、確認のみとなりますが、
image-resize.harunobukameda.labrat.onlineでアクセスができるようになっていることがわかります。
Workersサンプルスクリプト
例によって公式ドキュメントのサンプルを超簡略化したものを使います。
addEventListener("fetch", event => {
event.respondWith(handleRequest(event.request))
})
async function handleRequest(request) {
let imageresize = "https://jawsdays2018.jaws-ug.jp/wp-content/uploads/2018/02/kameda.jpg";
// Returning fetch() with resizing options will pass through response with the resized image.
return fetch(imageresize, {
        cf: {
          image: {
                        width: 600,
                        height: 600,
            draw: [
              {
                url: 'https://p.e-words.jp/img/PNG.png', // draw this image
              },
            ],
          },
        },
});
}
前回の記事と異りfetch関数にセットするのはオリジナルの画像URL絶対パスです。
https://jawsdays2018.jaws-ug.jp/wp-content/uploads/2018/02/kameda.jpg
ここにImage Resizing処理済みのURLを設定した場合、再帰呼び出しとなり動作しないことに注意してください。URLパラメータでリサイズなどの処理を与えるのはなく、cfという独自オブジェクトをfetchに与えることで動作します。つまりWorkersのfetchは独自で拡張されている、ということになります。
return fetch(imageresize, {
cf: {
image: {
width: 600,
height: 600,
draw: [
{
url: 'https://p.e-words.jp/img/PNG.png', // draw this image
},
],
},
},
}
image:部分が、前回までURLパラメータで与えていた画像変換の指示部分です。
draw:部分はオーバーレイ画像の指示です。
Deployしてアクセスをしてみると

このようになります。
少し透かしを入れてみます。
url: 'https://p.e-words.jp/img/PNG.png', // draw this image
opacity: 0.2, // 20% transparent
url: 'https://p.e-words.jp/img/PNG.png', // draw this image
opacity: 0.2, // 20% transparent
bottom: 5, // 5 pixels from the bottom edge
right: 5, // 5 pixels from the right edge
width: 100,
height: 50,

repeat: true,オプションを付けると画面全体に画像が繰り返し表示されます。
利用可能なパラメータはこちらにありますのでいろいろやってみて下さい。
https://developers.cloudflare.com/images/image-resizing/draw-overlays/
