これまで
これまでに、deviseのインストール・Userモデルの作成・Viewの作成・Controllerの作成・Modelのカスタマイズ・Routesの編集を行いました。
今回は、Deviseの設定 ( 独自カラムでログインできるようにする ) を行っていきたいと思います。
▽前回の記事はこちら▽
【Rails6】deviseで独自カラムを追加して使用する方法 ①
【Rails6】deviseで独自カラムを追加して使用する方法 ②
【Rails6】deviseで独自カラムを追加して使用する方法 ③
① Devise の設定
/config/initializers/devise.rb ファイルを編集していきます。
今回編集する内容は、ログインの認証するキーを email から user_code にするようにします。
コメントアウトされているので、#を外します。
# ==> Configuration for any authentication mechanism
  # Configure which keys are used when authenticating a user. The default is
  # just :email. You can configure it to use [:username, :subdomain], so for
  # authenticating a user, both parameters are required. Remember that those
  # parameters are used only when authenticating and not when retrieving from
  # session. If you need permissions, you should implement that in a before filter.
  # You can also supply a hash where the value is a boolean determining whether
  # or not authentication should be aborted when the value is not present.
  # config.authentication_keys = [:email]
# ==> Configuration for any authentication mechanism
  # Configure which keys are used when authenticating a user. The default is
  # just :email. You can configure it to use [:username, :subdomain], so for
  # authenticating a user, both parameters are required. Remember that those
  # parameters are used only when authenticating and not when retrieving from
  # session. If you need permissions, you should implement that in a before filter.
  # You can also supply a hash where the value is a boolean determining whether
  # or not authentication should be aborted when the value is not present.
  config.authentication_keys = [:user_code]
上記に編集すると、ログイン認証のキーが変更されます。
前回まで、ファイルをまるまる載せていましたが、長くなるため編集する部分のみを記載します。
② ストロングパラメータ 追加
今回の肝と思われるのは、ここの部分です。
今までのカスタマイズ・設定で、画面の表示は正常に行われるのですが、
このままでは、独自カラムが画面に入力した値が正常にコントローラへ渡せません。
Deviseでは、ストロングパラメータを追加する必要があります。
ストロングパラメータの追加は、 /app/controllers/application_controller.rbを編集します。
class ApplicationController < ActionController::Base

end
class ApplicationController < ActionController::Base
    before_action :configure_permitted_parameters, if: :devise_controller? # before_action でメゾット呼び出し

    protected # protected内にメゾットを記述

    def configure_permitted_parameters # メゾット
        devise_parameter_sanitizer.permit(:sign_up, keys: [:user_code, :user_last_name, :user_first_name] )
        devise_parameter_sanitizer.permit(:sign_in, keys: [:user_code])
        devise_parameter_sanitizer.permit(:account_update, keys: [:user_code, :user_last_name, :user_first_name])
    end

end
| No | 種類 | 説明 |
|---|---|---|
| 1 | sing_up | 登録時 |
| 2 | sing_in | ログイン時 |
| 3 | account_update | ユーザ情報更新時 |
上記のパターンの説明を表にしてみました。
3種類の処理時にストロングパラメータが通るように、追加します。
devise_parameter_sanitizer.permit(:処理種類, keys: [:カラム名, :カラム名])
ここまで行うと、独自カラムを追加してdeviseを使用することができるようになります。
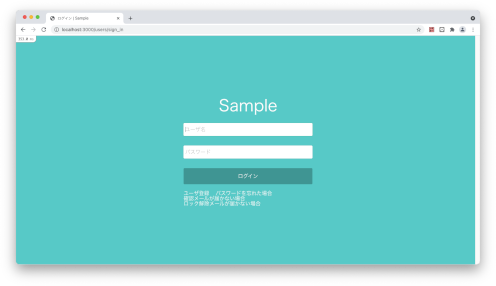
あとは、ログインページ等のHTMLとCSSを作り、実用性のある画面を作成すると完成です。
最後に
deviseの使用方法などはたくさんインターネットに情報がありますが、今回は「独自カラムの追加とログイン時に独自のカラムで行えるようにする」というテーマで、一からご説明してきました。
どちらかというと、Rails初心者の方向けに近かったのかなと思いますが、deviseのカスタマイズをされたい方も参考になるかなと思いますので、ぜひ参考にしてみてください。
記事を複数回分けましたが以上、deviseで独自カラムを追加して使用する方法のご紹介でした。