Pytorch でもCoreMLは使えます!
https://qiita.com/kamata1729/items/7adaead883566e3043b5
の続きです。
前回手書きスケッチの認識ができるようになったので、これをiOS端末上のCoreMLで行なってみたいと思います
CoreMLが標準的にサポートしているのはCaffe / Keras / XGBoost / scikit learn / turi / LIBSVMなどで、Pytorchはサポートしていませんが、ONNXを経由することでPytorch でもCoreMLは使えます
CoreMLとは?
iOS端末上でdeep learningモデルを使用できるようにしたライブラリ
vggやGoogLeNetなどのいくつかのpretrainedのモデルはすでに実装されており、それをそのまま使って物体検出やクラス認識などができるほか、自分で作成した学習済みモデルをiOS上で実行することも可能
モデル読み込み
早速やっていきましょう
前回の続きなのでtorch周りのimportは済んでいると仮定し、学習したモデルを読み込みます
import torch

model = SketchResModel()
model.load_state_dict(torch.load('model_hoge.pth'))
ONNX
このモデルをONNXというFacebookとMicrosoftが提唱しているモデル表現の標準フォーマットに変換します。
ONNXのサポート状況は以下の通りです(若干古いので今は変わってるかも)
| フレームワーク | Importer | Exporter |
|---|---|---|
| Caffe | × | × |
| TensorFlow | ○ | △ |
| MXNet | △ | × |
| CNTK | ○ | ○ |
| Chainer | △ | ○ |
| PyTorch | × | ○ |
| Caffe2 | ○ | ○ |
PytorchからONNXにExportでき、さらにこれをApple CoreMLの形式に変換することでSwift上で利用が可能です
ONNXのインストール
$ pip install onnx
ONNXへのモデル変換
前回の記事で、モデルの入力は(バッチ数, 1, 255, 255)の画像にしていたため、dummy_inputとしてtorch.FloatTensor(1, 1, 225, 225)を入れます
import torch
import onnx

model = SketchResModel()
model.load_state_dict(torch.load('model_hoge.pth'))

dummy_input = torch.FloatTensor(1, 1, 225, 225)
torch.onnx.export(model, dummy_input, 'SketchRes.proto', verbose=True)
CoreMLへのモデル変換
onnxに変換したモデルをcoremlの形式に変換するために、onnx-coremlをインストールします
https://attardi.org/pytorch-and-coreml
ここによるとPyPIのonnx-coremlは壊れてるらしいのでgithubから直接インストールします
$ pip install git+https://github.com/onnx/onnx-coreml.git
CoreMLへのモデル変換までまとめます
class_labelsはoutputの次元数と合って入ればなんでも良いはずです(0~9がどのクラスに対応してるかよくわからなかったのでそのまま数字で埋めました)
import torch
import onnx
from onnx_coreml import convert

model = SketchResModel()
model.load_state_dict(torch.load('model_hoge.pth'))

dummy_input = torch.FloatTensor(1, 1, 225, 225)
torch.onnx.export(model, dummy_input, 'SketchRes.proto', verbose=True)

model_onnx = onnx.load('SketchRes.proto')

coreml_model = convert(
    model_onnx,
    'classifier',
    image_input_names=['inout']
    image_output_names=['output'],
    class_labels=[i for i in range(10)],
)
coreml_model.save('SketchResModel.mlmodel')
モデルをSwiftに組み込み
ようやくSwiftの開発に入ります
先ほど生成した.mlmodelをドラッグ&ドロップしてあげると下のような画面が出て来ます
右側の赤丸のTarget Menbershipのチェックポイントを入れることを忘れずに
これによって自動的にInputとOutputのクラスが生成されます
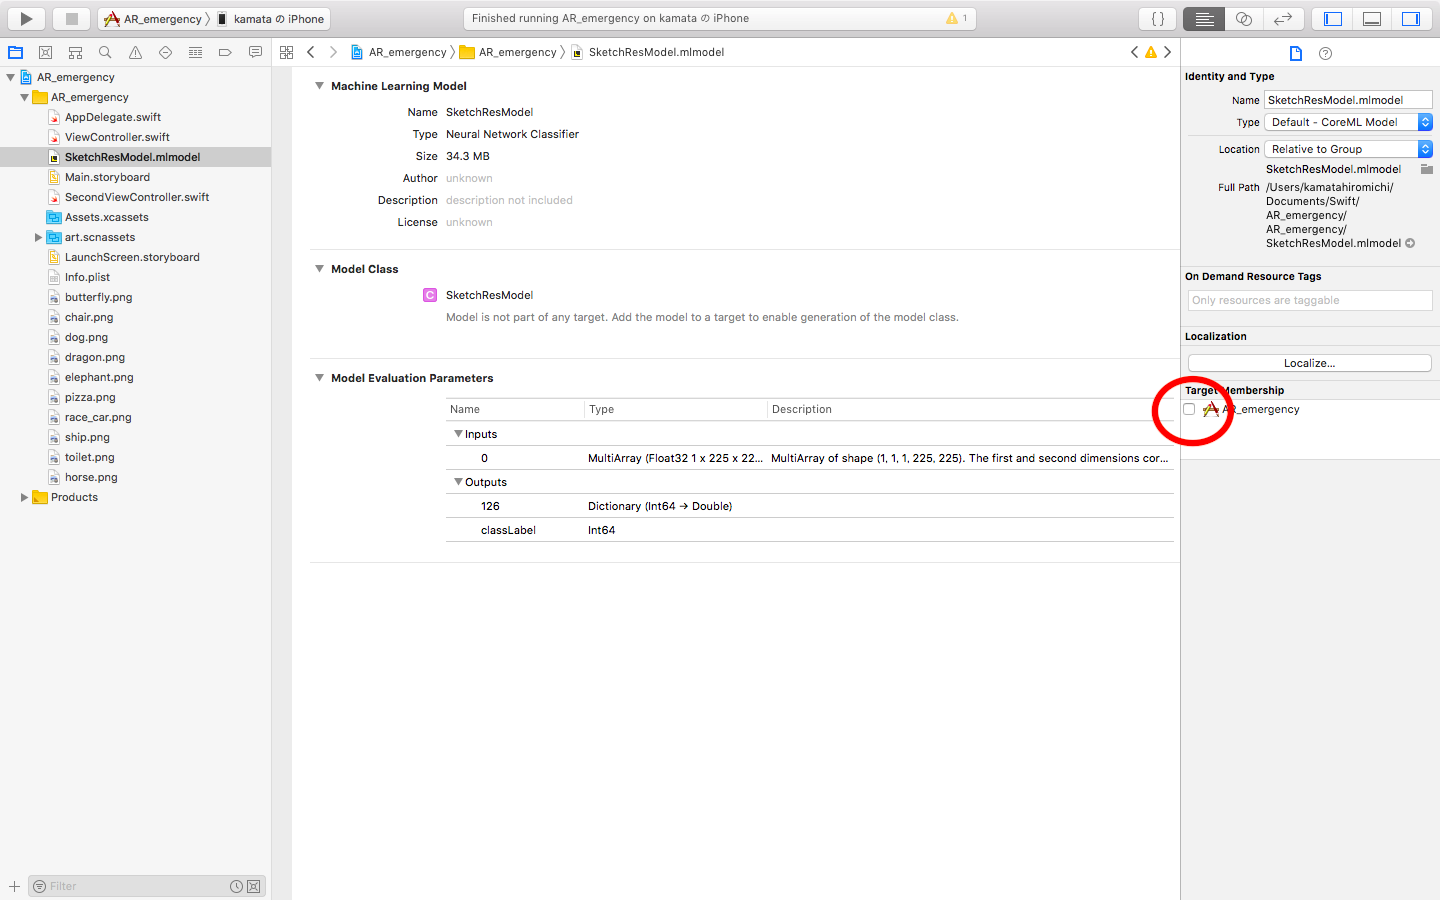
また、この画面でInputとOutputの形式も確認しておきましょう
今回の場合は、InputをMultiArray (Float32 1 x 225 x 225)の形にしてあげる必要がありそうです。
カメラ画像を取得し、モデルで予測
とりあえずテキトーにUIを配置します。次回以降の実装の関係上、ARSCNViewを使ってます
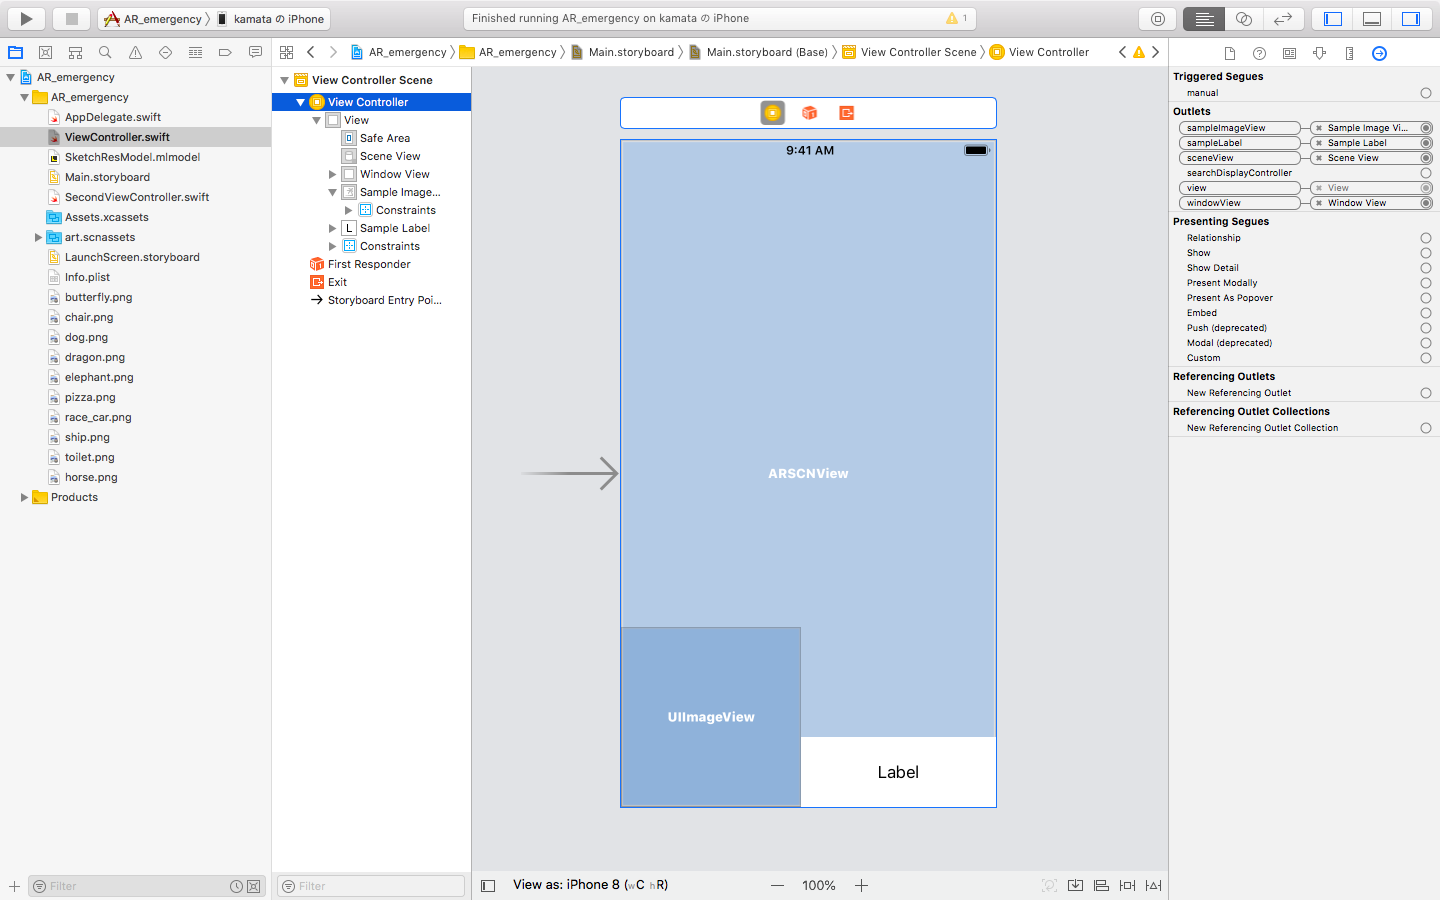
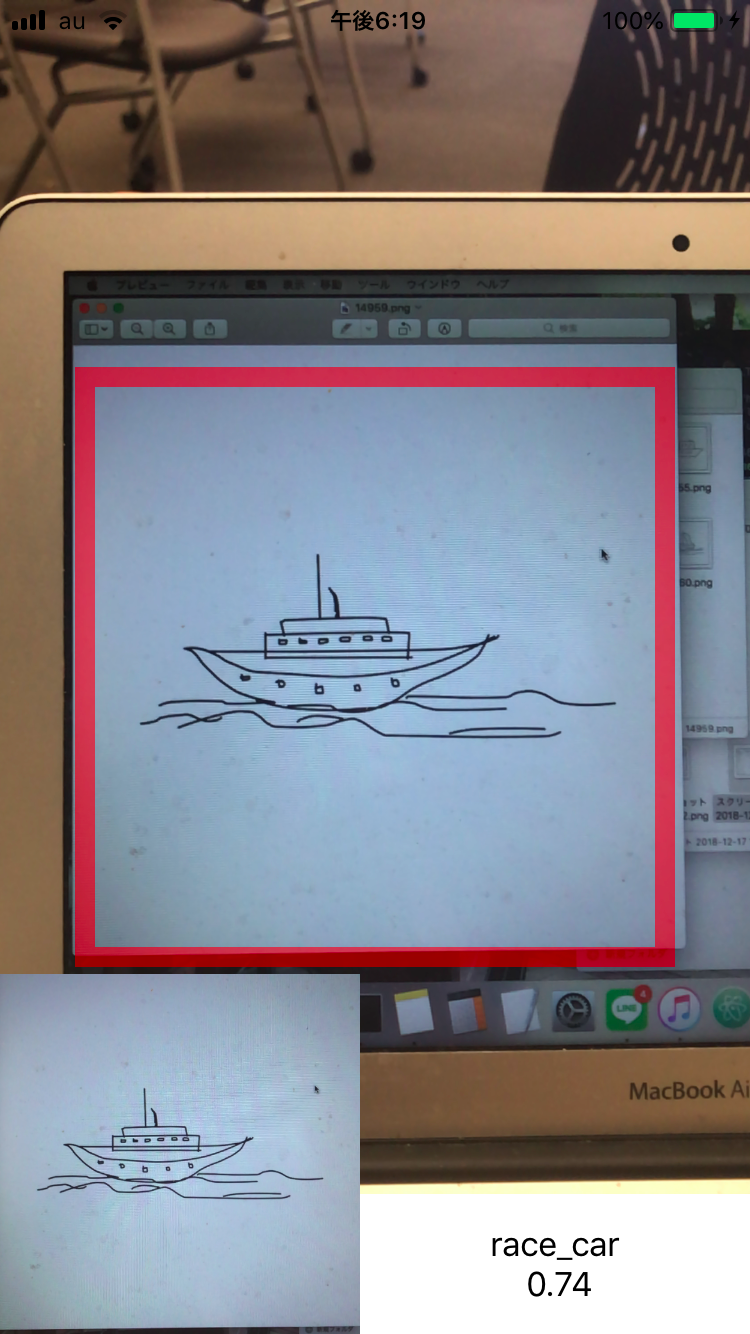
以下では、1秒ごとに赤い枠(windowView)の中のカメラ画像をクロップし、モデルに通して予測する処理になっています。
import UIKit
import CoreML
import SceneKit
import ARKit
import CoreImage

class ViewController: UIViewController, ARSCNViewDelegate {

    @IBOutlet weak var windowView: UIView!
    @IBOutlet weak var sceneView: ARSCNView!
    @IBOutlet weak var sampleImageView: UIImageView!
    @IBOutlet weak var sampleLabel: UILabel!

    //モデル読み込み
    let skechModel = SketchResModel()
    let classDic: [Int : String] = [0: "butterfly", 1: "chair", 2: "dog", 3: "dragon", 4: "elephant", 5: "horse", 6: "pizza", 7: "race_car", 8: "ship", 9: "toilet"]

    override func viewDidLoad() {
        super.viewDidLoad()
        sceneView.delegate = self
        sceneView.showsStatistics = true
    }

    override func viewDidLayoutSubviews() {
        windowView.layer.borderColor = UIColor.red.cgColor
        windowView.layer.borderWidth = 10
        sampleLabel.numberOfLines = 0
    }

    override func viewWillAppear(_ animated: Bool) {
        super.viewWillAppear(animated)
        let configuration = ARWorldTrackingConfiguration()
        sceneView.session.run(configuration)
    }

    override func viewDidAppear(_ animated: Bool) {
        // 1秒ごとに更新
        Timer.scheduledTimer(timeInterval: 1, target: self, selector: #selector(self.timerUpdate), userInfo: nil, repeats: true)
    }

    override func viewWillDisappear(_ animated: Bool) {
        super.viewWillDisappear(animated)
        sceneView.session.pause()
    }

    @objc func timerUpdate() {
        //赤い枠の中の画像をcropしてそれをcoreMLRequestに渡す
        let uiImage = sceneView.snapshot()
        let cropedUIImage = uiImage.cropImage(w: Int(self.windowView.bounds.width*2), h: Int(self.windowView.bounds.height*2))
        self.coreMLRequest(image: cropedUIImage)
    }


    func coreMLRequest(image: UIImage){
        self.sampleImageView.image = image //デモ用
        let imgSize: Int = 225
        let imageShape: CGSize = CGSize(width: imgSize, height: imgSize)
        //(255, 255)にリサイズ
        let imagePixel = image.resize(to: imageShape).getPixelBuffer()
        //(1, 255, 255)のMLMultiArrayを生成
        let mlarray = try! MLMultiArray(shape: [1, NSNumber(value: imgSize), NSNumber(value: imgSize)], dataType: MLMultiArrayDataType.float32 )
        for i in 0..<imgSize*imgSize {
            mlarray[i] = imagePixel[i] as NSNumber
        }

        //sketchModelのpredictionにmlarrayを入れてそ予測
        if let prediction = try? self.skechModel.prediction(_0: mlarray) {
            //outputは_126という変数に格納されていることがSketchResModel.mlmodelに自動生成されたコードからわかる
            if let first = (prediction._126.sorted{ $0.value > $1.value }).first {
                self.sampleLabel.text = "\(String(describing: classDic[Int(first.key)]!)) \n \(round(first.value*100)/100.0)"
            }
        }
    }
}

extension UIImage {
    func resize(to newSize: CGSize) -> UIImage {
        UIGraphicsBeginImageContextWithOptions(CGSize(width: newSize.width, height: newSize.height), true, 1.0)
        self.draw(in: CGRect(x: 0, y: 0, width: newSize.width, height: newSize.height))
        let resizedImage = UIGraphicsGetImageFromCurrentImageContext()!
        UIGraphicsEndImageContext()
        return resizedImage
    }

    // 二値化してpixelBUfferに変換
    func getPixelBuffer() -> [Float]
    {
        guard let cgImage = self.cgImage else {
            return []
        }
        let bytesPerRow = cgImage.bytesPerRow
        let width = cgImage.width
        let height = cgImage.height
        let bytesPerPixel = 4
        let pixelData = cgImage.dataProvider!.data! as Data
        var buf : [Float] = []
        let thresh: Float = 0.5 //閾値

        for j in 0..<height {
            for i in 0..<width {
                let pixelInfo = bytesPerRow * j + i * bytesPerPixel
                let r = CGFloat(pixelData[pixelInfo])
                let g = CGFloat(pixelData[pixelInfo+1])
                let b = CGFloat(pixelData[pixelInfo+2])

                var v: Float = 0
                if floor(Float(r + g + b)/3.0)/255.0 < thresh {
                    v = 0
                } else {
                    v = 1
                }
                buf.append(v)
            }
        }
        return buf
    }

    // 画像中心からcrop
    func cropImage(w: Int, h: Int) -> UIImage {
        let origRef    = self.cgImage
        let origWidth  = Int(origRef!.width)
        let origHeight = Int(origRef!.height)
        let cropRect  = CGRect.init(x: CGFloat((origWidth - w) / 2), y: CGFloat((origHeight - h) / 2), width: CGFloat(w), height: CGFloat(h))
        let cropRef   = self.cgImage!.cropping(to: cropRect)
        let cropImage = UIImage(cgImage: cropRef!)

        return cropImage
    }
}
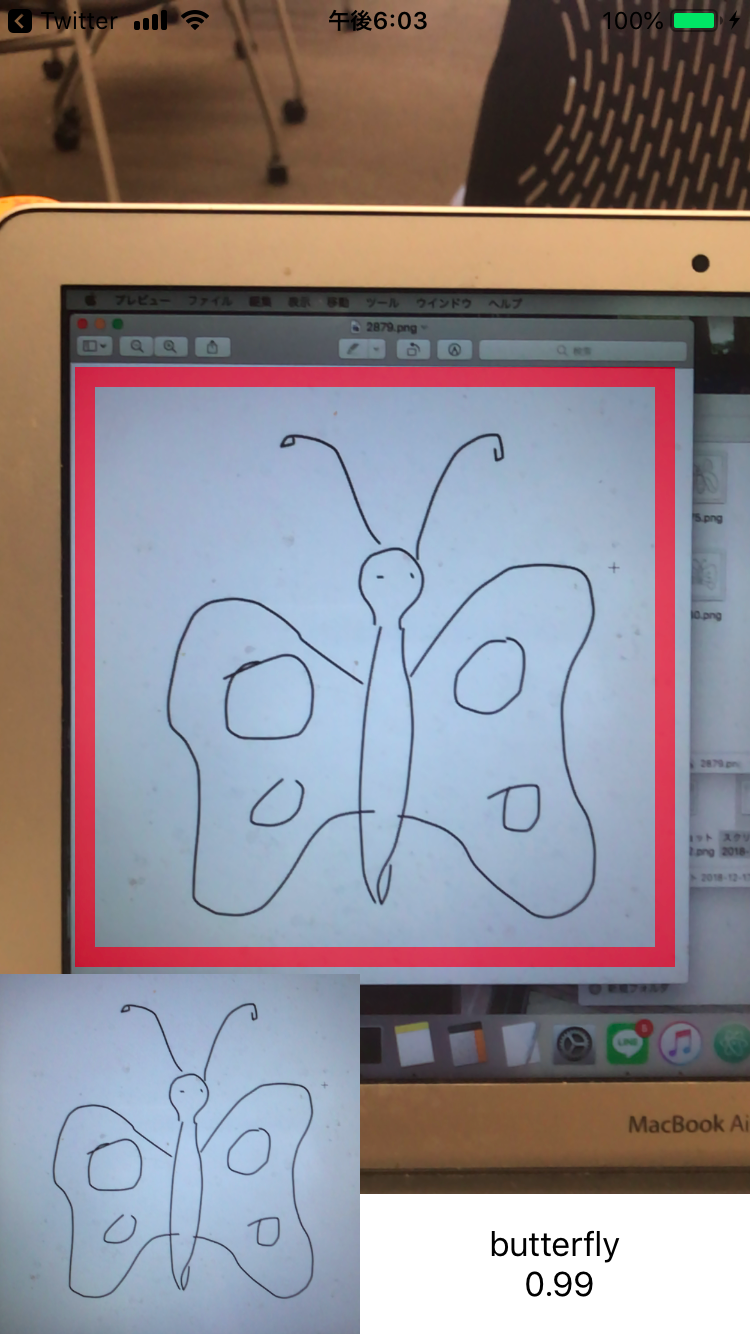
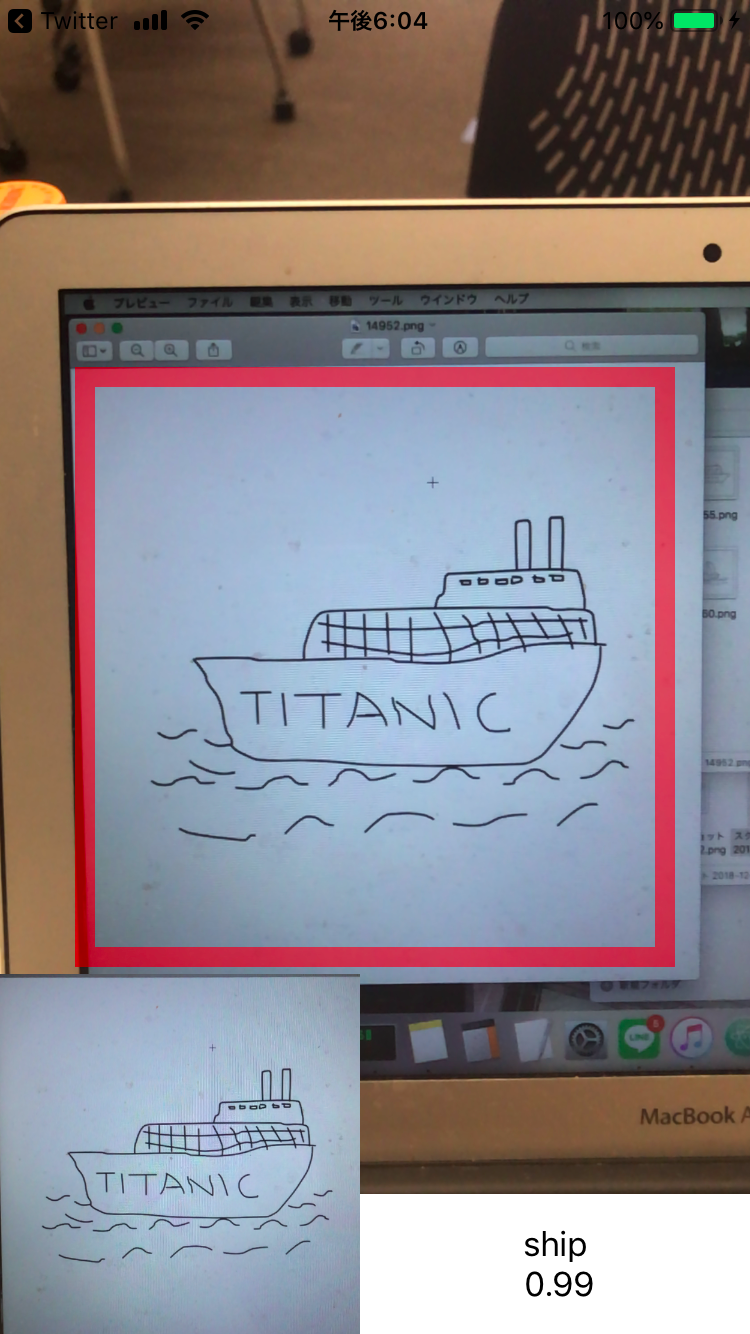
実行結果は下のような感じです
デモ用に左下にcropしたあとの画像と、右下に予測したクラスラベルを表示しています
多くの画像はうまく認識してくれますが、3枚目の画像のようにうまく認識してくれない画像が体感的に少し増えた気がします。
やはり現実の画像に応用するためには、ノイズを加えた学習をする必要がありそうです
| ok | ok | ng |
|---|---|---|
 |
 |
 |
参考