これは、WebGL Advent Calendarの6日目の記事です。
何の話?
gl.enchant.jsでオブジェクトにテクスチャを張り付ける際の、自由度を高める手法の話です。
gl.enchant.jsを使う理由
gl.enchant.jsは、enchant.jsにWebGL向けのクラスを追加するプラグインです。
gl.enchant.jsはゲームエンジンなのでロジックの実装は得意ですが、レンダリングなどのオプションは少ないので、シェーダを書き換えるようなヘビーユースよりも、3Dゲームのアルゴリズムの検証やプロトタイピングに向いたwebGLフレームワークです(だと思っています)。
ちなみに最近のスマホでも動作します。→スマホ向けゲーム作例
1.リソース画像を使う
一番簡単な3Dオブジェクトを扱う方法がこれです。
テクスチャに既存の画像ファイルを用いる方法です。
enchant.jsではpreload関数を使ってリソースファイルを読み込みます。
core.preload("./texture_stone.png"); をcore.onload前に実行しておくことで、texture_stone.pngが利用できます。
ファイル名は変数にしておくと使いまわす時に楽ができます。
var stone = "./texture_stone.png";
core.preload("./texture_stone.png");
core.onload = function(){
    //色々
};
一番シンプルな立体描画のコードを下記に出します。
var scene = new Scene3D(); // 基本となるシーンを定義
scene.backgroundColor = [0.1, 0.2, 0.25, 1]; // シーンの背景色を設定
var cube = new enchant.gl.primitive.Cube(1); // サイズ1の立方体を生成
cube.mesh.texture.src = "./texture_stone.png"; //テクスチャ画像を設定
scene.addChild(cube); //シーンに登録
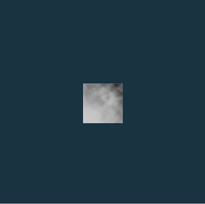
これを実行すると以下のような表示ができます。

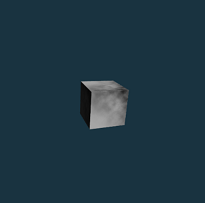
これでは立体なのか分からないので、下記の処理で回転を行うと、
cube.rotationApply(new Quat(1, 1, 0, Math.PI/180 * 30)); // [1,1,0]のベクトルを軸に30度回転する
サンプルでは最低限のことしかやっていないので、一行ずつが何をやっているか、分かりやすいと思います。
とりあえずこれだけで立方体が画面上にポンとでます。楽でいいですね。
ちなみに、テクスチャを指定しないと白塗りのテクスチャになります。
本当はカメラの設定が必要ですが、gl.enchant.jsのカメラ回りには初期値が入っているので、今回はそれを使うということで。
また、cube.texure.src = "./texture.hoge_png のくだりは、下記と同じ結果になります。
var texture = new Texure();
texture.src= "./texure_hoge.png"; //立方体の背景に文字列のリソース画像を設定する
cube.mesh.texture = texture;
Texture()の宣言を省いたほうが説明が簡単なのですが、後々に書くようなテクスチャを使いまわす場合には、別個にTextureの宣言が必要です。
以下のような処理を追加すれば、光源処理も調整できます。
cube.mesh.texture.ambient  = [0.4, 0.4, 0.4, 1];
cube.mesh.texture.diffuse  = [0.7, 0.7, 0.7, 1];
cube.mesh.texture.specular = [0.7, 0.7, 0.7, 1];
cube.mesh.shiness = 1;
2.自分でテクスチャに描画する
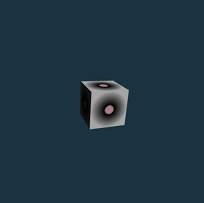
本題です。今度はテクスチャを宣言し、そこに何か描きこむ方法です。
自前で画像を用意しないせずに、canvasに描画するときと同じ方法でテクスチャを作成できます。
ファイルを用意しない事例としては、例えば読み込み速度の改善や、ファイルサイズの削減に効果的です。
var scene = new Scene3D(); // 基本となるシーンを定義
scene.backgroundColor = [0.1, 0.2, 0.25, 1]; // シーンの背景色を設定
var cube = new enchant.gl.primitive.Cube(1); // サイズ1の立方体を生成
var sf = new Surface(100, 100); // 100x100の解像度を持つテクスチャを作る
var ctx = sf.context; // getContext('2d')と同じオブジェクトが返る
var grad  = ctx.createRadialGradient(50,50,10,50,50,50);
grad.addColorStop(0,'pink');
grad.addColorStop(0.1,'black');
grad.addColorStop(1,'white');
ctx.fillStyle = grad;
ctx.rect(0,0, 100,100); // 矩形を描画
ctx.fill();
sf._element.src = Math.random(); //おまじないプロパティ(特に複数のSurfaceを扱うとき)
cube.mesh.texture.src = sf;
cube.rotationApply(new Quat(1, 1, 0, Math.PI/180 * 30)); // [1,1,0]のベクトルを軸に30度回転する
scene.addChild(cube);
Surfaceクラスはcanvasのラッパーなので、ctxを宣言した後は、HTML5のcanvas要素と同じように扱うことができます。
最後にcube.mesh.texture.src = sfとして代入することを忘れずに。
3.自分でテクスチャを更新する
何かのイベントを拾ったときにテクスチャを変えられたら、ゲームの演出になりますね。
衝突判定や時間経過で変化を出したい、そういう場合のやり方です。
ここでは、事前に複数のテクスチャを用意しておき、条件に応じて切り替える例を紹介します。
var texture0 = new Texture();
texture0.src = stoneImage;

var texture1 = new Texture();
texture1.src = blueStoneImage;

var texture2 = new Texture();
texture2.src = greenStoneImage;

var frag = 0;
cube.addEventListener('enterframe', function(){
        frag = Math.round( Math.random() *3) %3;
        if(frag === 2){
            this.mesh.texture = texture0;
        }else if(frag === 1){
            this.mesh.texture = texture1;
        }else if(frag === 0){
            this.mesh.texture = texture2;
        }else{
            this.mesh.texture = texture0;
        }
})
乱数で3通りの状態を作って、それぞれに応じてテクスチャを張り替えています。
これは既に画面に表示中のオブジェクトにも有効です。
4.テクスチャをアニメーションさせる
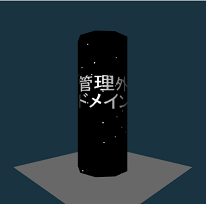
テクスチャ上でアニメーションを実行したいときがあるかもしれません。
そういう時には、(手前みそですが)enchant.js拡張のSceneTexture.gl.enchant.jsが利用できます。
ソースコードは一部省略しますが(リンク先で全部読めます)、2Dゲームのロジックを組む感覚で、動的なテクスチャが定義できます。
var set2d = function(){
    var core = enchant.Core.instance;
    cvl = new SceneTexture();
    var bg = new Sprite(512,512);
    var image = new Surface(512,512);
    image.context.fillStyle = "black";
    image.context.fillRect(0, 0, 512, 512);
    bg.image = image;
    cvl.addChild(bg);
    var t = new Label("");
    t.x = 0;
    t.y = 150;
    t.font = "64px sans bold";
    t.color = "white";
    t.text = "管理外<br>ドメイン";
    t.scaleX = -1;
    t.addEventListener('enterframe', function(){
        this.x -= 8;
        if(this.x < 0){
            this.x = 512;
        }
    });
    cvl.addChild(t);
    cvl.addEventListener('enterframe', function(){
            var s = new Sprite(4,4);
            var img = new Surface(4,4);
            img.context.fillStyle = "white";
            img.context.fillRect(0, 0, 4, 4);
            s.image = img;
            s.x = Math.random()*512;
            s.y = 0;
            this.addChild(s);
            s.addEventListener('enterframe', function(){
                this.y += 10;
                if(this.y > 512){
                    this.remove();
                }
    });
}
終わりに
以上です。
次は@gyohkさんですね。


