はじめに
この記事は ウェブクルー Advent Calendar 2018の15日目の記事です。
昨日は @kouchanne さんの「Vue.jsとFlaskのDocker環境を構築してみた」でした。
概要
先月に正式版がリリースされた Ktor を使って、簡単な Web API を作ってみます。
Ktor は Kotlin 製 Web Framework で、API が扱いやすい(らしい)点と、coroutine による非同期処理が売り文句になっています。また、機能の多くはプラグイン形式で提供され、フレームワーク本体は軽量に作られています。
1. セットアップ
公式の QuickStart を参考に進めていきます。
1-1. プロジェクト作成と Hello Wolrd
Ktor Project Generator でプロジェクトのスケルトンを生成できます。
とりあえず、デフォルト構成で進めます。
Build ボタンを押すと、Gradle プロジェクトとしてソース一式がダウンロードできます。
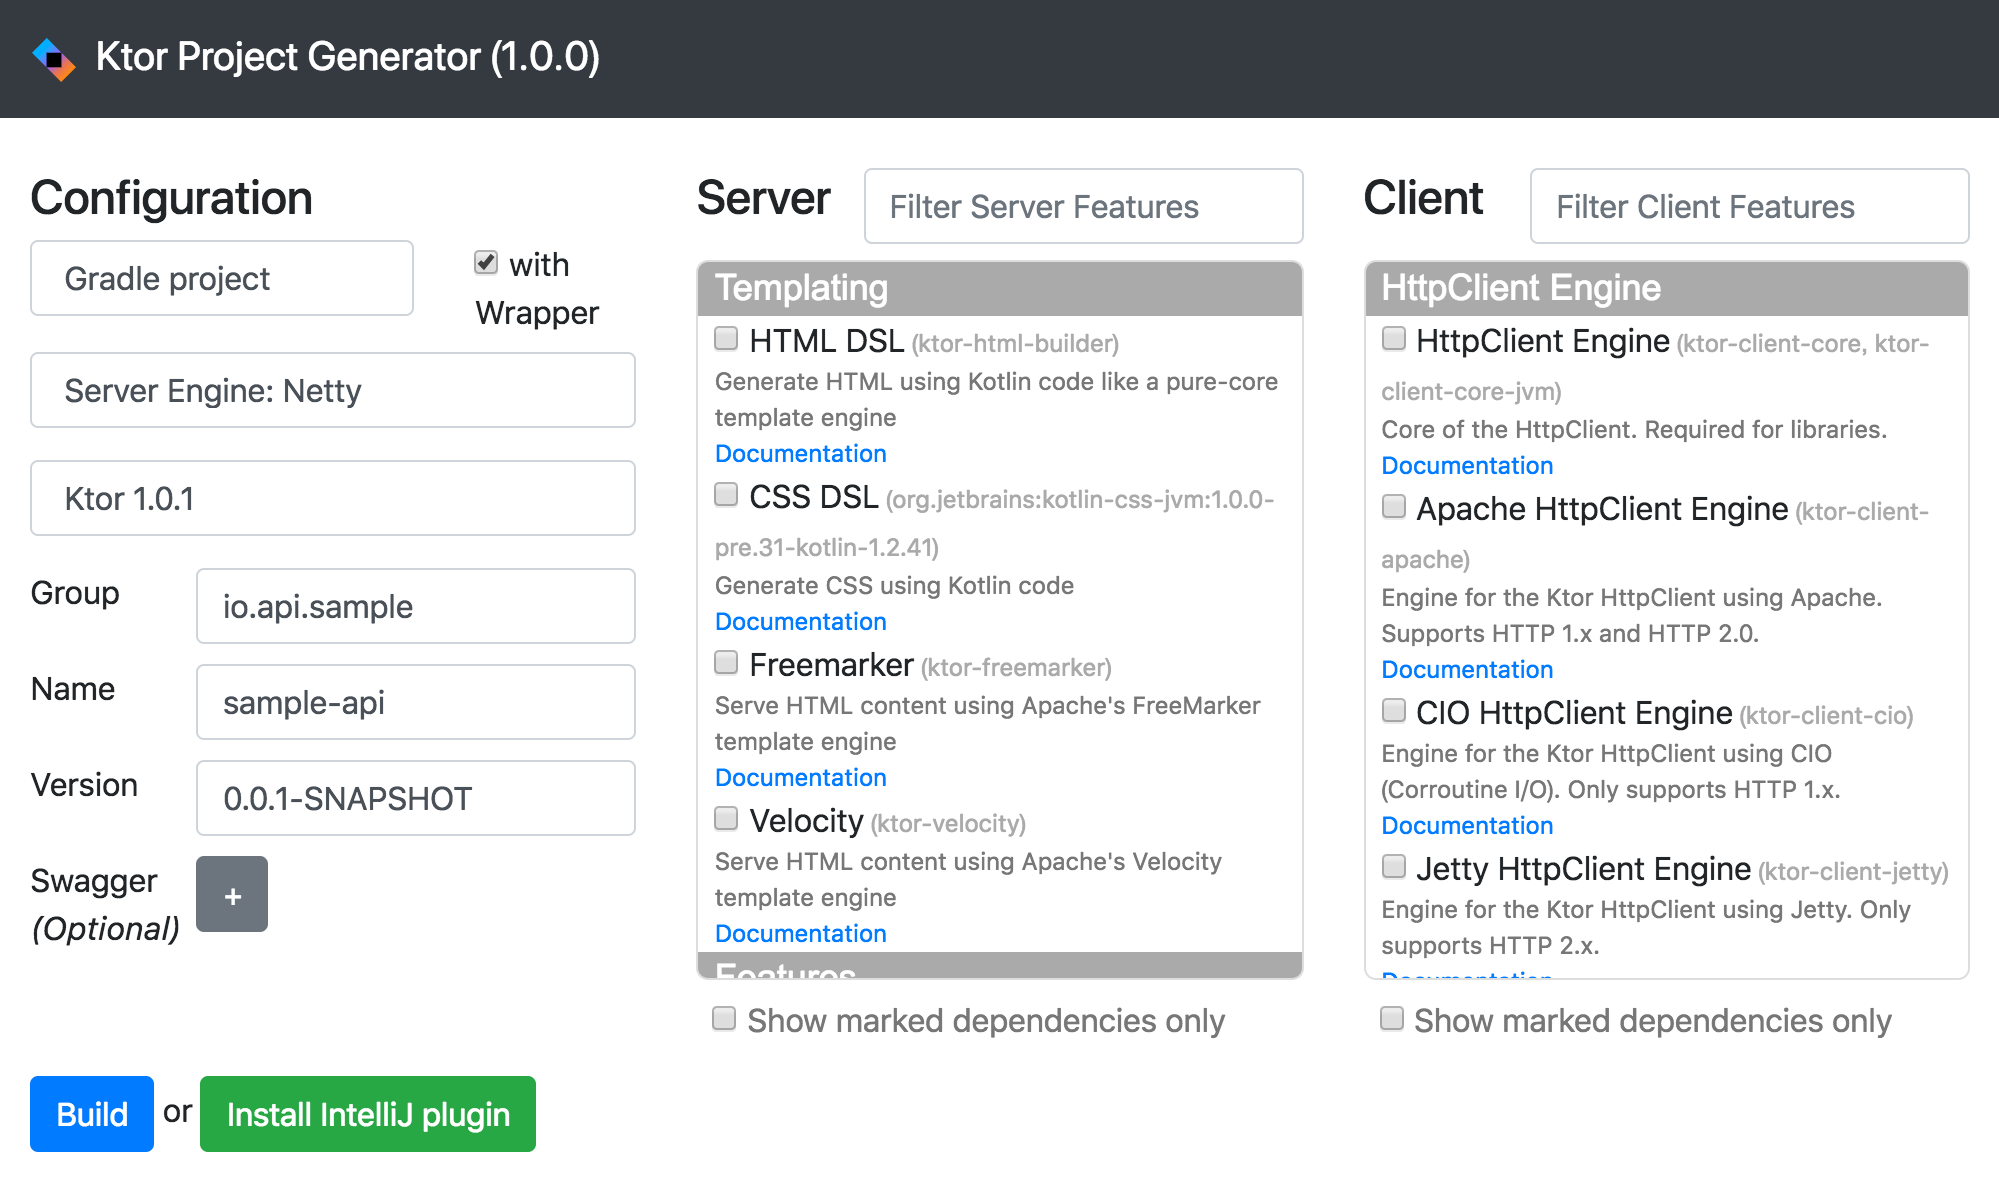
build.gradle は以下の内容で生成されました。
buildscript {
    repositories {
        jcenter()
    }

    dependencies {
        classpath "org.jetbrains.kotlin:kotlin-gradle-plugin:$kotlin_version"
    }
}

apply plugin: 'kotlin'
apply plugin: 'application'

group 'sample-api'
version '0.0.1-SNAPSHOT'
mainClassName = "io.ktor.server.netty.EngineMain"

sourceSets {
    main.kotlin.srcDirs = main.java.srcDirs = ['src']
    test.kotlin.srcDirs = test.java.srcDirs = ['test']
    main.resources.srcDirs = ['resources']
    test.resources.srcDirs = ['testresources']
}

repositories {
    mavenLocal()
    jcenter()
}

dependencies {
    compile "org.jetbrains.kotlin:kotlin-stdlib-jdk8:$kotlin_version"
    compile "io.ktor:ktor-server-netty:$ktor_version"
    compile "ch.qos.logback:logback-classic:$logback_version"
    testCompile "io.ktor:ktor-server-tests:$ktor_version"
}
logback_version=1.2.1
ktor_version=1.0.1
kotlin.code.style=official
kotlin_version=1.3.10
続いて、 /sample-api/src/Application.kt を実装します。
package io.api.sample

import io.ktor.application.Application
import io.ktor.application.call
import io.ktor.http.ContentType
import io.ktor.response.respondText
import io.ktor.routing.get
import io.ktor.routing.routing

fun main(args: Array<String>): Unit = io.ktor.server.netty.EngineMain.main(args)

fun Application.module() {
    routing {
        get("/") {
            call.respondText("Hello World!", ContentType.Text.Plain)
        }
    }
}
Hello, world までなら、これだけで完成です。
早速、動作確認してみましょう。
Gradle からビルド&起動します。
スケルトン自体に main メソッドが実装されており、IDE 等で main メソッドを実行する事でも起動できます。
./gradlew build run
...
yyyy-mm-dd xx:xx:xx.xxx [main] INFO  Application - Responding at http://0.0.0.0:8080
起動ログにある通り、 http://0.0.0.0:8080 にアクセスするとレスポンスが得られます。
Hello World!
1-2. Auto Reload の有効化
Auto Reload とは、class ファイルが更新された際、サーバーを再起動させずに変更内容を反映させる機能です。
Spring Boot で言うところの Automatic Restart です。
注意点として、現時点では Java 9 以降では機能しません。
application.conf の ktor.deployment.watch に、監視対象とする classpath を設定します。
プロジェクト名を設定すれば必然的に全てを監視対象とする事ができます。
ktor {
    deployment {
        port = 8080
        port = ${?PORT}
        watch = [ sample-api ] // 追加
    }
    application {
        modules = [ io.api.sample.ApplicationKt.module ]
    }
}
Auto Reload が設定されたら、起動ログに以下のようなメッセージが出力されます。
# Auto Reload が有効になっている場合
yyyy-mm-dd xx:xx:xx.xxx [main] DEBUG Application - Watching /xxxx/sample-api/build/classes/kotlin/main/io for changes.
yyyy-mm-dd xx:xx:xx.xxx [main] DEBUG Application - Watching /xxxx/sample-api/build/resources/main for changes.
yyyy-mm-dd xx:xx:xx.xxx [main] DEBUG Application - Watching /xxxx/sample-api/build/classes/kotlin/main/META-INF for changes.
yyyy-mm-dd xx:xx:xx.xxx [main] DEBUG Application - Watching /xxxx/sample-api/build/classes/kotlin/main/io/api for changes.
yyyy-mm-dd xx:xx:xx.xxx [main] DEBUG Application - Watching /xxxx/sample-api/build/classes/kotlin/main for changes.
yyyy-mm-dd xx:xx:xx.xxx [main] DEBUG Application - Watching /xxxx/sample-api/build/classes/kotlin/main/io/api/sample for changes.

# Auto Reload する対象が見つからなかった場合
yyyy-mm-dd xx:xx:xx.xxx [main] DEBUG Application - No ktor.deployment.watch patterns specified, automatic reload is not active
この Auto Reload 機能は、監視対象が更新された場合に自動反映するものです。
ビルドまで自動的に行う訳ではありませんので、./graldew run とは別に ./gradlew -t build して監視ビルドするようにする等、ビルドも並行して行うようにしてください。
2. Web API を作ってみる
ある程度、下ごしらえ(?)も出来たので、アプリケーションを実装してみます。
日本語版の WikiPedia を検索し、該当した記事の諸外国版の記事URL一覧を取得する API を作ってみます。
まるで需要が感じられない。
2-1. JSONフォーマットでのレスポンス
まずは JSON フォーマットでレスポンスするようにしてみます。
Ktor では様々な拡張機能を Feature という形で提供しており、JSON フォーマットのサポート も存在しますので、これを利用します。
必要なライブラリを build.gradle の dependencies に追加します。
JSON パーサーは Gson, Jackson, Kotlinx の Serialization をサポートしていますが、今回は Gson を選択します。
dependencies {
    ...
    compile "io.ktor:ktor-gson:$ktor_version" // 追加
}
適当な data class を用意し、それを返却するようにします。
module 内で install(...) する事で、先程追加した JSON サポートの Feature を利用する事ができます。
data class Message(val content: String)

fun Application.module() {
    install(ContentNegotiation) {
        gson()
    }
    routing {
        get("/") {
            call.respond(Message("Hello World!"))
        }
    }
}
以下のように、JSON 形式でレスポンスが得られます。
{"content":"Hello World!"}
2-2. クエリパラメータを型安全に受け取る
URLパス上のパラメータを受け取れるようにします。
Feature として用意されている Type-safe Routing を利用すると、リクエストパラメータやクエリパラメータを型安全に受け取る事ができます。
※現時点では Experimental Feature となっており、実験段階の機能です。
dependencies {
    ...
    compile "io.ktor:ktor-locations:$ktor_version" // 追加
}
data class Message(val content: String)

@KtorExperimentalLocationsAPI
@Location("/{name}")
data class Index(val name: String)

@KtorExperimentalLocationsAPI
fun Application.module() {
    install(Locations)
    install(ContentNegotiation) {
        gson()
    }
    routing {
        get<Index>{ p ->
            call.respond(Message("Hello, ${p.name}"))
        }
    }
}
これで、 http://0.0.0.0:8080/taro にアクセスすると...
{"content":"Hello, taro"}
というレスポンスが得られます。
2-3. 外部サービスに HTTP リクエストをする
HttpClient を利用して、外部サービスに HTTP リクエストをします。
利用できる Http クライアントとしては Apache, Jetty, OkHttp 等々ありますが、今回は Apache を選択します。
dependencies {
    ...
    compile "io.ktor:ktor-client-apache:$ktor_version" // 追加
}
リクエスト処理を非同期にしてみます。(内容がしょぼいので、特に意味は無いのですが・・・)
実装方法は Kotlin の Coroutine を利用したものになります。
@KtorExperimentalLocationsAPI
@Location("/")
data class Index(val url: String)

@KtorExperimentalLocationsAPI
fun Application.module() {
    install(Locations)
    install(ContentNegotiation) {
        gson()
    }
    routing {
        get<Index> { p ->
            val start = System.currentTimeMillis();
            log.info("start")

            // async {...} 内が非同期処理
            val content = async {
                HttpClient(Apache).use { client ->
                    log.info("client request start: time ${System.currentTimeMillis() - start}ms")
                    val content = client.call(p.url).response.readText()
                    log.info("client request end: time ${System.currentTimeMillis() - start}ms")
                    content
                }
            }

            log.info("client processed: time ${System.currentTimeMillis() - start}ms")

            // await で非同期処理の完了を待ち、結果を取得できる
            call.respondText(content.await(), ContentType.Text.Plain)
        }
    }
}
以下の形でアクセスすると、 url に渡した URL へのリクエストが行われます。
http://0.0.0.0:8080/?url=https://www.google.co.jp/
ログからも、リクエスト処理が非同期になっている事が伺えます。
yyyy-mm-dd xx:xx:xx.xxx [nettyCallPool-4-1] INFO  Application - start
yyyy-mm-dd xx:xx:xx.xxx [nettyCallPool-4-1] INFO  Application - client request start: time 5ms
yyyy-mm-dd xx:xx:xx.xxx [nettyCallPool-4-1] INFO  Application - client processed: time 11ms
yyyy-mm-dd xx:xx:xx.xxx [nettyCallPool-4-1] INFO  Application - client request end: time 225ms
2-4. API を作成する
ここまでの内容を元に、WikiPedia にリクエストを投げ、取得した内容を JSON でレスポンスする処理を実装してみます。
@Location("/{page}/{lang?}")
data class Index(val page: String, val lang: String = "")

data class WikiPedia(val parse: Parse?)
data class Parse(val title: String, val langlinks: List<Langlink>)
data class Langlink(val lang: String, val url: String)

fun Application.module() {
    install(Locations)
    install(ContentNegotiation) {
        gson()
    }
    routing {
        get<Index> { p ->
            val uri = "https://ja.wikipedia.org/w/api.php?action=parse&format=json&page=${p.page}&prop=langlinks"
            val content = async {
                HttpClient(Apache).use { client ->
                    client.call(uri).response.readText()
                }
            }
            val parse = Gson().fromJson(content.await(), WikiPedia::class.java).parse ?: Parse("", emptyList())
            val langlinks = when (p.lang.isEmpty()) {
                true  -> parse.langlinks
                false -> parse.langlinks.filter { it.lang == p.lang }
            }
            call.respond(parse.copy(langlinks = langlinks))
        }
    }
}
例えば http://0.0.0.0:8080/kotlin/en とリクエストすると、以下のようにレスポンスが得られます。
{"title":"Kotlin","langlinks":[{"lang":"en","url":"https://en.wikipedia.org/wiki/Kotlin_(programming_language)"}]}
http://0.0.0.0:8080/朝食/ で世界各国の「朝食」に関する記事が・・・
{
  "title": "朝食",
  "langlinks": [
      {
        "lang": "af",
        "url": "https://af.wikipedia.org/wiki/Ontbyt"
      },
      {
        "lang": "ang",
        "url": "https://ang.wikipedia.org/wiki/Morgenmete"
      },
...
3. パッキング
Fat jar へのパッキングは、Gradle Shadow Plugin を利用します。
buildscript {
    repositories {
        jcenter()
    }

    dependencies {
        classpath "org.jetbrains.kotlin:kotlin-gradle-plugin:$kotlin_version"
        classpath 'com.github.jengelman.gradle.plugins:shadow:4.0.2' // 追加する
    }
}

apply plugin: 'kotlin'
apply plugin: 'application'
apply plugin: 'com.github.johnrengelman.shadow' // 追加する
...
この状態で ./gradlew build すれば、 /build/libs/ 配下に jar が生成されています。
Fat jar なので、 java -jar でそのまま実行できます。
java -jar ./build/libs/sample-api-0.0.1-SNAPSHOT-all.jar
4. まとめ
入門部分は公式ドキュメントでも過不足なく解説されており、あまりハマる事なく実装できました。
Kotlin での Web 開発には Spring や Spring Boot が使われる事が多いと思いますが、Kotlin の開発元と同じ Jetbrains が開発しているので、今後の成長に期待です!
なお、今回実装したものは下記にありますので、全体像はこちらをご覧ください。
https://github.com/kalzit/sample-api/
明日の記事は @maiunderwood さんです。よろしくお願いいたします。
ウェブクルーでは一緒に働いていただける方を随時募集しております。
お気軽にエントリーくださいませ。