はじめに
以前に書いたWebStormでElectronを始める手順を元に、自分で設定してみたところ、
バージョンの違いで、実行できなくなってしまったので、
今回はアプリを作るまでを説明します。
目次
- 環境
- WebStormでの準備
- electronパッケージの追加
- index.htmlとmain.js
- Electronの実行と確認
- 作ったElectronをアプリにする
- electron-packagerパッケージの追加
- アプリとして書き出す
1. 環境
- Windows10 Pro
- Node.js : v12.16.1
- WebStorm : 2019.3.3
- NPM : 6.13.4
2. WebStormでの準備
WebStormを起動して、新しいプロジェクトを作成します。
File > New > Project...を選択。
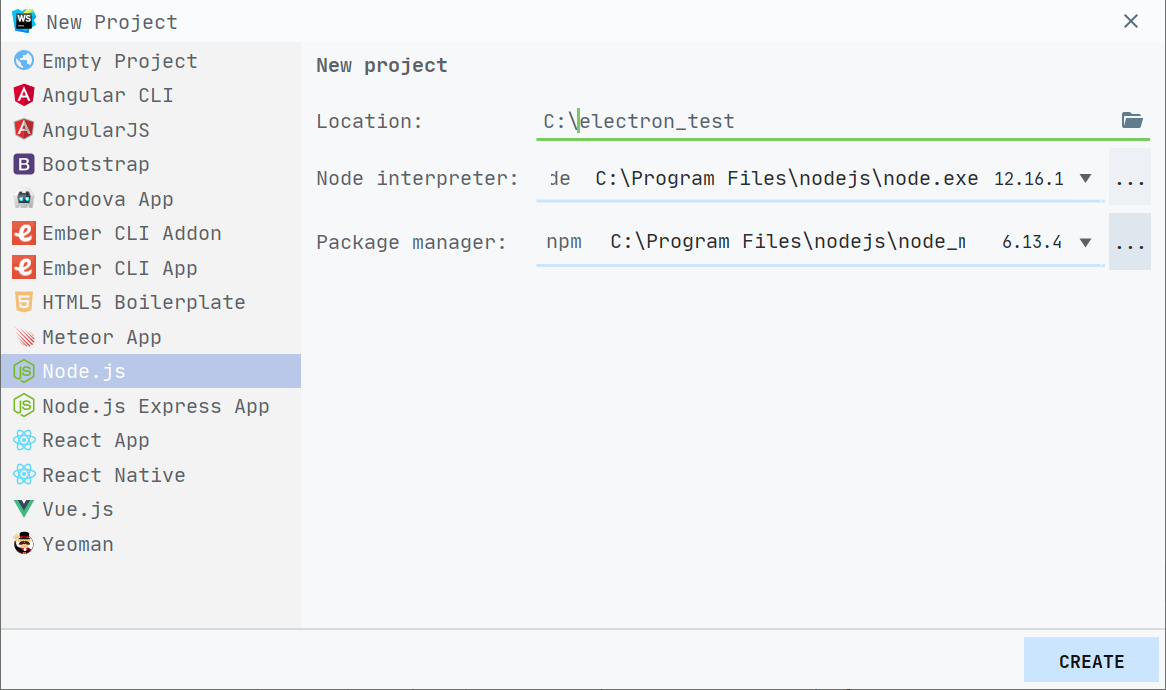
Node.jsを選び、Locationに、プロジェクトを作る場所を選択します。
3. electronパッケージの追加
プロジェクトを作ったら、electronパッケージを追加します。
File > Settings...を選択。
開いたウィンドウのLanguage & Frameworks内のNode.js and NPMを選択。

ウィンドウの右側真ん中あたりの+を選択。
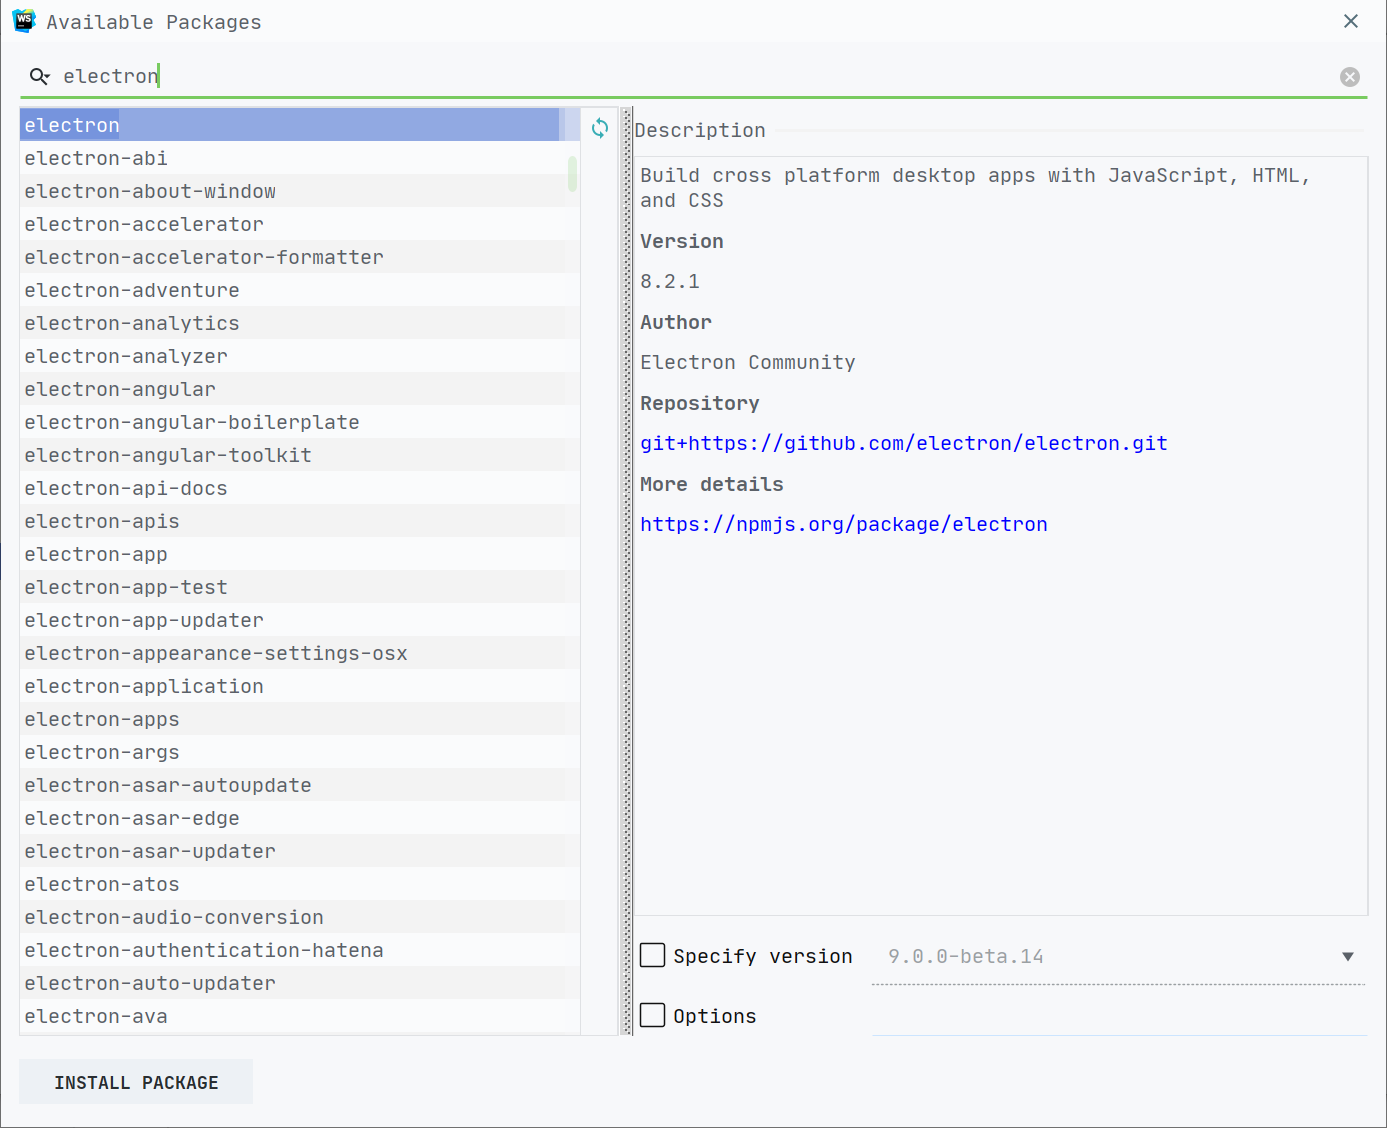 検索バーに`electron`と入力して、一覧から`electron`を選択。
`INSTALL PACKAGE`を押すと、パッケージのインストールが始まります。
緑のバーにsuccess見たいなのが出たらインストール完了です。
***
検索バーに`electron`と入力して、一覧から`electron`を選択。
`INSTALL PACKAGE`を押すと、パッケージのインストールが始まります。
緑のバーにsuccess見たいなのが出たらインストール完了です。
***
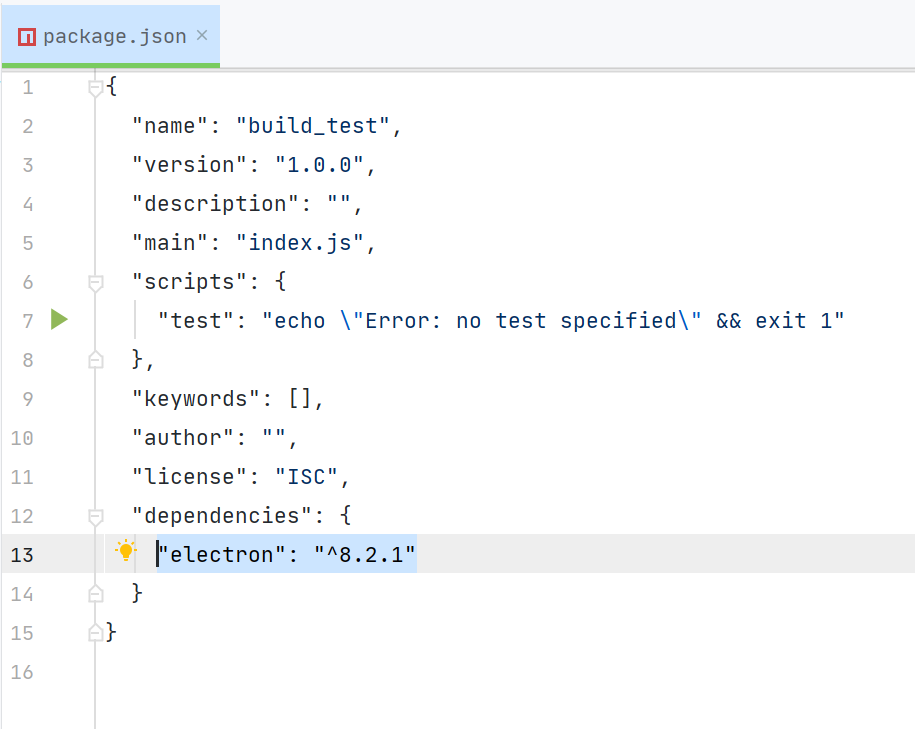 ウィンドウを閉じて、`package.json`を開くと、`dependencies`に`electron`が追加されていればオッケーです。
4. index.htmlとmain.jsの追加
package.jsonと同じ場所にindex.htmlとmain.jsを作ります。
それぞれの記述内容は以下になります。
コードは Writing Your First Electron App から引用
<!DOCTYPE html>
<html>
  <head>
    <meta charset="UTF-8">
    <title>Hello World!</title>
    <!-- https://electronjs.org/docs/tutorial/security#csp-meta-tag -->
    <meta http-equiv="Content-Security-Policy" content="script-src 'self' 'unsafe-inline';" />
  </head>
  <body>
    <h1>Hello World!</h1>
    We are using node <script>document.write(process.versions.node)</script>,
    Chrome <script>document.write(process.versions.chrome)</script>,
    and Electron <script>document.write(process.versions.electron)</script>.
  </body>
</html>
const { app, BrowserWindow } = require('electron')

function createWindow () {
  // Create the browser window.
  const win = new BrowserWindow({
    width: 800,
    height: 600,
    webPreferences: {
      nodeIntegration: true
    }
  })

  // and load the index.html of the app.
  win.loadFile('index.html')

  // Open the DevTools.
  win.webContents.openDevTools()
}

// This method will be called when Electron has finished
// initialization and is ready to create browser windows.
// Some APIs can only be used after this event occurs.
app.whenReady().then(createWindow)

// Quit when all windows are closed.
app.on('window-all-closed', () => {
  // On macOS it is common for applications and their menu bar
  // to stay active until the user quits explicitly with Cmd + Q
  if (process.platform !== 'darwin') {
    app.quit()
  }
})

app.on('activate', () => {
  // On macOS it's common to re-create a window in the app when the
  // dock icon is clicked and there are no other windows open.
  if (BrowserWindow.getAllWindows().length === 0) {
    createWindow()
  }
})

// In this file you can include the rest of your app's specific main process
// code. You can also put them in separate files and require them here.
package.jsonを開き、mainの内容を変更します。
"main":"main.js"
5. Electronの実行と確認
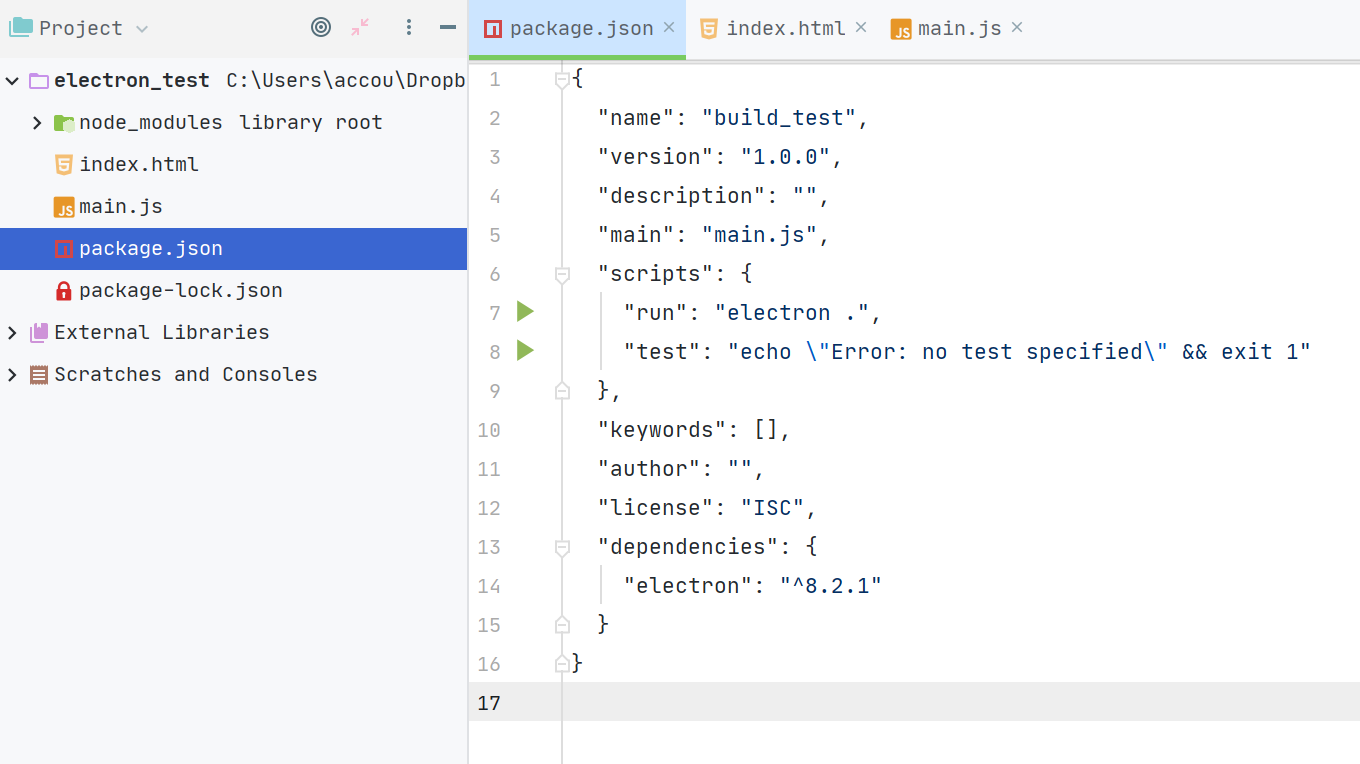 Electronで実行をするために、`package.json`の`scripts`の項目に、以下のコマンドを追記します。
"run":"electron ."
"run"の文字は"start"や、"debug"のような、好きな文字で大丈夫です。
追記すると、行の左側に、再生ボタンみたいなのが出ますので、それを選択。
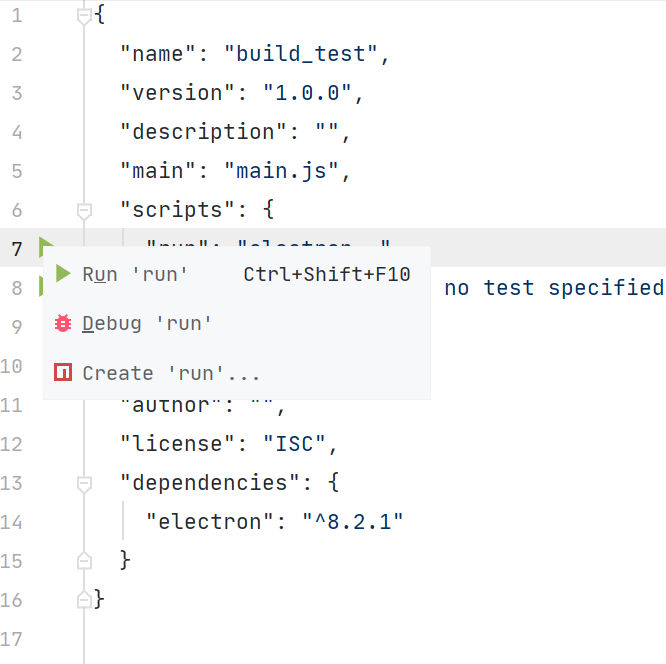
プルダウンから、RunかDebugを選択すると、Electronが起動し、
index.htmlの内容が表示されます。(何故か背景は黒くて文字が見にくいですが)
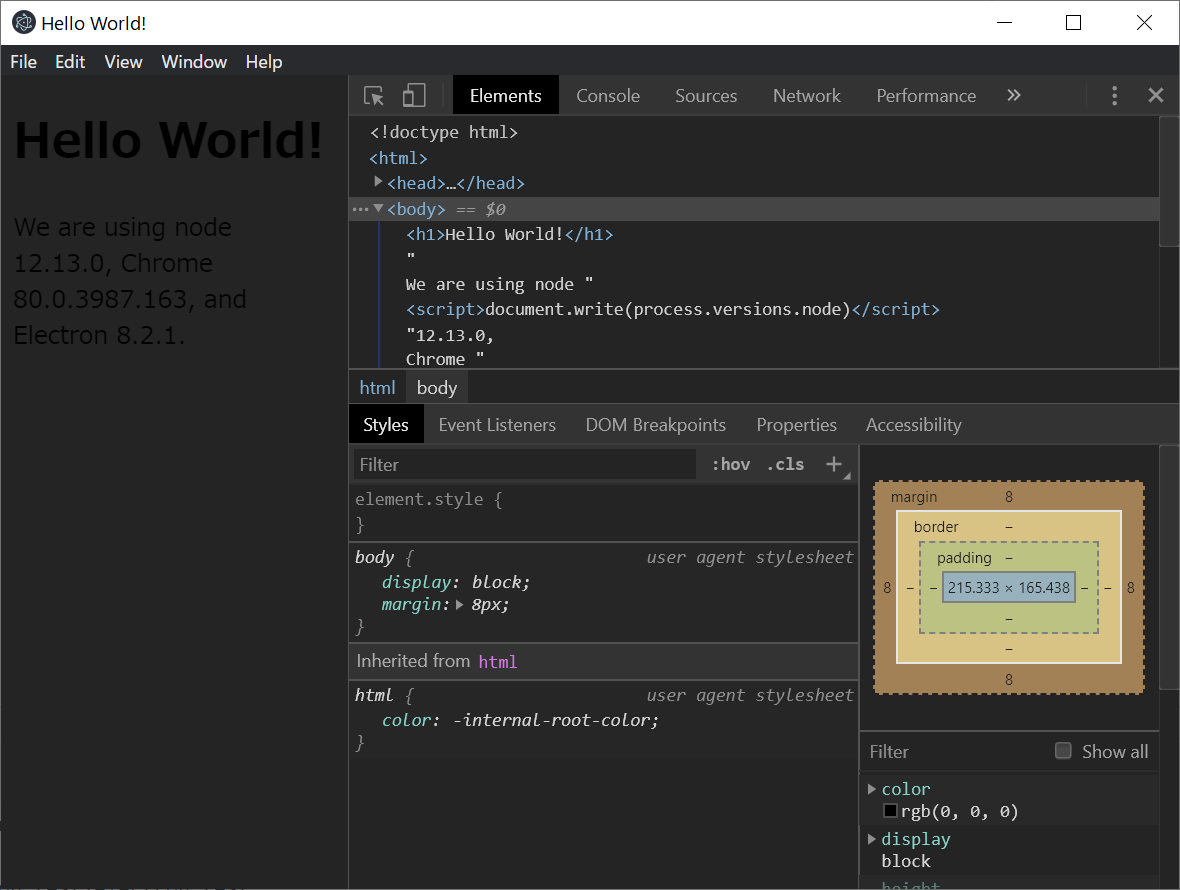
画面の設定などはmain.jsで行えます。
main.jsではサイズやフルスクリーン、開発画面の非表示などの変更ができます。
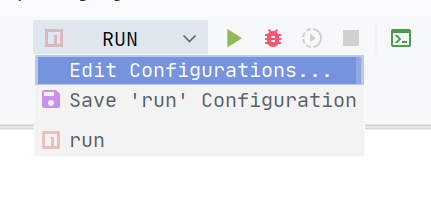
一度、実行を行うと、右上にショートカットが選べるようになりますので、
次回からは、package.jsonの画面を開かなくても、ここから実行できるようになります。
6. 作ったElectronをアプリにする
WebStormからの実行が確認されたので、最終的にアプリにするために、
electron-packagerパッケージを追加します。
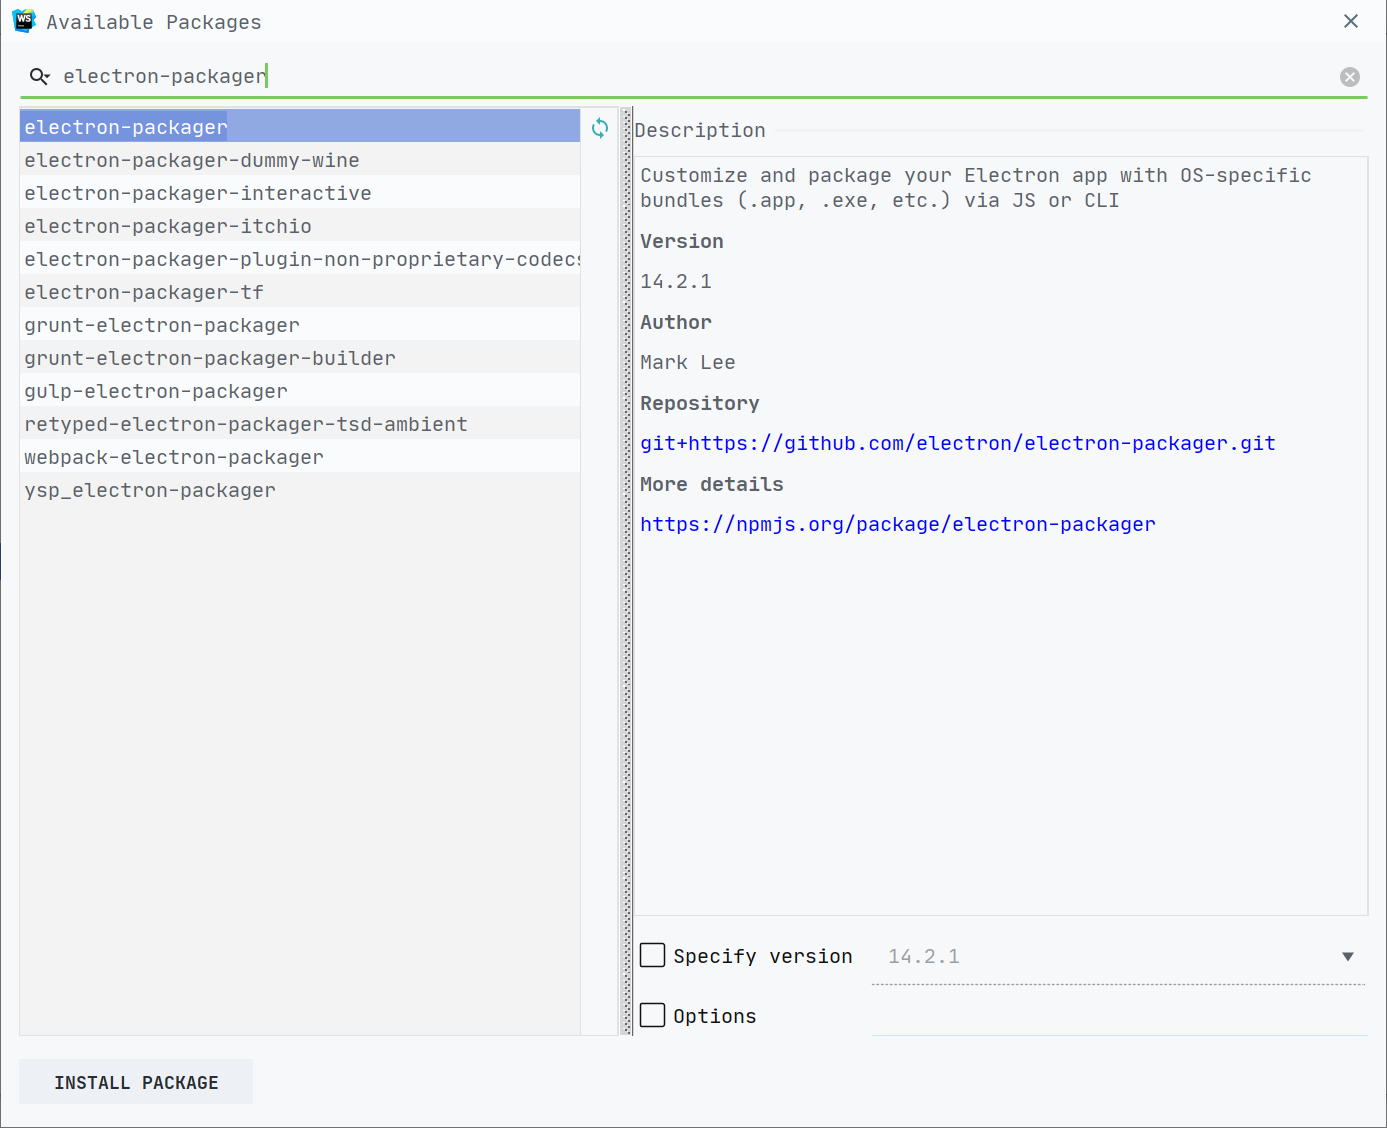
7. electron-packagerパッケージの追加
electronパッケージと同様に、Node.js and NPMから+を選択して、
electron-packagerをインストールします。
8. アプリとして書き出す
package.jsonを開き、``にelectron-packagerが追加されているのを確認します。

アプリにするためのコマンドをscriptsに追記します。
"build":"electron-packager . electron-helloworld --platform=win32 --arch=x64 --electron-version=8.2.1 --overwrite"
このbuildという名前も任意に変えることができます。
electron-packagerのパラメータとパラメータオプションは以下になります(一部)
| パラメータ | 値 | 説明 |
|---|---|---|
| sourcedir | . | アプリ化したいディレクトリの場所 |
| appname | electron-helloworld | アプリケーション名 |
| オプション | 値 | 説明 |
|---|---|---|
| --platform | win32 | プラットフォームの選択(all/darwin/linux/mac/win32) |
| --arch | x64 | 32bitや64bitなどのアーキテクチャの指定(all/ia32/x64/armv7l/arm64/mips64el) |
| --electron-version | 8.2.1 | Electronのパッケージのバージョン。package.jsonを参照 |
| --overwrite | 同じディレクトリがあったら上書き |
上記の以外にもアイコンを指定したり、保存先を指定したりといったオプションがありますので、
詳しくはelectron-packagerのgithubをご確認ください。