はじめに
RecyclerView で ViewBinding と ListAdapter を組み合わせて使う方法について調べたのでまとめます。
表示するデータを宣言する
はじめに User という firstName と lastName, age を持つデータクラスを定義します
今回はこの User に定義したデータを RecyclerView で表示できるようにします。
data class User(val firstName: String, val lastName: String, val age: Int) {
    val id = UUID.randomUUID().toString()
}
表示する View を宣言する
RecyclerView に表示する View を宣言する前に buildFeatures で viewBinding を true にしておきます。これで viewBinding が有効になり viewBinding を使った View の生成ができるようになります。
android {
    ︙省略
    buildFeatures {
        viewBinding true
    }
    ︙省略
}
今回は View を layout_user_item.xml というファイルに定義しておきます。
以下の通り View として firstName や lastName, age を表示できるようにしておきます。
<?xml version="1.0" encoding="utf-8"?>
<androidx.constraintlayout.widget.ConstraintLayout xmlns:android="http://schemas.android.com/apk/res/android"
    xmlns:app="http://schemas.android.com/apk/res-auto"
    xmlns:tools="http://schemas.android.com/tools"
    android:layout_width="match_parent"
    android:layout_height="wrap_content"
    android:layout_margin="8dp"
    android:background="#eeeeee"
    android:padding="8dp">

    <TextView
        android:id="@+id/age_text_view"
        android:layout_width="wrap_content"
        android:layout_height="wrap_content"
        android:textSize="64sp"
        app:layout_constraintBottom_toBottomOf="parent"
        app:layout_constraintEnd_toEndOf="parent"
        app:layout_constraintStart_toEndOf="@id/first_name_text_view"
        app:layout_constraintTop_toTopOf="parent"
        tools:text="100" />

    <TextView
        android:id="@+id/first_name_text_view"
        android:layout_width="0dp"
        android:layout_height="wrap_content"
        android:textSize="32sp"
        app:layout_constraintBottom_toTopOf="@id/last_name_text_view"
        app:layout_constraintEnd_toStartOf="@id/age_text_view"
        app:layout_constraintStart_toStartOf="parent"
        app:layout_constraintTop_toTopOf="parent"
        tools:text="FIRST NAME" />

    <TextView
        android:id="@+id/last_name_text_view"
        android:layout_width="0dp"
        android:layout_height="wrap_content"
        android:textSize="32sp"
        app:layout_constraintBottom_toBottomOf="parent"
        app:layout_constraintEnd_toStartOf="@id/age_text_view"
        app:layout_constraintStart_toStartOf="parent"
        app:layout_constraintTop_toBottomOf="@id/first_name_text_view"
        tools:text="LAST NAME" />
</androidx.constraintlayout.widget.ConstraintLayout>
表示を制御するアダプターを作成する
次に RecyclerView の表示を制御する RecyclerView.Adapter を作成します。以前は RecyclerView.Adapter を一から実装する必要がありかなり大変だったのですが今は ListAdapter という RecyclerViewAdapter の実装を楽にしてくれるクラスが公式から提供されています。
List Adapter には以下の特徴がありメリットがあるアダプターですが次のように実装します。
- RecyclerView.Adapter は RecyclerView でデータを表示を制御するために必要なクラス
- ReccylerView.Adapter をより簡単に実装できるようにしたものが ListAdater というクラス
- また ListAdapter では差分更新の仕組みがサポートされていて、簡単に差分更新が実装できるようになっている。
/**
 * ListAdapter<A: Object, B: RecyclerView.ViewHolder>(C: DiffUtils.ItemCallback<A>) を継承する
 * 今回は User を表示するので、User を表示するための View を保持した ViewHolder と User の差分を比較するための ItemCallback をセットしてやります。
 *
 * - A:Object には表示するデータを保持するクラスをセットする
 * - B:RecyclerView.ViewHolder には表示する View を保持する ViewHolder をセットする
 * - C:DiffUtils.ItemCallback<A> には A:Object の差分確認方法を実装した ItemCallback をセットする
 */
class UserListAdapter : ListAdapter<User, UserItemViewHolder>(DIFF_UTIL_ITEM_CALLBACK) {
    // ここで View を生成する、生成した View は ViewHolder に格納して、戻り値として返す
    override fun onCreateViewHolder(parent: ViewGroup, viewType: Int): UserItemViewHolder {
        val view = LayoutUserItemBinding.inflate(LayoutInflater.from(parent.context), parent, false)
        return UserItemViewHolder(view)
    }

    // その位置の User を取得し、ViewHolder を通じて View に User 情報をセットする
    override fun onBindViewHolder(holderUser: UserItemViewHolder, position: Int) {
        holderUser.bind(getItem(position))
    }
}

/**
 * 生成した View を保持する、 bind で User を View に反映させる
 */
class UserItemViewHolder(
    private val binding: LayoutUserItemBinding
) : RecyclerView.ViewHolder(binding.root) {
    fun bind(user: User) {
        binding.firstNameTextView.text = user.firstName
        binding.lastNameTextView.text = user.lastName
        binding.ageTextView.text = user.age.toString()
    }
}

/**
 * User の差分確認する
 */
val DIFF_UTIL_ITEM_CALLBACK = object : DiffUtil.ItemCallback<User>() {
    // 渡されたデータが同じ値であるか確認をする
    override fun areContentsTheSame(oldItem: User, newItem: User): Boolean {
        return oldItem == newItem
    }

    // 渡されたデータが同じ項目であるか確認する
    override fun areItemsTheSame(oldItem: User, newItem: User): Boolean {
        return oldItem.id == newItem.id
    }
}
RecyclerView にデータを表示する
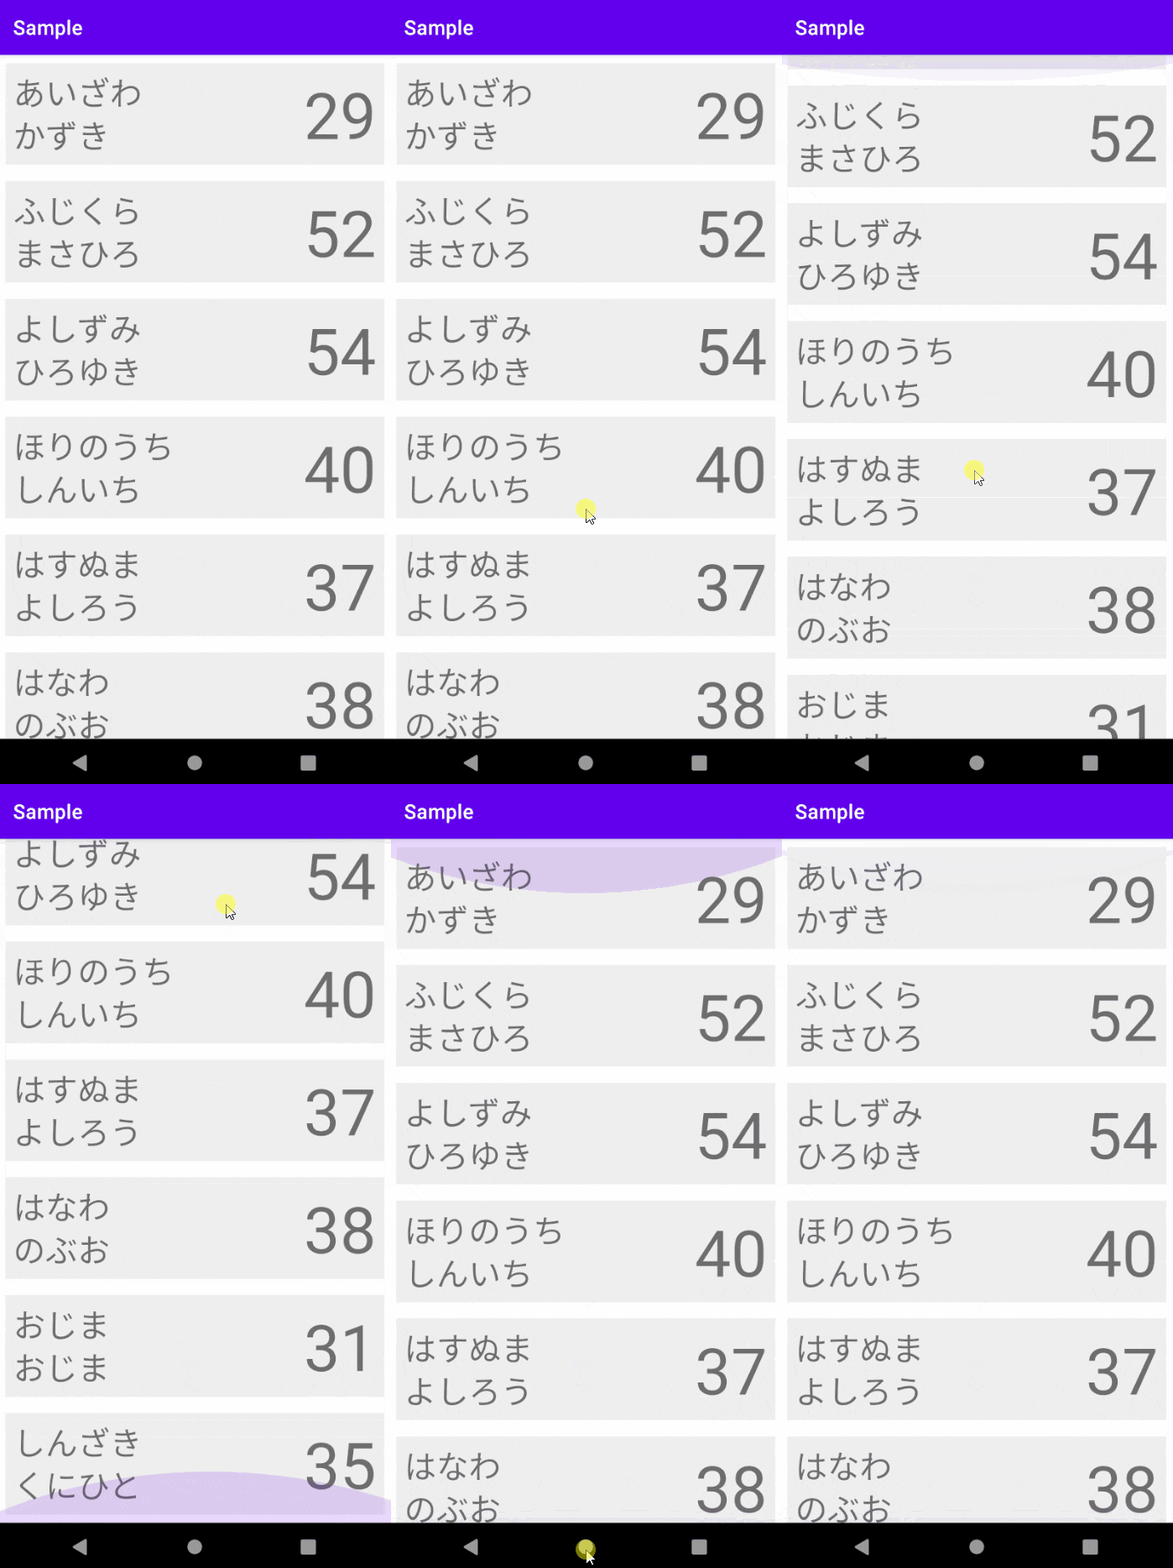
表示するデータ、表示する View、表示を制御するアダプターが完成したので、
あとは RecyclerView を定義して、作成した ListAdapter をセットすればOKです。
そして ListAdapter の submitList を呼び出せばセットしたデータが RecyclerView に表示されます。
class MainActivity : AppCompatActivity() {
    private lateinit var binding: ActivityMainBinding
    private val listAdapter = UserListAdapter()

    override fun onCreate(savedInstanceState: Bundle?) {
        super.onCreate(savedInstanceState)
        binding = ActivityMainBinding.inflate(layoutInflater)
        setContentView(binding.root)

        binding.recyclerView.adapter = listAdapter
        binding.recyclerView.layoutManager = LinearLayoutManager(applicationContext, RecyclerView.VERTICAL, false)
        listAdapter.submitList(
            listOf(
                User("あいざわ", "かずき", 29),
                User("ふじくら", "まさひろ", 52),
                User("よしずみ", "ひろゆき", 54),
                User("ほりのうち", "しんいち", 40),
                User("はすぬま", "よしろう", 37),
                User("はなわ", "のぶお", 38),
                User("おじま", "おじま", 31),
                User("しんざき", "くにひと", 35)
            )
        )
    }
}
<?xml version="1.0" encoding="utf-8"?>
<androidx.constraintlayout.widget.ConstraintLayout xmlns:android="http://schemas.android.com/apk/res/android"
    xmlns:app="http://schemas.android.com/apk/res-auto"
    xmlns:tools="http://schemas.android.com/tools"
    android:layout_width="match_parent"
    android:layout_height="match_parent"
    tools:context=".MainActivity">

    <androidx.recyclerview.widget.RecyclerView
        android:id="@+id/recycler_view"
        android:layout_width="match_parent"
        android:layout_height="match_parent"
        android:padding="8dp" />

</androidx.constraintlayout.widget.ConstraintLayout>
おわりに
以前は RecyclerView を実装したコードを記述するとなるとかなり大変なイメージでしたが、
ViewBinding と ListAdapter を組み合わせて使うことでかなりスマートな実装になりますね。
Android 公式ライブラリでここまでできるようになっているのは感動ですね。
現在の Android 開発では Epoxy や Groupie などのライブラリがよく使われると思いますが、
ListAdapter がここまで簡単に使えるとなるとこの類のライブラリを使うメリットは薄れてきますね。個人的には Epoxy に苦しめられることが多いので公式ライブラリだけで実装できる未来が来ることを願っています。

