はじめに
Shared Element Transition を利用すると Fragment 間で共有する View を指定することができ、次のように画面間でシームレスに View が移動したり拡大したりするようなアニメーションを実装できるらしい。Activity、Fragment どちらの画面遷移でも Shared Element Transition を利用できるらしいのだが、Single Activity で実装されることが最近は多いと思うので、Fragment を利用した画面遷移で Shared Element Transition を実装していこうかなと思います。
| Shared Element Transiton なし | Shared Element Transition あり |
|---|---|
 |
 |
準備
本記事では Navigation Component を利用して Fragment の画面遷移を実装します。次の手順に従って Navigation Component をセットアップすればとりあえず動かせます。詳細が知りたい方は公式ドキュメント、または次の記事を読んでみるとよいかもしれません。
- Get started with the Navigation component | Android Developers
- Navigation でシンプルな画面遷移を最速で実装する | Carefree Programmer
1. Navigation Component をインストールする
Navigation Component で必要な依存関係を build.gradle(app) に記述する。
dependencies {
    def nav_version = "2.2.2"
    implementation "androidx.navigation:navigation-fragment:$nav_version"
    implementation "androidx.navigation:navigation-ui:$nav_version"
    implementation "androidx.navigation:navigation-fragment-ktx:$nav_version"
    implementation "androidx.navigation:navigation-ui-ktx:$nav_version"
}
2. Navigation Graph を作成する
Navigation Component での画面遷移を定義する Navigation Graph を作成する。次の内容の main_graph_navigation.xml を res/navigation に作成すればよいです。
<?xml version="1.0" encoding="utf-8"?>
<navigation xmlns:android="http://schemas.android.com/apk/res/android"
    xmlns:app="http://schemas.android.com/apk/res-auto"
    xmlns:tools="http://schemas.android.com/tools"
    android:id="@+id/main_graph_navigation">
3. NavHostFragment を配置する
Navigation Compoennt での画面遷移をするときは、NavHostFragment が必要になります。なので MainActivity のレイアウトにに次の Fragment を追加します。そしてその Fragment にさっき作成した Navigation Graph を指定しておきます。
<?xml version="1.0" encoding="utf-8"?>
<androidx.constraintlayout.widget.ConstraintLayout xmlns:android="http://schemas.android.com/apk/res/android"
    xmlns:app="http://schemas.android.com/apk/res-auto"
    xmlns:tools="http://schemas.android.com/tools"
    android:layout_width="match_parent"
    android:layout_height="match_parent"
    tools:context=".MainActivity">

    <fragment
        android:id="@+id/nav_host_fragment"
        android:layout_width="match_parent"
        android:layout_height="match_parent"
        android:name="androidx.navigation.fragment.NavHostFragment"
        app:defaultNavHost="true"
        app:navGraph="@navigation/main_graph_navigation" />

</androidx.constraintlayout.widget.ConstraintLayout>
4. Framgent を作成する
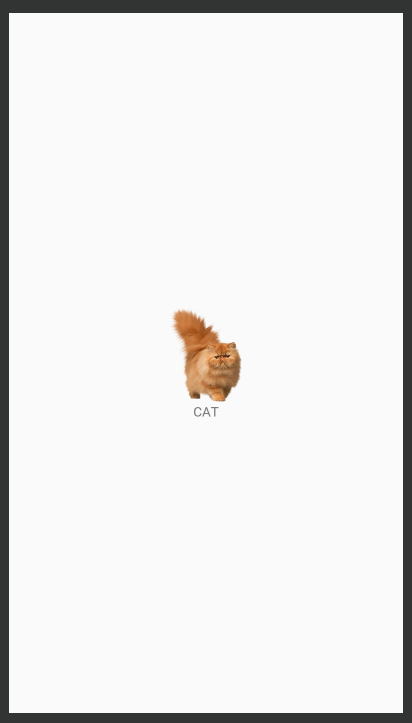
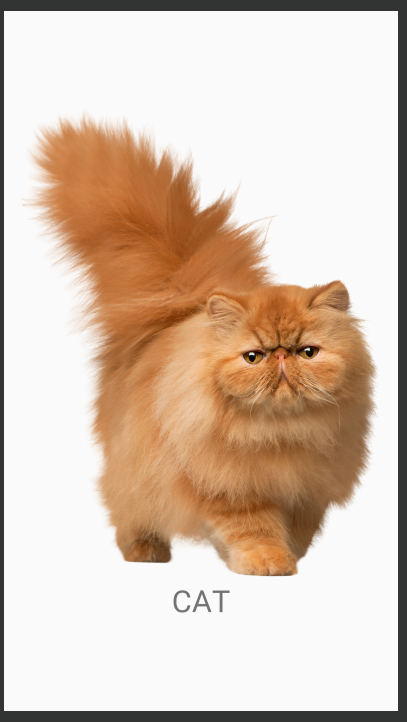
そして 2つの画面を遷移が必要になるので StartFragment と EndFragment という Fragment を作成しておきます。StartFragment と EndFragment ともに ImageView と TextView の同じ要素を配置したシンプルな画面です。
| StartFragment | EndFragment |
|---|---|
 |
 |
StartFragment
class StartFragment : Fragment(R.layout.fragment_start)
<?xml version="1.0" encoding="utf-8"?>
<androidx.constraintlayout.widget.ConstraintLayout xmlns:android="http://schemas.android.com/apk/res/android"
    xmlns:app="http://schemas.android.com/apk/res-auto"
    xmlns:tools="http://schemas.android.com/tools"
    android:id="@+id/container"
    android:layout_width="match_parent"
    android:layout_height="match_parent"
    tools:context=".StartFragment">

    <ImageView
        android:id="@+id/start_image_view"
        android:layout_width="100dp"
        android:layout_height="100dp"
        android:layout_gravity="center"
        android:src="@drawable/cat"
        android:transitionName="start_image_view_transition"
        app:layout_constraintBottom_toTopOf="@id/start_text_view"
        app:layout_constraintEnd_toEndOf="parent"
        app:layout_constraintStart_toStartOf="parent"
        app:layout_constraintTop_toTopOf="parent"
        app:layout_constraintVertical_chainStyle="packed" />

    <TextView
        android:id="@+id/start_text_view"
        android:layout_width="wrap_content"
        android:layout_height="wrap_content"
        android:text="CAT"
        android:transitionName="start_text_view_transition"
        app:layout_constraintBottom_toBottomOf="parent"
        app:layout_constraintEnd_toEndOf="parent"
        app:layout_constraintStart_toStartOf="parent"
        app:layout_constraintTop_toBottomOf="@id/start_image_view" />

</androidx.constraintlayout.widget.ConstraintLayout>
EndFragment
class EndFragment : Fragment(R.layout.fragment_end)
<?xml version="1.0" encoding="utf-8"?>
<androidx.constraintlayout.widget.ConstraintLayout xmlns:android="http://schemas.android.com/apk/res/android"
    xmlns:app="http://schemas.android.com/apk/res-auto"
    xmlns:tools="http://schemas.android.com/tools"
    android:id="@+id/container"
    android:layout_width="match_parent"
    android:layout_height="match_parent"
    tools:context=".EndFragment">

    <ImageView
        android:id="@+id/end_image_view"
        android:layout_width="match_parent"
        android:layout_height="500dp"
        android:layout_gravity="center"
        android:src="@drawable/cat"
        android:transitionName="end_image_view_transition"
        app:layout_constraintBottom_toTopOf="@id/end_text_view"
        app:layout_constraintEnd_toEndOf="parent"
        app:layout_constraintStart_toStartOf="parent"
        app:layout_constraintTop_toTopOf="parent"
        app:layout_constraintVertical_chainStyle="packed" />

    <TextView
        android:id="@+id/end_text_view"
        android:layout_width="wrap_content"
        android:layout_height="wrap_content"
        android:text="CAT"
        android:textSize="32sp"
        android:transitionName="end_text_view_transition"
        app:layout_constraintBottom_toBottomOf="parent"
        app:layout_constraintEnd_toEndOf="parent"
        app:layout_constraintStart_toStartOf="parent"
        app:layout_constraintTop_toBottomOf="@id/end_image_view" />

</androidx.constraintlayout.widget.ConstraintLayout>
5. 画面遷移処理を実装する
そして最後に画面遷移できるように main_navigation_graph.xml に StartFragment と EndFragment を登録、StartFragment と EndFragment の画面遷移を追加しておきます。
<?xml version="1.0" encoding="utf-8"?>
<navigation xmlns:android="http://schemas.android.com/apk/res/android"
    xmlns:app="http://schemas.android.com/apk/res-auto"
    xmlns:tools="http://schemas.android.com/tools"
    android:id="@+id/main_graph_navigation"
    app:startDestination="@id/startFragment">

    <fragment
        android:id="@+id/startFragment"
        android:name="jp.kaleidot725.sample.StartFragment"
        android:label="fragment_start"
        tools:layout="@layout/fragment_start" >
        <action
            android:id="@+id/action_startFragment_to_endFragment"
            app:destination="@id/endFragment"
            app:enterAnim="@android:anim/fade_in"
            app:exitAnim="@android:anim/fade_out"
            app:popEnterAnim="@android:anim/fade_in"
            app:popExitAnim="@android:anim/fade_out" />
    </fragment>
    <fragment
        android:id="@+id/endFragment"
        android:name="jp.kaleidot725.sample.EndFragment"
        android:label="fragment_end"
        tools:layout="@layout/fragment_end" />
</navigation>
あとは StartFragment の ImageView が選択されたら画面遷移が開始する、EndFragment の ImageView が選択されたら前の画面に戻るように実装してあげればこれで準備完了です。
class StartFragment : Fragment(R.layout.fragment_start) {
    private val navController get() = findNavController()

    override fun onViewCreated(view: View, savedInstanceState: Bundle?) {
        super.onViewCreated(view, savedInstanceState)
            navController.navigate(R.id.action_startFragment_to_endFragments)
        }
    }
}
class EndFragment : Fragment(R.layout.fragment_end) {
    private val navController get() = findNavController()

    override fun onViewCreated(view: View, savedInstanceState: Bundle?) {
        super.onViewCreated(view, savedInstanceState)
        end_image_view.setOnClickListener {
            navController.popBackStack()
        }
    }
}
実装
準備がやたらと長かったですが、ようやく Shared Element Transition に実装を進められるようになりましたので実装を進めていきます。Shared Element Transition を使うためには次の 3 つの実装をする必要があります。
- View に
android:transitionを設定する - View を Shared Element として登録する
- Shared Element をどのようなアニメーションで表示するか設定する
1. View に android:transition を設定する
Shared Element Transition を利用するには Shared Element として扱う View の要素に android:transitionName を設定しておく必要がありますので設定します。
StartFragment
    <ImageView
        android:id="@+id/start_image_view"
        android:layout_width="100dp"
        android:layout_height="100dp"
        android:layout_gravity="center"
        android:src="@drawable/cat"
        android:transitionName="start_image_view_transition"
        app:layout_constraintBottom_toTopOf="@id/start_text_view"
        app:layout_constraintEnd_toEndOf="parent"
        app:layout_constraintStart_toStartOf="parent"
        app:layout_constraintTop_toTopOf="parent"
        app:layout_constraintVertical_chainStyle="packed" />

    <TextView
        android:id="@+id/start_text_view"
        android:layout_width="wrap_content"
        android:layout_height="wrap_content"
        android:text="CAT"
        android:transitionName="start_text_view_transition"
        app:layout_constraintBottom_toBottomOf="parent"
        app:layout_constraintEnd_toEndOf="parent"
        app:layout_constraintStart_toStartOf="parent"
        app:layout_constraintTop_toBottomOf="@id/start_image_view" />
EndFragment
    <ImageView
        android:id="@+id/end_image_view"
        android:layout_width="match_parent"
        android:layout_height="500dp"
        android:layout_gravity="center"
        android:src="@drawable/cat"
        android:transitionName="end_image_view_transition"
        app:layout_constraintBottom_toTopOf="@id/end_text_view"
        app:layout_constraintEnd_toEndOf="parent"
        app:layout_constraintStart_toStartOf="parent"
        app:layout_constraintTop_toTopOf="parent"
        app:layout_constraintVertical_chainStyle="packed" />

    <TextView
        android:id="@+id/end_text_view"
        android:layout_width="wrap_content"
        android:layout_height="wrap_content"
        android:text="CAT"
        android:textSize="32sp"
        android:transitionName="end_text_view_transition"
        app:layout_constraintBottom_toBottomOf="parent"
        app:layout_constraintEnd_toEndOf="parent"
        app:layout_constraintStart_toStartOf="parent"
        app:layout_constraintTop_toBottomOf="@id/end_image_view" />
2. View を Shared Element として登録する
View を Shared Element として登録していきます。 Shared Element の登録は StartFragmentで行います。そして Navigation Compoent を利用している場合には FragmentNavigatorExtras というクラスを生成して登録を行います。
FragemtnNavigatorExtras は View と transtionName の組み合わせを保持するクラスになっています。次のように StartFragment の View と EndFragment の TransitionName の Map を作成して FragmentNavigatorExtras を生成してやります。
そして FragmentNavigatorExtras を NavController.navigate にて画面遷移する際に渡してやります。そうすることで Map で指定した View と TransitionName の View が Shared Element として認識されるようになります。
class StartFragment : Fragment(R.layout.fragment_start) {
    private val navController get() = findNavController()

    override fun onViewCreated(view: View, savedInstanceState: Bundle?) {
        super.onViewCreated(view, savedInstanceState)
        start_image_view.setOnClickListener {
            val extras = FragmentNavigatorExtras(
                start_image_view to "end_image_view_transition",
                start_text_view to "end_text_view_transition"
            )
            navController.navigate(R.id.action_startFragment_to_endFragment, null, null, extras)
        }
    }
}
3. Shared Element をどのようなアニメーションで表示するか設定する
Shared Element のアニメーション設定は EndFragmentで行います。その画面に遷移したときのアニメーションは sharedElementEnterTransition、その画面から離れるときのアニメーションは sharedElementReturnTransiton に設定するようになっています。
sharedElementEnterTransition、 sharedElementReturnTransition には Transitionを指定するようになっています、Transition の種類は次のようなものがあり Shared Element として登録した View に適したものを選択してやります。
- ChangeBounds - Viewのレイアウト境界の変更をアニメーション化する。
- ChangeClipBounds - Viewのクリップ境界の変化をアニメーション化する。
- ChangeTransform - View のスケールと回転の変化をアニメーション化します。
- ChangeImageTransform - ImageView のサイズとスケールの変化をアニメーション化する。
今回は Shared Element として TextView と ImageView を登録したので ChangeBounds と Change-Transform、 ChangeImageTransform のアニメーションを TransitionSet にセットして設定してやります。
class EndFragment : Fragment(R.layout.fragment_end) {
    override fun onCreate(savedInstanceState: Bundle?) {
        super.onCreate(savedInstanceState)

        val transition = TransitionSet().apply {
            addTransition(ChangeBounds())
            addTransition(ChangeTransform())
            addTransition(ChangeImageTransform())
        }
        sharedElementEnterTransition = transition
        sharedElementReturnTransition = transition
    }
}
おわりに
実装したアプリを起動すると次のような感じになります。Shared Element として登録した TextView と ImageView が滑らかにスケールが変化するようになっています。このように Shared Element Transition を利用すると画面遷移したときにでもシームレスに View を表示できるようになります。
| Shared Element Transiton なし | Shared Element Transition あり |
|---|---|
 |
 |
今回作成したソースコードはこちらにあります。
