概要
皆さんは、Excelのアート効果というものをご存じでしょうか?
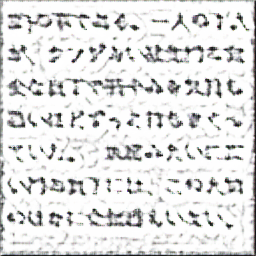
アート効果は図を絵具やクレヨンで書いたように加工してくれる機能なのですが、使い方によっては以下のように、個人情報を隠すことにも使えます。
しかしAIの進化でモザイク画像の元画像を予測する技術が出てきており、これらのアート効果も簡単に取り除かれるのも時間の問題と考えられます。
そこで、pix2pixという技術を用いて、アート効果をあたえた文章の復元を行い、どのアート効果の復元が最も難しいのかを調査します。

目次
使用するデータやアート効果
使用する文章については、驚くほど難解な漢字とカタカナやひらがながメチャクチャ大量に混じっている方がいいと考えて「クソデカ羅生門」を用いることにしました。
この「クソデカ羅生門」の一部をExcelのテキストボックスに入れ、そのテキストボックスを画像に変換したものに、アート効果をあたえます。
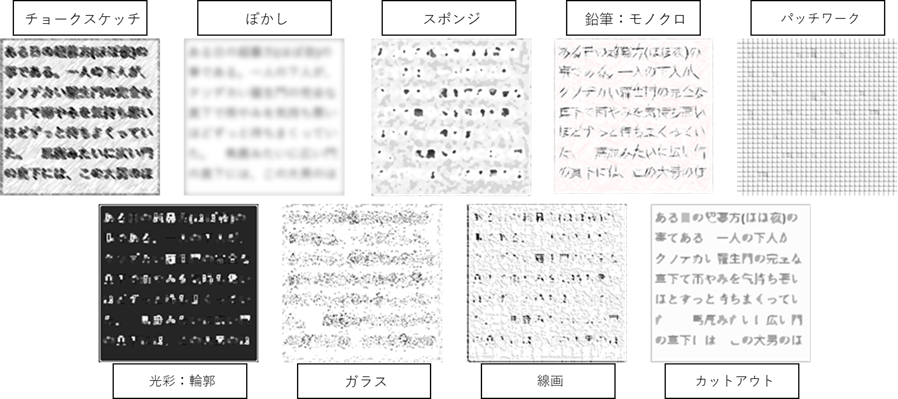
そして、使用したアート効果が以下の図です。
自分で一部が読めないもののみ残し、そのまま読めてしまうアート効果は除外しました。
評価方法
評価方法は、IoUを用いて、元画像の文字と予想結果の文字を比べ、一番IoUの値が小さいアート効果が「最もAIに強い」とします。
IoU = \frac{選択できた場所[赤]}{選択できなかった場所[青]+選択できた場所[赤]+間違った選択をした場所[緑]}

使用したコード
Excelのテキストボックスに特定の文章を設定し、画像として保存するコードが以下のものです。
動かす前に、Sheet1にテキストボックスと、"文章"と名前を付けたセルを用意し、"文章"と名前を付けたセルに好きな文章を入力して、main()を実行します。
注意点としては、動作環境によっては、ウィンドウを画面に表示していないと、正常に画像が保存されませんし、まれに画像の保存が失敗します。
ほんとうに、VBAの画像関連の処理がクソザコナメクジなところが大嫌いです。
Option Explicit

# If VBA7 Then
Private Declare PtrSafe Sub Sleep Lib "kernel32" (ByVal ms As LongPtr)
# Else
Private Declare Sub Sleep Lib "kernel32" (ByVal ms As Long)
# End If

Sub Sleep_(time As Long)
    Dim I As Long

    For I = 1 To Int(time / 25)
        Sleep 25
        DoEvents
    Next I

End Sub

Sub main()

    Call Makeimg(msoEffectPencilGrayscale, "PencilGrayscale")
    Call Makeimg(msoEffectPencilSketch, "PencilSketch")
    Call Makeimg(msoEffectLineDrawing, "LineDrawing")
    Call Makeimg(msoEffectChalkSketch, "ChalkSketch")
    Call Makeimg(msoEffectPaintStrokes, "PaintStrokes")
    Call Makeimg(msoEffectPaintBrush, "PaintBrush")
    Call Makeimg(msoEffectGlowDiffused, "GlowDiffused")
    Call Makeimg(msoEffectBlur, "Blur")
    Call Makeimg(msoEffectLightScreen, "LightScreen")
    Call Makeimg(msoEffectWatercolorSponge, "WatercolorSponge")
    Call Makeimg(msoEffectFilmGrain, "FilmGrain")
    Call Makeimg(msoEffectMosiaicBubbles, "MosiaicBubbles")
    Call Makeimg(msoEffectGlass, "Glass")
    Call Makeimg(msoEffectCement, "Drawing")

    Call Makeimg(msoEffectTexturizer, "Texturizer")
    Call Makeimg(msoEffectCrisscrossEtching, "CrisscrossEtching")
    Call Makeimg(msoEffectPastelsSmooth, "PastelsSmooth")
    Call Makeimg(msoEffectPlasticWrap, "PlasticWrap")
    Call Makeimg(msoEffectCutout, "Cutout")
    Call Makeimg(msoEffectPhotocopy, "Photocopy")
    Call Makeimg(msoEffectGlowEdges, "GlowEdges")
    Call Makeimg(0, "None")


End Sub

Sub Makeimg(msoEffect As Long, savefolder As String)

    Dim textobj As Object, imageobj As Object
    Dim text As String
    Dim count As Long

    Application.DisplayAlerts = False
    Application.ScreenUpdating = False
    '保存するフォルダを選択
    If Dir(ThisWorkbook.Path & "\" & savefolder, vbDirectory) = "" Then
        MkDir ThisWorkbook.Path & "\" & savefolder
    End If

    text = Sheet1.Range("文章")
    count = 1
    Do While Len(text) > 140
        'テキストをセット
        Set textobj = ActiveSheet.Shapes.Range(Array("TextBox 1"))
        textobj.TextFrame2.TextRange.Characters.text = text
        'テキストボックスを画像としてコピーする
        Do While Not (Copy_Text_Box(textobj))
            DoEvents
        Loop
        '先ほどコピーした画像を選択
        DoEvents
        Set imageobj = ActiveSheet.Shapes(2)
        DoEvents
        'アート効果をつける
        If msoEffect <> 0 Then
            Call imageobj.Fill.PictureEffects.Insert(msoEffect)
            Sleep_ (100)
        End If
        DoEvents
        '画像を保存する
        Do While Not (Save_Pic(imageobj, savefolder & "\" & count & ".png"))
            DoEvents
        Loop
        '新しいテキストを選択する
        count = count + 1
        text = Right(text, Len(text) - 10)
        imageobj.Delete
        DoEvents
    Loop
    Application.DisplayAlerts = True
    Application.ScreenUpdating = True


End Sub

Function Copy_Text_Box(textobj As Object) As Boolean
On Error GoTo copy_Error
    textobj.Select
    DoEvents
    Selection.copy
    Sheet1.Range("D1").Select
    DoEvents
    ActiveSheet.Pictures.Paste.Select

    Copy_Text_Box = True
    Exit Function
copy_Error:
    Copy_Text_Box = False
End Function

Function Save_Pic(imageobj As Object, savefile As String) As Boolean
On Error GoTo save_pic_Error
    Application.ScreenUpdating = True
    DoEvents
    imageobj.CopyPicture
    DoEvents
    ActiveSheet.ChartObjects.Add(0, 0, imageobj.Width, imageobj.Height).Name = "貼付用"
    DoEvents
    With ActiveSheet.ChartObjects("貼付用")
      .Chart.PlotArea.Fill.Visible = msoFalse
      DoEvents
      .Chart.ChartArea.Fill.Visible = msoFalse
      DoEvents
      .Chart.ChartArea.Border.LineStyle = 0
    End With

    Sleep_ (1000)
    ActiveSheet.ChartObjects("貼付用").Chart.Paste
    Sleep_ (1000)
    ActiveSheet.ChartObjects("貼付用").Chart.Export ThisWorkbook.Path & "\" & savefile
    ActiveSheet.ChartObjects("貼付用").Delete
    Application.ScreenUpdating = False
    Save_Pic = True
    Exit Function
save_pic_Error:
    Application.ScreenUpdating = False
    Save_Pic = False

End Function
VBAは画像を処理するには不向きなので、以下のように、Excelから出力された画像を、pix2pixに読み込めるように変換する、pythonのコードを作成しました。
from PIL import Image
import numpy  as np
import os
import glob

dirlist = os.listdir(path='./excelimg')
# フォルダのループ
for folder_ in dirlist:
    folder_fll = './excelimg/' + folder_
    print(folder_fll)
    list_ = glob.glob(folder_fll + "/*")
    for file_ in list_:
        filename =  file_.split("/")[-1].split("\\")[-1]
        print(filename)
        if os.path.isfile("./excelimg/None/" + filename):
            #画像の読み込みを行う
            img1 = np.asarray(Image.open(file_).convert('RGB').resize((256, 256)))
            img2 = np.asarray(Image.open("./excelimg/None/" + filename).convert('RGB').resize((256, 256)))
            outimg = np.zeros((img1.shape[0],img1.shape[1] * 2,3),dtype = "int")
            #pix2pix用の画像の作成
            outimg[:,:img1.shape[1],:] = img1
            outimg[:,img1.shape[1]:,:] = img2

            #フォルダがなければ作成する
            if not os.path.exists('./pix2pixdata/' + folder_):
                os.mkdir('./pix2pixdata/' + folder_)
            if not os.path.exists('./pix2pixdata/' + folder_ + "/train"):
                os.mkdir('./pix2pixdata/' + folder_+ "/train")
            if not os.path.exists('./pix2pixdata/' + folder_ + "/test"):
                os.mkdir('./pix2pixdata/' + folder_+ "/test")
            if not os.path.exists('./pix2pixdata/' + folder_ + "/val"):
                os.mkdir('./pix2pixdata/' + folder_+ "/val")
            #画像を保存する
            pilImg = Image.fromarray(np.uint8(outimg))
            if filename[0] == "1":
                pilImg.save('./pix2pixdata/' + folder_ +"/val/"+ filename)
            elif filename[0] == "2":
                pilImg.save('./pix2pixdata/' + folder_ +"/test/"+ filename)
            else:
                pilImg.save('./pix2pixdata/' + folder_ +"/train/"+ filename)
次に以下のサイトからpix2pixのソースコードをクローンし、README.mdに書かれている通りにpix2pixの学習を実行していきます。
IoUの計算を行うため、test.pyを以下のコードと入れ替えて実行してください。
import os
from options.test_options import TestOptions
from data import create_dataset
from models import create_model
from util.visualizer import save_images
from util import html
from util import util
import cv2
import numpy as np

if __name__ == '__main__':
    opt = TestOptions().parse()  # get test options
    # hard-code some parameters for test
    opt.num_threads = 0   # test code only supports num_threads = 0
    opt.batch_size = 1    # test code only supports batch_size = 1
    opt.serial_batches = True  # disable data shuffling; comment this line if results on randomly chosen images are needed.
    opt.no_flip = True    # no flip; comment this line if results on flipped images are needed.
    opt.display_id = -1   # no visdom display; the test code saves the results to a HTML file.
    dataset = create_dataset(opt)  # create a dataset given opt.dataset_mode and other options
    model = create_model(opt)      # create a model given opt.model and other options
    model.setup(opt)               # regular setup: load and print networks; create schedulers
    # create a website
    web_dir = os.path.join(opt.results_dir, opt.name, '{}_{}'.format(opt.phase, opt.epoch))  # define the website directory
    if opt.load_iter > 0:  # load_iter is 0 by default
        web_dir = '{:s}_iter{:d}'.format(web_dir, opt.load_iter)
    print('creating web directory', web_dir)
    webpage = html.HTML(web_dir, 'Experiment = %s, Phase = %s, Epoch = %s' % (opt.name, opt.phase, opt.epoch))
    # test with eval mode. This only affects layers like batchnorm and dropout.
    # For [pix2pix]: we use batchnorm and dropout in the original pix2pix. You can experiment it with and without eval() mode.
    # For [CycleGAN]: It should not affect CycleGAN as CycleGAN uses instancenorm without dropout.
    area_of_ove = 0
    area_of_uni = 0

    if opt.eval:
        model.eval()
    for i, data in enumerate(dataset):
        if i >= opt.num_test:  # only apply our model to opt.num_test images.
            break
        model.set_input(data)  # unpack data from data loader
        model.test()           # run inference
        visuals = model.get_current_visuals()  # get image results
        img_path = model.get_image_paths()     # get image paths
        if i % 5 == 0:  # save images to an HTML file
            print('processing (%04d)-th image... %s' % (i, img_path))
        save_images(webpage, visuals, img_path, aspect_ratio=opt.aspect_ratio, width=opt.display_winsize)
        #Iou
        for label, im_data in visuals.items():
            im = util.tensor2im(im_data)
            if "fake_B" == label:
                fake_B = (cv2.cvtColor(im, cv2.COLOR_BGR2GRAY) < 128)
            elif "real_B" == label:
                real_B = (cv2.cvtColor(im, cv2.COLOR_BGR2GRAY) < 128)
        area_of_ove_flag = (fake_B & real_B)
        area_of_uni_flag = (fake_B | real_B)
        area_of_ove = area_of_ove + np.count_nonzero(area_of_ove_flag)
        area_of_uni = area_of_uni + np.count_nonzero(area_of_uni_flag)

    print("------------IoU----------------")
    print(area_of_ove/area_of_uni)
    print("-------------------------------")

    webpage.save()  # save the HTML
結果
以下の画像が、アート効果をあたえた画像を復元した結果です。
ひらがなやカタカタは、うまく復元できているように見えますが、「パッチワーク」は日本語っぽい文字を張り付けているだけで、言語として読むことができません。
漢字は全体的に復元がうまくいっていないようで、謎の漢字っぽい何かが出現することがあります。

そして、IoUの計算結果が、以下の表です。
この表から、パッチワークとガラスが最も復元が難しいようです。
一番驚いたのが、人間が見ても元の文章が分かりにくい「光彩:輪郭」が2番目に復元しやすかったということで、人間にはわからない文字の痕跡を、機械は簡単に見つけられるようです。
| アート効果 | IoU |
|---|---|
| パッチワーク | 0.353 |
| ガラス | 0.369 |
| スポンジ | 0.414 |
| ぼかし | 0.428 |
| 線画 | 0.452 |
| 鉛筆:モノクロ | 0.471 |
| チョークスケッチ | 0.491 |
| 光彩:輪郭 | 0.527 |
| カットアウト | 0.536 |
まとめ
pix2pixを用いてExcelのアート効果から元画像の復元を行いました。
結果は、パッチワークが最も復元しにくく、カットアウトが最も復元しやすかったようです。
ただし、今回行った方法はアート効果ごとに機械学習のモデルを作成するという方法であり、ちゃんと復元するには、どのようなアート効果を使用したかの詳細が必要です。
例えば「ぼかし」を復元するpix2pixのモデルで「チョークスケッチ」を復元すると、以下のような画像になりIoUは0.201まで落ちます。
実際に他人の修正の入った文章を復元しようとすると、使用したアート効果の詳細は分かりませんから、復元することは困難であると考えられます。
当然、技術は日々様々な問題を解決していっているので、いずれこれらの問題も解決されるでしょうから、機密情報を隠したいときは、黒塗りを用いる方がいいでしょう。