Qiita APIのCLIツールを作成しているときに、アクセストークンの設定方法どうしようかなぁと悩んで、OAuth2つかってみようと思いたって試してみました。
結論
OAuth2を利用してアクセストークンを取得することはできたのですが、クライアントシークレットという暗号キーを含める必要があったので、よろしくないなぁと思いました。
実装
GitHubにもソースをアップしていますので、ご参考ください。
https://github.com/kai-kou/qiita-oauth2-with-python-cli
以下の記事でFaceBookでOAuth2を利用した方法を説明されていたので、それを参考にさせてもらいました。
ひとことでまとめると「ローカルにHTTPサーバたてて、リダイレクトを受ける。」です。
LOGGING IN TO FACEBOOK OAUTH2 VIA COMMAND LINE USING PYTHON
https://www.pmg.com/blog/logging-facebook-oauth2-via-command-line-using-python/
QiitaのOAuth2認証については公式ドキュメントが参考になります。
Qiita API v2ドキュメント - Qiita:Developer
https://qiita.com/api/v2/docs#%E8%AA%8D%E8%A8%BC%E8%AA%8D%E5%8F%AF
Qiita APIへアクセスするのにrequests を利用しています。あとは標準ライブラリだけで実現できます。
> mkdir 任意のディレクトリ
> cd 任意のディレクトリ
> python -m venv venv
> . venv/bin/activate

> pip install requests
> touch qiita_api_auth.py
> touch main.py
Qiitaでの認証・認可後にレダイレクトを受け付けるHTTPサーバの実装です。BaseHTTPRequestHandler クラスのdo_GET メソッドでGETを受け付けて、URLに含まれるcode を取得します。取得できたらQiita APIを利用してアクセストークンを作成します。
from http.server import BaseHTTPRequestHandler, HTTPServer

from urllib.request import urlopen, HTTPError

from webbrowser import open_new

import requests

import json

import random, string

QIITA_API_BASE_URL = 'https://qiita.com/api/v2/'


class HTTPServerHandler(BaseHTTPRequestHandler):
  """
  QiitaのOAuth2認証でリダイレクトを受け入れるHTTPサーバ
  """
  def __init__(self, request, address, server, client_id, client_secret):
    self._client_id = client_id
    self._client_secret = client_secret
    super().__init__(request, address, server)


  def do_GET(self):
    self.send_response(200)
    self.send_header('Content-type', 'text/html')
    self.end_headers()

    # リダイレクトURLからコードが取得できたらアクセストークンを取得する
    if 'code' in self.path:
      params = self.path.split('&')
      code = params[0].replace('/?code=', '')
      state = params[0].replace('state=', '')
      url = f'{QIITA_API_BASE_URL}access_tokens'
      headers = {'Content-Type': 'application/json'}
      params = {
        'client_id': self._client_id,
        'client_secret': self._client_secret,
        'code': code
      }
      response = requests.request(
        method='POST',
        url=url,
        headers=headers,
        data=json.dumps(params))
      self.wfile.write(bytes('<html><h1>Please close the window.</h1></html>', 'utf-8'))
      self.server.access_token = None
      if response.status_code == 201:
        self.server.access_token = response.json()['token']


class QiitaAccessTokenHandler:
  """
  QiitaのOAuth2認証を利用してアクセストークンを取得するクラス
  """
  def __init__(self, client_id, client_secret, scope=['read_qiita', 'write_qiita']):
    self._client_id = client_id
    self._client_secret = client_secret
    self._scope = '+'.join(scope)


  def get_access_token(self):
    state = self._randomname(40)
    access_url = f'{QIITA_API_BASE_URL}oauth/authorize?client_id={self._client_id}&scope={self._scope}&state={state}'
    open_new(access_url)
    httpServer = HTTPServer(
      ('localhost', 8080),
      lambda request, address, server: HTTPServerHandler(
        request, address, server, self._client_id, self._client_secret))
    httpServer.handle_request()
    return httpServer.access_token


  def _randomname(self, n):
    randlst = [random.choice(string.ascii_letters + string.digits) for i in range(n)]
    return ''.join(randlst)
上記クラスを呼び出す実装です。Qiitaでアプリケーションを作成し生成されたClient ID とClient Secret を環境変数に設定して利用しています。
import os

from qiita_api_auth import QiitaAccessTokenHandler


def get_access_token(init=False):
  client_id = os.getenv('QIITA_CLIENT_ID')
  client_secret = os.getenv('QIITA_CLIENT_SECRET')

  # OAuth2認証でアクセストークンを取得する
  token_handler = QiitaAccessTokenHandler(client_id, client_secret)
  return token_handler.get_access_token()


if __name__ == '__main__':
  access_token = get_access_token()
  print(f'アクセストークンとれたよー: {access_token}')
認証してみる
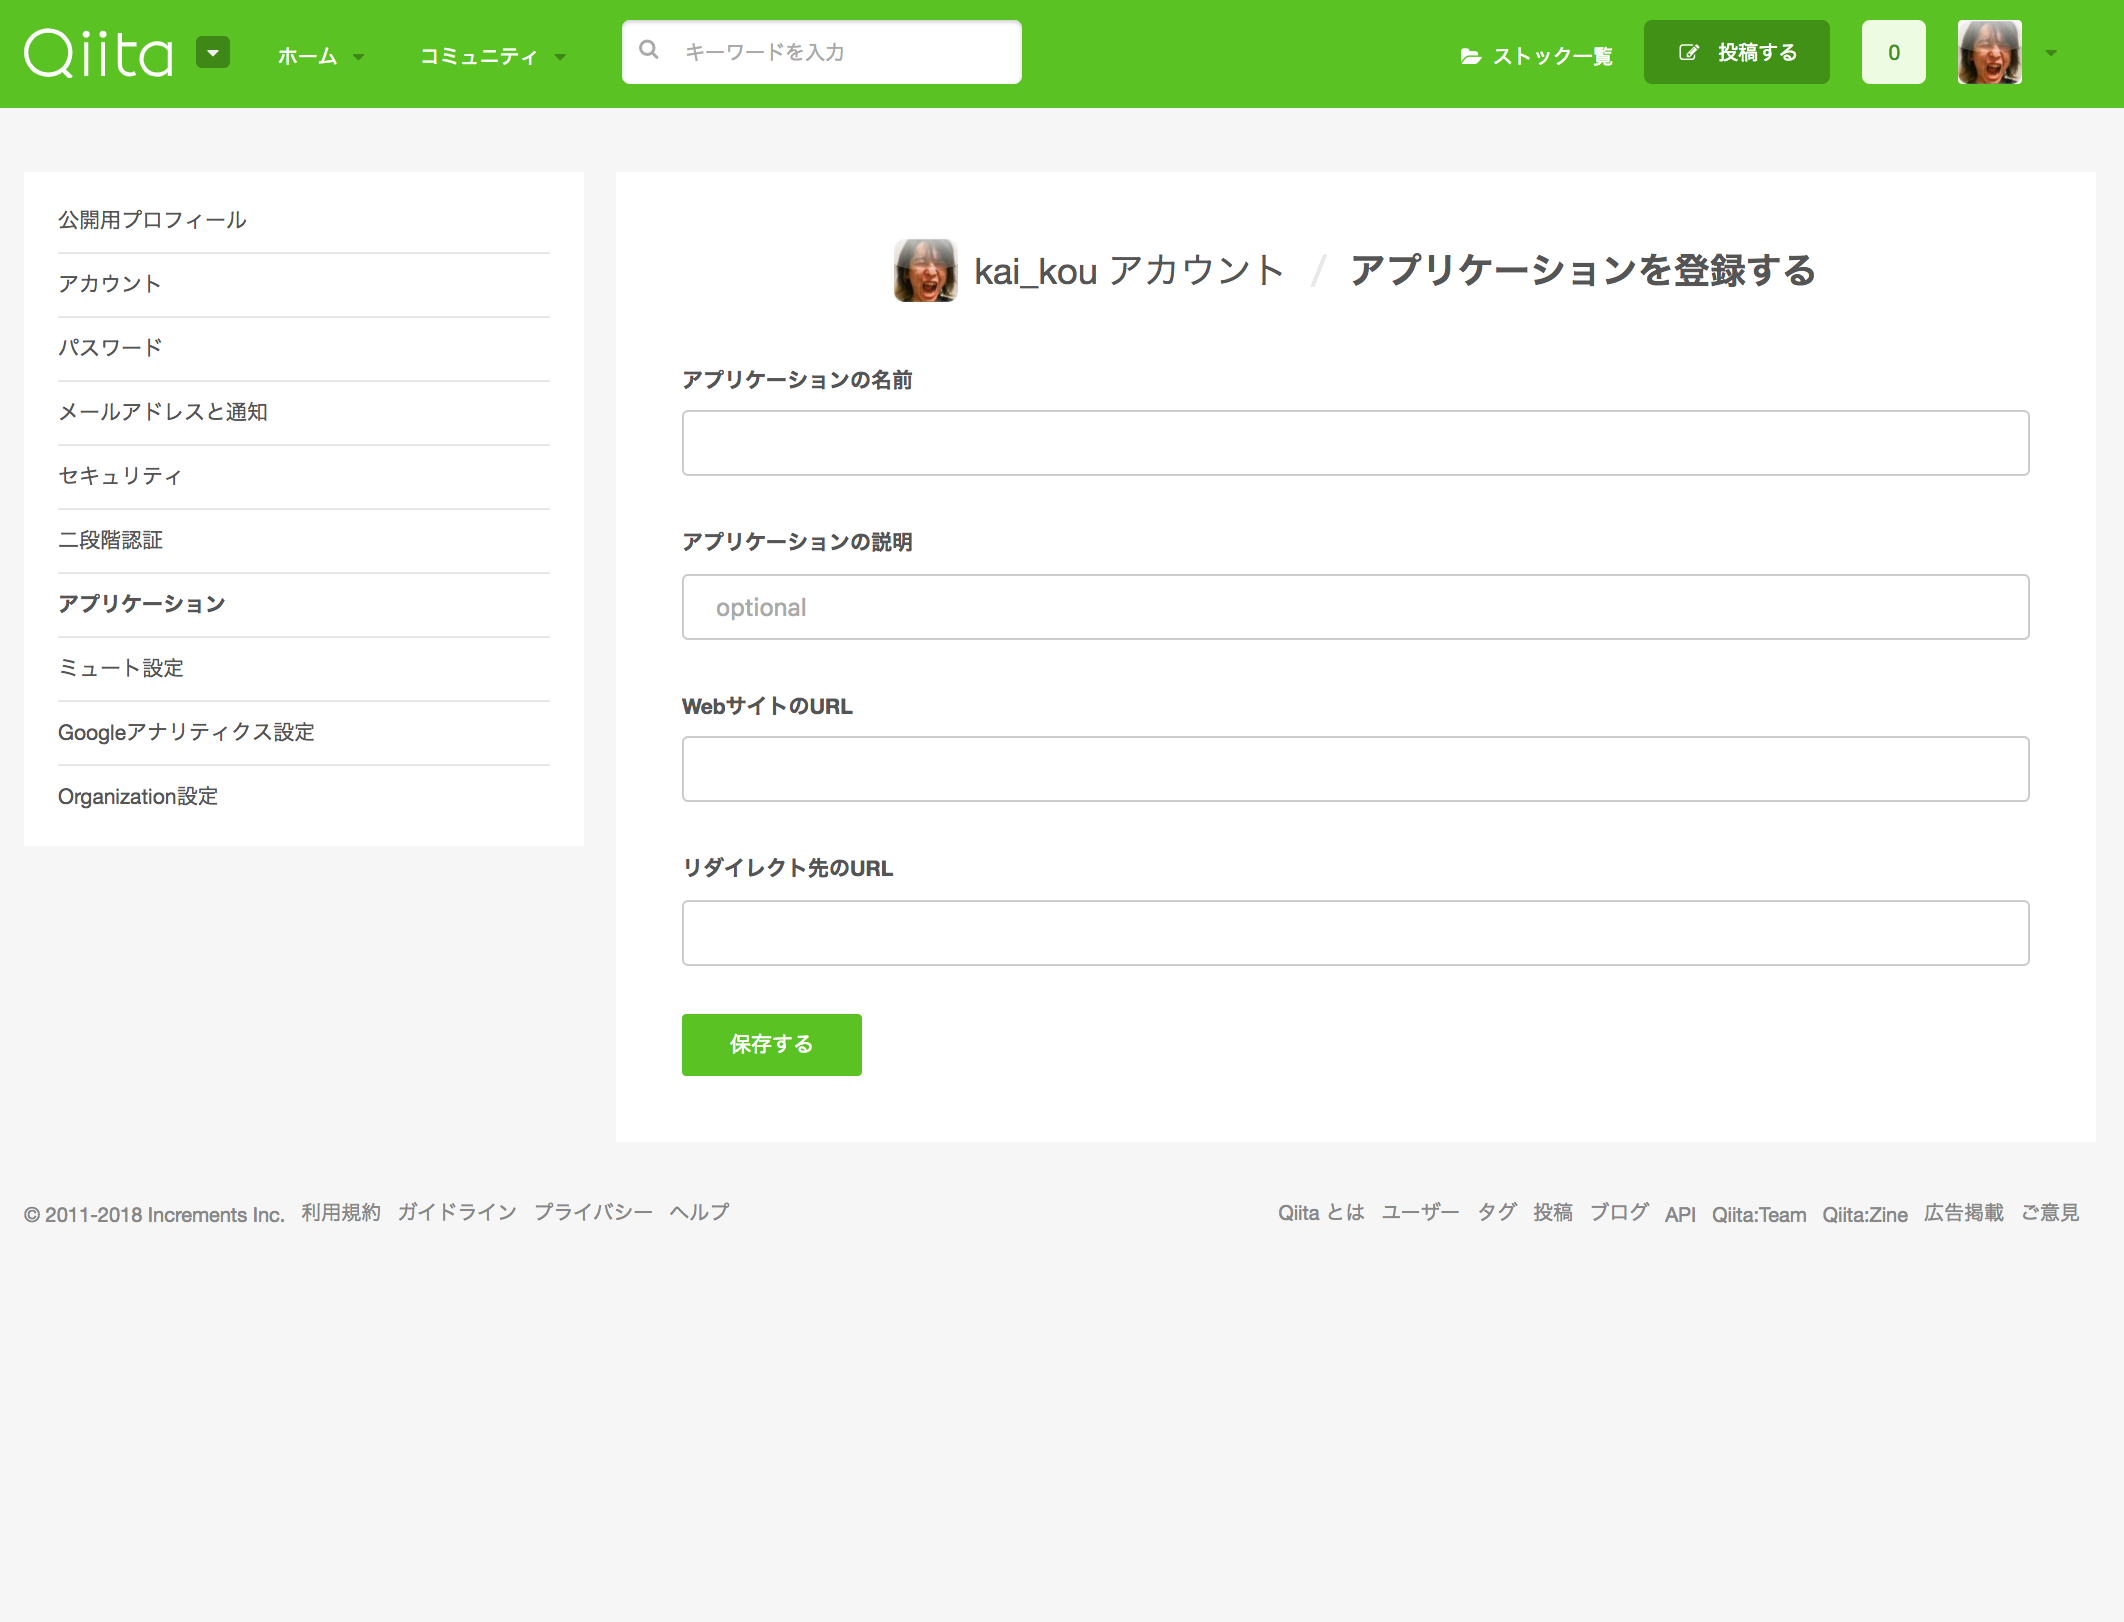
Qiitaでアプリケーションを作成する
Qiitaにログインした状態で、下記URLへアクセスして、アプリケーションを登録します。

アプリケーションの名前
任意で入力してください。
アプリケーションの説明
必須ではありませんが、認可時に表示されますので、どういったアプリ・サービス・ツールなのか明記しておくとわかりやすいですね。
WebサイトのURL
アプリ・サービス・ツールのサイトがあればそのURLを指定します。
なければ、とりあえずQiitaのマイページのURLでも設定しましょう。
リダイレクト先のURL
認可後に、Qiitaからリダイレクトする際のURLになります。
ローカルにHTTPサーバを立ち上げるので、そのURLを指定します。
- リダイレクト先のURL:
http://localhost:8080
クライアント情報の取得と設定
アプリケーションが作成後、アプリケーション一覧にある「編集ボタン」から編集ページを開くと、Client ID とClient Secret が表示されているのでそれを利用します。

Client ID とClient Secret は他人に知られてしまうと、悪用される恐れがありますので、取扱にはご注意ください。
環境変数にClient ID とClient Secret を設定します。
# bash
> export QIITA_CLIENT_ID=<Client ID>
> export QIITA_CLIENT_SECRET=<Client Secret>

# fish
> set -x QIITA_CLIENT_ID <Client ID>
> set -x QIITA_CLIENT_SECRET <Client Secret>
実行する
実行すると、Qiitaの認証ページがブラウザで表示されます。

「許可する」をクリックすると、先程設定したリダイレクト先のURLへリダイレクトします。ローカルでHTTPサーバを立ち上げているので、そこでURLに含まれるquery文字列からcode が取得できます。
取得したcode と環境変数に設定したClient ID とClient Secret をパラメータにしてQiita APIからアクセストークンが取得できます。
> python main.py
 やったぜ。
やったぜ。
まとめ
HTTPサーバをローカルで立ち上げてしまえば、リダイレクト先を簡単に用意できることが確認できました。
ただCLIツールなどで利用する場合、Client Secret をソースに含める必要があるため、アプリなどと違い、非常に簡単に参照できてしまいます。勝手にIDとSecretを利用・悪用されるリスクを考えると、一般公開するようなツールだと利用は難しいところです。
検証や個人ツールでアクセストークンを作成するのが面倒なときに利用するのが良いかもしれませんね。
OAuth クライアント シークレット(Facebook)の漏えい - Google ヘルプ
https://support.google.com/faqs/answer/7126515?hl=ja
security - OAuth2のclient_secretは、漏れると何がマズいか? また、どうやって隠すか? - スタック・オーバーフロー
https://ja.stackoverflow.com/questions/26469/oauth2%E3%81%AEclient-secret%E3%81%AF-%E6%BC%8F%E3%82%8C%E3%82%8B%E3%81%A8%E4%BD%95%E3%81%8C%E3%83%9E%E3%82%BA%E3%81%84%E3%81%8B-%E3%81%BE%E3%81%9F-%E3%81%A9%E3%81%86%E3%82%84%E3%81%A3%E3%81%A6%E9%9A%A0%E3%81%99%E3%81%8B
参考
LOGGING IN TO FACEBOOK OAUTH2 VIA COMMAND LINE USING PYTHON
https://www.pmg.com/blog/logging-facebook-oauth2-via-command-line-using-python/
21.22. http.server — HTTP サーバ — Python 3.6.5 ドキュメント
https://docs.python.jp/3.6/library/http.server.html
BaseHTTPServer – web サーバを実装するベースクラス
http://ja.pymotw.com/2/BaseHTTPServer/
Pythonで簡単にHTTPサーバを作る
https://qiita.com/shinido/items/b4fdc907a37424bcf15b
デバッグ用HTTP ServerをPythonで起動する
https://ishiis.net/2016/10/10/python-http-server/
OAuth クライアント シークレット(Facebook)の漏えい - Google ヘルプ
https://support.google.com/faqs/answer/7126515?hl=ja
security - OAuth2のclient_secretは、漏れると何がマズいか? また、どうやって隠すか? - スタック・オーバーフロー
https://ja.stackoverflow.com/questions/26469/oauth2%E3%81%AEclient-secret%E3%81%AF-%E6%BC%8F%E3%82%8C%E3%82%8B%E3%81%A8%E4%BD%95%E3%81%8C%E3%83%9E%E3%82%BA%E3%81%84%E3%81%8B-%E3%81%BE%E3%81%9F-%E3%81%A9%E3%81%86%E3%82%84%E3%81%A3%E3%81%A6%E9%9A%A0%E3%81%99%E3%81%8B