はじめに
前回はHERE Maps API for JavaScriptにコンパスアイコンを追加してみました。
やってみて分かったことは、mapviewchangeイベントの拡張性と応答性が結構良かったので、これで地図と連動した独自の3D表現も行けるんじゃないかと思いました。
というわけで今回はHERE Maps API for JavaScriptに3Dマーカーを追加してみました。
動作環境
- OS: macOS Monterey (Version 12.6.2)
- Browser: Google Chrome (Version 108.0.5359.124)
- HERE Maps API for JavaScript (Version 3.1.37.0)
- Three.js (Version r147)
事前準備
まずは前回最後のテンプレートから始まります。
See the Pen HERE Maps API for JavaScript - Japan by kairyu (@kairyu1103) on CodePen.
Three.jsの追加
JavaScriptで3Dの表現といえば、真っ先に思いつくのがThree.jsというライブラリではないでしょうか。
しかし残念ながら私はThree.jsに関しては全くの初心者なので、ここでは先人の知恵を拝借させて頂きます。
下記コードを追加します。
...
  <meta name="viewport" content="initial-scale=1.0, width=device-width" />
+ <script src="https://cdnjs.cloudflare.com/ajax/libs/three.js/0.147.0/three.min.js"></script>
  <script src="https://js.api.here.com/v3/3.1/mapsjs-core.js"></script>
...
  <script>
    function createScene() {
      const scene = new THREE.Scene();

      const ambientLight = new THREE.AmbientLight(0xffffff, 0.6);
      scene.add(ambientLight);

      const directionalLight = new THREE.DirectionalLight(0xffffff, 0.8);
      directionalLight.position.set(200, 500, 300);
      scene.add(directionalLight);
      return scene;
    }

    function createCamera(container) {
      // Setting up camera
      const aspectRatio = container.offsetWidth / container.offsetHeight;
      const cameraWidth = 150;
      const cameraHeight = cameraWidth / aspectRatio;
      const camera = new THREE.OrthographicCamera(
        cameraWidth / -2, // left
        cameraWidth / 2, // right
        cameraHeight / 2, // top
        cameraHeight / -2, // bottom
        0, // near plane
        1000 // far plane
      );
      camera.position.set(200, 200, 200);
      camera.lookAt(0, 10, 0);
      return camera;
    }

    function createRenderer(container, pixelRatio) {
      // Set up renderer
      const renderer = new THREE.WebGLRenderer({ alpha: true, antialias: true });
      renderer.setSize(container.offsetWidth, container.offsetHeight);
      renderer.setPixelRatio(pixelRatio);
      renderer.setClearColor(0x000000, 0);
      container.appendChild(renderer.domElement);
      return renderer;
    }

    function getCarFrontTexture() {
      const canvas = document.createElement("canvas");
      canvas.width = 64;
      canvas.height = 32;
      const context = canvas.getContext("2d");

      context.fillStyle = "#ffffff";
      context.fillRect(0, 0, 64, 32);

      context.fillStyle = "#666666";
      context.fillRect(8, 8, 48, 24);

      return new THREE.CanvasTexture(canvas);
    }

    function getCarSideTexture() {
      const canvas = document.createElement("canvas");
      canvas.width = 128;
      canvas.height = 32;
      const context = canvas.getContext("2d");

      context.fillStyle = "#ffffff";
      context.fillRect(0, 0, 128, 32);

      context.fillStyle = "#666666";
      context.fillRect(10, 8, 38, 24);
      context.fillRect(58, 8, 60, 24);

      return new THREE.CanvasTexture(canvas);
    }

    function createWheels() {
      const geometry = new THREE.BoxBufferGeometry(12, 12, 33);
      const material = new THREE.MeshLambertMaterial({ color: 0x333333 });
      const wheel = new THREE.Mesh(geometry, material);
      return wheel;
    }

    function createCar() {
      const car = new THREE.Group();

      const backWheel = createWheels();
      backWheel.position.y = 6;
      backWheel.position.x = -18;
      car.add(backWheel);

      const frontWheel = createWheels();
      frontWheel.position.y = 6;
      frontWheel.position.x = 18;
      car.add(frontWheel);

      const main = new THREE.Mesh(
        new THREE.BoxBufferGeometry(60, 15, 30),
        new THREE.MeshLambertMaterial({ color: 0xa52523 })
      );
      main.position.y = 12;
      car.add(main);

      const carFrontTexture = getCarFrontTexture();

      const carBackTexture = getCarFrontTexture();

      const carRightSideTexture = getCarSideTexture();

      const carLeftSideTexture = getCarSideTexture();
      carLeftSideTexture.center = new THREE.Vector2(0.5, 0.5);
      carLeftSideTexture.rotation = Math.PI;
      carLeftSideTexture.flipY = false;

      const cabin = new THREE.Mesh(new THREE.BoxBufferGeometry(33, 12, 24), [
        new THREE.MeshLambertMaterial({ map: carFrontTexture }),
        new THREE.MeshLambertMaterial({ map: carBackTexture }),
        new THREE.MeshLambertMaterial({ color: 0xffffff }), // top
        new THREE.MeshLambertMaterial({ color: 0xffffff }), // bottom
        new THREE.MeshLambertMaterial({ map: carRightSideTexture }),
        new THREE.MeshLambertMaterial({ map: carLeftSideTexture }),
      ]);
      cabin.position.x = -6;
      cabin.position.y = 25.5;
      car.add(cabin);

      return car;
    }
  </script>
...
    compassControl.addChild(compassButton);
    compassControl.setAlignment('top-right');
+
+   const scene = createScene();
+   const car = createCar();
+   scene.add(car);
...
おかげでだいぶ手間が省けました。ただしこれだけではまだ3Dのクルマが地図上に表示されないので、次はマーカーを追加します。
マーカーの追加
HERE Maps API for JavaScriptは様々なタイプのマーカーをサポートしていますが、今回はH.map.DomMarkerを使います。
下記コードを追加します。
    let renderer;
    let camera;
    const position = {lat: 35.68, lng: 139.76};
    const pixelRatio = window.devicePixelRatio > 1 ? 2 : 1;

    function addMarker() {
      const outerElement = document.createElement('div');
      const innerElement = document.createElement('div');
      innerElement.style.width = '200px';
      innerElement.style.height = '200px';
      innerElement.style.transform = 'translate(-50%, -50%)';
      outerElement.appendChild(innerElement);
      const icon = new H.map.DomIcon(outerElement, {
        onAttach: function (clonedElement, domIcon, domMarker) {
          const innerElement = clonedElement.getElementsByTagName('div')[0];
          camera = createCamera(innerElement);
          renderer = createRenderer(innerElement, pixelRatio);
          renderer.render(scene, camera);
        },
      });
      const marker = new H.map.DomMarker(position, {icon});
      map.addObject(marker);
    }

    window.onload = function () {
      addMarker();
    };
DomMarkerとは任意のDOM要素をマーカーとして地図に追加できるタイプのマーカーで、階層関係はMap > DomMarker > DomIcon > DOM要素になります。
その中身となるDOM要素は予めHTMLに存在するものでも問題ありませんが、今回はマーカーを追加するタイミングでコードで動的に生成しています。
そしてさらにDomIconのonAttachというタイミングで、DOM要素の中にThree.jsのrendererを入れ込みました。
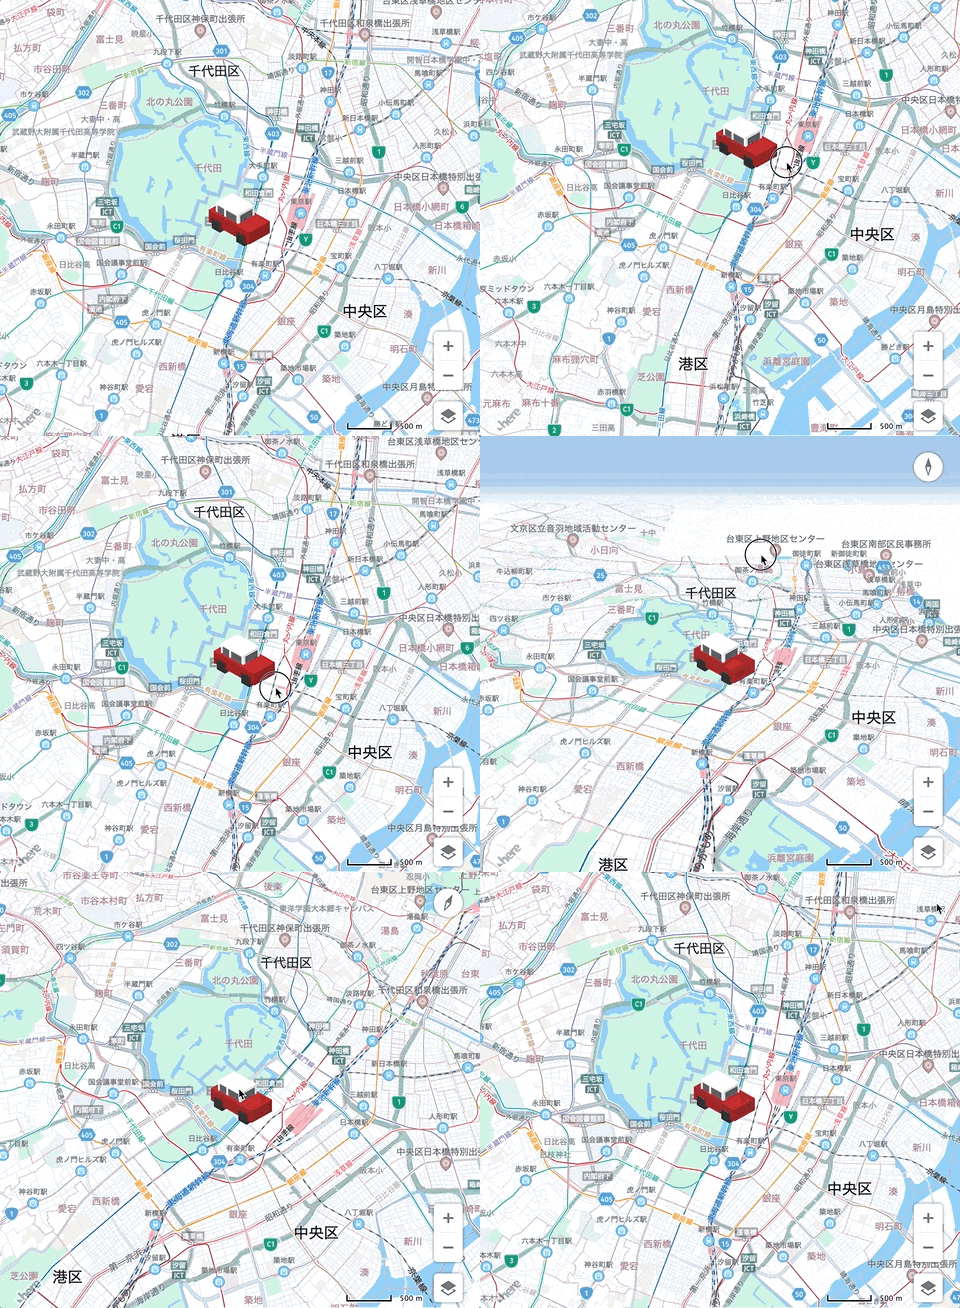
その効果は以下のようになります。

これで3Dのクルマをマーカーとして地図上に追加出来ました。マーカーなので位置は自動的に地図と一緒に移動できるのは当たり前ですが、向きはまだ全然地図と同期出来ていませんね。これではまだ真の3Dと言えません。
地図のカメラと同期させる
問題はクルマに向けているカメラが固定のままだったので、それを地図のカメラと同期させればいい感じになるはずです。
ここでまたmapviewchangeイベントの出番です。
...
    function addMarker() {
      const outerElement = document.createElement('div');
      const innerElement = document.createElement('div');
      innerElement.style.width = '200px';
      innerElement.style.height = '200px';
      innerElement.style.transform = 'translate(-50%, -50%)';
      outerElement.appendChild(innerElement);
      const icon = new H.map.DomIcon(outerElement, {
        onAttach: function (clonedElement, domIcon, domMarker) {
          const innerElement = clonedElement.getElementsByTagName('div')[0];
          camera = createCamera(innerElement);
          renderer = createRenderer(innerElement, pixelRatio);
-         renderer.render(scene, camera);
+         const lookAt = map.getViewModel().getLookAtData();
+         updateIcon(lookAt);
        },
      });
      const marker = new H.map.DomMarker(position, {icon});
      map.addObject(marker);
    }

+   function updateIcon(lookAt) {
+     const {heading, incline, tilt} = lookAt;
+     car.rotation.y = heading / 180 * Math.PI;
+     const x = 200 * Math.sin(tilt / 180 * Math.PI);
+     const y = 200 * Math.cos(tilt / 180 * Math.PI);
+     const z = 0;
+     camera.position.set(x, y, z);
+     camera.up.set(-1, 0, 0);
+     camera.lookAt(0, 0, 0);
+     renderer.render(scene, camera);
+   }

    map.addEventListener('mapviewchange', function (evt) {
...
+     if (evt.modifiers & (
+       H.map.ChangeEvent.Type.HEADING |
+       H.map.ChangeEvent.Type.INCLINE |
+       H.map.ChangeEvent.Type.TILT
+     )) {
+       updateIcon(evt.newValue.lookAt);
+     }
    }
...
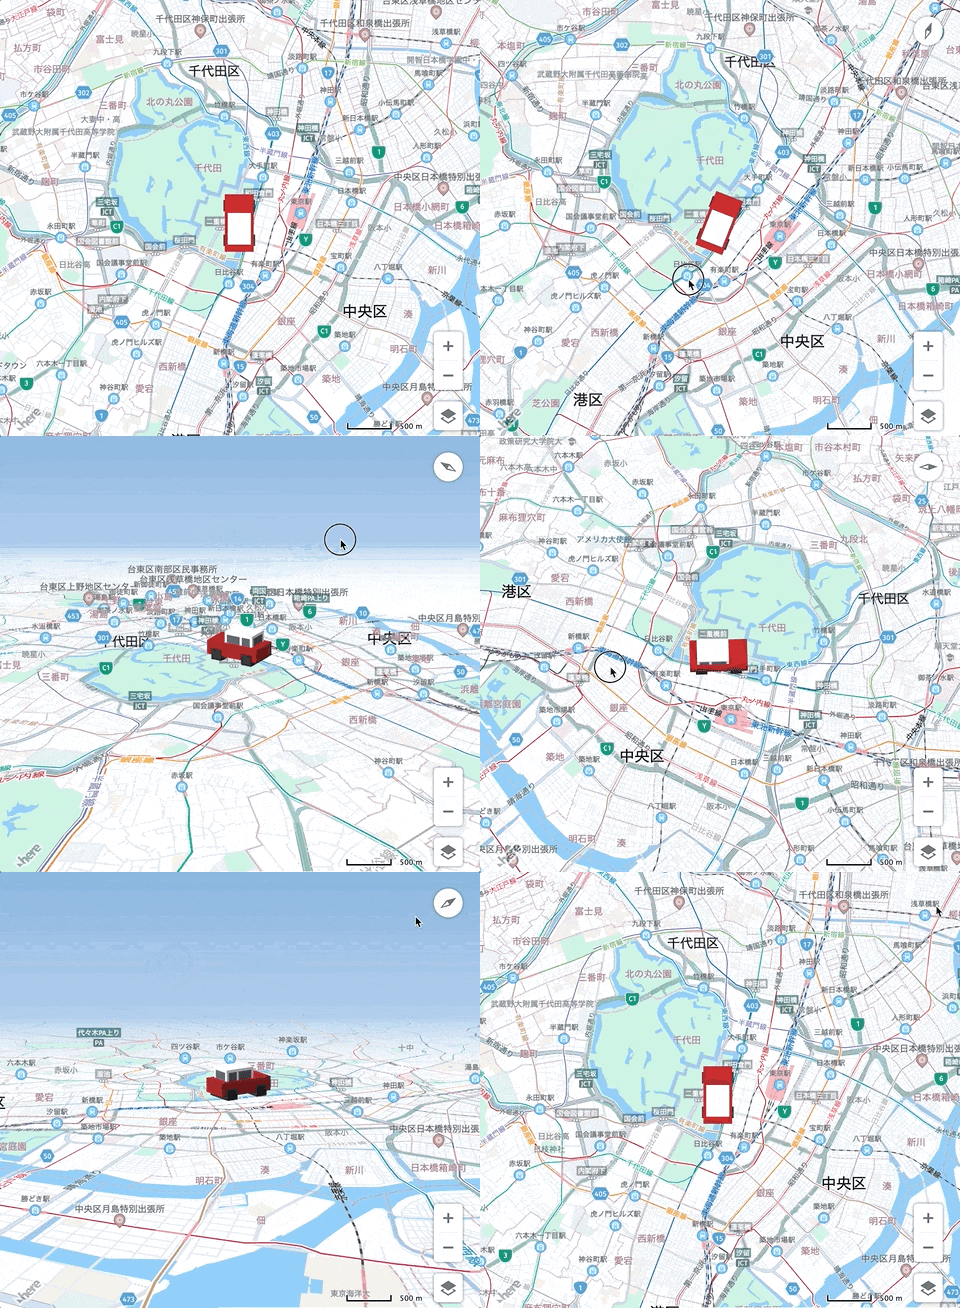
私は数学があまり得意な方ではないので、updateIcon内の計算式にたどり着くまで相当試行錯誤してました。効果は以下のようになります。

すごくスムーズに動いてくれて感動!(実際はこのGIFよりもさらにスムーズ)
注意点
実はまだ注意点があります。
平行投影
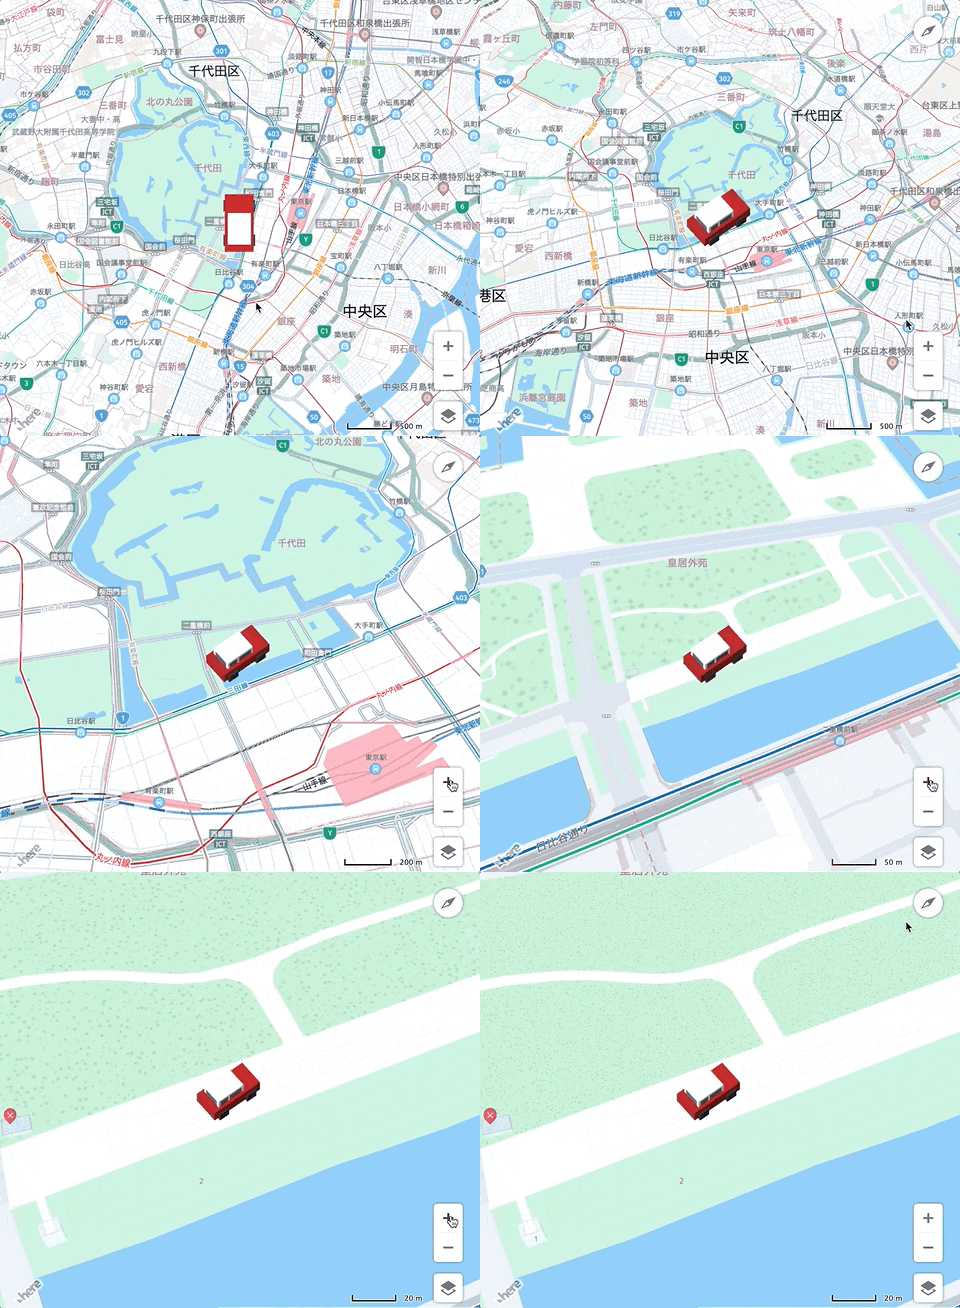
まずは今回OrthographicCameraを使っているので、レンダリング時は平行投影になります。つまりクルマの大きさは地図のズームレベルによって変化しません。

これは意図的にこうしている部分もありまして、今回は完全なる3D地図を目指しているわけではなく、あくまでも3Dマーカーですので、マーカーは地図のズームレベルと関係なく常にサイズを一定に保つのが一般的かと思います。
レイヤー関係
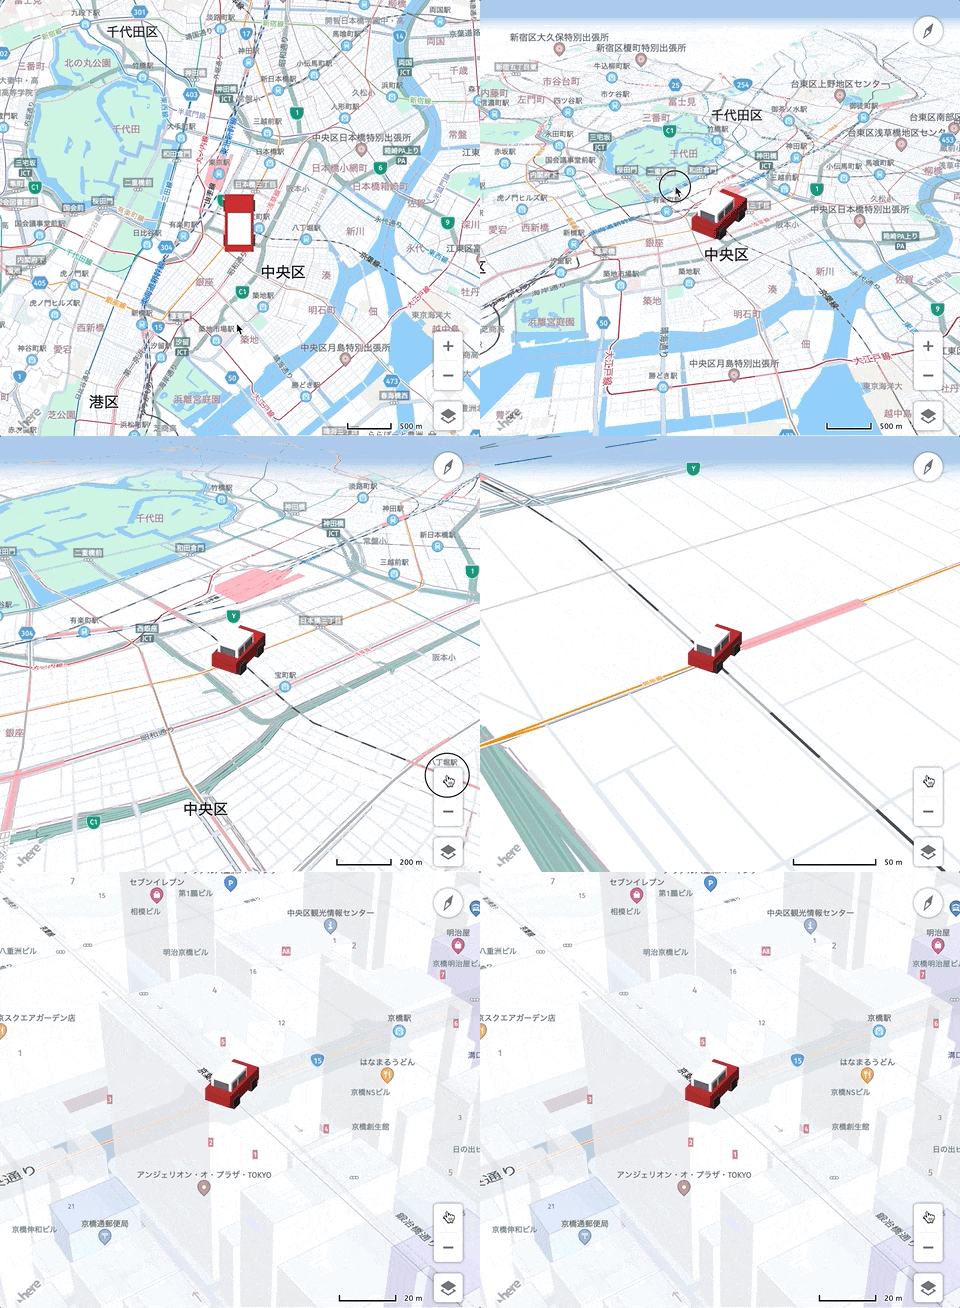
もう一つ注意点は、マーカーの場所を変えるとよりわかりやすくなります。

すごくズームインすると、今度はHERE Maps API for JavaScriptがデフォルトで提供している3D Buildingが仇となって、位置関係がちぐはぐになってしまい、クルマが建物の上に乗っているように見えてしまいました。
これはマーカーレイヤーは常に3D Buildingを含む他のベース地図レイヤーよりも上でレンダリングされているのが原因かと推測しています。本格的な3D遮蔽処理までして直そうとするとすごく大掛かりになってしまうので、ここでは逆に3D Buildingの方を消すことで逃げます…
    function setStyle(map) {
      const provider = map.getBaseLayer().getProvider();
      const style = provider.getStyle();
      const changeListener = e => {
        if (style.getState() === H.map.Style.State.READY) {
          style.removeEventListener('change', changeListener);
          style.removeProperty('layers.buildings.extrude');
        }
      }
      style.addEventListener('change', changeListener);
    }
    setStyle(map);
おわりに
最終のコードをまとめて以下に置いておきました。ご参考になれば幸いです。
See the Pen HERE Maps API for JavaScript - 3D Marker by kairyu (@kairyu1103) on CodePen.