はじめに
この記事はAuth.jsがどのようなものか,どのように実装すればいいかなどをドキュメントを要約しながら紹介するものです.
2024/02/19 追記
Auth.jsはv5で破壊的変更がありました.新たにAuth.jsを学ぶ場合には,特に理由がない限りv5を使うことをお勧めします.v5の記事は近日中に出します.
Auth.jsはドキュメント整備中です.現在のドキュメントとは内容が異なる場合があります.この記事では旧ドキュメントの内容も交えて解説しています.
2025/10/06 追記
Auth.jsはBetterAuthに合流しました.詳しくはこちらを参照してください.
今回はNext.js App Router実装編です.前回の記事はこちら
環境構築
JWTを用いたOAuth認証を行うためのNext.js環境を構築します.面倒であれば以下にテンプレートを用意しましたのでご自由にお使いください.
まず,Next.jsを作成します.以下のコマンドを実行し,質問に答えながら構築します.
npx create-next-app@latest
√ What is your project named? ... auth-app
√ Would you like to use TypeScript with this project? ... Yes
√ Would you like to use ESLint with this project? ... Yes
√ Would you like to use Tailwind CSS with this project? ... Yes
√ Would you like to use `src/` directory with this project? ... Yes
√ Use App Router (recommended)? ... Yes
√ Would you like to customize the default import alias? ... No
√ What import alias would you like configured? ... @/*
次に,NextAuth.js(Auth.js)をいれます.
npm install next-auth
実装
src/app/api/auth/[...nextauth]/route.tsを作成します.
import NextAuth from 'next-auth'
import GithubProvider from 'next-auth/providers/github'

export const authOptions = {
  secret: process.env.NEXTAUTH_SECRET,
  providers: [
    GithubProvider({
      clientId: process.env.GITHUB_CLIENT_ID ?? '',
      clientSecret: process.env.GITHUB_CLIENT_SECRET ?? '',
    }),
  ],
}

const handler = NextAuth(authOptions)

export { handler as GET, handler as POST }
これは,Next.jsの機能Dynamic Routesを利用して/api/auth/*のリクエストをすべてこのroute.tsで処理するためのファイルです.
Auth.jsは認証周りの機能をAPI Routes(サーバー)で処理するため,GETやPOSTを処理するためのhandlerを名前付きでエクスポートします.ここで処理するリクエストは以下のとおりです.
リクエスト一覧
| http method | path | description |
|---|---|---|
| GET | /api/auth/signin |
サインページの取得 |
| POST | /api/auth/signin/:provider |
各プロバイダにサインインリクエストを送る |
| GET/POST | /api/auth/callback/:provider |
各プロバイダからサインイン結果が返ってくる |
| GET | /api/auth/signout |
サインアウトページの取得 |
| POST` | /api/auth/signout |
サインアウト処理 |
| GET | /api/auth/session |
セッション情報の取得 |
| GET | /api/auth/csrf |
CSRFトークンの取得 |
| GET | /api/auth/providers |
サインインできるプロバイダ一覧の取得 |
また,Auth.jsをクライアントで使えるようにするために,src/providers/NextAuth.tsxを作成します.
'use client'

import { SessionProvider } from 'next-auth/react'
import { ReactNode } from 'react'

const NextAuthProvider = ({ children }: { children: ReactNode }) => {
  return <SessionProvider>{children}</SessionProvider>
}

export default NextAuthProvider
SessionProviderはuseContextを含むのでClient Componentsにしなければいけないことに注意です.
あとはこれをsrc/app/layout.tsxで読み込みます.
import './globals.css'
import { Inter } from 'next/font/google'
import NextAuthProvider from '@/providers/NextAuth'

const inter = Inter({ subsets: ['latin'] })

export const metadata = {
  title: 'Create Next App',
  description: 'Generated by create next app',
}

export default function RootLayout({ children }: { children: React.ReactNode }) {
  return (
    <html lang='en'>
      <body className={inter.className}>
        <NextAuthProvider>{children}</NextAuthProvider>
      </body>
    </html>
  )
}
次に,以下のOAuthアプリの作成に従って認可機構を作ります.入力内容で注意したいのはcallback URLです.必ずhttp://localhost:3000/api/auth/callback/githubのように/api/auth/callback/githubをオリジンURLの後ろに入れましょう.
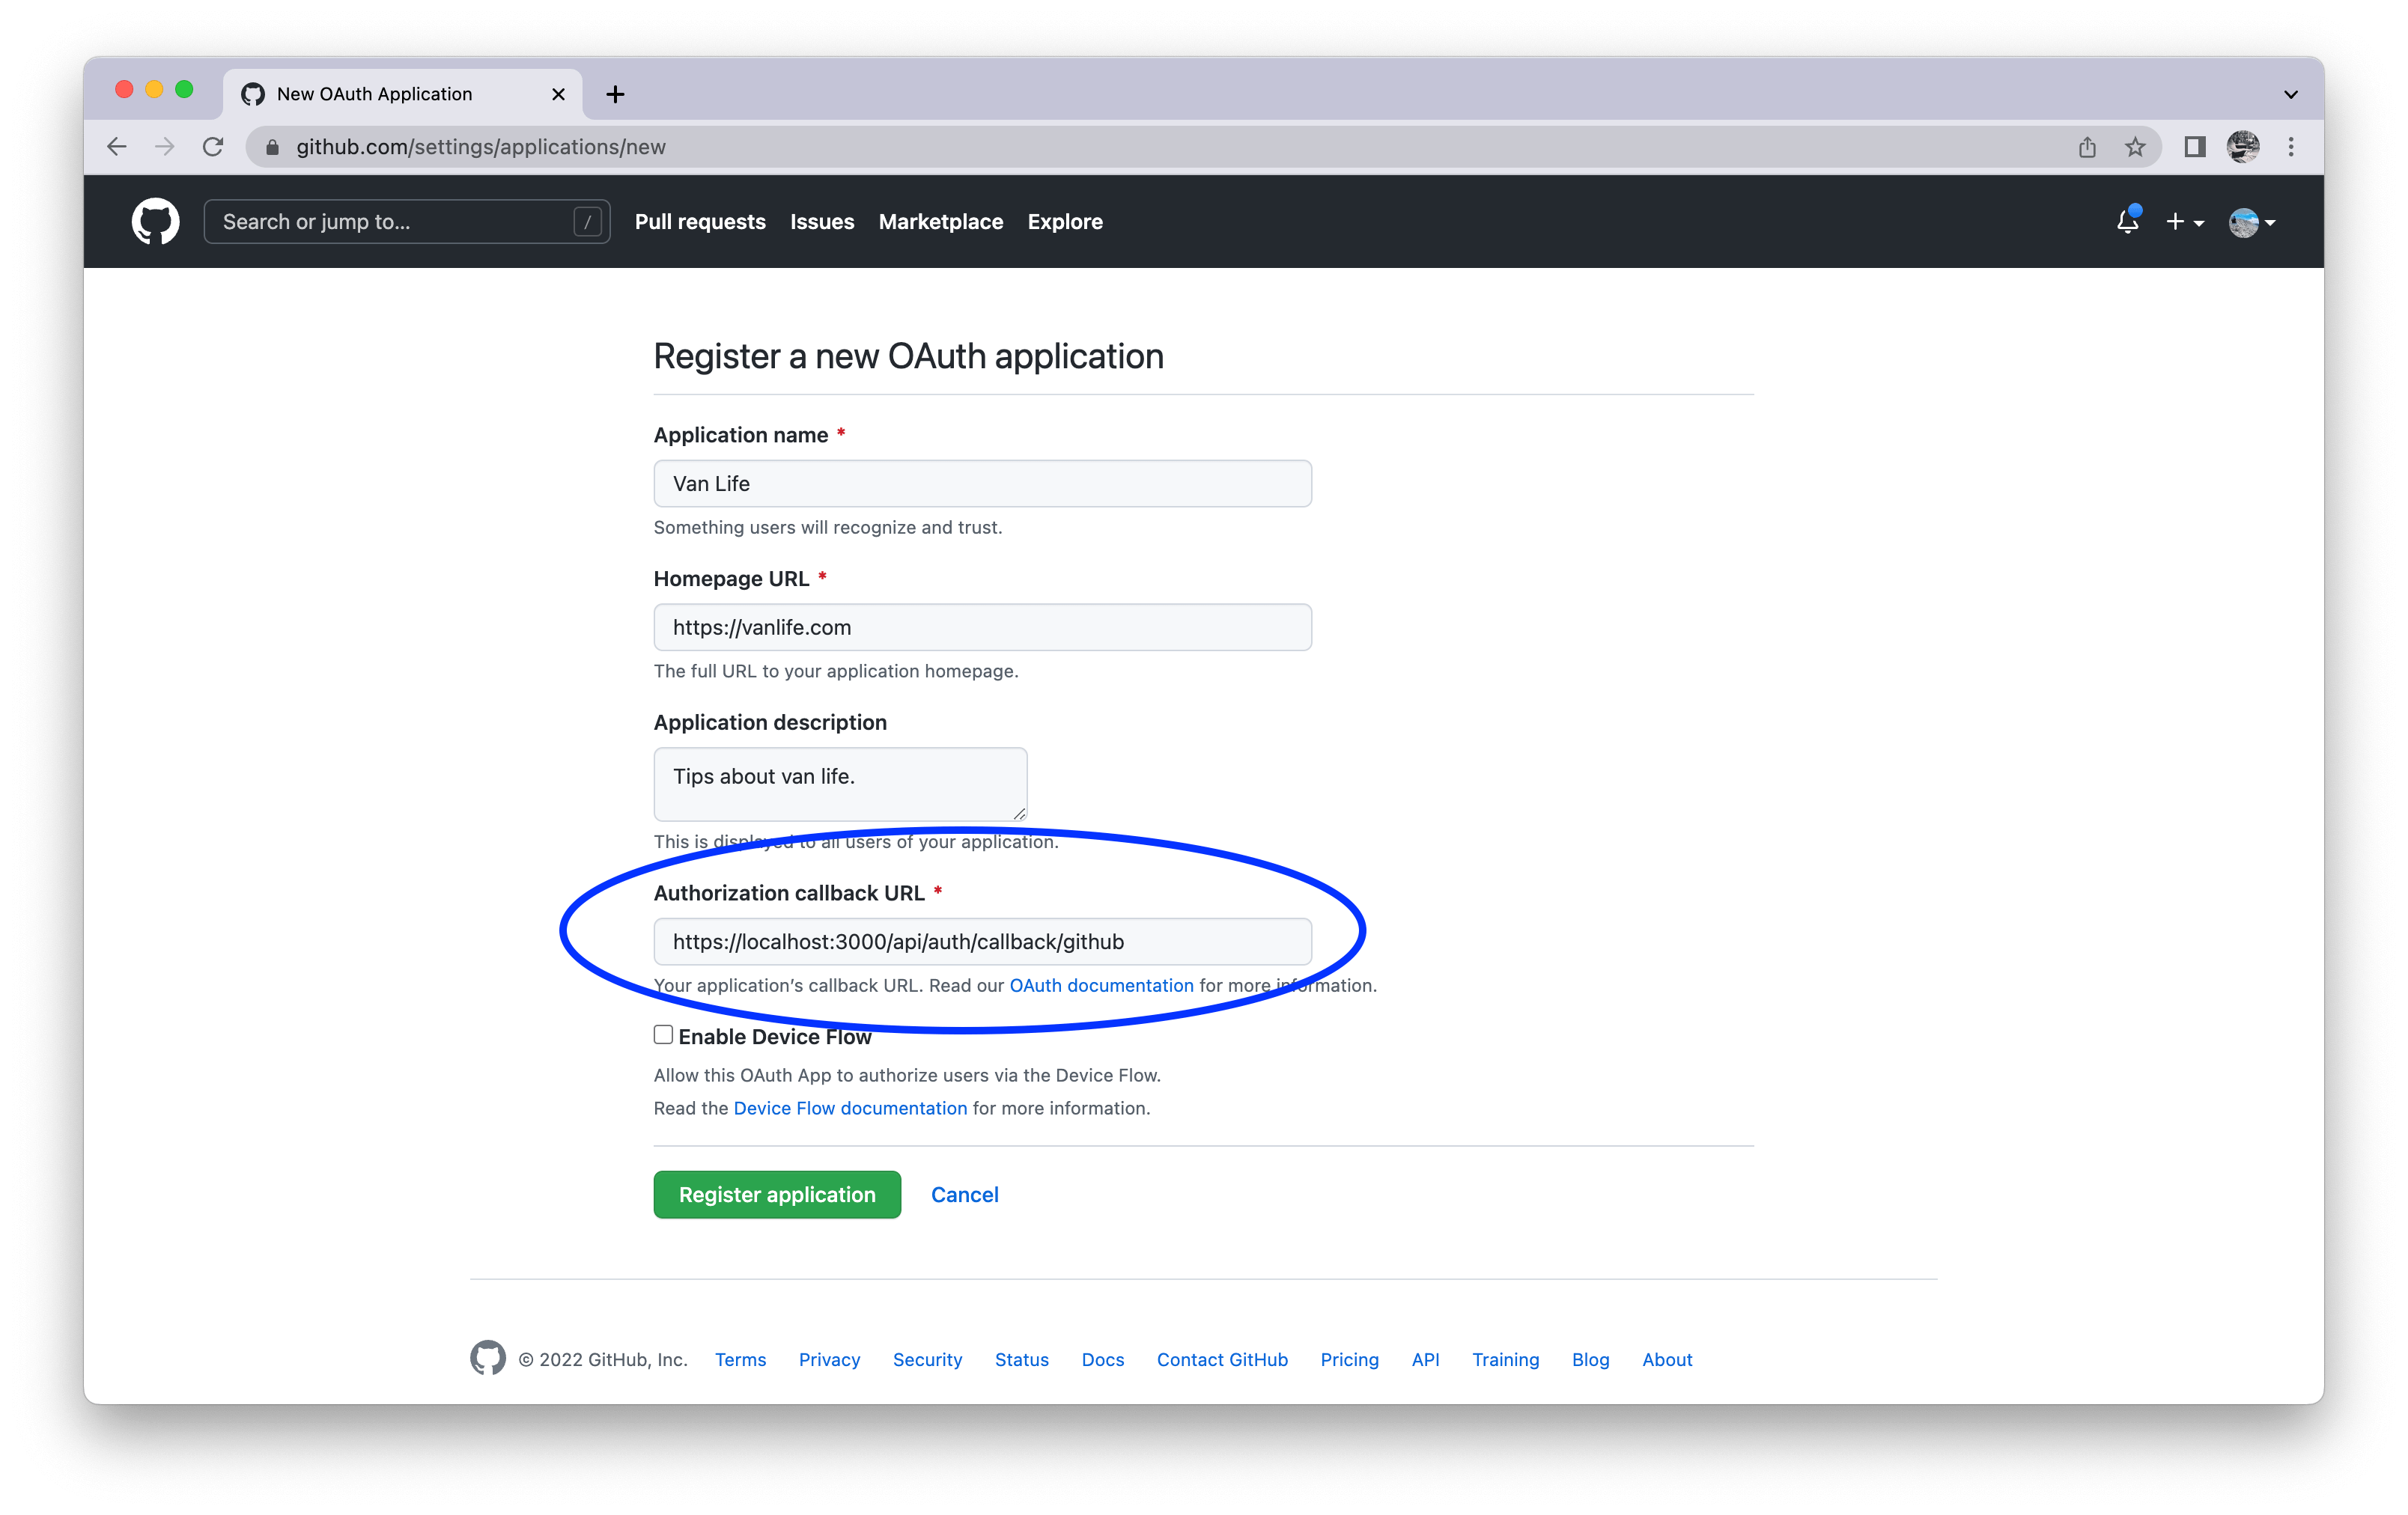
(https://authjs.dev より)
すると,client IDが表示されます.また,その少し右下にGenerate a new client secretというボタンがあるので,そこをクリックするとClient Secretが生成されます.
このClient IDとClient Secret2つをコピーします.
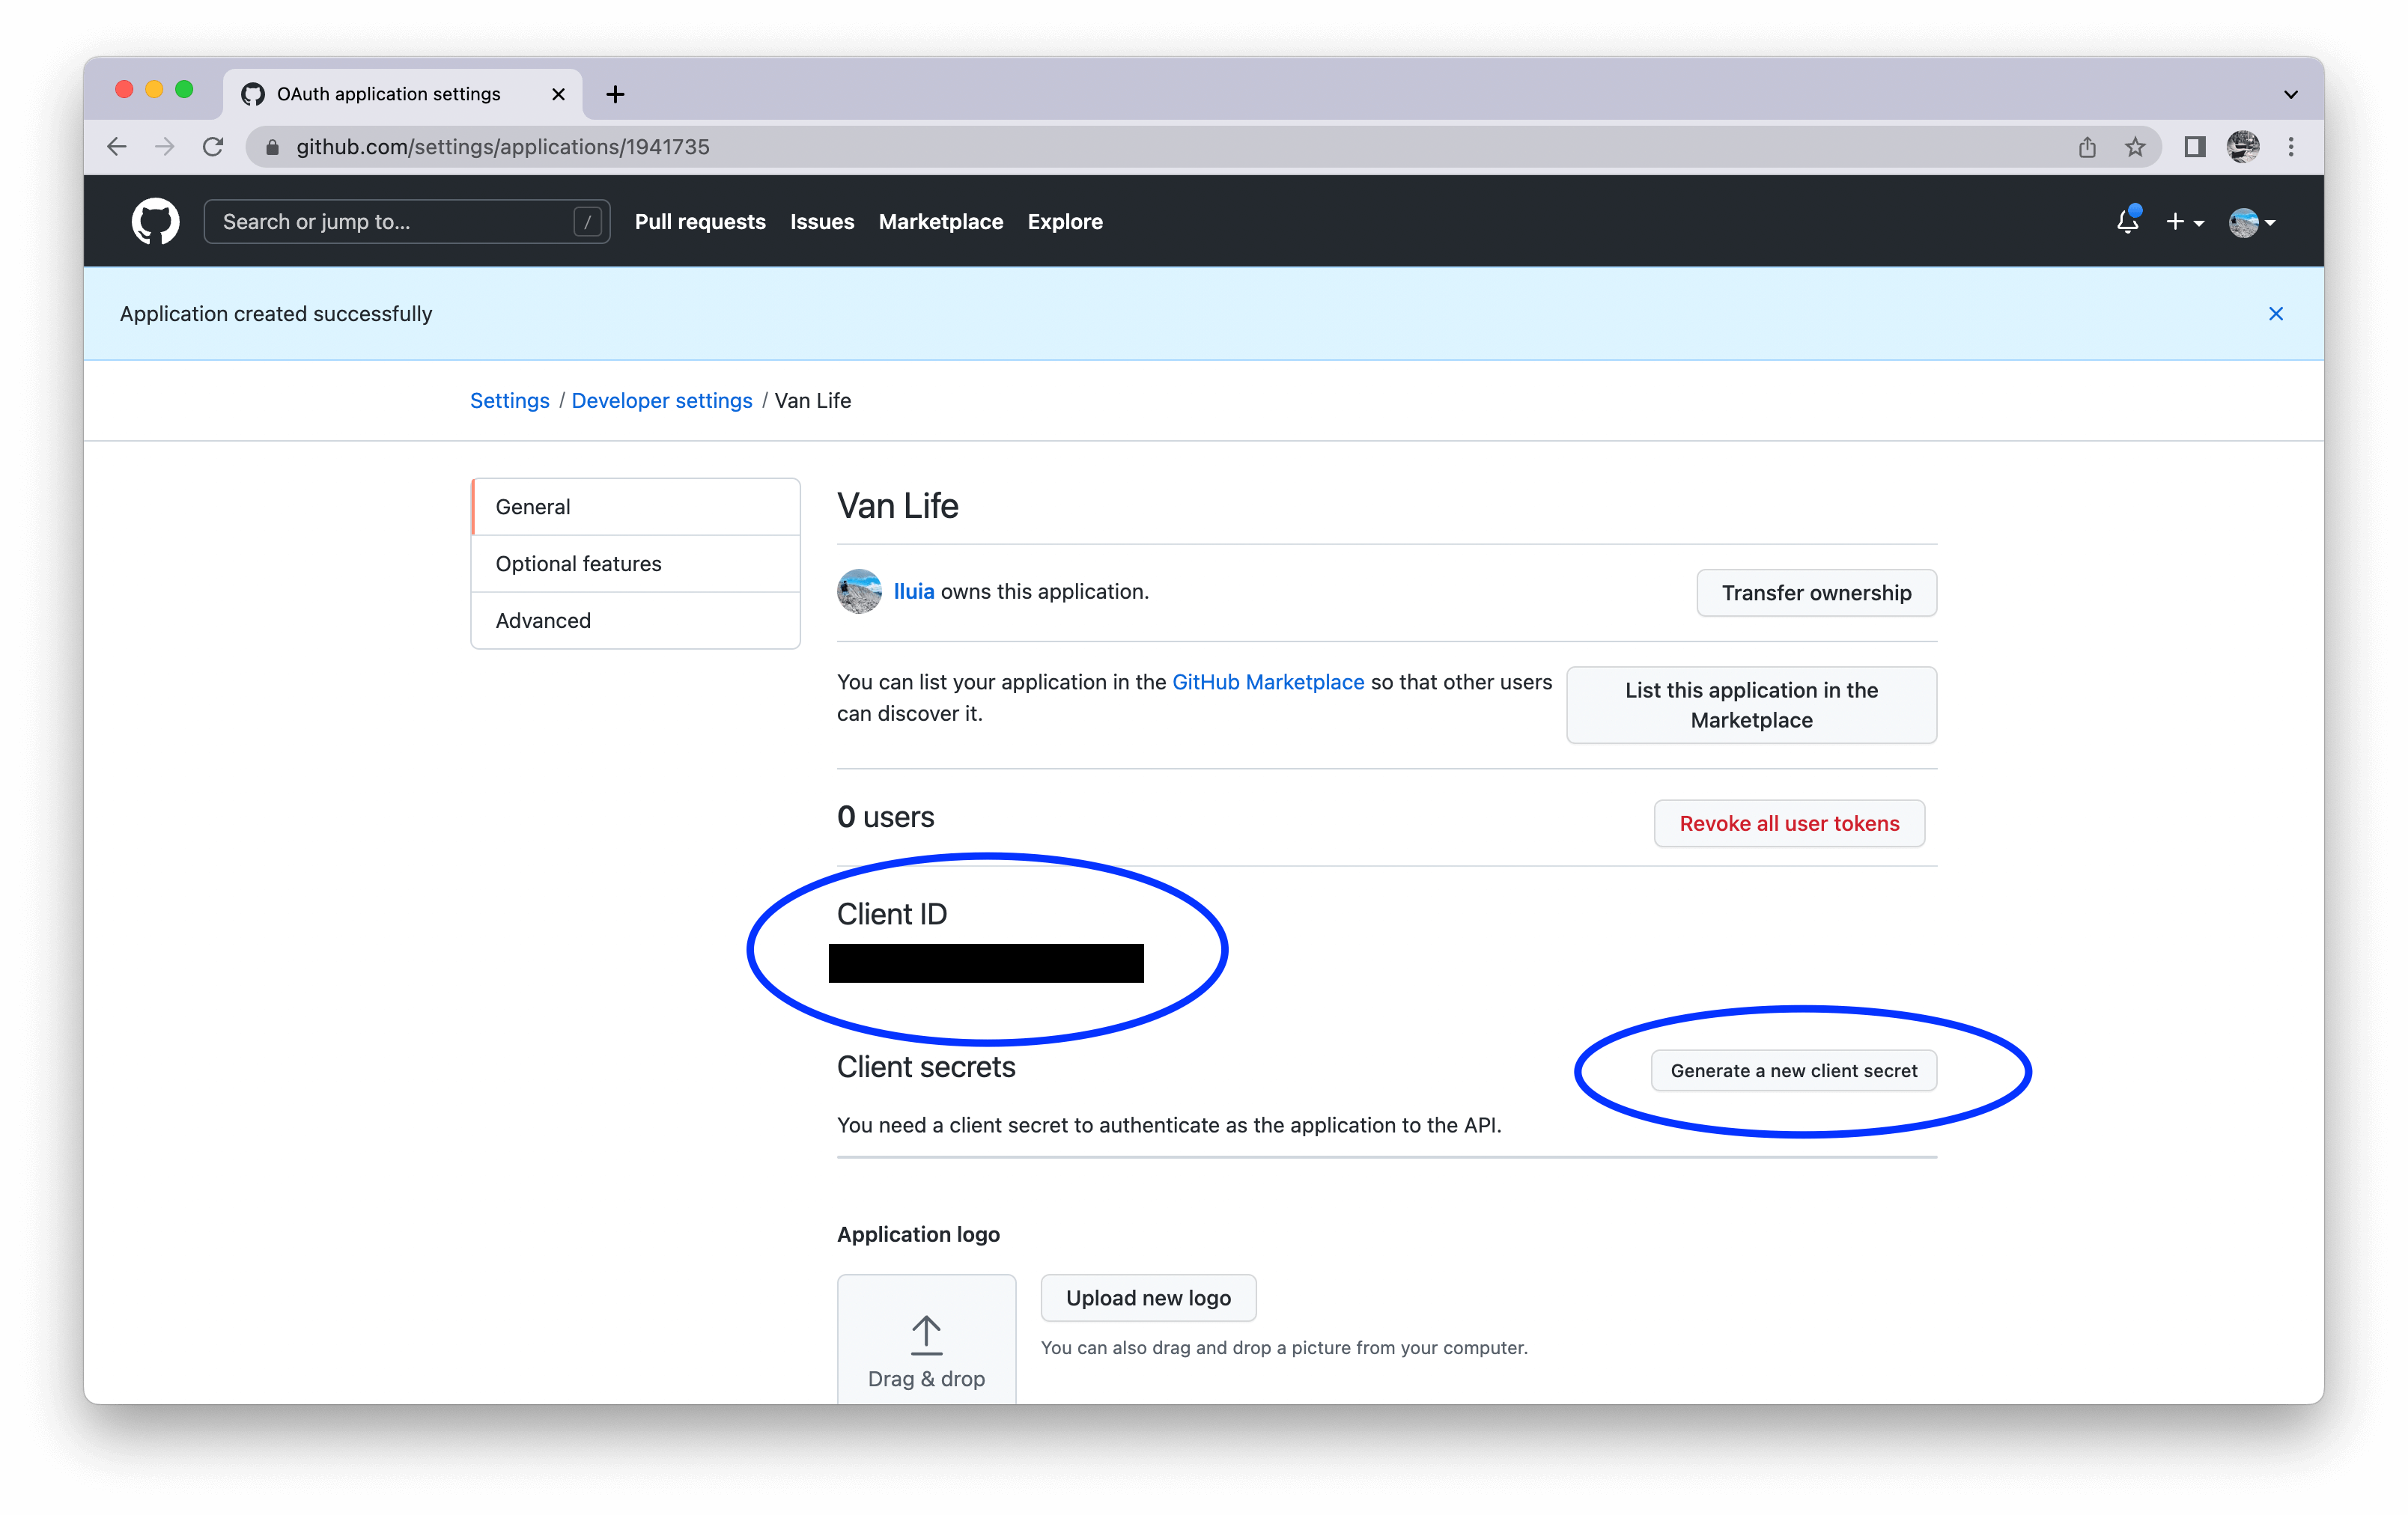
(https://authjs.dev より)
プロジェクトルートに.envファイルを作成し,先ほどコピーした2つの値を以下のように貼り付けます.
NEXTAUTH_URL="http://localhost:3000"
NEXTAUTH_SECRET="secret"

GITHUB_CLIENT_ID="12345"
GITHUB_CLIENT_SECRET="67890"
また,NEXTAUTH_URLとNEXTAUTH_SECRETも設定しましょう.前者に関してはコピペでいいですが,後者は別の値を使うことを推奨します.この値はJWTを暗号化するのに使われるなど秘密鍵としての役割を担うので以下のように生成するなど対策を施してください.
$ openssl rand -base64 32
または, https://generate-secret.vercel.app/32 にアクセスして生成してもいいです.
これで設定は終了です.src/app/page.tsxでセッションを確認してみましょう.
クライアントサイドでのセッション確認
'use client';
import Image from 'next/image';
import { useSession, signIn, signOut } from 'next-auth/react';
export default function Home() {
const { data: session } = useSession();
return (
<main className='flex min-h-screen flex-col items-center justify-between p-24'>
<div className='z-10 max-w-5xl w-full items-center justify-between font-mono text-sm lg:flex'>
<p className='fixed left-0 top-0 flex w-full justify-center border-b border-gray-300 bg-gradient-to-b from-zinc-200 pb-6 pt-8 backdrop-blur-2xl dark:border-neutral-800 dark:bg-zinc-800/30 dark:from-inherit lg:static lg:w-auto lg:rounded-xl lg:border lg:bg-gray-200 lg:p-4 lg:dark:bg-zinc-800/30'>
Hello
<code className='font-mono font-bold'>{session?.user?.name ?? 'guest'}</code>
</p>
{!session && (
<button
onClick={() => signIn()}
className='flex w-full justify-center border-2 border-b border-red-300 hover:border-red-400 bg-red-200 hover:bg-red-300 pb-6 pt-8 backdrop-blur-2xl dark:border-red-800 dark:hover:border-red-900 dark:bg-red-800/50 dark:hover:bg-red-900/30 lg:static lg:w-auto lg:rounded-xl lg:p-4'
>
Sign In
</button>
)}
{session && (
<button
onClick={() => signOut()}
className='flex w-full justify-center border-2 border-b border-green-300 bg-green-200 pb-6 pt-8 backdrop-blur-2xl dark:border-green-800 dark:bg-green-800/30 lg:static lg:w-auto lg:rounded-xl lg:p-4 hover:border-green-400 hover:bg-green-300 dark:hover:border-green-900 dark:hover:bg-green-900/30'
>
Sign Out
</button>
)}
<div className='fixed bottom-0 left-0 flex h-48 w-full items-end justify-center bg-gradient-to-t from-white via-white dark:from-black dark:via-black lg:static lg:h-auto lg:w-auto lg:bg-none'>
<a
className='pointer-events-none flex place-items-center gap-2 p-8 lg:pointer-events-auto lg:p-0'
href='https://vercel.com?utm_source=create-next-app&utm_medium=appdir-template&utm_campaign=create-next-app'
target='_blank'
rel='noopener noreferrer'
>
By{' '}
<Image
src='/vercel.svg'
alt='Vercel Logo'
className='dark:invert'
width={100}
height={24}
priority
/>
</a>
</div>
</div>
<div className="relative flex place-items-center before:absolute before:h-[300px] before:w-[480px] before:-translate-x-1/2 before:rounded-full before:bg-gradient-radial before:from-white before:to-transparent before:blur-2xl before:content-[''] after:absolute after:-z-20 after:h-[180px] after:w-[240px] after:translate-x-1/3 after:bg-gradient-conic after:from-sky-200 after:via-blue-200 after:blur-2xl after:content-[''] before:dark:bg-gradient-to-br before:dark:from-transparent before:dark:to-blue-700 before:dark:opacity-10 after:dark:from-sky-900 after:dark:via-[#0141ff] after:dark:opacity-40 before:lg:h-[360px] z-[-1]">
<Image
className='relative dark:drop-shadow-[0_0_0.3rem_#ffffff70] dark:invert'
src='/next.svg'
alt='Next.js Logo'
width={180}
height={37}
priority
/>
</div>
<div className='mb-32 grid text-center lg:max-w-5xl lg:w-full lg:mb-0 lg:grid-cols-4 lg:text-left'>
<a
href='https://nextjs.org/docs?utm_source=create-next-app&utm_medium=appdir-template&utm_campaign=create-next-app'
className='group rounded-lg border border-transparent px-5 py-4 transition-colors hover:border-gray-300 hover:bg-gray-100 hover:dark:border-neutral-700 hover:dark:bg-neutral-800/30'
target='_blank'
rel='noopener noreferrer'
>
<h2 className={`mb-3 text-2xl font-semibold`}>
Docs{' '}
<span className='inline-block transition-transform group-hover:translate-x-1 motion-reduce:transform-none'>
->
</span>
</h2>
<p className={`m-0 max-w-[30ch] text-sm opacity-50`}>
Find in-depth information about Next.js features and API.
</p>
</a>
<a
href='https://nextjs.org/learn?utm_source=create-next-app&utm_medium=appdir-template-tw&utm_campaign=create-next-app'
className='group rounded-lg border border-transparent px-5 py-4 transition-colors hover:border-gray-300 hover:bg-gray-100 hover:dark:border-neutral-700 hover:dark:bg-neutral-800/30'
target='_blank'
rel='noopener noreferrer'
>
<h2 className={`mb-3 text-2xl font-semibold`}>
Learn{' '}
<span className='inline-block transition-transform group-hover:translate-x-1 motion-reduce:transform-none'>
->
</span>
</h2>
<p className={`m-0 max-w-[30ch] text-sm opacity-50`}>
Learn about Next.js in an interactive course with quizzes!
</p>
</a>
<a
href='https://vercel.com/templates?framework=next.js&utm_source=create-next-app&utm_medium=appdir-template&utm_campaign=create-next-app'
className='group rounded-lg border border-transparent px-5 py-4 transition-colors hover:border-gray-300 hover:bg-gray-100 hover:dark:border-neutral-700 hover:dark:bg-neutral-800/30'
target='_blank'
rel='noopener noreferrer'
>
<h2 className={`mb-3 text-2xl font-semibold`}>
Templates{' '}
<span className='inline-block transition-transform group-hover:translate-x-1 motion-reduce:transform-none'>
->
</span>
</h2>
<p className={`m-0 max-w-[30ch] text-sm opacity-50`}>
Explore starter templates for Next.js.
</p>
</a>
<a
href='https://vercel.com/new?utm_source=create-next-app&utm_medium=appdir-template&utm_campaign=create-next-app'
className='group rounded-lg border border-transparent px-5 py-4 transition-colors hover:border-gray-300 hover:bg-gray-100 hover:dark:border-neutral-700 hover:dark:bg-neutral-800/30'
target='_blank'
rel='noopener noreferrer'
>
<h2 className={`mb-3 text-2xl font-semibold`}>
Deploy{' '}
<span className='inline-block transition-transform group-hover:translate-x-1 motion-reduce:transform-none'>
->
</span>
</h2>
<p className={`m-0 max-w-[30ch] text-sm opacity-50`}>
Instantly deploy your Next.js site to a shareable URL with Vercel.
</p>
</a>
</div>
</main>
);
}
サーバーサイドでのセッション確認
import Image from 'next/image'
import {getServerSession} from 'next-auth'
import { authOptions } from '@/api/auth/[..nextauth]/route'
import SessionTip from '@/components/SessionTip'
export default async function Home() {
const session = await getServerSession(authOptions)
return (
<main className='flex min-h-screen flex-col items-center justify-between p-24'>
<div className='z-10 max-w-5xl w-full items-center justify-between font-mono text-sm lg:flex'>
<p className='fixed left-0 top-0 flex w-full justify-center border-b border-gray-300 bg-gradient-to-b from-zinc-200 pb-6 pt-8 backdrop-blur-2xl dark:border-neutral-800 dark:bg-zinc-800/30 dark:from-inherit lg:static lg:w-auto lg:rounded-xl lg:border lg:bg-gray-200 lg:p-4 lg:dark:bg-zinc-800/30'>
Hello
<code className='font-mono font-bold'>{session?.user?.name ?? 'guest'}</code>
</p>
<SessionTip session={session} />
<div className='fixed bottom-0 left-0 flex h-48 w-full items-end justify-center bg-gradient-to-t from-white via-white dark:from-black dark:via-black lg:static lg:h-auto lg:w-auto lg:bg-none'>
<a
className='pointer-events-none flex place-items-center gap-2 p-8 lg:pointer-events-auto lg:p-0'
href='https://vercel.com?utm_source=create-next-app&utm_medium=appdir-template&utm_campaign=create-next-app'
target='_blank'
rel='noopener noreferrer'
>
By{' '}
<Image
src='/vercel.svg'
alt='Vercel Logo'
className='dark:invert'
width={100}
height={24}
priority
/>
</a>
</div>
</div>
<div className="relative flex place-items-center before:absolute before:h-[300px] before:w-[480px] before:-translate-x-1/2 before:rounded-full before:bg-gradient-radial before:from-white before:to-transparent before:blur-2xl before:content-[''] after:absolute after:-z-20 after:h-[180px] after:w-[240px] after:translate-x-1/3 after:bg-gradient-conic after:from-sky-200 after:via-blue-200 after:blur-2xl after:content-[''] before:dark:bg-gradient-to-br before:dark:from-transparent before:dark:to-blue-700 before:dark:opacity-10 after:dark:from-sky-900 after:dark:via-[#0141ff] after:dark:opacity-40 before:lg:h-[360px] z-[-1]">
<Image
className='relative dark:drop-shadow-[0_0_0.3rem_#ffffff70] dark:invert'
src='/next.svg'
alt='Next.js Logo'
width={180}
height={37}
priority
/>
</div>
<div className='mb-32 grid text-center lg:max-w-5xl lg:w-full lg:mb-0 lg:grid-cols-4 lg:text-left'>
<a
href='https://nextjs.org/docs?utm_source=create-next-app&utm_medium=appdir-template&utm_campaign=create-next-app'
className='group rounded-lg border border-transparent px-5 py-4 transition-colors hover:border-gray-300 hover:bg-gray-100 hover:dark:border-neutral-700 hover:dark:bg-neutral-800/30'
target='_blank'
rel='noopener noreferrer'
>
<h2 className={`mb-3 text-2xl font-semibold`}>
Docs{' '}
<span className='inline-block transition-transform group-hover:translate-x-1 motion-reduce:transform-none'>
->
</span>
</h2>
<p className={`m-0 max-w-[30ch] text-sm opacity-50`}>
Find in-depth information about Next.js features and API.
</p>
</a>
<a
href='https://nextjs.org/learn?utm_source=create-next-app&utm_medium=appdir-template-tw&utm_campaign=create-next-app'
className='group rounded-lg border border-transparent px-5 py-4 transition-colors hover:border-gray-300 hover:bg-gray-100 hover:dark:border-neutral-700 hover:dark:bg-neutral-800/30'
target='_blank'
rel='noopener noreferrer'
>
<h2 className={`mb-3 text-2xl font-semibold`}>
Learn{' '}
<span className='inline-block transition-transform group-hover:translate-x-1 motion-reduce:transform-none'>
->
</span>
</h2>
<p className={`m-0 max-w-[30ch] text-sm opacity-50`}>
Learn about Next.js in an interactive course with quizzes!
</p>
</a>
<a
href='https://vercel.com/templates?framework=next.js&utm_source=create-next-app&utm_medium=appdir-template&utm_campaign=create-next-app'
className='group rounded-lg border border-transparent px-5 py-4 transition-colors hover:border-gray-300 hover:bg-gray-100 hover:dark:border-neutral-700 hover:dark:bg-neutral-800/30'
target='_blank'
rel='noopener noreferrer'
>
<h2 className={`mb-3 text-2xl font-semibold`}>
Templates{' '}
<span className='inline-block transition-transform group-hover:translate-x-1 motion-reduce:transform-none'>
->
</span>
</h2>
<p className={`m-0 max-w-[30ch] text-sm opacity-50`}>
Explore starter templates for Next.js.
</p>
</a>
<a
href='https://vercel.com/new?utm_source=create-next-app&utm_medium=appdir-template&utm_campaign=create-next-app'
className='group rounded-lg border border-transparent px-5 py-4 transition-colors hover:border-gray-300 hover:bg-gray-100 hover:dark:border-neutral-700 hover:dark:bg-neutral-800/30'
target='_blank'
rel='noopener noreferrer'
>
<h2 className={`mb-3 text-2xl font-semibold`}>
Deploy{' '}
<span className='inline-block transition-transform group-hover:translate-x-1 motion-reduce:transform-none'>
->
</span>
</h2>
<p className={`m-0 max-w-[30ch] text-sm opacity-50`}>
Instantly deploy your Next.js site to a shareable URL with Vercel.
</p>
</a>
</div>
</main>
)
}
'use client'

import { signIn, signOut } from 'next-auth/react'
import type { Session } from 'next-auth'

export default function SessionTip({ session }:{session: Session | null}) {
  if (!session) return (
    <button
      onClick={() => signIn()}
      className='flex w-full justify-center border-2 border-b border-red-300 hover:border-red-400 bg-red-200 hover:bg-red-300 pb-6 pt-8 backdrop-blur-2xl dark:border-red-800 dark:hover:border-red-900 dark:bg-red-800/50 dark:hover:bg-red-900/30 lg:static lg:w-auto lg:rounded-xl lg:p-4'
    >
      Sign In
    </button>
  )

  return (
    <button
      onClick={() => signOut()}
      className='flex w-full justify-center border-2 border-b border-green-300 bg-green-200 pb-6 pt-8 backdrop-blur-2xl dark:border-green-800 dark:bg-green-800/30 lg:static lg:w-auto lg:rounded-xl lg:p-4 hover:border-green-400 hover:bg-green-300 dark:hover:border-green-900 dark:hover:bg-green-900/30'
    >
      Sign Out
    </button>
  )
}
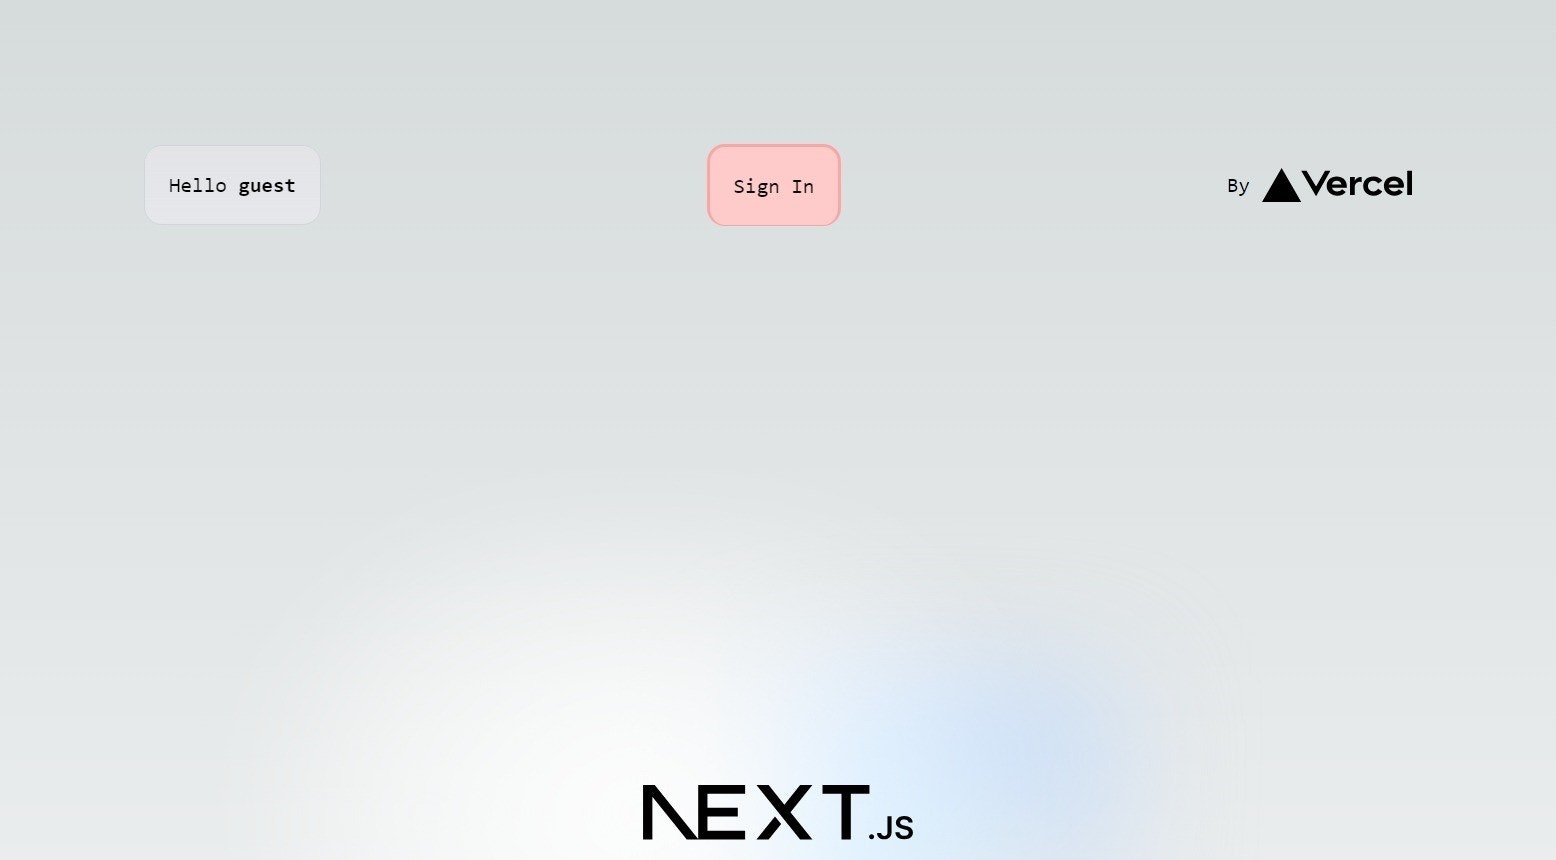
サインイン前
サインイン後
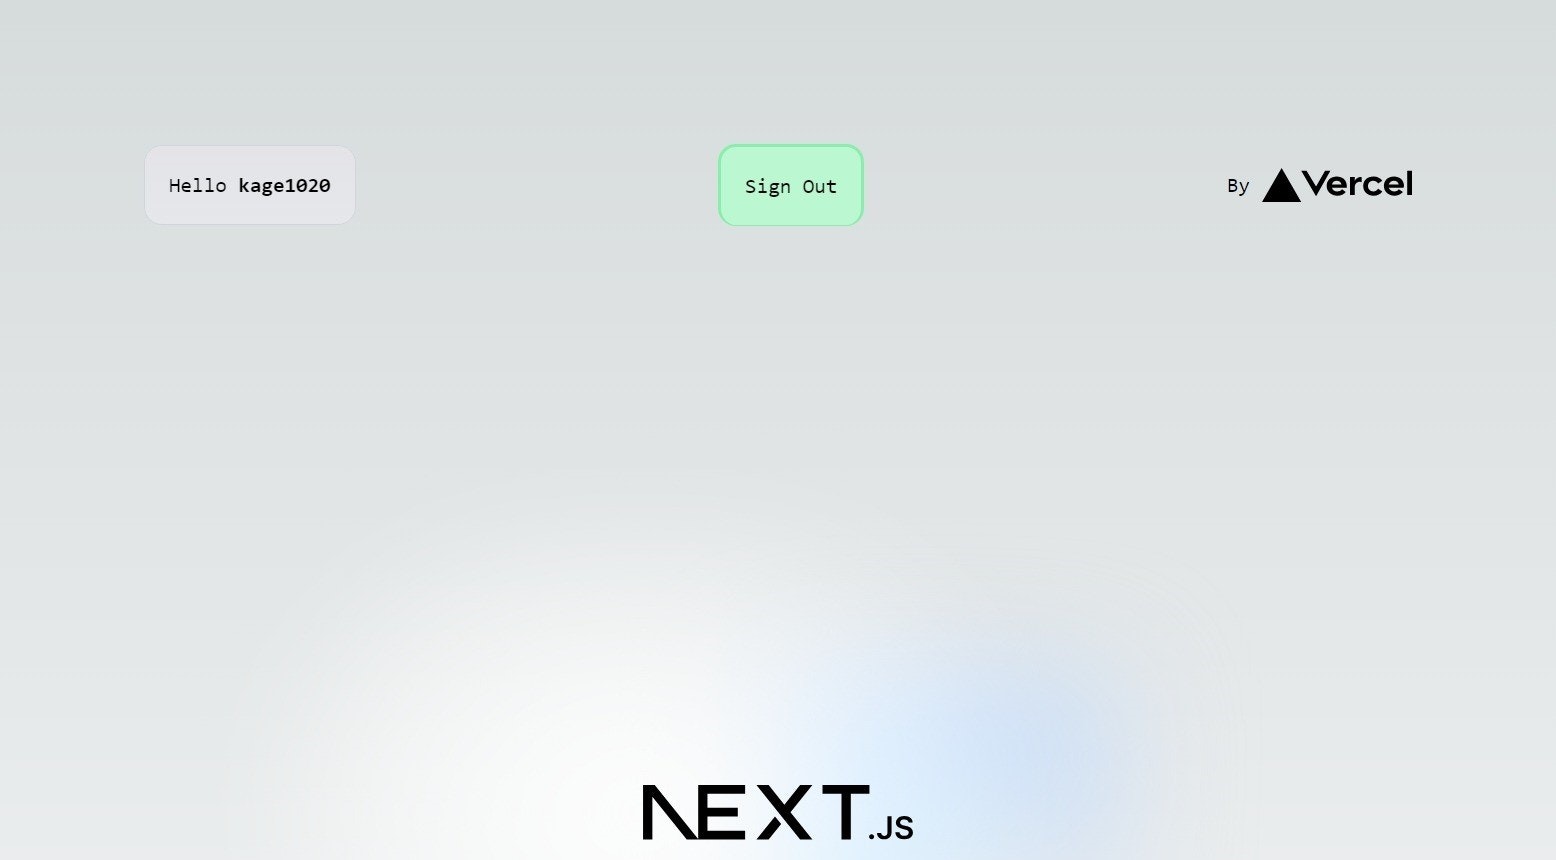
無事サインイン情報によってビューが変化しています.
デプロイ
基本どこでもデプロイできますが,今回はVercelにデプロイしてみます.
Vercelアカウントを作成したうえでこちらにアクセスして,Githubアカウントと連携します.すると,レポジトリ一覧が表示されるのでデプロイしたいレポジトリを選択します.
選択をすると,以下の画像のような画面になるので,.envファイルに書いてある内容をコピペします.
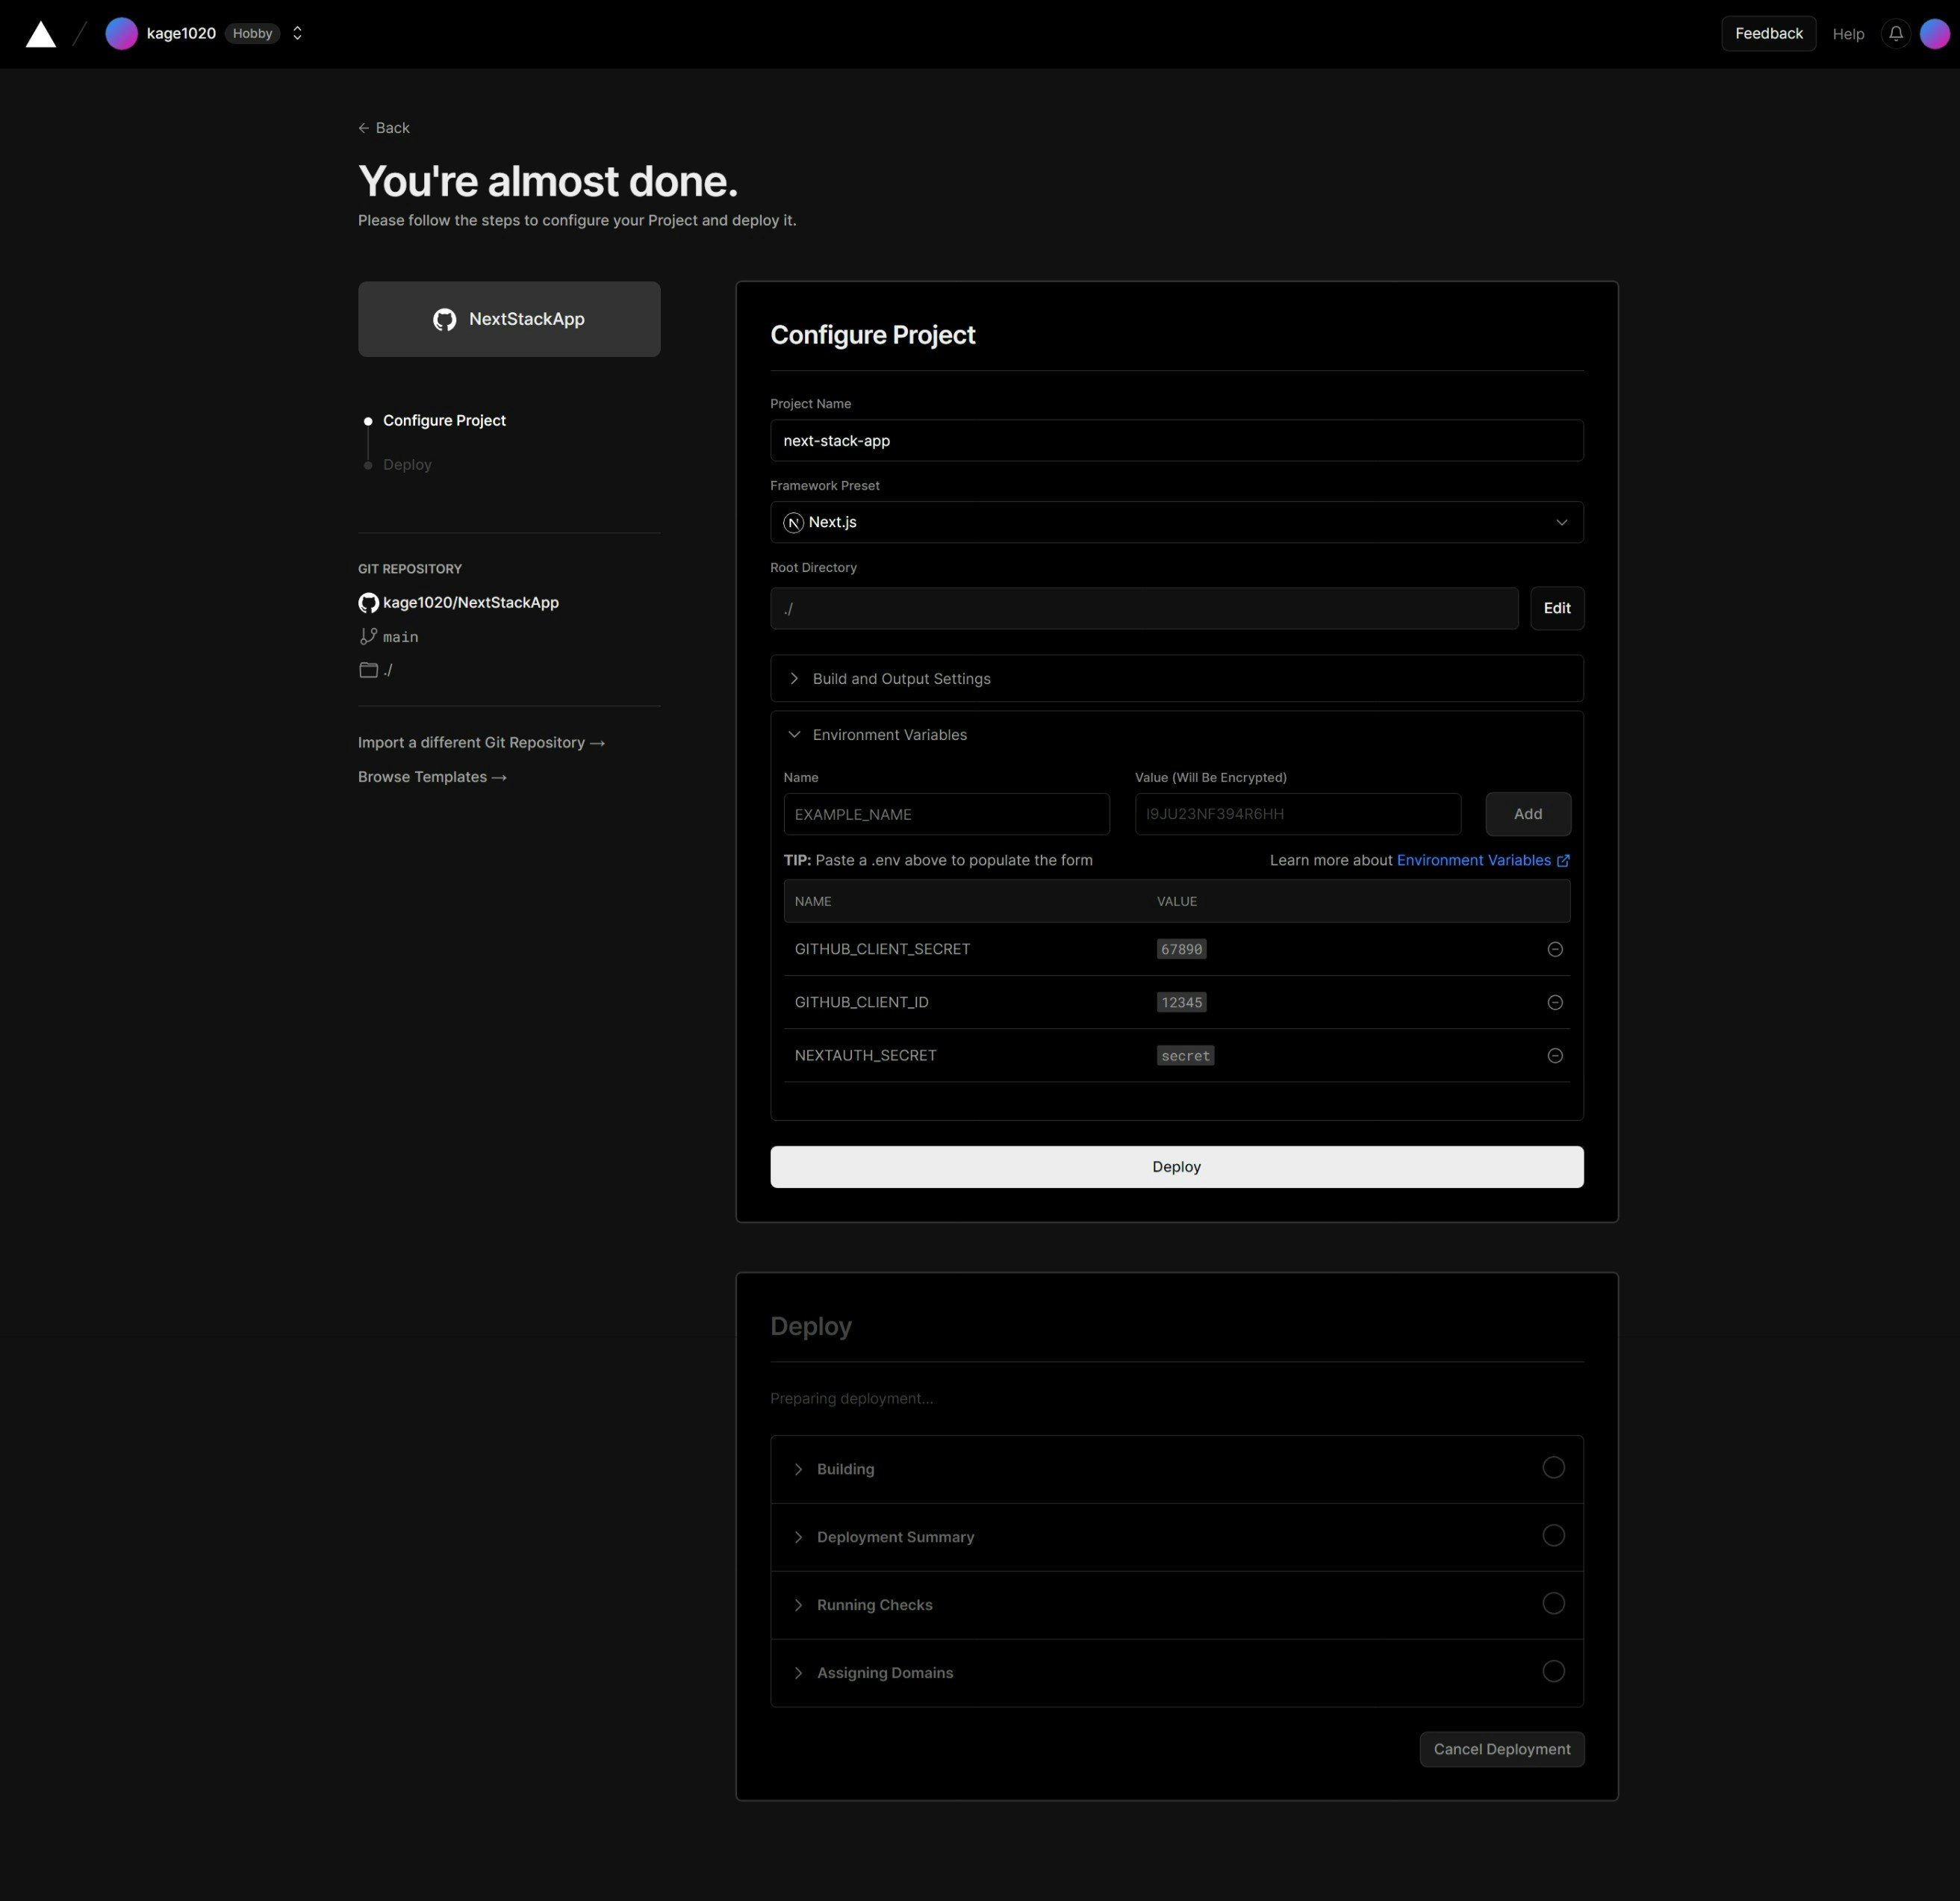
後はDeployボタンを押すと無事デプロイが完了します.
API等具体的な内容
Session情報
useSessionを使って得られるセッション情報は以下のとおりです.
{
  user?: {
    name?: string
    email?: string
    image?: string
  },
  expires: Date // This is the expiry of the session, not any of the tokens within the session
}
この値はセキュリティを考慮してプロバイダから得られる情報の中のごく一部となっています.各ユーザー個別の情報が欲しい場合には,以下のように都度拡張することができます.
// jwtを利用する場合
const handler = NextAuth({
  session: {
    strategy: 'jwt', // default
  },
  callbacks: {
    jwt: async ({ token, account }) => {
      if (account) { // 初回サインイン時にアカウント情報を取得できる
        token.id = account.id
      }
      return token
    },
    session: async ({ session, token }) => {
      session.user.id = token.id // jwt関数でセットしたidをtoken.idで取得できる
      return session
    }
  }
})

// databaseを利用する場合
const handler = NextAuth({
  session: {
    strategy: 'database',
  },
  callbacks: {
    session: async ({ session, user }) => {
      session.user.id = user.id // `User`テーブルのフィールド値を取得できる
      return session
    }
  }
})
また,TypeScriptではinterfaceの拡張も必要です.
import NextAuth from 'next-auth'

import type { DefaultSession } from 'next-auth'
import type { JWT } from "next-auth/jwt"

declare module 'next-auth' {
  interface Session {
    user?: {
      id: string
    } & DefaultSession['user']
  }
}

declare module "next-auth/jwt" {
  interface JWT {
    id: string
  }
}
認証情報の取得
useSession
何度も説明していますが,クライアント側でセッション情報を取得するhooksです.内部ではReactのuseContextを使用しているのでクライアントコンポーネントでしか使えません.
'use client'

export default function ProtectedPage() {
  const { data, status, update } = useSession({
    required: true, // SSRやCSRで有効
    onUnauthenticated: () => {
      // デフォルトではビルトインの`signIn`関数が呼ばれる
      // またサイン後にこのページに戻ってくるようcallbackUrlの設定も行われる
      // loggerやクライアントでの特別な処理をしたいときに有効
    }
  })

  return (
    ...
  )
}
useSessionはオプショナルな引数としてrequiredとonUnauthenticatedをとります.
また,返り値としてdata, status, updateがあります.前2つはセッションの状態によって次のような値をとります.
| 状態 | data |
status |
|---|---|---|
| セッション取得中 | undefined |
loading |
| 認証失敗 | null |
unauthenticated |
| 認証成功 | Session |
authenticated |
update関数はセッション情報を即座(非同期)に変更したいときに使います.詳細はこちら
useSessionの欠点としてセッションを確認するたびに(ページが更新されたりフォーカスされたりしたとき)/api/auth/sessionにリクエストが飛びます.セッション情報自体はそんなにサイズは大きくありませんが処理に時間がかかる場合があります.RootLayoutなどでuseSessionを呼ぶ場合セッション情報が必要ない場面でも無駄なリクエストが増えてしまうためあまりよろしくないです.これを回避するため,以下のような方法が提案されています.
// src/app/layout.tsx
export default function RootLayout({ children }: { children: ReactNode }) {
  return (
    <SessionProvider>
      {children.auth.role === 'admin' && (
        <Auth>{children}</Auth>
      )}
      {children.auth.role !== 'admin' && children}
    </SessionProvider>
  )
}

// src/components/auth.tsx
'use client'

function Auth({ children }: { children: ReactNode }) {
  const router = useRouter()
  const { status } = useSession({
    required: true,
    onUnauthenticated: () => router.push(children.unauthorized)
  })

  if (status === 'loading') return children.loading
  return children
}

// src/app/admin/page.tsx
export default function AdminPage() {
  ...
}

AdminPage.auth = {
  role: "admin",
  loading: <AdminLoadingSkeleton />,
  unauthorized: "/login-with-different-user", // redirect to this url
}
つまり,コンポーネント側でSessionを使うかどうか定義しておいて必要な時に呼び出そうというわけです.できるなら,ページやレイアウト単位で分けるのではなくコンポーネント単位でセッション情報を取得すれば無駄なClient Componentsが増えなくてよいですね.
getServerSession
サーバー側でセッション情報を取得するための関数です.この関数は/api/auth/sessionへリクエストするのではなく,リクエストヘッダやCookieなどからセッション情報を取得します.
// src/app/api/auth/[...nextauth]/route.ts
export const authOptions = {
  ...
}

// src/app/api/cart/route.ts
export const POST = async (req: Request) => {
  const session = await getServerSession(authOptions)
  ...
}
getCsrfToken
各プロバイダでサインインをするときに必要なCross Site Request Forgery Tokenを取得するための関数です.自前でプロバイダを用いたサインインページを作成する場合に使います.
async function myFunction() {
  const csrfToken = await getCsrfToken()
  ...
}
/api/auth/csrfにGETしても取得できます.
getProviders
自前のプロバイダを用いたサインインページを作る場合,サインインできるプロバイダリストを取得できます.
async function myFunction() {
  const providers = await getProviders()
  ...
}
{
  github: {
    id: "github",
    name: "GitHub",
    type: "oauth",
    signinUrl: "http://localhost:3000/api/auth/signin/github",
    callbackUrl: "http://localhost:3000/api/auth/callback/github"
  },
  ...
}
/api/auth/providersにGETしても取得できます.
signIn, signOut
NextAuth.jsが標準で提供するサインイン・サインアウト関数です.
import { signIn, signOut } from "next-auth/react"

export default () => <button onClick={() => signIn()}>Sign in</button>
// or
export default () => (
  <button onClick={() => signIn("google")}>Sign in with Google</button>
)
// or
export default ({ email }) => (
  <button onClick={() => signIn("email", { email })}>Sign in with Email</button>
)

export default () => <button onClick={() => signOut()}>Sign out</button>
また,第2引数に認証後のリダイレクト先を指定することもできます.
signIn(undefined, { callbackUrl: 'http://localhost:3000/foo' })
signIn('email', { email, callbackUrl: 'http://localhost:3000/foo' })
signOut({ callbackUrl: 'http://localhost:3000/foo' })
emailとcredentialsでの認証のみにおいてリダイレクトをせずにPromiseを取得できます.
const res = signIn('credentials', { redirect: false, password: 'password' })

// resの中身
{
  error: string | undefined
  status: number
  ok: boolean
  url: string | null
}
認証情報の更新
クライアントサイドから認証情報の更新ができます.セッションにいろいろ情報を持たせているときに,リロードすることなくクライアントから変更のイベントを発火させられるので便利です.
引数なしで使うとデータベースの情報を取得してクライアントを新しいものに更新します.引数あり(セッションオブジェクトを渡す)で使うと以下のjwtまたはsessionが再度呼ばれるのでその中で更新を行います.
import { useSession } from "next-auth/react"

export default function Page() {
  const { data: session, status, update } = useSession()

  if (status === "authenticated") {
    return (
      <>
        <p>Signed in as {session.user.name}</p>

        {/* Update the value by sending it to the backend. */}
        <button onClick={() => update({ name: "John Doe" })}>
          Edit name
        </button>
        {/*
          * Only trigger a session update, assuming you already updated the value server-side.
          * All `useSession().data` references will be updated.
          */}
        <button onClick={() => update()}>
          Edit name
        </button>
      </>
    )
  }

  return <a href="/api/auth/signin">Sign in</a>
}
クライアントから送信した情報はcallbacksの中で処理されます.
export default NextAuth({
  callbacks: {
    // strategyがjwtの場合
    jwt({ token, trigger, session }) {
      if (trigger === "update" && session?.name) {
        // Note, that `session` can be any arbitrary object, remember to validate it!
        token.name = session.name
      }
      return token
    },
    // strategyがsessionの場合
    async session({ session, trigger, newSession }) {
      if (trigger === "update" && newSession?.name) {
        // await adapter.updateUser(session.user.id, { name: newSession.name })
        session.name = newSession.name
      }
      return session
    }
  }
})
update()は,後述のSessionProvider.refetchIntervalやSessionProvider.refetchOnWindowFocusと機能は同じですが,複数タブ間で新しいセッションは共有されないので注意が必要です.
SessionProvider
前述のとおり,セッション情報をuseContextを用いて配信するためのプロバイダです.ここで配信されるセッション情報は複数のタブやウィンドウで同期されCookieに保存します.また,セッション情報を扱ううえでいくつかのオプションを設定できます.
'use client'

import { SessionProvider } from "next-auth/react"

export default function NextAuthProvider({ children }: { children: ReactNode }) {
  return (
    <SessionProvider
      baseUrl="https://example.com"
      // In case you use a custom path and your app lives at "/cool-app" rather than at the root "/"
      basePath="cool-app"
      // Re-fetch session every 5 minutes
      refetchInterval={5 * 60}
      // Re-fetches session when window is focused
      refetchOnWindowFocus={true}
      // Set to `false` to stop polling when the device has no internet access offline (determined by `navigator.onLine`)
      refetchWhenOffline={false}
    >
      {children}
    </SessionProvider>
  )
}
ここでbaseUrlやbasePathを変更した場合は,NEXTAUTH_URLも変更しましょう.
環境変数
Auth.jsを使うにあたって設定可能な環境変数は以下のとおりです.
| 変数名 | 説明 | 例 |
|---|---|---|
NEXTAUTH_URL |
認証のためのエンドポイントのベースパス.Vercelにデプロイする場合のみ本番環境での設定は必須ではない | https://example.com |
NEXTAUTH_URL_INTERNAL |
認証のためのエンドポイントのベースパス.クライアントとサーバーでプロジェクトルートが違う場合にサーバー側の設定として利用される | https://example.com |
NEXTAUTH_SECRET |
JWTを暗号化するための秘密鍵などに使われる.ここで生成できる | 17a1594cf715274bf3373f560cde609f |
詳細設定
providers
50個以上のプロバイダを用いて認証処理ができます.
42 School, Amazon Cognito, Apple, Atlassian, Auth0, Authentik, Azure Active Directory, Azure Active Directory B2C, Battle.net, Box, BoxyHQ SAML, Bungie, Coinbase, Discord, Dropbox, DuendeIdentityServer6, EVE Online, Facebook, FACEIT, Foursquare, Freshbooks, FusionAuth, GitHub, GitLab, Google, HubSpot, IdentityServer4, Instagram, Kakao, Keycloak, LINE, LinkedIn, Mail.ru, Mailchimp, Medium, Naver, Netlify, Okta, OneLogin, Osso, Osu!, Patreon, Pinterest, Pipedrive, Reddit, Salesforce, Slack, Spotify, Strava, Todoist, Trakt, Twitch, Twitter, United Effects, VK, Wikimedia, WordPress.com, WorkOS, Yandex, Zitadel, Zoho, Zoom,
import TwitterProvider from "next-auth/providers/"
...
providers: [
  TwitterProvider({
    clientId: process.env.TWITTER_ID,
    clientSecret: process.env.TWITTER_SECRET
  })
],
...
また,メールでの認証も可能です.ただし,データベースは必須です.
import EmailProvider from `next-auth/providers/email`
...
providers: [
  EmailProvider({
    id: "myEmail", // Unique ID for the provider
    name: myMail, // Descriptive name for the provider
    type: "email",
    server: process.env.EMAIL_SERVER,
    from: process.env.EMAIL_FROM,
    sendVerificationRequest: () => {
    // Callback to execute when a verification request is sent
    }
  }),
],
...
2要素認証などをする場合にはCredentialでの認証が便利です.
import CredentialsProvider from "next-auth/providers/credentials"
...
providers: [
  CredentialsProvider({
    // The name to display on the sign in form (e.g. 'Sign in with...')
    name: 'Credentials',
    id: "myCredential",
    type: "credentials",
    // You can pass any HTML attribute to the <input> tag through the object.
    credentials: {
      username: { label: "Username", type: "text", placeholder: "jsmith" },
      password: {  label: "Password", type: "password" }
    },
    async authorize(credentials, req) {
      const res = await fetch("/your/endpoint", {
        method: 'POST',
        body: JSON.stringify(credentials),
        headers: { "Content-Type": "application/json" }
      })
      const user = await res.json()

      // If no error and we have user data, return it
      if (res.ok && user) {
        return user
      }
      // Return null if user data could not be retrieved
      return null
    }
  })
]
...
authorize関数のcredentialsは直前に記述したcredentialsを参照できます.
また,authorize関数はUserを返す必要があります.デフォルトではid, name, email, imageしか認識しないので,認証時に追加情報をもたせたい場合はカスタムプロバイダーで追加するかcallbacksで都度追加しなければいけないことに注意してください.
secret
トークンのハッシュ化,Cookieの署名/暗号化,秘密鍵の生成などに使われます.NEXTAUTH_SECRETを指定している場合,必須ではありません.linuxでは以下のコマンドで生成できます.
openssl rand -base64 32
NEXTAUTH_SECRETもsecretも指定しない場合,開発環境では警告が,本番環境ではエラーが発生します.
session
セッション情報の取り扱い方の設定ができます.
session: {
  // The default is `"jwt"`, an encrypted JWT (JWE) stored in the session cookie.
  // If you use an `adapter` however, we default it to `"database"` instead.
  strategy: "database",

  // Seconds - How long until an idle session expires and is no longer valid.
  maxAge: 30 * 24 * 60 * 60, // 30 days

  // Seconds - Throttle how frequently to write to database to extend a session.
  // Use it to limit write operations. Set to 0 to always update the database.
  // Note: This option is ignored if using JSON Web Tokens
  updateAge: 24 * 60 * 60, // 24 hours

  // The session token is usually either a random UUID or string, however if you
  // need a more customized session token string, you can define your own generate function.
  generateSessionToken: () => {
    return randomUUID?.() ?? randomBytes(32).toString("hex")
  }
}
jwt
jwtモードにおけるセッションの取り扱い方の設定ができます.
jwt: {
  // The maximum age of the NextAuth.js issued JWT in seconds.
  // Defaults to `session.maxAge`.
  maxAge: 60 * 60 * 24 * 30,
  // You can define your own encode/decode functions for signing and encryption
  async encode() {},
  async decode() {},
}
pages
通常,サインインや認証エラーページはAuth.jsによって自動生成されます.カスタムページで認証を行いたい場合はpagesを設定します.
...
  pages: {
    signIn: '/auth/signin',
    signOut: '/auth/signout',
    error: '/auth/error', // Error code passed in query string as ?error=
    verifyRequest: '/auth/verify-request', // (used for check email message)
    newUser: '/auth/new-user' // New users will be directed here on first sign in (leave the property out if not of interest)
  }
...
theme
デフォルトテーマはシステム依存ですが,強制的にライトテーマやブランドカラーに変更することができます.
theme: {
  colorScheme: "auto", // "auto" | "dark" | "light"
  brandColor: "", // Hex color code
  logo: "" // Absolute URL to image
}
callbacks
...
  callbacks: {
    async signIn({ user, account, profile, email, credentials }) {
      const isAllowedToSignIn = ...
        if (isAllowedToSignIn) {
          return true
        } else {
          // Return false to display a default error message
          return false
          // Or you can return a URL to redirect to:
          // return '/unauthorized'
        }
      }
    },
    async redirect({ url, baseUrl }) {
      // Allows relative callback URLs
      if (url.startsWith("/")) return `${baseUrl}${url}`
      // Allows callback URLs on the same origin
      else if (new URL(url).origin === baseUrl) return url
      return baseUrl
    },
    async session({ session, user, token, newSession, trigger }) {
      if (account) {
        token.accessToken = account.access_token
        token.id = profile.id
      }
      return token
    },
    async jwt({ token, user, account, profile, trigger, isNewUser, session }) {
      // Send properties to the client, like an access_token and user id from a provider.
      session.accessToken = token.accessToken
      session.user.id = token.id

      return session
    }
...
}
signInはユーザーのサインインを許可するかを判定します.許可する場合にはtrueを,許可しない場合にはfalseまたはURL文字列を返します.
redirectはcallback URLへリダイレクトされるたびに呼ばれます.
events
外部のロギングサービスへはこのオプションから送ることができます.
events: {
  async signIn(message) { /* on successful sign in */ },
  async signOut(message) { /* on signout */ },
  async createUser(message) { /* user created */ },
  async updateUser(message) { /* user updated - e.g. their email was verified */ },
  async linkAccount(message) { /* account (e.g. Twitter) linked to a user */ },
  async session(message) { /* session is active */ },
}
adapter
データベースやORMと連携するための関数を指定できます.また,自作したアダプタも指定できます.
import { type Adapter } from "@auth/core/adapters"

const MyAdapter: Adapter {
 // implement the adapter methods here
}

export default NextAuth({
  ...
  adapter: MyAdapter,
})
debug
デバッグモードです.ユーザーの生情報がターミナルに出力される場合があるので本番環境では使ってはいけません.
debug: process.env.NODE_ENV !== 'production'
logger
ログをレベル別で取得できます.こちらも外部のロギングサービスと連携できます.
import log from "logging-service"

export default NextAuth({
  ...
  logger: {
    error(code, metadata) {
      log.error(code, metadata)
    },
    warn(code) {
      log.warn(code)
    },
    debug(code, metadata) {
      log.debug(code, metadata)
    }
  }
  ...
})
おわりに
以上がNext.js App RouterでのAuth.jsの実装方法と具体的な設定項目の説明でした.