経緯
私が所属している会社では__待ラノ__という小説投稿サイトを運営しています。
待ラノではオススメ小説のランキング上位5作を定期的にTwitterの公式アカウントで紹介しています。
紹介された小説をTwitter広告のキャンペーンを利用してプロモーションをしようってなりました。
そもそもTwitter広告のキャンペーンって何?
Twitter広告のキャンペーンですが、簡単いうと1日にかける予算や期間内にかける総予算を指定して、Twitterに広告を出す機能です。
Twitter広告APIでキャンペーンを作る理由
1つのキャンペーンで複数のツイートをプロモーションする場合、1日にかける予算を一気に消化されてしまいます。
しかもどのツイートにどれだけ予算が消化されているかがわかりません。
そのため、1つのツイートに1キャンペーンを紐付けることで消化される予算の見える化を行うことになりました。
ただ手動でTwitterの広告コンソールから、1ツイートに1キャンペーンを毎回作ることになると結構手間です。
というわけで、__Twitter広告APIを利用して動的にキャンペーンを作成__することになりました。
Twitter広告APIでキャンペーンを作成するためには
以下の手順が必要です。
- Tiwtterアカウントを作成する(省略)
- Tiwtterアカウントにメールアドレスと電話番号を設定する(省略)
- TiwtterAPIの利用申請をする
- TiwtterAPIのAPIキーとトークンを取得する
- TiwtterAPIを利用してツイートをする
- Tiwtter広告APIの利用申請をする
- Tiwtter広告APIでを利用してツイートを使ったキャンペーンを作る ←イマココ
今回は5の__【Tiwtter広告APIでを利用してツイートを使ったキャンペーンを作る】__について説明していきます。
動作環境
- 使用端末:Mac
- Node.js:v12.18.2
- yarn:v1.22.4
- gem:v3.0.3
使用するライブラリ
仕様
サーバーのURLにアクセスすると【その5】で作成したツイートも利用したキャンペーンを作成する。
1.Twitterの連携アプリを認証する
1-1. Twurlをインストールする
$ sudo gem install twurl
1-2. Twurlコマンドで認証URLを取得する
【その2】で取得した__「APIキー」と「APIシークレットキー」__を使って以下のコマンドを叩きます。
すると、認証URLが出力されます。
さらにPINコードの入力も求められていますが、下記の【1-4】までそのままにしてください。
$ twurl authorize --consumer-key [APIキー] --consumer-secret [APIシークレットキー]
Go to https://api.twitter.com/oauth/authorize?oauth_consumer_key=xxx&oauth_nonce=yyy&oauth_signature=zzz&oauth_signature_method=HMAC-SHA1&oauth_timestamp=1600840260&oauth_token=fff&oauth_version=1.0 and paste in the supplied PIN
1-3. ブラウザで認証URLにアクセスしてPINコードを取得する
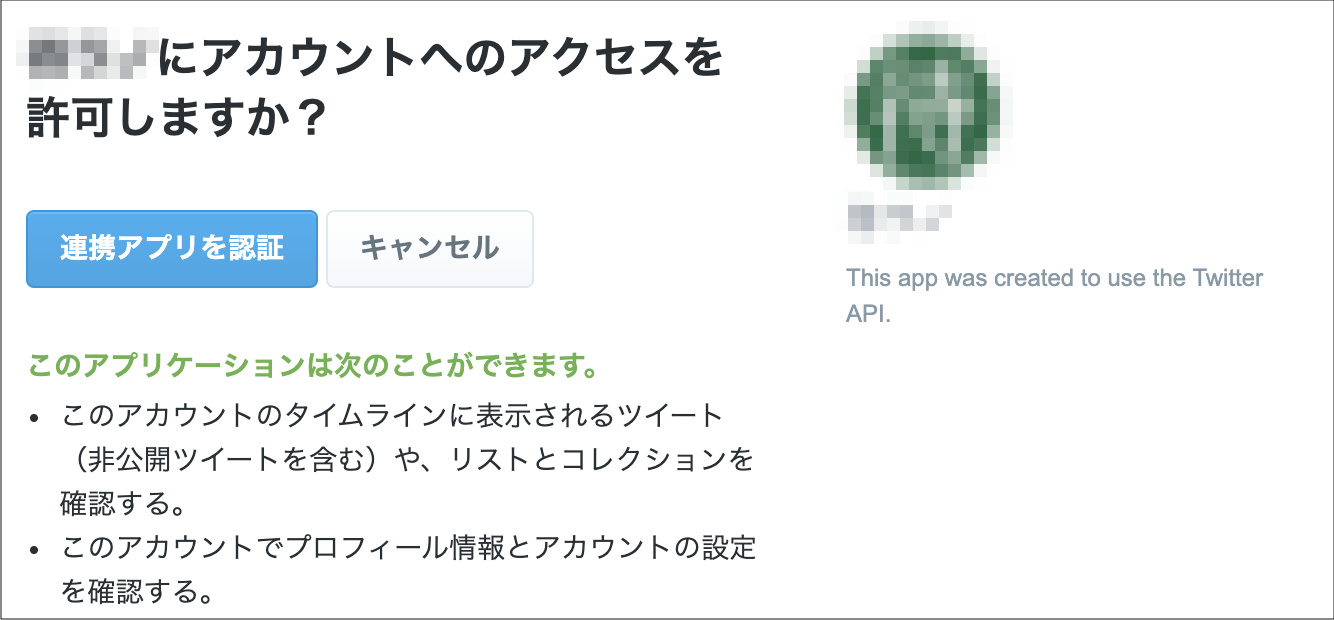
__【1-2】で取得した認証URLにブラウザでアクセスします。
以下のようにページが開かれるので「連携アプリを認証」__ボタンをクリックします。
するとPINコードが表示されます。
1-4. 取得したPINコードをコマンドライン上にペーストして実行する
成功すると「Authorization successful」と表示されます。
$ twurl authorize --consumer-key [APIキー] --consumer-secret [APIシークレットキー]
Go to https://api.twitter.com/oauth/authorize?oauth_consumer_key=xxx&oauth_nonce=yyy&oauth_signature=zzz&oauth_signature_method=HMAC-SHA1&oauth_timestamp=1600840260&oauth_token=fff&oauth_version=1.0 and paste in the supplied PIN
111111 ←PINコードを入力してEnterを押す
Authorization successful
1-5. アクセストークンを再生成する
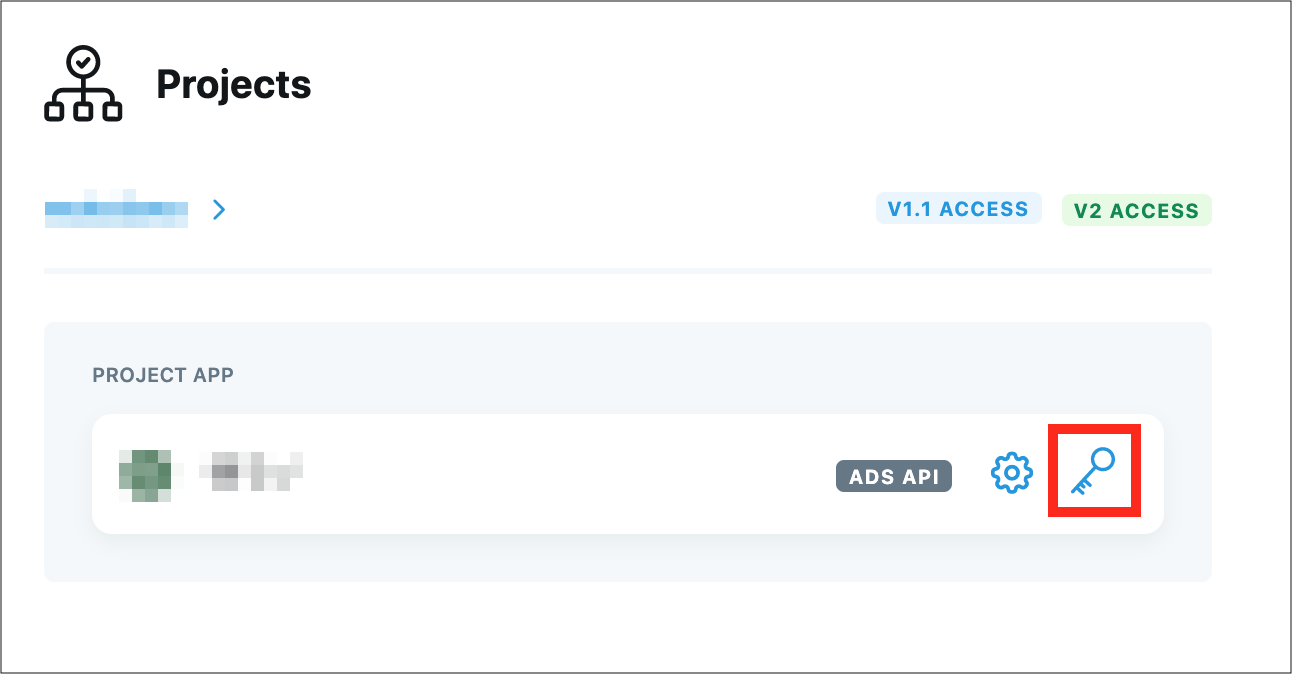
__「開発ポータル」にアクセスして、対象のアプリの「鍵」__ボタンをクリックしてください。
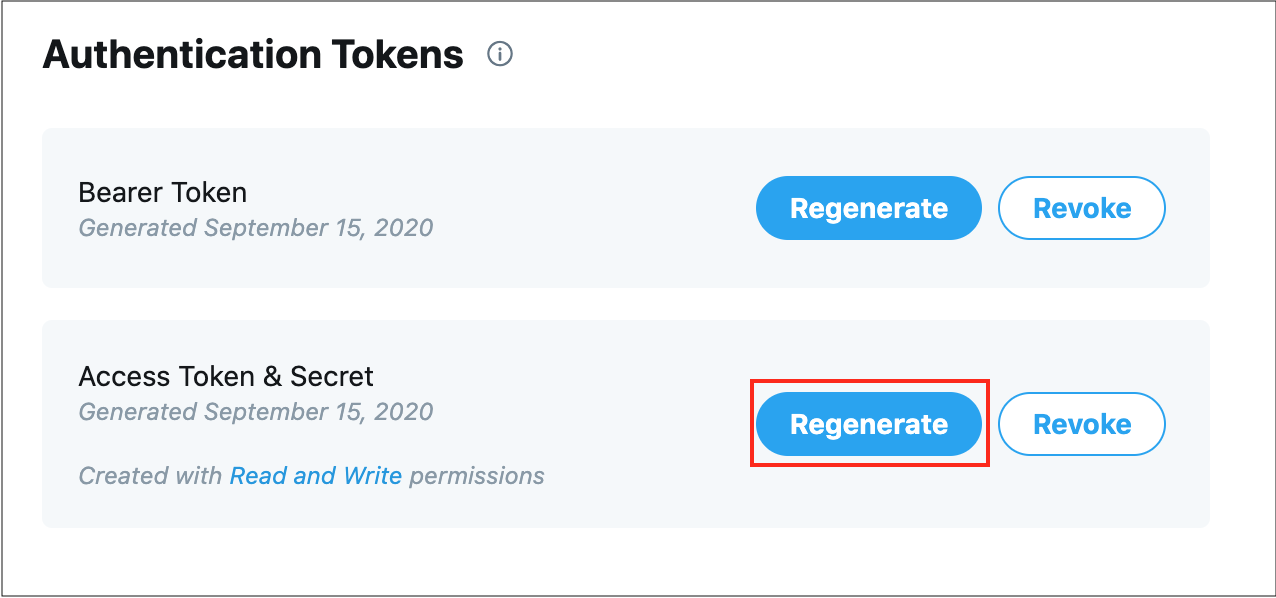
次にAccess Token & Secretの__「Regenerate」__ボタンをクリックします。
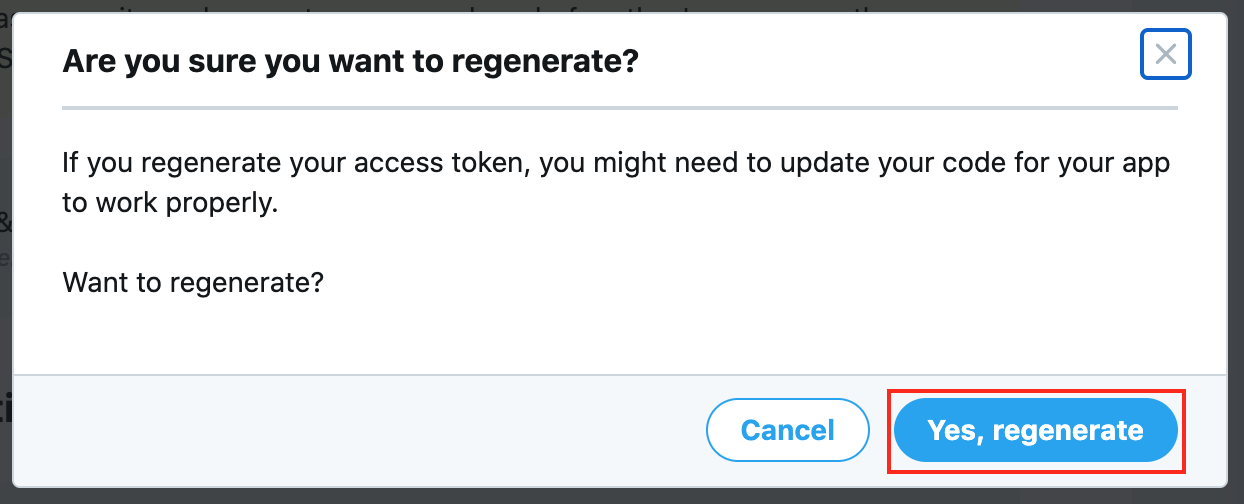
確認画面が表示されますので__「Yes, regenerate」__ボタンをクリックします。
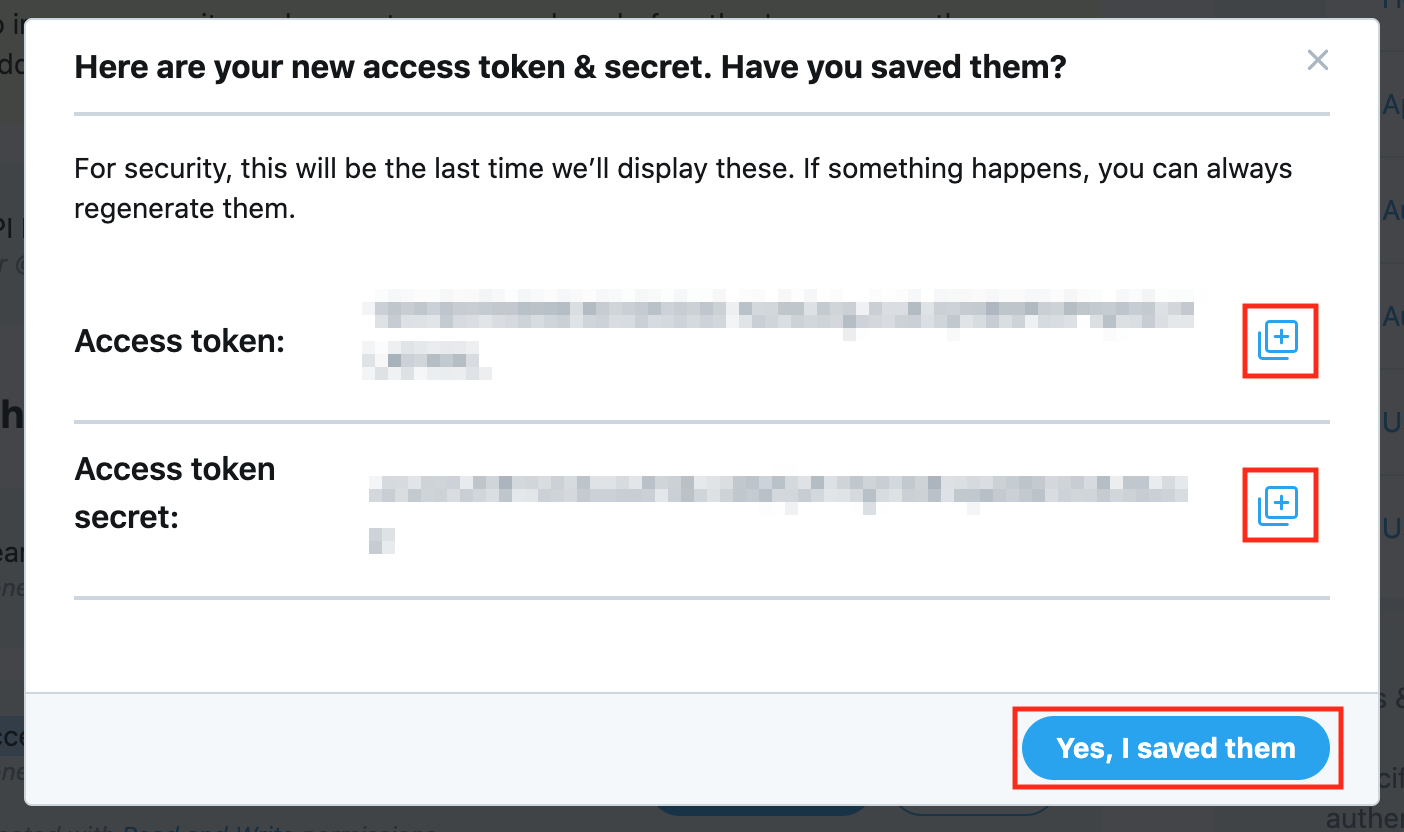
再生成された__「Access token」と「Access token secret」__をどこかにメモしておきます。
2.Twitter広告APIのバージョンを確認する
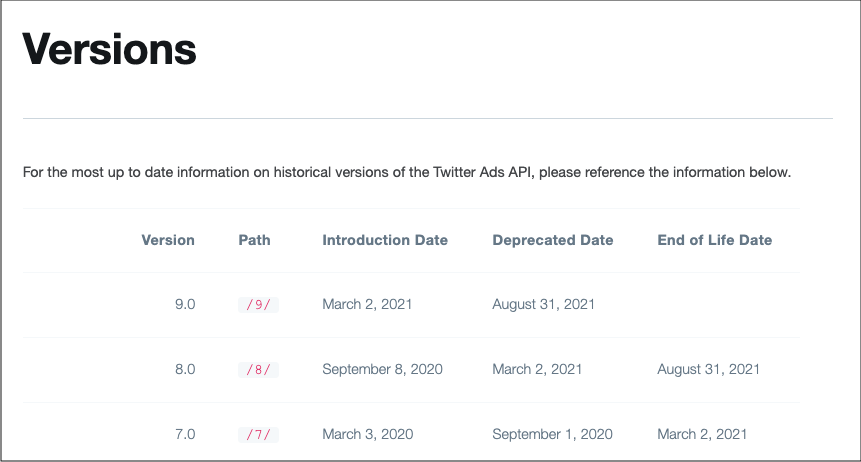
Twitter広告APIのバージョンが掲載されているページにアクセスします。
有効期限が細く設定されているので、確認してください。
※2020年9月23日現在ではバージョンは__「8」__となってます。
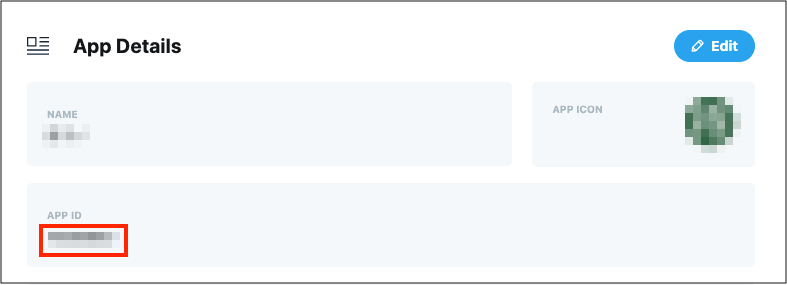
3.アプリIDを取得する
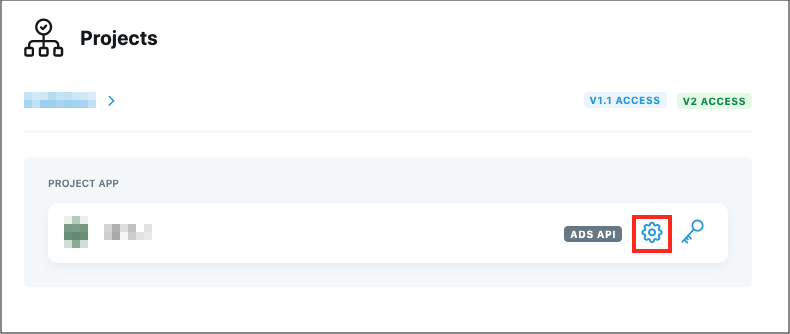
__「開発ポータル」にアクセスして、対象のアプリの「設定(歯車)」__ボタンをクリックしてください。
4.package.jsonを作成する
以下のコマンドでpackage.jsonを作成します。
対話式で質問を聞かれるので基本的に全てEnterで問題ありません。
$ yarn init
question name (twitter-api-post-tweet):
question version (1.0.0):
question description:
question entry point (index.js):
question repository url:
question author:
question license (MIT):
question private:
2.ライブラリをインストールする
以下のコマンドでライブラリをインストールする
$ yarn add express twitter-ads
3.ソースファイルを作成する
$ touch index.js
4.ソースコードを書く
今回使用しているTwitter広告APIに関しては、「キャンペーンの作成 - 詳細な手順」を参考にしております。
※ちなみに今回使用してる__「twitter-ads」__は__async/await__に対応していないため、コールバック地獄になってるのであしからず
// Server settings
const express = require('express')
const server = express()
const port = 3000

// Twitter settings
const TwitterAdsAPI = require('twitter-ads')

// 【その2】で取得したAPIキー
const API_KEY = 'AAAAAAAAAA'
const API_SECRET_KEY = 'BBBBBBBBBB'
// 【1-5】で取得したトークン
const ACCESS_TOKEN = 'CCCCCCCCCC'
const ACCESS_TOKEN_SECRET = 'DDDDDDDDDD'
// 【2】で取得したトークン
const VERSION = '8'
// 【3】で取得したアプリID
const APP_ID = 'XXXXXXX'
// 【その3】で取得したツイートID
const TWEET_ID = '1309021433616633862'

const twitterAdsClient = new TwitterAdsAPI({
  consumer_key: API_KEY,
  consumer_secret: API_SECRET_KEY,
  access_token: ACCESS_TOKEN,
  access_token_secret: ACCESS_TOKEN_SECRET,
  sandbox: false,
  api_version: VERSION
})

// Routes
server.get('/', (req, res, next) => {
  res.send('server is up')
})

// http://localhost:3000/campaign にアクセスすると自動でキャンペーンを作成する
server.get('/campaign', (req, res, next) => {
  // 1.アカウントIDを取得します
  // APIの詳細は「https://developer.twitter.com/en/docs/ads/campaign-management/api-reference/accounts#get-accounts」を確認してください
  twitterAdsClient.get('accounts', null, (accountError, accountResponse, accountBody) => {
    if (accountError) {
      console.log(accountError)
      res.send(accountError)
      return
    }

    if (accountBody.data.length > 0) {
      const accountId = accountBody.data[0].id

      // 2.お支払いIDを取得します
      // APIの詳細は「https://developer.twitter.com/en/docs/ads/campaign-management/api-reference/funding-instruments#get-accounts-account-id-funding-instruments」を確認してください
      const fundingInstrumentsUrl = 'accounts/' + accountId + '/funding_instruments'
      twitterAdsClient.get(fundingInstrumentsUrl, null, (fundingInstrumentError, fundingInstrumentResponse, fundingInstrumentBody) => {
        if (fundingInstrumentError) {
          console.log(fundingInstrumentError)
          res.send(fundingInstrumentError)
          return
        }

        if (fundingInstrumentBody.data.length > 0) {
          const fundingInstrumentId = fundingInstrumentBody.data[0].id

          // 3.キャンペーンを作成し、お支払い方法に関連付けます
          // APIの詳細は「https://developer.twitter.com/en/docs/ads/campaign-management/api-reference/campaigns#post-accounts-account-id-campaigns」を確認してください
          const createCampaignUrl = 'accounts/' + accountId + '/campaigns'
          const createCampaignParams = {
            funding_instrument_id: fundingInstrumentId, // お支払いID
            name: 'キャンペーン01', // キャンペーン名
            start_time: '2020-10-01T00:00:00Z', // キャンペーン開始時間(ISO 8601表記)
            end_time: '2020-10-07T23:59:59Z', // (ISO 8601表記)
            total_budget_amount_local_micro: 1000000, // キャンペーンに割り当てる合計予算額(1000000で1円扱い)
            daily_budget_amount_local_micro: 1000000, // キャンペーンに割り当てる日別予算額(1000000で1円扱い)
            entity_status: 'PAUSED' // ステータス
          }
          twitterAdsClient.post(createCampaignUrl, createCampaignParams, (createCampaignError, createCampaignResponse, createCampaignBody) => {
            if (createCampaignError) {
              console.log(createCampaignError)
              res.send(createCampaignError)
              return
            }

            const campaignId = createCampaignBody.data.id

            // 4.キャンペーンに関連付けた行項目(広告グループ)を作成します
            // APIの詳細は「https://developer.twitter.com/en/docs/ads/campaign-management/api-reference/line-items#post-accounts-account-id-line-items」を確認してください
            const createLineItemUrl = 'accounts/' + accountId + '/line_items'
            const createLineItemParams = {
              campaign_id: campaignId, // キャンペーンID,
              name: '広告グループ01', // 行項目(広告グループ)名
              objective: 'WEBSITE_CLICKS', // キャンペーン目的
              placements: 'ALL_ON_TWITTER', // 配置場所
              product_type: 'PROMOTED_TWEETS', // プロモ商品のタイプ
              automatically_select_bid: true, // 自動入札最適化フラグ
              entity_status: 'PAUSED' // ステータス
            }
            twitterAdsClient.post(createLineItemUrl, createLineItemParams, (createLineItemError, createLineItemResponse, createLineItemBody) => {
              if (createLineItemError) {
                console.log(createLineItemError)
                res.send(createLineItemError)
                return
              }

              const lineItemId = createLineItemBody.data.id

              // 5.行項目にツイートを関連付けます
              // APIの詳細は「https://developer.twitter.com/en/docs/ads/campaign-management/api-reference/promoted-tweets#post-accounts-account-id-promoted-tweets」を確認してください
              const relatePromotedTweetUrl = 'accounts/' + accountId + '/promoted_tweets'
              const relatePromotedTweetParams = {
                line_item_id: lineItemId, // 行項目ID,
                tweet_ids: TWEET_ID // ツイートID
              }
              twitterAdsClient.post(relatePromotedTweetUrl, relatePromotedTweetParams, (relatePromotedTweetError, relatePromotedTweetResponse, relatePromotedTweetBody) => {
                if (relatePromotedTweetError) {
                  console.log(relatePromotedTweetError)
                  res.send(relatePromotedTweetError)
                  return
                }

                /**
                 * 6.行項目に関連付けるターゲティングプロフィールを作成します
                 */
                // 6-1.行項目に関連付けるターゲティング(地域)を取得します
                // APIの詳細は「https://developer.twitter.com/en/docs/ads/campaign-management/api-reference/targeting-options#get-targeting-criteria-locations」を確認してください
                const getTargetLocationsUrl = 'targeting_criteria/locations?location_type=COUNTRIES&q=Japan'
                twitterAdsClient.get(getTargetLocationsUrl, null, (getTargetLocationsError, getTargetLocationsResponse, getTargetLocationsBody) => {
                  if (getTargetLocationsError) {
                    console.log(getTargetLocationsError)
                    res.send(getTargetLocationsError)
                    return
                  }

                  if (getTargetLocationsBody.data.length > 0) {
                    const locationTargetValue = getTargetLocationsBody.data[0].targeting_value

                    // 6-2.行項目にターゲティング(地域)を関連付けます
                    // APIの詳細は「https://developer.twitter.com/en/docs/ads/campaign-management/api-reference/targeting-criteria#post-accounts-account-id-targeting-criteria」を確認してください
                    const relateTargetLocationUrl = 'accounts/' + accountId + '/targeting_criteria'
                    const relateTargetLocationParams = {
                      line_item_id: lineItemId, // 行項目ID,
                      operator_type: 'EQ', // 比較演算子(EQ/NE/GTE/LTE)
                      targeting_type: 'LOCATION', // ターゲティング種別
                      targeting_value: locationTargetValue // ターゲティング値
                    }
                    twitterAdsClient.post(relateTargetLocationUrl, relateTargetLocationParams, (relateTargetLocationError, relateTargetLocationResponse, relateTargetLocationBody) => {
                      if (relateTargetLocationError) {
                        console.log(relateTargetLocationError)
                        res.send(relateTargetLocationError)
                        return
                      }

                      // 6-3.行項目に関連付けるターゲティング(言語)を取得します
                      // APIの詳細は「https://developer.twitter.com/en/docs/ads/campaign-management/api-reference/targeting-options#get-targeting-criteria-languages」を確認してください
                      const getTargetLanguagesUrl = 'targeting_criteria/languages?q=Japanese'
                      twitterAdsClient.get(getTargetLanguagesUrl, null, (getTargetLanguagesError, getTargetLanguagesResponse, getTargetLanguagesBody) => {
                        if (getTargetLanguagesError) {
                          console.log(getTargetLanguagesError)
                          res.send(getTargetLanguagesError)
                          return
                        }

                        if (getTargetLanguagesBody.data.length > 0) {
                          const languageTargetValue = getTargetLanguagesBody.data[0].targeting_value

                          // 6-4.行項目にターゲティング(言語)を関連付けます
                          // APIの詳細は「https://developer.twitter.com/en/docs/ads/campaign-management/api-reference/targeting-criteria#post-accounts-account-id-targeting-criteria」を確認してください
                          const relateTargetLanguageUrl = 'accounts/' + accountId + '/targeting_criteria'
                          const relateTargetLanguageParams = {
                            line_item_id: lineItemId, // 行項目ID,
                            operator_type: 'EQ', // 比較演算子(EQ/NE/GTE/LTE)
                            targeting_type: 'LANGUAGE', // ターゲティング種別
                            targeting_value: languageTargetValue // ターゲティング値
                          }
                          twitterAdsClient.post(relateTargetLanguageUrl, relateTargetLanguageParams, (relateTargetLanguageError, relateTargetLanguageResponse, relateTargetLanguageBody) => {
                            if (relateTargetLanguageError) {
                              console.log(relateTargetLanguageError)
                              res.send(relateTargetLanguageError)
                              return
                            }

                            // 6-5.行項目にターゲティング(年齢)を関連付けます
                            // APIの詳細は「https://developer.twitter.com/en/docs/ads/campaign-management/api-reference/targeting-criteria#post-accounts-account-id-targeting-criteria」を確認してください
                            const relateTargetAgeUrl = 'accounts/' + accountId + '/targeting_criteria'
                            const relateTargetAgeParams = {
                              line_item_id: lineItemId, // 行項目ID,
                              operator_type: 'EQ', // 比較演算子(EQ/NE/GTE/LTE)
                              targeting_type: 'AGE', // ターゲティング種別
                              targeting_value: 'AGE_20_TO_49' // ターゲティング値(詳細は「https://developer.twitter.com/ja/docs/ads/general/overview/enums#targeting-age」を参照)
                            }
                            twitterAdsClient.post(relateTargetAgeUrl, relateTargetAgeParams, (relateTargetAgeError, relateTargetAgeResponse, relateTargetAgeBody) => {
                              if (relateTargetAgeError) {
                                console.log(relateTargetAgeError)
                                res.send(relateTargetAgeError)
                                return
                              }

                              // 6-6.行項目にターゲティング(キーワード)を関連付けます
                              // APIの詳細は「https://developer.twitter.com/en/docs/ads/campaign-management/api-reference/targeting-criteria#post-accounts-account-id-targeting-criteria」を確認してください
                              const relateTargetKeywordUrl = 'accounts/' + accountId + '/targeting_criteria'
                              const relateTargetKeywordParams = {
                                line_item_id: lineItemId, // 行項目ID,
                                operator_type: 'EQ', // 比較演算子(EQ/NE/GTE/LTE)
                                targeting_type: 'PHRASE_KEYWORD', // ターゲティング種別
                                targeting_value: 'キーワード' // ターゲティング値
                              }
                              twitterAdsClient.post(relateTargetKeywordUrl, relateTargetKeywordParams, (relateTargetKeywordError, relateTargetKeywordResponse, relateTargetKeywordBody) => {
                                if (relateTargetKeywordError) {
                                  console.log(relateTargetKeywordError)
                                  res.send(relateTargetKeywordError)
                                  return
                                }

                                // 7.行項目の一時停止を解除します
                                // APIの詳細は「https://developer.twitter.com/en/docs/ads/campaign-management/api-reference/line-items#put-accounts-account-id-line-items-line-item-id」を確認してください
                                const updateLineItemUrl = 'accounts/' + accountId + '/line_items/' + lineItemId
                                const updateLineItemParams = {
                                  entity_status: 'ACTIVE' // ステータス
                                }
                                twitterAdsClient.put(updateLineItemUrl, updateLineItemParams, (updateLineItemError, updateLineItemResponse, updateLineItemBody) => {
                                  if (updateLineItemError) {
                                    console.log(updateLineItemError)
                                    res.send(updateLineItemError)
                                    return
                                  }

                                  // 8.最後に、キャンペーンの一時停止を解除します
                                  // APIの詳細は「https://developer.twitter.com/en/docs/ads/campaign-management/api-reference/line-items#put-accounts-account-id-line-items-line-item-id」を確認してください
                                  const updateCampaignUrl = 'accounts/' + accountId + '/campaigns/' + campaignId
                                  const updateCampaignParams = {
                                    entity_status: 'ACTIVE' // ステータス
                                  }
                                  twitterAdsClient.put(updateCampaignUrl, updateCampaignParams, (updateCampaignError, updateCampaignResponse, updateCampaignBody) => {
                                    if (updateCampaignError) {
                                      console.log(updateCampaignError)
                                      res.send(updateCampaignError)
                                      return
                                    }

                                    // TwitterAdsAPIの結果をそのまま返す
                                    res.send(updateCampaignBody)
                                  })
                                })
                              })
                            })
                          })
                        } else {
                          res.send(new Error('Not found targeting languages.'))
                        }
                      })
                    })
                  } else {
                    res.send(new Error('Not found targeting locations.'))
                  }
                })
              })
            })
          })
        } else {
          res.send(new Error('Not found funding instrument.'))
        }
      })
    } else {
      res.send(new Error('Not found account.'))
    }
  })
})

server.listen(port, function () {
  console.log('Listening on port ' + port)
})
5.サーバーを立ち上げる
以下のコマンドを叩いてサーバーを起動させる。
$ node index.jp
6.自動ツイートするURLにアクセスする。
ブラウザで「http://localhost:3000/campaign」にアクセスする。
アクセスするとキャンペーンが作成されます。
差育成されているかを確認する場合はTwitterの__広告コンソール__をご確認ください。
■「Twitter広告APIを利用してキャンペーンを作ってみる 」シリーズ
- その1~TwitterAPI申請編~
- その2~TiwtterAPIのAPIキーとトークンの取得編~
- その3~TwitterAPIでツイート編~
- その4~Tiwtter広告APIのAPI申請編~
- その5~Twitter広告APIでキャンペーン作成編~ ←イマココ
