実行環境
MacOS BigSur -- 11.2.1
Python3 -- 3.8.2
Django -- 3.1.7
djangorestframework -- 3.12.2
npm -- 6.14.4
react -- 17.0.1
react-dom -- 17.0.1
axios -- 0.21.1
DRF(バックエンド)
DRFとReactを用いたWebアプリケーションの作成中、詳細表示の仕方がよく分からず困ったので今回はその詳細表示をまとめていきます。
前回の記事⇨
https://qiita.com/kachuno9/items/c72f91203dba9356c605
でAPI連携部分は終わっているのでその続きからです。
ちなみに、DRF側ではhttp://localhost:8000/api/v1/post で一覧表示、
http://localhost:8000/api/v1/post/○ で詳細表示が出来る様にURLを設定しています。
React(フロントエンド)
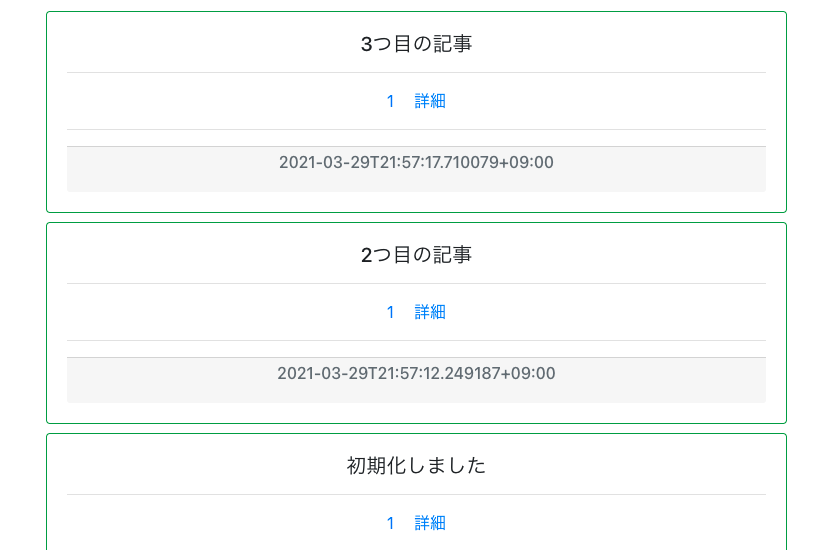
今回はTrend.jsで一覧を表示させ、PostDetail.jsでそれぞれの詳細を表示させるという処理を実装しました。
一覧表示
import React, { Component } from 'react';
import axios from 'axios';
import PostCard from './PostCard';

class Trend extends Component {
    state = {
        posts: []
    };

    componentDidMount() {
        this.getPosts();
    }

    getPosts() {
        axios
            .get('http://localhost:8000/api/v1/post')
            .then(res => {
                this.setState({ posts: res.data });
            })
            .catch(err => {
                console.log(err);
            });
    }

    render() {
      return (
        <div>
          <MenuBar active={"/trend"}/>
            <h1>トレンドです</h1><hr />
              {this.state.posts.map(item => (
                  <PostCard title={item.title} owner={item.owner} created_at={item.created_at} detail_link={`post/${item.id}`}/>
              ))}
        </div>
    )
  }
};

export default Trend;
axiosを用いて指定したURLからデータを受け取っています。ちなみに表示にはReact-BootstrapのCardを用いており、PostCard.jsは以下の様になっています。
import React from 'react';
import Card from 'react-bootstrap/Card';

const PostCard = (props) => {
  return (
    <Card style={{ width: '90%' }} border="success">
      <Card.Body>
        <Card.Title >{props.title}</Card.Title><hr />
        <Card.Text>
          {props.text}
        </Card.Text>
        <Card.Link href="#">{props.owner}</Card.Link>
        <Card.Link href={props.detail_link}>詳細</Card.Link><hr />
        <Card.Footer>
          <Card.Subtitle className="mb-2 text-muted">{props.created_at}</Card.Subtitle>
        </Card.Footer>
      </Card.Body>
    </Card>
  )
};

export default PostCard;
詳細表示
さて、今回の本題はこれらの一覧から詳細ページに移りたい!と言うことです。
色々な記事を調べた結果、React HooksのuseParams()を用いてURLからパラメータを取得する方法を見つけました。
他にはpropsでコンポーネント間でパラメータを受け渡す方法もありますが、useParams()を使うとコンポーネントに関係なくどこからでもURLからパラメータを簡単に取得できるそうです。しかし、ここでReact Hookを理解していなかったためにクラスコンポーネント内でuseParams()を使おうとしてもどうしてもエラーが出て原因が分からず行き詰まりました。
ということで自分が躓いたReact Hooksについての注意事項を少しだけまとめておきます。
React Hooks注意事項
- 関数コンポーネント内での仕様が大前提
- Hookは関数のトップレベルでのみ呼び出す(ループやif条件などの内部で呼び出さない)
- クラスコンポーネントでのライフサイクル(componentDidMount()等)は、HookではuseEffect()を用いる
ということで、詳細表示は以下の様な関数コンポーネントで実装しました。
import React, { Component } from 'react';
import axios from 'axios';
import { useParams,Link } from 'react-router-dom';
import { useEffect,useState,toJson } from 'react';

const PostDetail = () => {
  const {id} = useParams();
  const [title, setTitle] = useState([])
  const [text, setText] = useState([])
  const [created_at, setCreatedAt] = useState([])
  const [owner, setOwner] = useState([])

  useEffect(async () => {
    const result = await axios(
          'http://localhost:8000/api/v1/post/'+id,
        );
    setTitle(result.data.title);
    setText(result.data.text);
    setCreatedAt(result.data.created_at);
    setOwner(result.data.owner);
  });

  return(
    <div>
      <h1>{title}</h1>
      <p>{created_at}</p><hr />
      <p>{text}</p>
      <Link to="/trend">Return</Link>
    </div>
  )
}

export default PostDetail;
ちなみに、
const [title, setTitle] = useState([])
は配列の分割代入をしていて、useState()でtitleの初期化を行い、setTitle()でtitleに値を代入できるという処理を意味しています。JavaScriptに慣れていないのでこの辺の処理の意味の理解もまあまあ時間がかかりました。。。
これで無事詳細表示の実装ができました。
React HooksはReact16.8で追加された新機能で、より多くのReactの機能をクラスを使わずに使用できる様にしているそうで、これからはHooksでどんどん実装していきたいです。
