目的
LINE Notifyが終了するので、今までLINEに通知していたbot配信をすべてDiscord配信に切り替える
(EventBridge→Lambda→DiscordのLambda→Discord部分の備忘)
手順
Discrod Botの設定
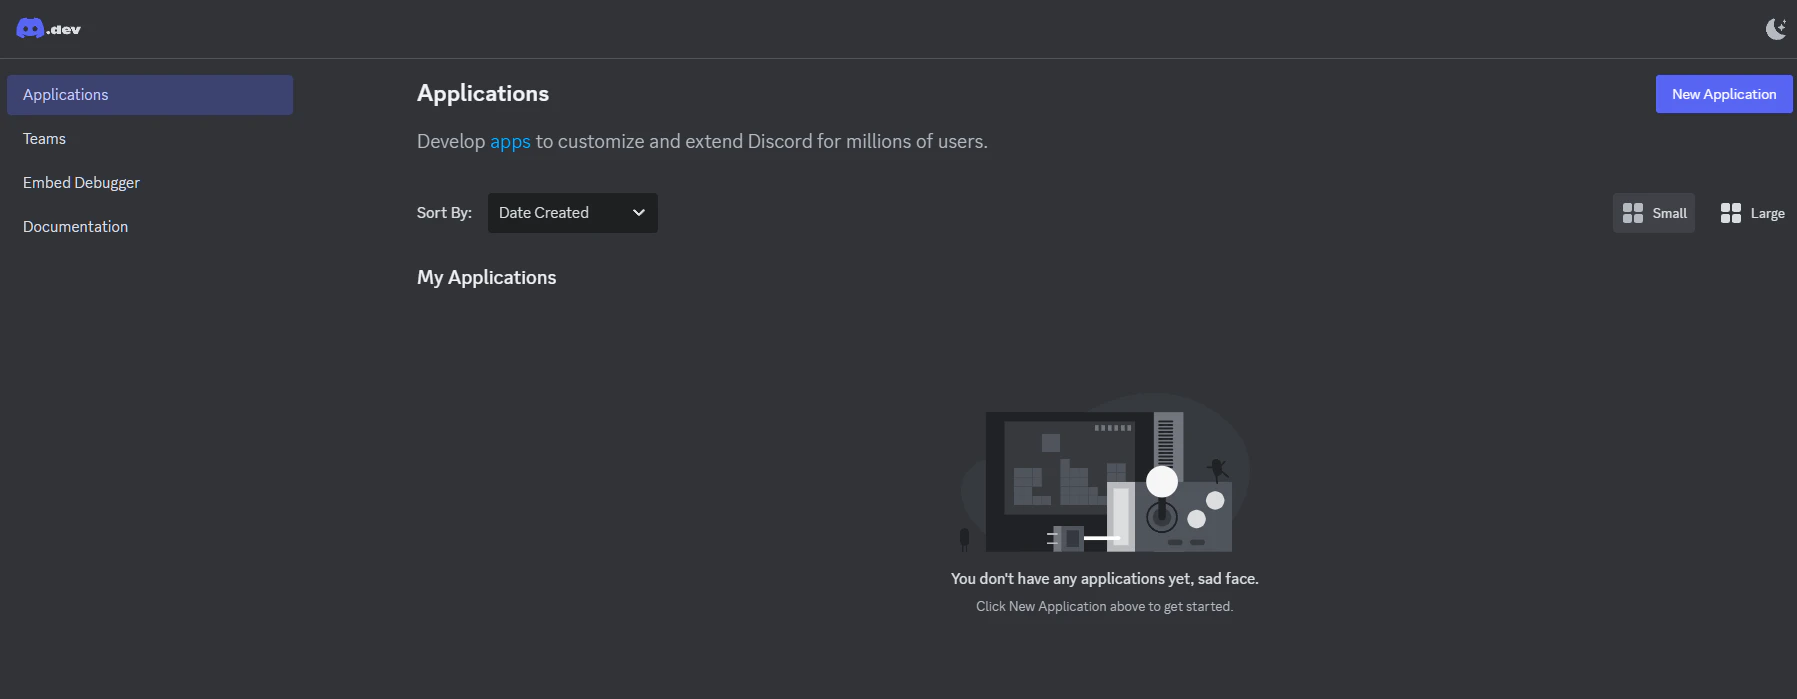
サイトにアクセス(Discordへのログインが必要)
https://discord.com/developers/applications
右上のNew Applicationをクリック
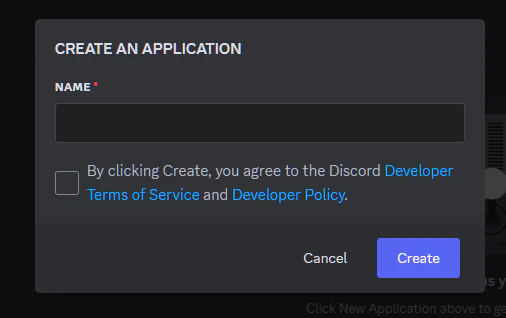
任意のアプリケーション名を入力し、チェックを入れCreate
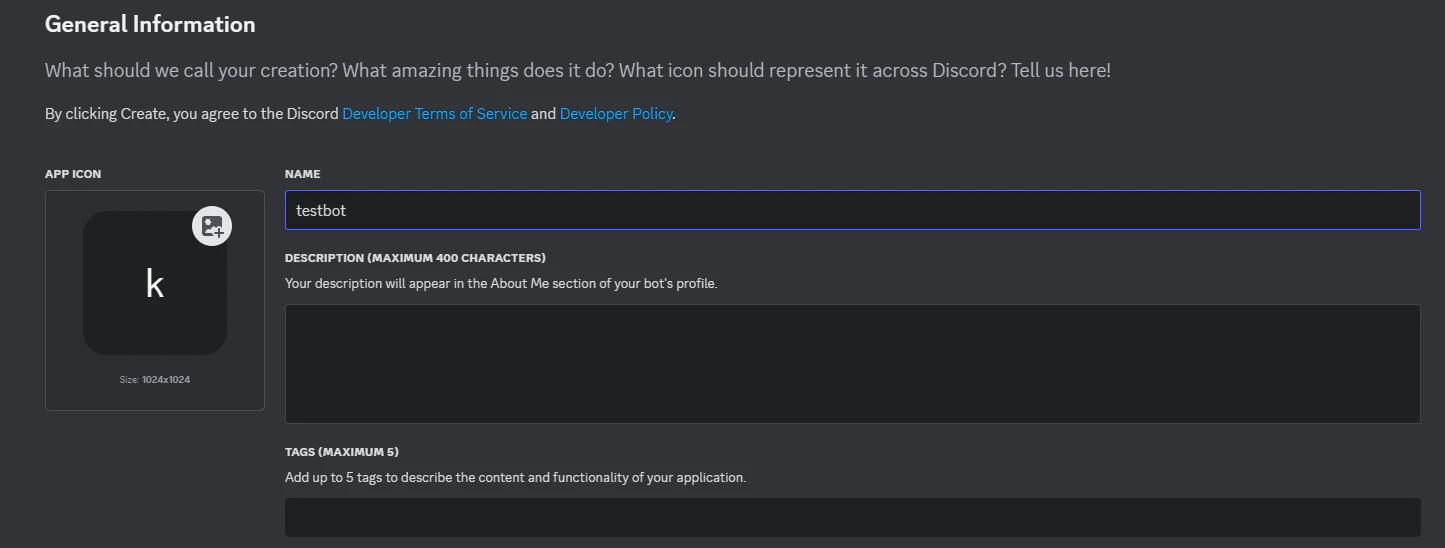
設定画面に遷移するので、名前やアイコンなどの設定をする
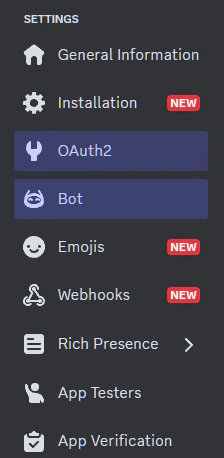
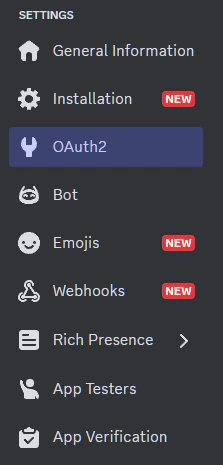
左メニューからBotをクリックし以下を有効にする
・Presence Intent
・Server Members Intent
・Message Content Intent

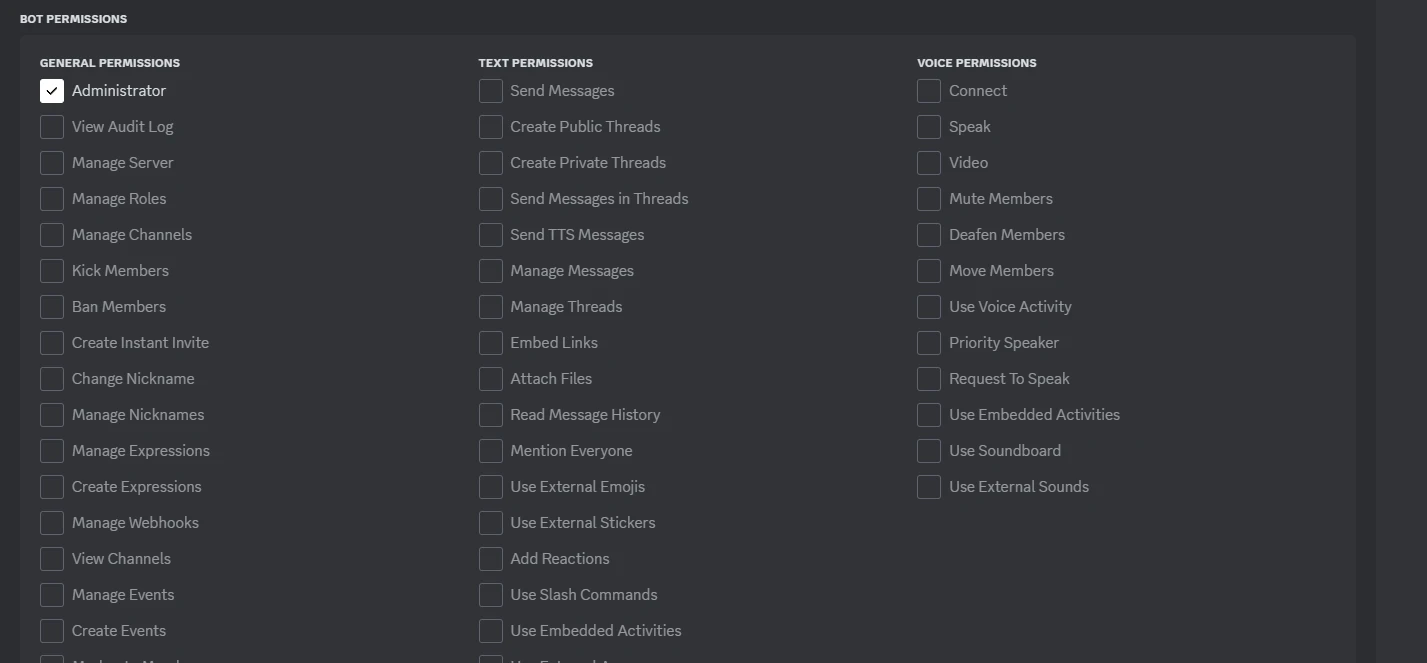
左メニューからOauth2をクリックしてScopes>bot,Bot Permissions>Administratorにチェックを入れる

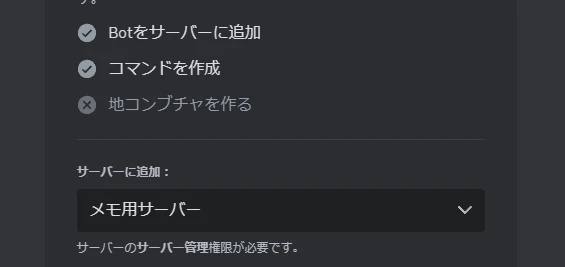
Integration TypeをGuild installにし、Generated URLをコピーしておく

botを参加させたいサーバーにGenerated URLを貼り付けて開くと、アクセス認証画面へ遷移するので参加させたいサーバーを選択肢認証する
成功

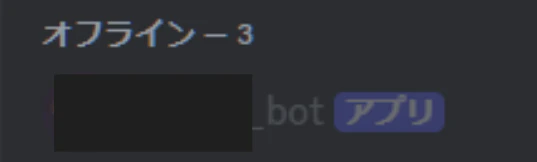
Discordのサーバーを見るとオフラインにbotが追加されている
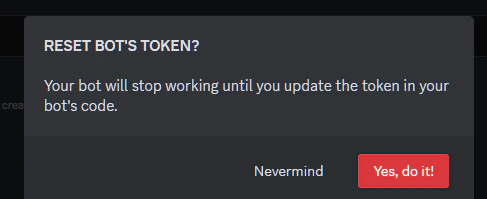
左メニューからBotをクリックし、TOKENのReset TokenをクリックするとTOKENが発行される
漏洩した場合などもここからリセットする
TOKENは後で利用するので控えておく

Discordの開発者モードをONにして、通知先のチャンネルIDをコピーして控えておく


Lambdaの設定
例として、自分のサイト(https://tritake.net/) をスクレイピングし、動画のURLを取得してその中からランダムなものをDiscrodに通知する
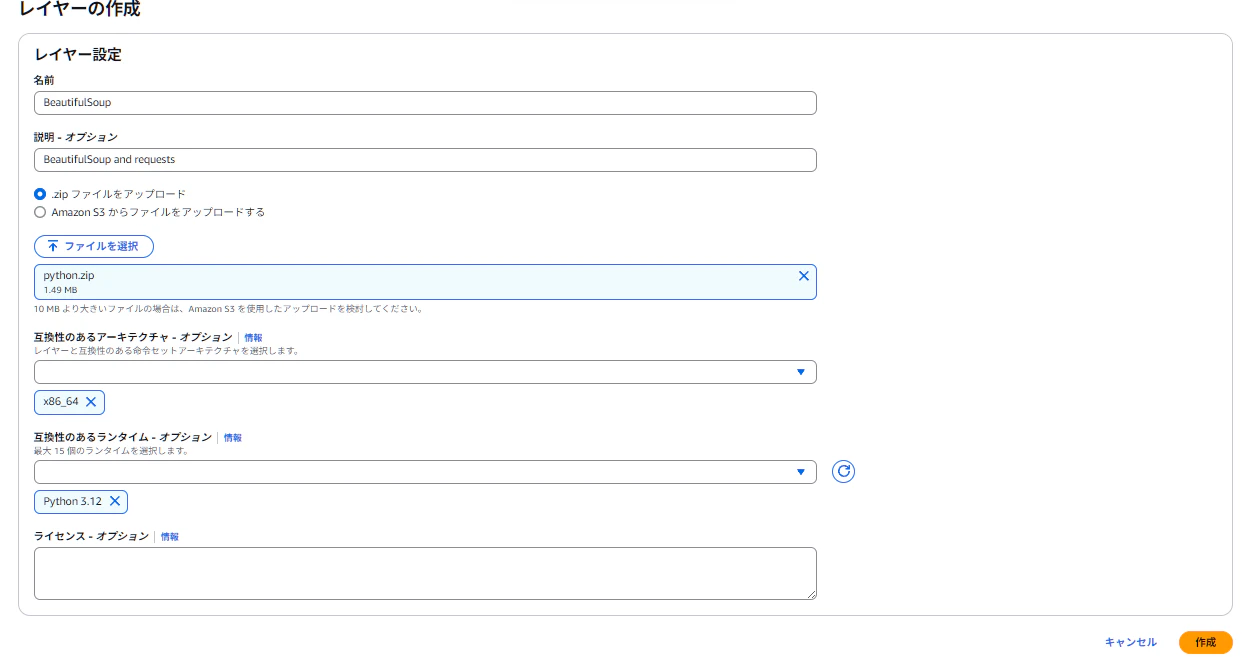
レイヤー作成
ローカルで以下コマンドを実行し、zipコマンドなどでpython.zipにする
参考:https://twinkangaroos.com/how-to-use-aws-lambda-for-periodic-scraping-3.html
mkdir python
pip3 install requests -t ./python/
pip3 install beautifulsoup4 -t ./python/
Lambda>レイヤー>レイヤーの作成からzipを用いてレイヤーを作成
関数の作成とレイヤー追加
Lambda関数を作成する
今回はPython3.12
【コードソース】
import os
import requests
from bs4 import BeautifulSoup
import random

# Discord設定を環境変数から取得
TOKEN = os.environ['DISCORD_BOT_TOKEN']
CHANNEL_ID = os.environ['DISCORD_CHANNEL_ID']

def lambda_handler(event, context):
    # tritake.netのページをスクレイピング
    tritake_url = "https://tritake.net/"
    response = requests.get(tritake_url)
    soup = BeautifulSoup(response.text, 'html.parser')

    # MANGA MUSIC VIDEOの取得
    mmv_section = soup.find('section', id='MMV')

    # すべての動画リンクを取得
    video_links = mmv_section.find_all('a', href=True)

    if video_links:
        # ランダムに1つの動画を選択
        random_video = random.choice(video_links)
        video_url = random_video['href']
    else:
        video_url = "動画が見つかりませんでした。"


    # Discord APIのエンドポイント
    discord_url = f"https://discord.com/api/channels/{CHANNEL_ID}/messages"

    # ヘッダー
    headers = {
        "Authorization": f"Bot {TOKEN}",
        "Content-Type": "application/json"
    }

    # 送信内容
    payload = {
        "content": f"MANGA MUSIC VIDEOから選ばれた動画:\n{video_url}"
    }

    # POSTリクエストを送信
    r = requests.post(discord_url, json=payload, headers=headers)
    data = r.json()

    # ログに結果を出す
    print(data)

    return {
        'statusCode': 200,
        'body': 'メッセージ送信成功'
    }
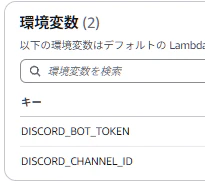
環境変数にDISCORD_BOT_TOKEN(TOKEN)とDISCORD_CHANNEL_ID(通知先のチャンネルID)を設定する
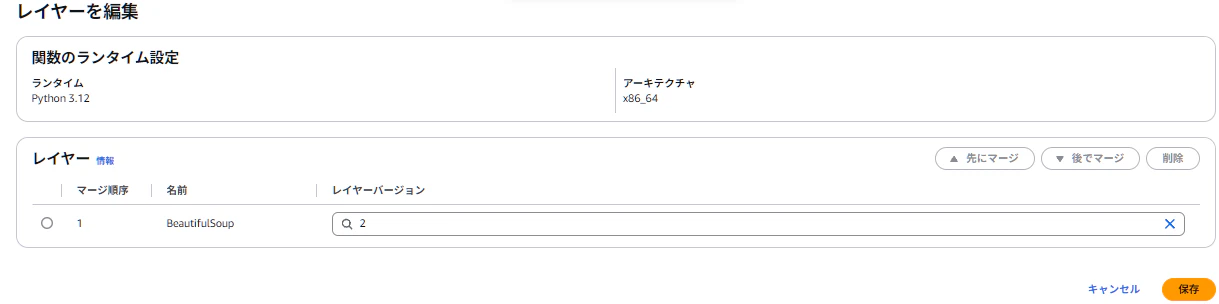
レイヤーを追加したい関数>レイヤーを追加から作成したレイヤーを追加する

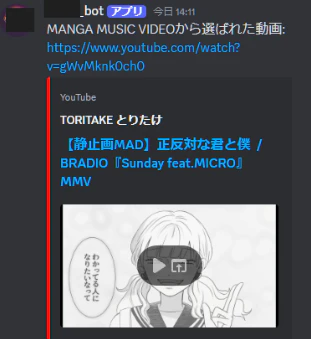
テストから実行してみる
成功し、Discordに配信されていることが確認できる

おわりに
EventBridgeと組み合わせて定期スクレイピング実行や、AWS使用料通知に利用している