はじめに
SMSで届いた認証コードを、ワンタップでアプリに反映することができるSMS User Consent APIの実装方法についてまとめました。
開発環境
PC:MacBook Pro
OS:macOS BigSur
Android Studio:Arctic Fox 2020.3.1
SMS User Consent APIの導入方法
1.ライブラリを追加
build.gradle(app)
dependencies {
    // 以下2行を追加
    implementation "com.google.android.gms:play-services-auth:20.0.1"
    implementation "com.google.android.gms:play-services-auth-api-phone:18.0.1"
}
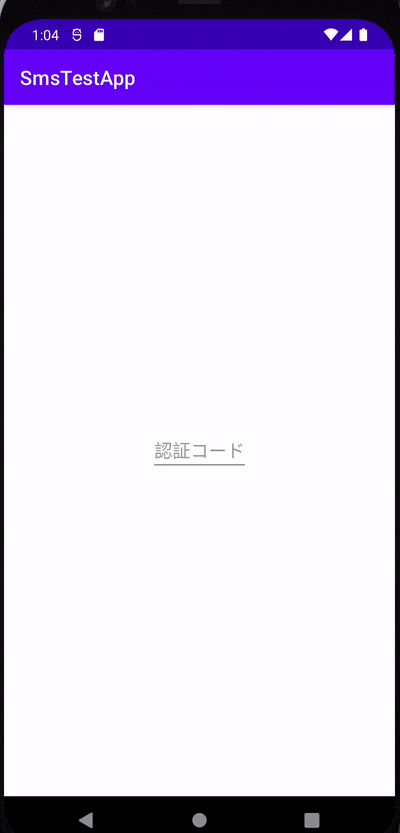
2.レイアウトを作成
activity_main.xmlに認証コードを入力するEditTextを配置します。
activity_main.xml
<?xml version="1.0" encoding="utf-8"?>
<androidx.constraintlayout.widget.ConstraintLayout
    xmlns:android="http://schemas.android.com/apk/res/android"
    xmlns:app="http://schemas.android.com/apk/res-auto"
    xmlns:tools="http://schemas.android.com/tools"
    android:layout_width="match_parent"
    android:layout_height="match_parent"
    tools:context=".MainActivity">

    <EditText
        android:id="@+id/editText"
        android:layout_width="wrap_content"
        android:layout_height="wrap_content"
        android:hint="Enter verification code"
        android:importantForAutofill="no"
        android:inputType="text"
        app:layout_constraintBottom_toBottomOf="parent"
        app:layout_constraintEnd_toEndOf="parent"
        app:layout_constraintStart_toStartOf="parent"
        app:layout_constraintTop_toTopOf="parent"
        tools:ignore="HardcodedText" />

</androidx.constraintlayout.widget.ConstraintLayout>
3.MainActivityを編集
MainActivity.ktにSMS認証コードを受信し自動入力するための処理を記述します。
MainActivity.kt
class MainActivity : AppCompatActivity() {

    override fun onCreate(savedInstanceState: Bundle?) {
        super.onCreate(savedInstanceState)
        setContentView(R.layout.activity_main)
    }

    override fun onResume() {
        super.onResume()

        val intentFilter = IntentFilter(SmsRetriever.SMS_RETRIEVED_ACTION)
        registerReceiver(smsVerificationReceiver, intentFilter)

        // SMSメッセージの受信待機開始
        SmsRetriever.getClient(this).startSmsUserConsent(null)
    }

    override fun onPause() {
        super.onPause()

        // SMSメッセージの受信待機解除
        unregisterReceiver(smsVerificationReceiver)
    }

    private val smsVerificationReceiver = object : BroadcastReceiver() {

        override fun onReceive(context: Context?, intent: Intent?) {
            if (SmsRetriever.SMS_RETRIEVED_ACTION == intent?.action
                && intent.extras != null
            ) {
                val status = intent.extras?.get(SmsRetriever.EXTRA_STATUS) as Status
                when (status.statusCode) {
                    CommonStatusCodes.SUCCESS -> {
                        requestSmsCode(intent)
                    }
                    CommonStatusCodes.TIMEOUT -> {
                        Log.d(MainActivity::class.java.simpleName, "smsVerificationReceiver timeout")
                    }
                }
            }
        }
    }

    private val requestSmsResult =
        registerForActivityResult(ActivityResultContracts.StartActivityForResult()) { result: ActivityResult? ->
            if (result?.resultCode != Activity.RESULT_OK) {
                return@registerForActivityResult
            }
            result.data?.let { data: Intent ->
                val message = data.getStringExtra(SmsRetriever.EXTRA_SMS_MESSAGE) ?: ""
                val oneTimeCode = parseOneTimeCode(message)
                findViewById<EditText>(R.id.editText).setText(oneTimeCode)
            }
        }

    private fun requestSmsCode(intent: Intent) {
        val consentIntent =
            intent.extras?.getParcelable<Intent>(SmsRetriever.EXTRA_CONSENT_INTENT)
        requestSmsResult.launch(consentIntent)
    }

    private fun parseOneTimeCode(message: String): String {
        // 送信するメッセージに合わせて文字列を処理する
        return message.split("\n")[0].split(":")[1]
    }

}
実装は以上で終わりです。
実際にSMSで送られてきたコードが自動入力できるか確認してみます。
SMS User Consent APIの動作確認方法
まずSMSを送信する検証端末(エミュレータ)を起動し、AndroidStudioのTerminalを開きます。
Terminalに以下のコマンドを入力し、先ほど起動した端末を確認します。
$ adb devices ←コマンド
List of devices attached
emulator-5554   device ←”emulator-5554”が対象端末
次に以下のコマンドを入力し、対象端末にSMSを送信します。
今回は電話番号が「09012345678」、SMSの内容が「認証コード code:123456」の場合です。
$ adb -s emulator-5554 emu sms send 09012345678 認証コード code:123456 ←コマンド
OK ←成功した場合
SMS受信時に表示されるダイアログのAllowボタンをタップすると認証コードが自動入力されます。
参考文献
・Google developers
・[Android]SMS認証のユーザー負担を減らすSMS User Consent APIを使ってみた