1. はじめに
この記事の概要
WSL2(Windows Subsystem for Linux)の上でDokcerを動かします。
記事が前提とする環境
- Windows10 Pro 64bit 1909(OSビルド 18363,1198)
- CPU:Core-i7 5500U
2. 導入本編
DockerDesktopの導入
(1)WSL2を導入します。
以下を参考にWSL2を導入して下さい。
(2)DockerDesktopのダウンロード
- DockerDesktop for Windowsをダウンロードする。
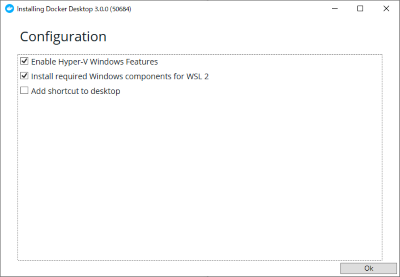
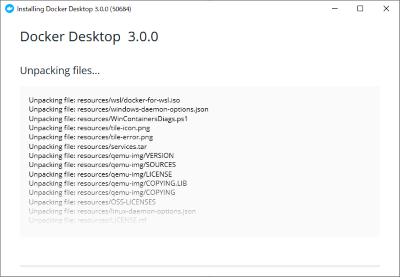
(3)インストーラの実行
- [Docker Desktop Installer.exe]を実行して画面を進める。
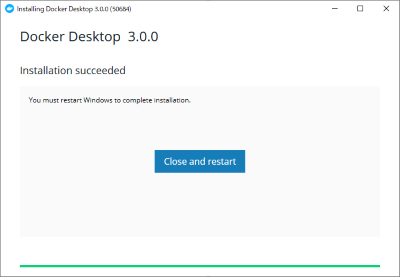
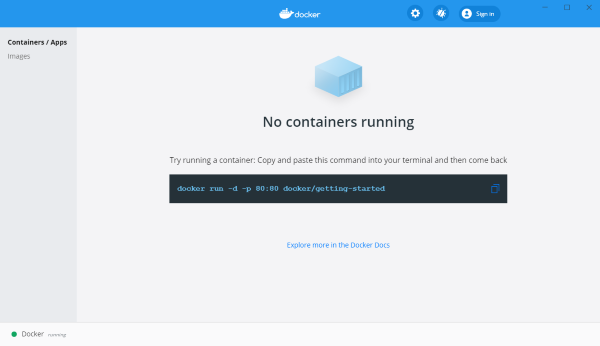
再起動
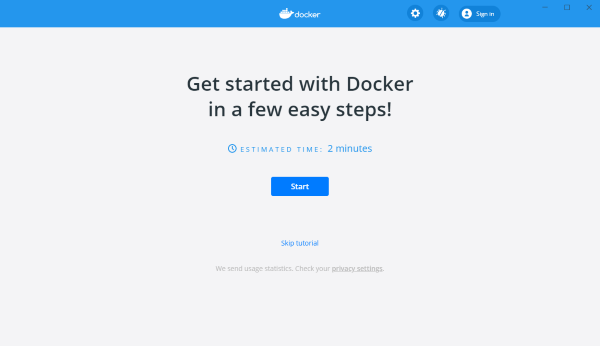
skip tutorial
(4)必要に応じてProxyを設定する
プロシキが必要な環境で使う人は、必要に応じてプロキシを設定します。
- [スタート]—->[Docker Desktop]
- 画面上部の設定ボタン[⚙]—->[Resources]
- [Manual proxy configuration]をON
- プロキシサーバの情報を入力する。
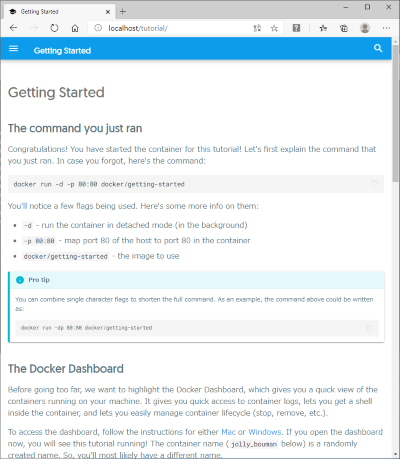
(5)getting-startedのコンテナを試しに起動
- コマンドプロンプトを起動する。
- コンテナをを起動する。
<コマンド>
C:\> docker run -d -p 80:80 --name docker_getting_started docker/getting-started
↑ 管理しやすいように--nameでコンテナ名を指定してます。指定しないと自動で名前が設定されます。
<実行結果>
Unable to find image 'docker/getting-started:latest' locally
latest: Pulling from docker/getting-started
188c0c94c7c5: Pull complete
617561f33ec6: Pull complete
7d856acdaa9c: Pull complete
a0d3c6e28e6d: Pull complete
af69a9b963c8: Pull complete
0739f3815ad8: Pull complete
7c7b75d0baf8: Pull complete
Digest: sha256:b821569034e3b5fae03b40e64a866017067f3bf17effe185b782bdbf02179528
Status: Downloaded newer image for docker/getting-started:latest
968e5ed0c3110cfc0d3a1db69d9a4d3cba232fcb28ebe3f9ae76b1ca80699b14
- 起動したコンテナにアクセスする。
(6)dockerの状態を確認する。
まずはdockerイメージの一覧を確認。
<コマンド>
C:\> docker images
<実行結果>
REPOSITORY               TAG       IMAGE ID       CREATED      SIZE
docker/getting-started   latest    021a1b85e641   3 days ago   27.6MB
次に起動したコンテナの一覧を確認。
<コマンド>
C:\> docker ps -a
<実行結果>
CONTAINER ID   IMAGE                    COMMAND                  CREATED              STATUS PORTS NAMES
968e5ed0c311   docker/getting-started   "/docker-entrypoint.…"   About a minute ago   Up About a minute   0.0.0.0:80->80/tcp   docker_getting_started
(7)WSLの状態を確認してみる
<コマンド>
C:\> wsl -l -v
<結果>
  NAME                   STATE           VERSION
* Ubuntu-20.04           Running         2
  docker-desktop-data    Running         2
  docker-desktop         Running         2
Docker用のディストリビューションが導入されてます。
(8)Ubuntsuの中を覗いてみます。
中に入ってみます。
C:\> wsl -d Ubuntu-20.04
Linuxの中で操作してみます。
$ uname -r
4.19.128-microsoft-standard
$ cat /etc/issue
Ubuntu 20.04.1 LTS \n \l
$ docker ps -a
CONTAINER ID   IMAGE                    COMMAND                  CREATED STATUS PORTS NAMES
968e5ed0c311   docker/getting-started   "/docker-entrypoint.…"   3 minutes ago   Up 3 minutes   0.0.0.0:80->80/tcp   docker_getting_started
Ubuntu上のdockerコマンドの結果は、Windows上のDockerコマンドと同じ結果ですね。
Ubuntu上に実態があるのがわかります。
以上、導入できたでしょうか?
3. おためしで使ってみる
Pythonのイメージを導入してみる
Pythonのコンテナを使ってみます。以下の2つをやってみます。
- Winodws上で作成したhello.pyをコンテナ上で実行してみる。
- コンテナ上でpythonコマンドを実行してみる。
(1)イメージをダウンロード
<コマンド>
C:\> docker pull python
<実行結果>
Using default tag: latest
latest: Pulling from library/python
6c33745f49b4: Pull complete
c87cd3c61e27: Pull complete
05a3c799ec37: Pull complete
a61c38f966ac: Pull complete
c2dd6d195b68: Pull complete
29b9446ae7bd: Pull complete
09cf96c794f9: Pull complete
f674fd97fba7: Pull complete
ffc24df6b7b8: Pull complete
Digest: sha256:b273b08cf9fe6b07ee4c2466095e5a4ac5301ade62106b7e7817eba00a684613
Status: Downloaded newer image for python:latest
docker.io/library/python:latest
(2)イメージを確認
<コマンド実行>
C:\> docker images
<実行結果>
C:\> docker images
REPOSITORY               TAG       IMAGE ID       CREATED        SIZE
python                   latest    0611cf846c85   16 hours ago   885MB
docker/getting-started   latest    021a1b85e641   3 days ago     27.6MB
pythonのイメージがダウンロードされているのが確認できました。
(3)Pythonのhello.pyを用意する。
helloを出力する簡単なプログラムを用意します。
C:\work\docker\playgraound\python\hello.py
print('hello')
ans = 5**2
print(f'5の2乗は{ans}')
(4)コンテナを開始する
<コマンド>
docker run -itd -v Winのフォルダ:コンテナ上のフォルダ --name コンテナ名 イメージ名
C:\> docker run -itd -v C:\work\docker\playground\python:/mnt/python --name playground_python python
<実行結果>
80de49d79dfba3d65cb944f7d8348ab2d9f090a8438d67afb81e2e91413a5f16
↑dockerのidが表示されます。
(5)起動状態を確認する
<コマンド>
C:\> docker ps -a
<実行結果>
CONTAINER ID   IMAGE                    COMMAND                  CREATED          STATUS          PORTS         NAMES
80de49d79dfb   python                   "python3"                19 seconds ago   Up 16 seconds                        playground_python
968e5ed0c311   docker/getting-started   "/docker-entrypoint.…"   3 hours ago      Up 3 hours      0.0.0.0:80->80/tcp   docker_getting_started
ダウンロードしたpythonイメージを元に、新しいコンテナ環境が作られました。
(6)コンテナの中に入る
<コマンド>
起動中のコンテナにbashで入ります。
C:\> docker exec -it playground_python /bin/bash
(7)Pythonのバージョンを確認する
<コマンド>
# python --version
<実行結果>
Python 3.9.1
(8)Windows上のフォルダがマウントされたか確認する。
<コマンド>
# ls /mnt/python
<実行結果>
hello.py
(9)Windows上のpyファイルを実行する
<コマンド>
# python /mnt/python/hello.py
<実行結果>
hello
5の2乗は25
Windows上のファイルが操作できています。
(10)pythonをコマンドラインで使ってみる。
<コマンド>
# python -c "ans=10*10; print(ans)"
<実行結果>
100
(11)コンテナから抜ける
# exit
(12)コンテナの状態を確認する
<コマンド>
C:\> docker ps -a
<実行結果>
runした時に-dオプションでバックグランド化しているので起動し続けてます。
CONTAINER ID   IMAGE                    COMMAND                  CREATED          STATUS          PORTS                NAMES
80de49d79dfb   python                   "python3"                12 minutes ago   Up 12 minutes                        playground_python
968e5ed0c311   docker/getting-started   "/docker-entrypoint.…"   3 hours ago      Up 3 hours      0.0.0.0:80->80/tcp   docker_getting_started
4.まとめ
dockerとwindowsでファイル共有が簡単に出来る事がわかりました。
開発の生産性が上がるのではないでしょうか。
ただしパフォーマンスは落ちると警告が書かれてますので留意点です。
参考文献
- Docker ドキュメント日本語化プロジェクト
- Docker Desktop WSL 2 バックエンド
おすすめ書籍
- Linuxコンテナー最新ツール Dockerを支える技術
- Dockerが動く仕組みをLinuxの機能を通じて説明してくれる良書
- 日経BP (2015/3/25)
- Kindle版でたったの990円