Nextremer Advent Calendar 2017の8日目。
最近next.jsが流行ってるぽいので、同じく流行ってるmobxとともに入門してみた。
今回作ったものはこちら
next.js
nowを提供しているZeitが提供するReactアプリケーションを簡単に作成するためのフレームワーク
何がいいの?
1. 環境構築が超簡単
一番大きいメリットとして、環境構築の容易さが挙げられる
通常、Reactプロジェクトを構築する場合、webpackやbabelなどのライブラリのインストール、設定を行う必要がある。これが毎回だと何気に結構(かなり)面倒くさい
next.jsでは、これらの構築を一切行う必要が無い
必要なことは npm install -S next react react-domを実行することだけ
これだけでReactの実装をはじめられる
更にホットリロードの機能まで備わってる
言うことなしに便利
2. ルーティング設定が不要
Reactにはルーティングの機能が備わっていないため、自分でreact-routerなどのライブラリを導入して設定する必要がある
しかもコンポーネントでルーティングを設定するため、ルートコンポーネントが超煩雑になる
next.jsではこれらの設定は不要で、pagesディレクトリを作ってその下にReactコンポーネントを置くだけ
pages/index.jsファイルを置けば/にマッピングされ、
pages/about.jsファイルを置けば/aboutにマッピングされる
もちろんcomponentsディレクトリを容易してpages配下のコンポーネントから共通部品を読み込むことも出来る
使ってみる
Hello world
適当なディレクトリで、以下を実行
yarn init -y
yarn add next@beta #beta版を利用
yarn add react react-dom
mkdir pages
pagesディレクトリにindex.jsを作成
export default () => <div>Hello Next.js</div>
NPM ScriptにStart用コマンドを追加
  "scripts": {
    "start": "`npm bin`/next"
  },
next.js実行
yarn start
これでhttp://localhost:3000にアクセスすればHello Next.jsと表示されるはず。
mobx
mobxはシンプルなステートマネージャで、Reactのステート管理に良いのではないかと巷で話題らしい
Reactと併せて利用する場合はmobx-reactにてmobxとreactを紐付ける(react-reduxのようなもの)
※ 事前に。以下の例ではBabelのDecoratorを使ってます
概要
管理したいデータをmobxのobservableとして定義し、データを利用する側をmobx-reactのobserverとして定義する
class Counter {
  @observable count = 0;
}

@observer
class App extends React.Component {
  render() {
    return <div>count: {this.props.counter.count}</div>
  }
}

render(<App counter={new Counter()} />, document.getElementById('main'));
これでCounter.countが変更されるとReact側に変更が反映される
countを変更するためのメソッドを追加してみる
他の値を利用する場合はcomputed
値を変更したい場合はactionを使う(action.boundを使うことでthisを束縛できる)
import { observable, action, computed } from 'mobx';

export default class Counter {
  @observable count = 0;

  @computed get twice() {
    return this.count * 2;
  }

  @action.bound
  inc() {
    this.count = this.count + 1;
  }

  @action.bound
  dec() {
    this.count = this.count - 1;
  }

  @action.bound
  async asyncInc() {
    await new Promise(resolve => setTimeout(resolve, 1000));
    this.count = this.count + 1;
  }

  @action.bound
  async asyncDec() {
    await new Promise(resolve => setTimeout(resolve, 1000));
    this.count = this.count - 1;
  }
}
これらをReactから使ってみる。
@observer
class App extends React.Component {
  render() {
    const { counter } = this.props;
    return (
      <div>
        <div>count: {counter.count}</div>
        <div>count*2: {counter.twice}</div>
        <button onClick={counter.inc}>+1</button>
        <button onClick={counter.dec}>-1</button>
        <button onClick={counter.asyncInc}>async +1</button>
        <button onClick={counter.asyncDec}>async -1</button>
      </div>
    );
  }
}
next.js + mobx
next.jsからmobxを使ってみる
インストール
mkdir nextjs_mobx
cd nextjs_mobx
yarn init -y
yarn add next@beta react react-dom mobx mobx-react
yarn add -D babel-plugin-transform-decorators-legacy
Babel環境準備
普段はnext.js使うときは不要だが、今回はDecoratorを使いたいので.babelrcを用意する
{
  "presets": ["next/babel"],
  "plugins": ["transform-decorators-legacy"]
}
Mobx Store作成
Counterクラスをstores/counter.jsに↑と同じ内容で作成する
あとはStore取りまとめ用のファイルを作成
import Counter from './counter';
export default {
  counter: new Counter(),
};
next.jsからMobx Storeを読み込む
import React, { Component } from 'react';
import { Provider } from 'mobx-react';
import store from '../stores';
import Main from '../components/Main';

export default class App extends Component {
  render() {
    return (
      <Provider {...store}>
        <Main />
      </Provider>
    );
  }
}
Mobx Storeの値を利用するコンポーネントを作る
※
pages/index.jsでまとめて書ければよかったんだけど何故かできなかったのでコンポーネントを分けてます
import React, { Component } from 'react';
import { inject, observer } from 'mobx-react';

@inject('counter')
@observer
export default class Main extends Component {
  render() {
    const { counter } = this.props;
    return (
      <div>
        <div>count: {counter.count}</div>
        <div>count*2: {counter.twice}</div>
        <button onClick={counter.inc}>+1</button>
        <button onClick={counter.dec}>-1</button>
        <button onClick={counter.asyncInc}>async +1</button>
        <button onClick={counter.asyncDec}>async -1</button>
      </div>
    );
  }
}
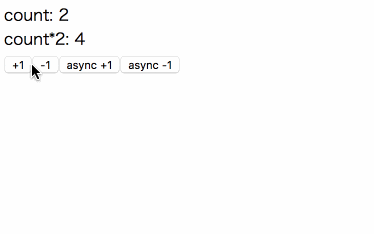
これで完了(・∀・)
出来上がったものはこんな感じ
テスト
jestを使ってテストを書いてみる
インストール
yarn add -D jest
準備
next.jsと併用する場合は.babelrcを少々変更する必要がある。
jestはデフォルトでbabelのenvをtestにして実行するため、以下のように.babelrcでenv:testの設定を作成する。
{
  "env": {
    "development": {
      "presets": ["next/babel"],
      "plugins": ["transform-decorators-legacy"]
    },
    "production": {
      "presets": ["next/babel"],
      "plugins": ["transform-decorators-legacy"]
    },
    "test": {
      "presets": [["env", {"modules": "commonjs"}], "next/babel"],
      "plugins": ["transform-decorators-legacy"]
    },
  },
}
Viewのテスト
Enzymeとかで書く感じかな?今回は省略。
書くならこの辺を参考に。
MobXのテスト
こんな感じ?
import CounterStore from '../../stores/counter';

describe('CounterStore',() => {
  let store;
  beforeEach(() => {
    store = new CounterStore();
  })
  describe('#constructor', () => {
    it('count expect to be 0', () => {
      expect(store.count).toBe(0);
    })

    it('twice count expect to be 0', () => {
      expect(store.twice).toBe(0);
    })
  });
  describe('#inc', () => {
    it('count expect to be increment', () => {
      store.inc();
      expect(store.count).toBe(1);
    })
  });
  describe('#dec', () => {
    it('count expect to be decrement', () => {
      store.inc();
      expect(store.count).toBe(1);
      store.dec();
      expect(store.count).toBe(0);
    })
  });
  describe('#asyncInc', () => {
    it('count expect to be increment', async () => {
      await store.asyncInc();
      expect(store.count).toBe(1);
    })
  });
  describe('#asyncDec', () => {
    it('count expect to be decrement', async () => {
      store.inc();
      expect(store.count).toBe(1);
      await store.asyncDec();
      expect(store.count).toBe(0);
    })
  });
});
感想
兎にも角にもnext.jsが超楽
mobxも単純なアプリを作る分には十分使える代物だと思う(複雑なパターンでも使えるかは要検証
Reduxを使う場合に比べて記述量、要する時間ともに圧倒的に少ないのがいい
今後サンプルを作る場合とかは全部これでいいんじゃないかと思ふ